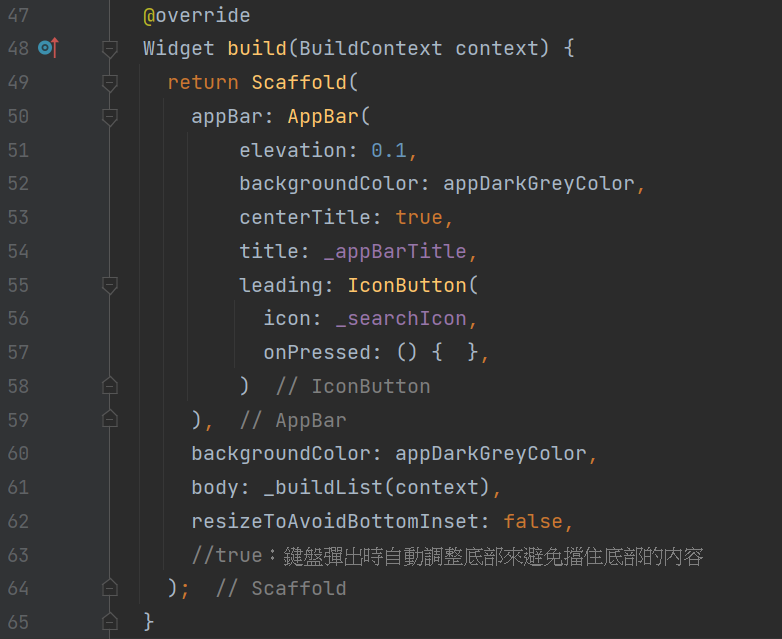
4.實作HomePage

Widget _buildListItem(BuildContext context, Record record) {
      return Card(
       // key:可以幫助flutter識別不同的Card,這裡是用record.name來識別 Card
        key: ValueKey(record.name),
        elevation: 8.0, //陰影高度
        margin: new EdgeInsets.symmetric(horizontal: 10.0, vertical: 6.0), //設定Card的邊距

        child: Container( //Card的主要內容:
          decoration: BoxDecoration(color: Color.fromRGBO(64, 75, 96, .9)), //設置背景顏色
          //每一個Card有一個ListTile
          child: ListTile(
            contentPadding: EdgeInsets.symmetric(horizontal: 20.0, vertical: 10.0), //設置ListTile的邊距
            //聯絡人圖片
            leading: Container(
                padding: EdgeInsets.only(right: 12.0), //邊距,在右側添加空間
                //設定右邊的邊框,在圖片旁邊增加一條分隔線的效果
                decoration: new BoxDecoration(
                    border: new Border(
                        right: new BorderSide(width: 1.0, color: Colors.white24))),
                //Hero是要用來實作動畫的元件
                child: Hero(
                    tag: "avatar_" + record.name, //定義標籤,以識別不同頁面的Hero元素。
                    child: CircleAvatar( //用CircleAvatar來顯示圖像
                      radius: 32, //圓形頭像的半徑大小
                      backgroundImage: NetworkImage(record.photo), //設置圖片
                    )
                )
            ),
            //ListTile的主標題:聯絡人名字
            title: Text( //設置聯絡人姓名及文字風格(白色、粗體文字)
              record.name,
              style: TextStyle(color: Colors.white, fontWeight: FontWeight.bold),
            ),
            //ListTile的副標題:其他描述
            subtitle: Row( //水平排列其他元件
              children: <Widget>[
                new Flexible( //副標題可以根據內容的大小自動調整
                    child: new Column( //用Column將副標題的內容垂直排列
                        crossAxisAlignment: CrossAxisAlignment.start, //內容靠左對齊
                        children: <Widget>[
                          //使用RichText來顯示record.address
                          RichText(
                            text: TextSpan( //TextSpan可以用來定義不同風格的文字
                              //這裡將record.address的文字顏色設為白色
                              text: record.address,
                              style: TextStyle(color: Colors.white),
                            ),
                            maxLines: 3, //內容的最大行數為3行,超過會被截斷
                            softWrap: true, //超出一行寬度時,允許文本換行
                          )
                        ]))
              ],
            ),
            //右箭頭圖示
            trailing:
            //設置一個向右的圖案,並顯示在列表的右側
            Icon(Icons.keyboard_arrow_right, color: Colors.white, size: 30.0),
            onTap: () {}, //被點擊時觸發的事件
          ),
        ),
      );
  }

今天到這裡結束,明天繼續加入搜尋的功能!
參考資料:
https://www.appcoda.com.tw/flutter-basics/
