2023鐵人賽今天會開始實作 api 部分,建議讀者如果沒看昨日內容可以先去看~今天會繼續使用
那登入部分需要到 db 所以會需要添加以下的 model。
model Account {
  id                String  @id @default(cuid())
  userId            String
  type              String
  provider          String
  providerAccountId String
  refresh_token     String? @db.Text
  access_token      String? @db.Text
  expires_at        Int?
  token_type        String?
  scope             String?
  id_token          String? @db.Text
  session_state     String?

  user User @relation(fields: [userId], references: [id], onDelete: Cascade)

  @@unique([provider, providerAccountId])
}

model Session {
  id           String   @id @default(cuid())
  sessionToken String   @unique
  userId       String
  expires      DateTime
  user         User     @relation(fields: [userId], references: [id], onDelete: Cascade)
}

model User {
  id             String    @id @default(cuid())
  name           String?
  email          String?   @unique
  emailVerified  DateTime?
  hashedPassword String?
  image          String?
  accounts       Account[]
  sessions       Session[]
  Post           Post[]
}

model VerificationToken {
  identifier String
  token      String   @unique
  expires    DateTime

  @@unique([identifier, token])
}
不知道小夥伴還記得前幾天做 infinite scroll 的時候用到的 post schema 嗎~
原本是長這樣,但這樣我們不會知道這個 post 是誰做的所以我們需要添加關聯。
model Post {
  id        Int     @id @default(autoincrement())
  title     String
  content   String?
  published Boolean @default(false)

  createdAt DateTime @default(now())
  updatedAt DateTime @default(now()) @updatedAt

}
這邊修改一下 model,在 prisma 中我們透過 @relation 做到關聯,因為我們是一個 user 會新增很多 post 所以會是一對多的關係。onDelete: Cascade: 在 prisma 中有提供 Referential actions 操作,以 post 來說 onDelete: Cascade 代表當 User 刪除,所有關聯到 userId 的 post 也一並移除,如果讀者想看更多 Referential actions 方式的話可以看點擊下方連結。
model Post {
  id        Int     @id @default(autoincrement())
  title     String
  content   String?
  published Boolean @default(false)

  createdAt DateTime @default(now())
  updatedAt DateTime @default(now()) @updatedAt

  userId String
  author User   @relation(fields: [userId], references: [id], onDelete: Cascade)
}
所以需要在 Post中指定 userId (fk) 去連到 User 的 id (pk)。
model User {
  //..
  Post           Post[]
}
定義好 schema 後你因為你的 db 還沒有 create table 所以需要做一下 migrate,在 prisma 要做 migrate 可以打以下 cli :
* 直得提醒的是如果你調整得 model 有衝突的話 prisma 會要求你把 db 資料全部刪除這樣才不會有schema 使用問題~
> npx prisma migrate dev

Environment variables loaded from .env
Prisma schema loaded from prisma/schema.prisma
Datasource "db": PostgreSQL database "root", schema "public" at "zeabur-gcp-asia-east1-1.clusters.zeabur.com:30797"

Already in sync, no schema change or pending migration was found.

✔ Generated Prisma Client (v5.2.0) to ./node_modules/@prisma/client in 75ms
之後我們到 studio 查看,如此一來我們就成功 migrate db 摟~
> npx prisma studio
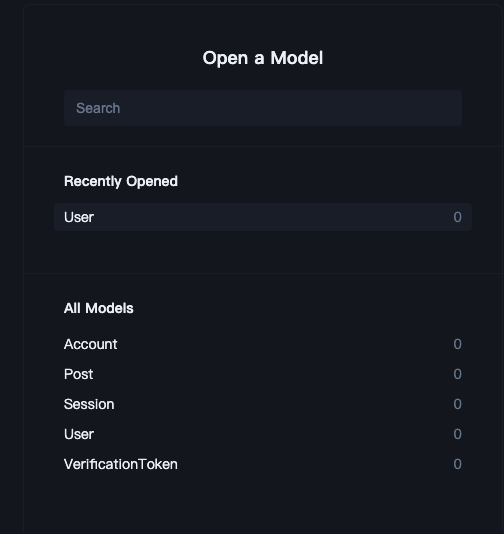
現在我們 db 中有我們這次會用到的 model 這樣我們就可以簡單實作 api 了,首先先創建 ~src/register/index.ts ,在 next page 中的 api 如果要做 post 是透過 req.method 判斷內容,所以整個 CRUD 都會是在handler 這個 function 中完成,如果讀者想用 next13 新的 app 方式寫 api handler 也都可以,主要是看讀者習慣的方式,但這邊因為專案是 page 為主所以不考慮用 next13 寫法喔~
export default async function handler(
  req: NextApiRequest,
  res: NextApiResponse
) {
    try{

        if (req.method === 'POST') {
            // post api
        }
         if (req.method === 'GET') {
            // get api
        }

    }catch(e){}

}
然後把需要用到的套件引入,讀者記得先 install 套件喔~
registerSchema : 用來驗證 req.body 內容。bcrypt : 用來 hash user password 以防被偷走。
import { prisma } from '@/server/db'
import type { NextApiRequest, NextApiResponse } from 'next'
import { ZodError, z } from 'zod'
import bcrypt from 'bcrypt'
const registerSchema = z.object({
  name: z.string({
    required_error: 'name is require',
    invalid_type_error: 'invalidate name type'
  }).min(1, 'name must be provider'),
  email: z.string({
    required_error: 'email is require',
  }).email('invalidate email type'),
  password: z.string({
    required_error: 'password is require',
    invalid_type_error: 'invalidate password type'
  }).min(4, { message: 'password must be at least 4 characters' }),
})
export type RegisterSchema = z.infer<typeof registerSchema>
透過 registerSchema 驗證 req.body 如果值有錯誤就 return 400
export default async function handler(
  req: NextApiRequest,
  res: NextApiResponse
) {
  try {

    if (req.method === 'POST') {

      const {
        email,
        name,
        password
      } = registerSchema.parse(req.body)

  } catch (e) {
    if (e instanceof ZodError) {
      console.log(e)
      const { message } = e.errors[0]
      return res.status(400).json({ message })
    }
    return res.status(500).json({ message: 'server error' })
  }
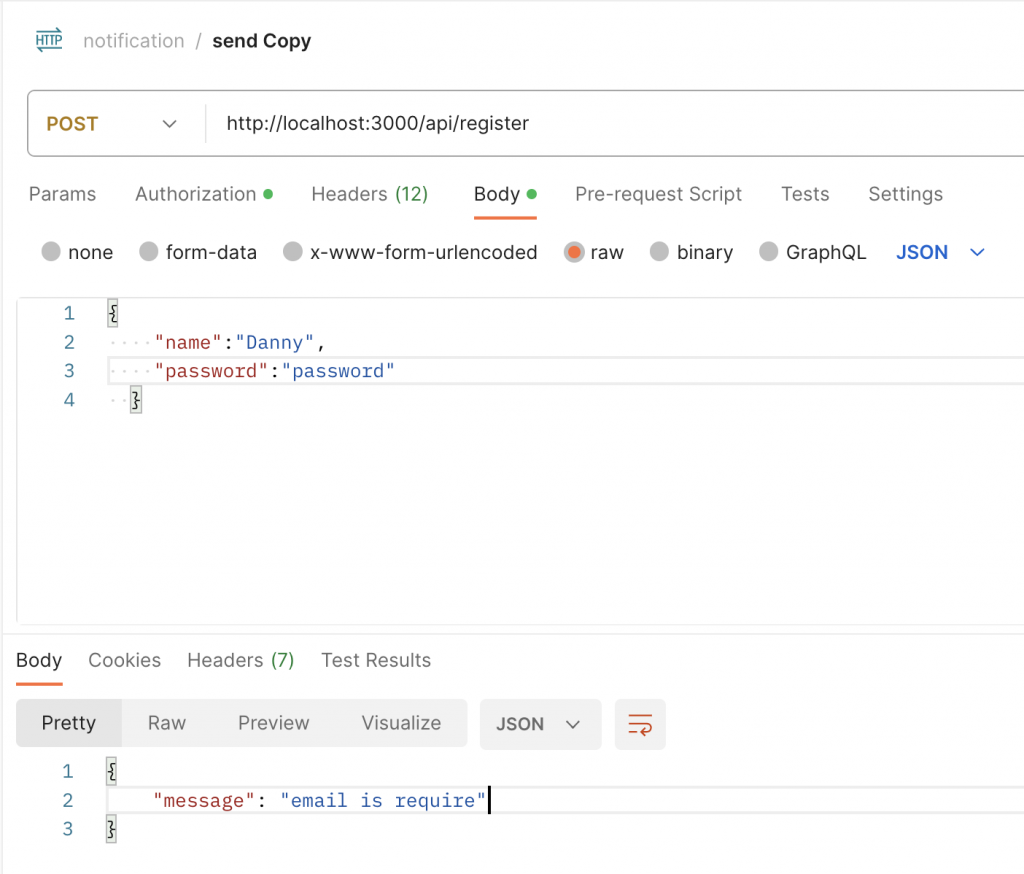
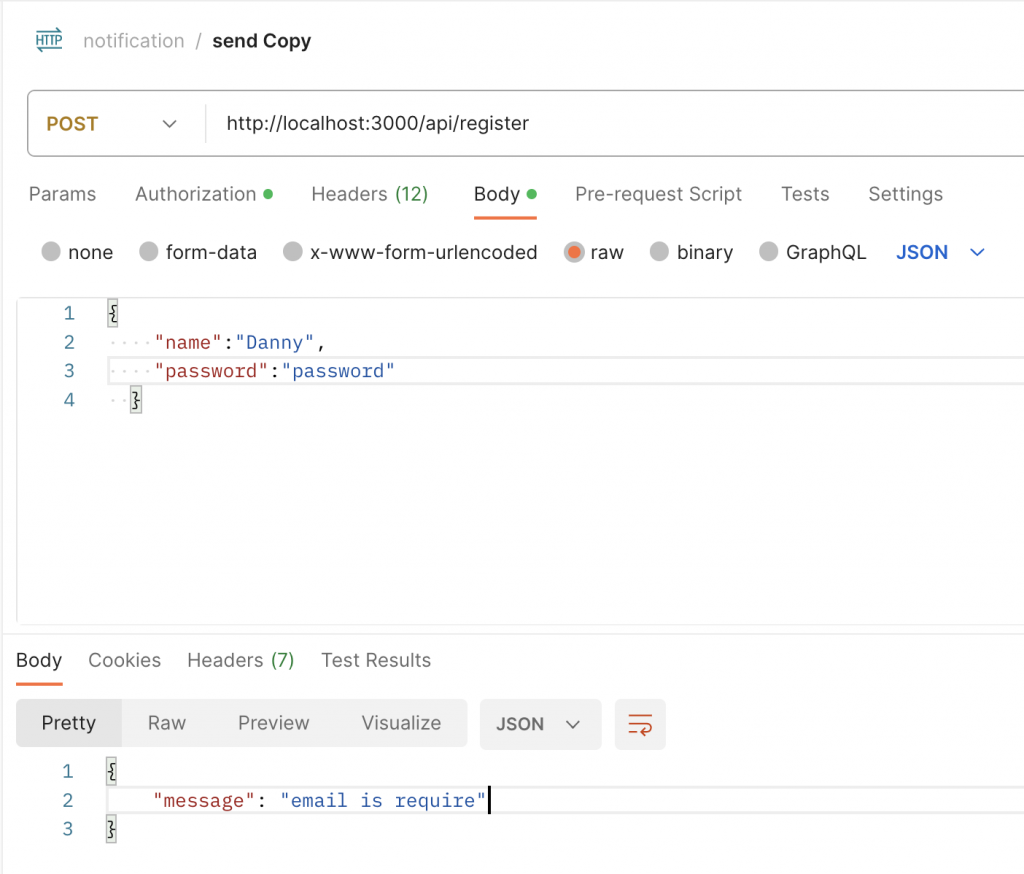
簡單測試如果欄位有少就是給你 message 提示,這樣是不是很方便呢~
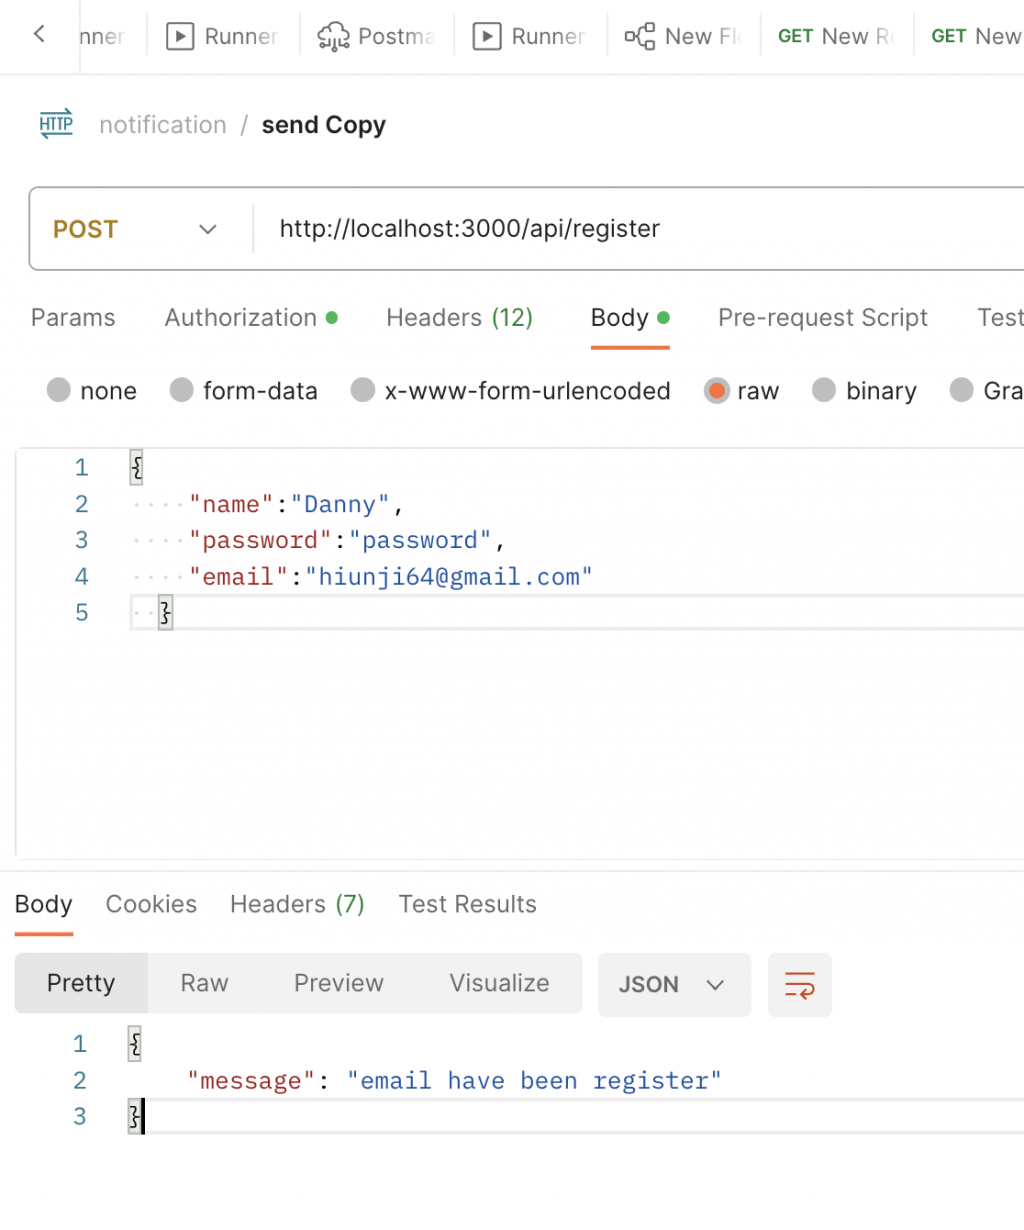
然後註冊部分我們希望每個 email 是唯一性,所以需要檢查 duplicateUser ,如果有就 return 400
export default async function handler(
  req: NextApiRequest,
  res: NextApiResponse
) {
  try {

    if (req.method === 'POST') {

      const {
        email,
        name,
        password
      } = registerSchema.parse(req.body)

      const duplicateUser = await prisma.user.findFirst({
        where: {
          email
        }
      })
      if (duplicateUser) return res.status(400).json({ message: 'email have been register' })

  } catch (e) {
    if (e instanceof ZodError) {
      console.log(e)
      const { message } = e.errors[0]
      return res.status(400).json({ message })
    }
    return res.status(500).json({ message: 'server error' })
  }
接著為了考量 user password 安全總不可能直接把 password 存到 user db 中,所以實務上我們會將 user password hash 後存 hash 內容,日後登入時則就拿 hash value 做 decryption 。
如此一來就完成拉~
export default async function handler(
  req: NextApiRequest,
  res: NextApiResponse
) {
  try {

    if (req.method === 'POST') {

        //..

      const hashedPassword = await bcrypt.hash(password, 12)
      const newUser = await prisma.user.create({
        data: {
          name,
          email,
          hashedPassword
        }
      })
      return res.status(201).json({ message: 'success register' })
  } catch (e) {
    if (e instanceof ZodError) {
      console.log(e)
      const { message } = e.errors[0]
      return res.status(400).json({ message })
    }
    return res.status(500).json({ message: 'server error' })
  }
完整的 demo 如下。
import { prisma } from '@/server/db'
import type { NextApiRequest, NextApiResponse } from 'next'
import { ZodError, z } from 'zod'
import bcrypt from 'bcrypt'
const registerSchema = z.object({
  name: z.string({
    required_error: 'name is require',
    invalid_type_error: 'invalidate name type'
  }).min(1, 'name must be provider'),
  email: z.string({
    required_error: 'email is require',
  }).email('invalidate email type'),
  password: z.string({
    required_error: 'password is require',
    invalid_type_error: 'invalidate password type'
  }).min(4, { message: 'password must be at least 4 characters' }),
})
export type RegisterSchema = z.infer<typeof registerSchema>
export default async function handler(
  req: NextApiRequest,
  res: NextApiResponse
) {
  try {

    if (req.method === 'POST') {

      const {
        email,
        name,
        password
      } = registerSchema.parse(req.body)
      const duplicateUser = await prisma.user.findFirst({
        where: {
          email
        }
      })
      if (duplicateUser) return res.status(400).json({ message: 'email have been register' })

      const hashedPassword = await bcrypt.hash(password, 12)
      const newUser = await prisma.user.create({
        data: {
          name,
          email,
          hashedPassword
        }
      })
      return res.status(201).json({ message: 'success register' })
    }
  } catch (e) {
    if (e instanceof ZodError) {
      console.log(e)
      const { message } = e.errors[0]
      return res.status(400).json({ message })
    }
    return res.status(500).json({ message: 'server error' })
  }
}
完成後沒意外 prisma studio 應該會有資料~
接著我們到 AuthFormProps 中onSubmit call register api,那這邊筆者有加 toast ,讀者可以自行決定要不要使用~主要是用來檢查結果。
toast 套件:
https://www.npmjs.com/package/react-toastify
interface AuthFormProps {
  variants: VARIANTS
  toggleVariants: () => void
}

export const AuthForm = ({ variants, toggleVariants }: AuthFormProps) => {
    //..

  const onSubmit = async (value: LoginFormSchema | RegisterFormSchema) => {
    try {
      setIsLoading(true)
      if (variants === 'Login') {

      }
      if (formSchemaTypeGuard(value) && variants === 'Register') {
        const { message } = await axios.post<{ message: string }, AxiosResponse<{ message: string }>, RegisterSchema>('/api/register', {
          name: value.name,
          email: value.email,
          password: value.password,
        }).then(res => res.data)
        toast.success(message)

      }
    } catch (e) {
      if (e instanceof AxiosError) {
        const message = e.response?.data.message
        toast.error(message)
        return
      }
      console.log(e)
    } finally {
      setIsLoading(false)

    }
  }
  return (
      //..
  )
}
最後我們簡單看一下效果吧~
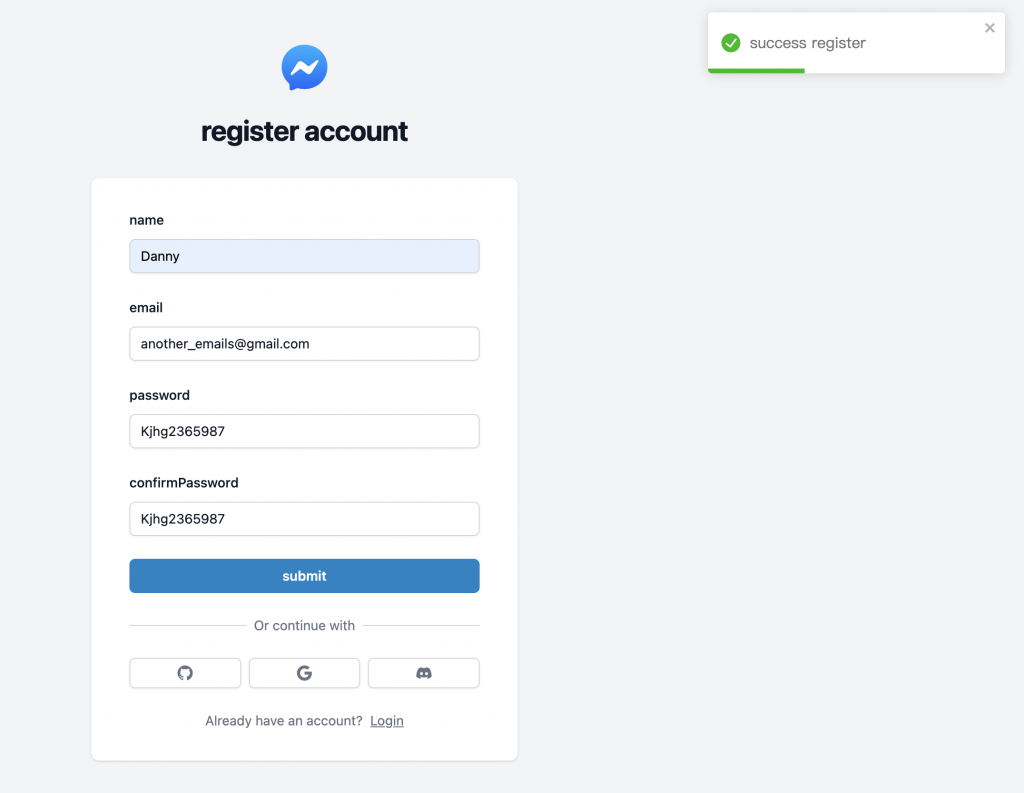
這樣我們就成功完成 register 內容摟~明天我們就搭配 next auth 完成 sign in 部分~
https://www.npmjs.com/package/react-toastify
https://github.com/Danny101201/next_demo/tree/main
https://www.prisma.io/docs/concepts/components/prisma-schema/relations/referential-actions#setdefault
✅ 前端社群 :
https://lihi3.cc/kBe0Y
