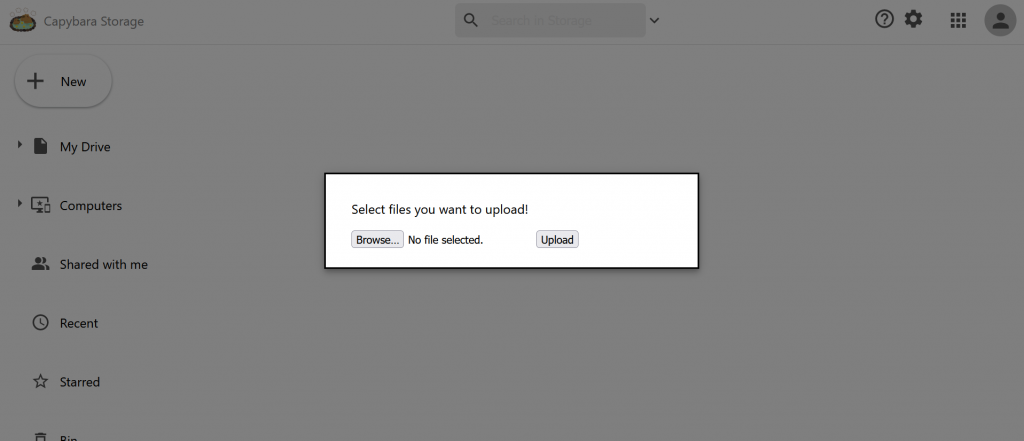
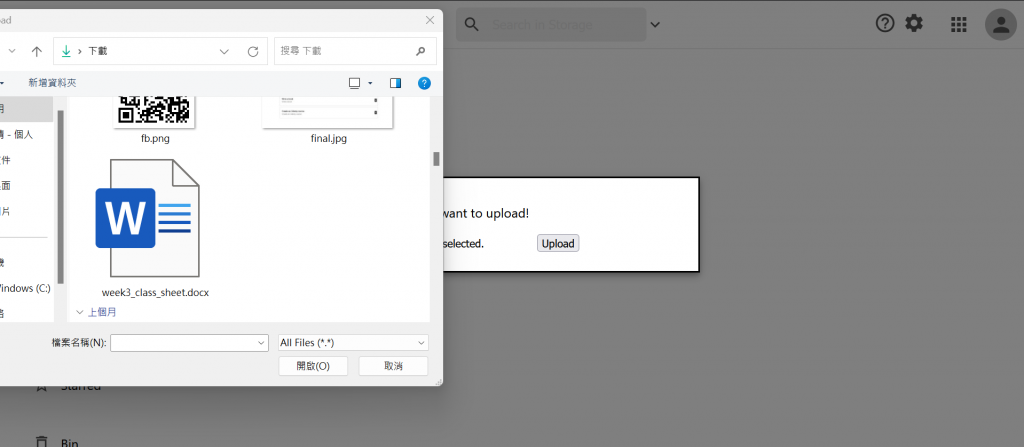
做一個cloud storage最重要的就是上傳檔案拉!前面提到過,firebase可以想成一種資料庫與後端的聯集,檔案的處理與上傳當然也可以使用firebase。今天的實作完成後,我們會看到可以上傳的案件,並且真的可以讀取你電腦的檔案,然而因為firebase的rules還沒設定,真的上傳會遇到問題,此為後話、明天處理。


今天的概念我們可以大致分成firebase的處理以及FileComponent的處理來說。
firebase的處理上,我們大致需要:
初始化
經過了兩個project,想必都對這步熟悉不已,firebase在建置時會給你config、作為API與domian這些的設定,initialize一個App才可以實際操作。
auth
這是雲端設計的巧思。我們過往使用過的雲端往往都需要一個帳號登入,來記錄現在這些檔案是誰的,所以用auth處理,也可以運用GoogleAuthProvider支持google登入。
存儲
有些人會將db與storage搞混。這裡的storage指向的是firebase的storage,讓project可以上傳以及下載文件。
資料庫
db則是一個資料、數據庫的服務,可以查詢已經存進的東西,以及顯示,也只可以查詢與檢索。
FileComponent的處理
這裡可以分為細項,以行為推導需要什麼function。我們在存取雲端資料的時候,需要上傳、下載,而對於電腦來說,需要顯示上傳的model、關閉model,當然,這裡的model也由你自己設計,所以:
// firebase.js
import { initializeApp } from "firebase/app";
import { getAuth, GoogleAuthProvider } from "firebase/auth";
import { getStorage } from "firebase/storage";
import { getFirestore } from "firebase/firestore";

const firebaseConfig = {
    apiKey: { your key },
    authDomain: { your auth },
    projectId: { your Id },
    storageBucket: { your Bucket },
    messagingSenderId: { your Id },
    appId: { you appID}
};

const app = initializeApp(firebaseConfig);
const auth = getAuth(app);
const provider = new GoogleAuthProvider();
const storage = getStorage(app);
const db = getFirestore(app);

export { auth, provider, storage, db };
// FileCompoent.js
import React, { useState } from 'react'
import AddIcon from '@material-ui/icons/Add'
import './FileComponent.css'
import { FieldValue } from "firebase/firestore";
import { ref, uploadBytes, getDownloadURL } from 'firebase/storage'
import { storage, db } from '../firebase.js'
import { makeStyles } from '@material-ui/core/styles';
import Modal from '@material-ui/core/Modal';

function getModalStyle() {
    return {
        top: `50%`,
        left: `50%`,
        transform: `translate(-50%, -50%)`,
    };
}
const useStyles = makeStyles((theme) => ({
    paper: {
        position: 'absolute',
        width: 400,
        backgroundColor: theme.palette.background.paper,
        border: '2px solid #000',
        boxShadow: theme.shadows[5],
        padding: theme.spacing(2, 4, 3),
    },
}));

const FileComponent = () => {
    const classes = useStyles();
    const [modalStyle] = useState(getModalStyle);
    const [open, setOpen] = useState(false);
    const [file, setFile] = useState(null)
    const [uploading, setUploading] = useState(false);
    const handleOpen = () => { setOpen(true); };
    const handleClose = () => { setOpen(false); };

    const handleChange = (e) => {
        if (e.target.files[0]) {
            setFile(e.target.files[0]);
        }
    }

    const handleUpload = () => {
        setUploading(true);

        // console.log('initial')
        // 跟原書不同,firebase的寫法在新版本中有很多改變,所以這不是直接用object存取的方式用ref,而是import了ref的function來設定
        const storageRef = ref(storage, `files/${file.name}`);

        // 同樣地,這裡也用了uploadBytes的function來設定,注意這些function都要import
        uploadBytes(storageRef, file).then((snapshot) => {
            // console.log('place 2')
            getDownloadURL(storageRef).then((url) => {
                // console.log('place 3')
                db.collection('myFiles').add({
                    timestamp: FieldValue.serverTimestamp(),
                    caption: file.name,
                    fileUrl: url,
                    size: snapshot.totalBytes,
                });
                // console.log('closing')
                setUploading(false);
                setOpen(false);
                setFile(null);
            });
        }).catch((error) => {
            console.error('Error uploading file:', error);
            setUploading(false);
        });
    };

    return (
        <div className="file">
            <div className="file__container" onClick={handleOpen}>
                <AddIcon fontSize='large' />
                <p>New</p>

                <Modal
                    open={open}
                    onClose={handleClose}
                    aria-labelledby="simple-modal-title"
                    aria-describedby="simple-modal-description"
                >
                    <div style={modalStyle} className={classes.paper}>
                        <p>Select files you want to upload!</p>
                        {
                            uploading ? (
                                <p>Uploading...</p>
                            ) : (
                                <>
                                    <input type="file" onChange={handleChange} />
                                    <button onClick=
                                        {handleUpload}>Upload</button>
                                </>
                            )
                        }
                    </div>
                </Modal>
            </div>
        </div >
    )
}

export default FileComponent
