
CredentialsProvider 他是一個 next-auth 提供客製化帳密管理的功能搭配 next-auth session 驗證機制,雖然 next-auth 官方並不推薦這種帳密管理方式,畢竟帳密安全這塊還是交給專業的平台把管比較實際,但撇除安全問題 CredentialsProvider 使用上蠻方便的,可以透過 callback 方式驗證 user 帳號,不需要再額外寫一個 api 去驗證。
首先我們先定義我們 signin 的 page 在哪邊因為本次login 跟 register 都在 / ,所以我們定義 signIn: '/',還記得我們昨日的 github 登入嗎,這邊定義好 signIn 後,日後只要呼叫 nextAuth 的 signIn() ,都會到 http://localhost:3000/ 中。
大家還記得在實作 register 時候有添加的 prisma schema 嗎,他主要是用來搭配 adapter 用的,每當 user 登入成功就會自動把 user info 單加到你使用的 orm 資料中, next-auth 還有提供超多種的 orm 有興趣的讀者可以 參考參考 ~
import NextAuth, { AuthOptions, getServerSession } from "next-auth"
import CredentialsProvider from "next-auth/providers/credentials"
import GithubProvider from "next-auth/providers/github"
import { PrismaAdapter } from "@next-auth/prisma-adapter"
import { prisma } from "@/server/db"
export const authOptions: AuthOptions = {

  //..
  pages: { signIn: '/' },
  adapter: PrismaAdapter(prisma),
}
export default NextAuth(authOptions)
補充一下 其實每個 adapter 只是拿以下的 code 把 client 傳下去執行的各種 callBack 而已,所以如果讀者想自己寫一個 adapter 可以拿以下的 code 去修改,但要記得 return 的 key 是固定的。
如果想知道其他 adpter 怎麼實作的可以參考官方寫法。
https://github.com/nextauthjs/next-auth/tree/main/packages
/** @return { import("next-auth/adapters").Adapter } */
export default function MyAdapter(client, options = {}) {
  return {
    async createUser(user) {
      return
    },
    async getUser(id) {
      return
    },
    async getUserByEmail(email) {
      return
    },
    async getUserByAccount({ providerAccountId, provider }) {
      return
    },
    async updateUser(user) {
      return
    },
    async deleteUser(userId) {
      return
    },
    async linkAccount(account) {
      return
    },
    async unlinkAccount({ providerAccountId, provider }) {
      return
    },
    async createSession({ sessionToken, userId, expires }) {
      return
    },
    async getSessionAndUser(sessionToken) {
      return
    },
   //..
  }
}
https://next-auth.js.org/tutorials/creating-a-database-adapter
CredentialsProvider 主要有三個部分:name : 讓 sign() 驗證你的 name 是什麼,假如你是 Credentials ,則可以透過signIn("Credentials") 告訴 next-auth 你要透過 CredentialsProvider 方式登入。
credentials : 因為 CredentialsProvider 是一個需要客製化帳密的用法,這邊可以可你希望 user 輸入什麼 fields。authorize : 用來驗證 user auth 的 function ,而這邊 return 的結果將會是你希望 use 收到什麼的 info 到session 中。
以下一一介紹 authorize 中比較重要的內容。
import NextAuth, { AuthOptions, getServerSession } from "next-auth"
import CredentialsProvider from "next-auth/providers/credentials"
import bcrypt from 'bcrypt'
export const authOptions: AuthOptions = {
   //..
  providers: [
   //..
    CredentialsProvider({
      name: 'Credentials',
      credentials: {
        email: { label: "email", type: "text", placeholder: "email" },
        password: { label: "Password", type: "password" }
      },
      async authorize(credentials, req) {
        if (!credentials?.email || !credentials?.password) {
          throw new Error('Invalidate credentials')
        }
        const user = await prisma.user.findFirst({
          where: {
            email: credentials.email
          }
        })
        if (!user || !user?.hashedPassword) {
          throw new Error('user credentials not found or user have not register')
        }
        const isCorrectPassword = await bcrypt.compare(
          credentials.password,
          user.hashedPassword
        )
        if (!isCorrectPassword) {
          throw new Error('Invalidate password')
        }
        return user
      }
    }),


    // ...add more providers here
  ],
}
export default NextAuth(authOptions)
驗證 user 是否有 input
  if (!credentials?.email || !credentials?.password) {
      throw new Error('Invalidate credentials')
    }
從 prisma 中尋找是否有 user
const user = await prisma.user.findFirst({
  where: {
    email: credentials.email
  }
})
if (!user || !user?.hashedPassword) {
  throw new Error('user credentials not found or user have not register')
}
驗證 user 是否有 hashedPassword ,同時透過bcrypt.compare 驗證 input password,成功就 return user info。
if (!user || !user?.hashedPassword) {
throw new Error('user credentials not found or user have not register')
}
const isCorrectPassword = await bcrypt.compare(
credentials.password,
user.hashedPassword
)
if (!isCorrectPassword) {
throw new Error('Invalidate password')
}
return user

還記得我們昨天在用 github 登入時候查看 useSession 的內容嗎?你會發現這邊只有簡單的 user info 而已,但如果我們想要拿到其他 user info 呢?怎麼辦?,這時我們可以設定 next-auth 說你希望 return 什麼 data 到 session 中。
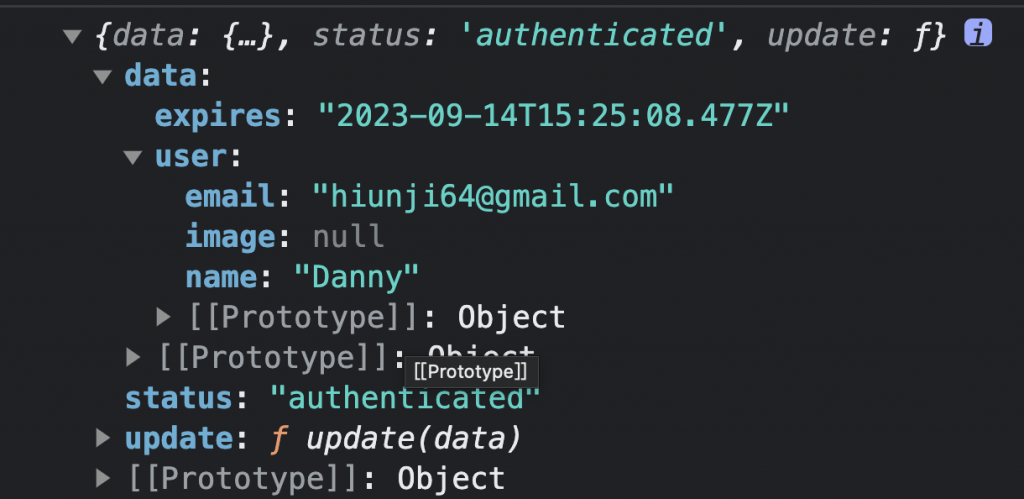
假設我希望將 user id 送到 session ,我們可以先將 callbacks 中的 jwt 從 prisma 中拿到 user 接著 return,此時 session 中的params token 就是上面 jwt callback return 的內容,這樣我們就可以return userId 到 session 中了。
export const authOptions: AuthOptions = {
  //..
  callbacks: {
    async jwt({ token, user, account, profile, isNewUser }) {
      const userInfo = await prisma.user.findFirst({
        where: {
          email: token.email
        }
      })

      if (!userInfo) return token
      return { ...token, ...userInfo }
    },
    session({ session, token }) {
      return { ...session, user: { ...session.user, id: token.id } }
    },
  }
}
export default NextAuth(authOptions)
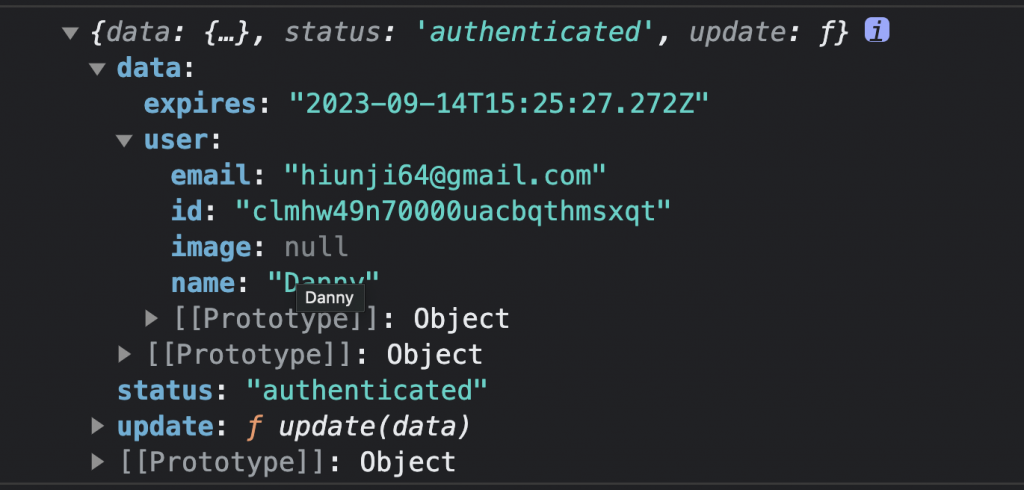
這時我們在看一下 console.log ,我們成功添加 userId 了~
最後放上完整 authOptions setting 如下
import NextAuth, { AuthOptions, getServerSession } from "next-auth"
import CredentialsProvider from "next-auth/providers/credentials"
import GithubProvider from "next-auth/providers/github"
import { PrismaAdapter } from "@next-auth/prisma-adapter"
import { prisma } from "@/server/db"
import bcrypt from 'bcrypt'
export const authOptions: AuthOptions = {
  pages: { signIn: '/' },
  adapter: PrismaAdapter(prisma),
  // Configure one or more authentication providers
  providers: [
    GithubProvider({
      clientId: process.env.GITHUB_ID as string,
      clientSecret: process.env.GITHUB_SECRET as string,
    }),
    CredentialsProvider({
      // The name to display on the sign in form (e.g. 'Sign in with...')
      name: 'Credentials',
      // The credentials is used to generate a suitable form on the sign in page.
      // You can specify whatever fields you are expecting to be submitted.
      // e.g. domain, username, password, 2FA token, etc.
      // You can pass any HTML attribute to the <input> tag through the object.
      credentials: {
        email: { label: "email", type: "text", placeholder: "email" },
        password: { label: "Password", type: "password" }
      },
      async authorize(credentials, req) {
        if (!credentials?.email || !credentials?.password) {
          throw new Error('Invalidate credentials')
        }
        const user = await prisma.user.findFirst({
          where: {
            email: credentials.email
          }
        })
        if (!user || !user?.hashedPassword) {
          throw new Error('user credentials not found or user have not register')
        }
        const isCorrectPassword = await bcrypt.compare(
          credentials.password,
          user.hashedPassword
        )
        if (!isCorrectPassword) {
          throw new Error('Invalidate password')
        }
        return user
      }
    }),


    // ...add more providers here
  ],
  secret: process.env.AUTH_SECRET,
  callbacks: {
    async jwt({ token, user, account, profile, isNewUser }) {
      const userInfo = await prisma.user.findFirst({
        where: {
          email: token.email
        }
      })

      if (!userInfo) return token
      return { ...token, ...userInfo }
    },
    session({ session, token }) {
      return { ...session, user: { ...session.user, id: token.id } }
    },
  },
  session: {
    strategy: 'jwt',
    maxAge: 1 * 24 * 60 * 60
  }
}
export default NextAuth(authOptions)
之後我們到 authForm 在 onSubmit 中把 signin 邏輯加上,那 signIn 哪有一個 callBack 結果,我們可以透過 callBack 去做一些登入成功或是失敗的行為。
  const onSubmit = async (value: LoginFormSchema | RegisterFormSchema) => {
    try {
      setIsLoading(true)
      if (variants === 'Login') {
        const callBack = await signIn('credentials', {
          email: value.email,
          password: value.password,
          redirect: false
        })
        if (callBack?.error) {
          toast.error(callBack.error)
        }
        if (callBack?.ok) {
          toast.success('success login')
          router.push('/posts')
        }
      }
Register 部分我們也可以優化一下,只要 user 註冊成功我們就自動幫忙 login。
 const onSubmit = async (value: LoginFormSchema | RegisterFormSchema) => {
    try {
      setIsLoading(true)
      if (variants === 'Login') {
        //..
      }
      if (formSchemaTypeGuard(value) && variants === 'Register') {
        const { message } = await axios.post<{ message: string }, AxiosResponse<{ message: string }>, RegisterSchema>('/api/register', {
          name: value.name,
          email: value.email,
          password: value.password,
        }).then(res => res.data)
        toast.success(message)
        const callBack = await signIn('credentials', {
          email: value.email,
          password: value.password,
          redirect: false
        })
        if (callBack?.error) {
          toast(callBack.error)
        }
        if (callBack?.ok) {
          toast.success('success login')
          router.push('/posts')
        }
      }
    } catch (e) {
      if (e instanceof AxiosError) {
        const message = e.response?.data.message
        toast.error(message)
        return
      }
      console.log(e)
    } finally {
      setIsLoading(false)

    }
  }
因為login 跟 register 共用同一個 signin 邏輯所以拆成 handleSignCredentials
const handleSignCredentials = async (value: LoginFormSchema | RegisterFormSchema) => {
    const callBack = await signIn('credentials', {
      email: value.email,
      password: value.password,
      redirect: false
    })
    if (callBack?.error) {
      toast(callBack.error)
    }
    if (callBack?.ok) {
      toast.success('success login')
      router.push('/posts')
    }
  }
如此code 就簡潔多了~
const onSubmit = async (value: LoginFormSchema | RegisterFormSchema) => {
    try {
      setIsLoading(true)
      if (variants === 'Login') {
        handleSignCredentials(value)
      }
      if (formSchemaTypeGuard(value) && variants === 'Register') {
        const { message } = await axios.post<{ message: string }, AxiosResponse<{ message: string }>, RegisterSchema>('/api/register', {
          name: value.name,
          email: value.email,
          password: value.password,
        }).then(res => res.data)
        toast.success(message)
        handleSignCredentials(value)
      }
    } catch (e) {
      if (e instanceof AxiosError) {
        const message = e.response?.data.message
        toast.error(message)
        return
      }
      console.log(e)
    } finally {
      setIsLoading(false)

    }
  }
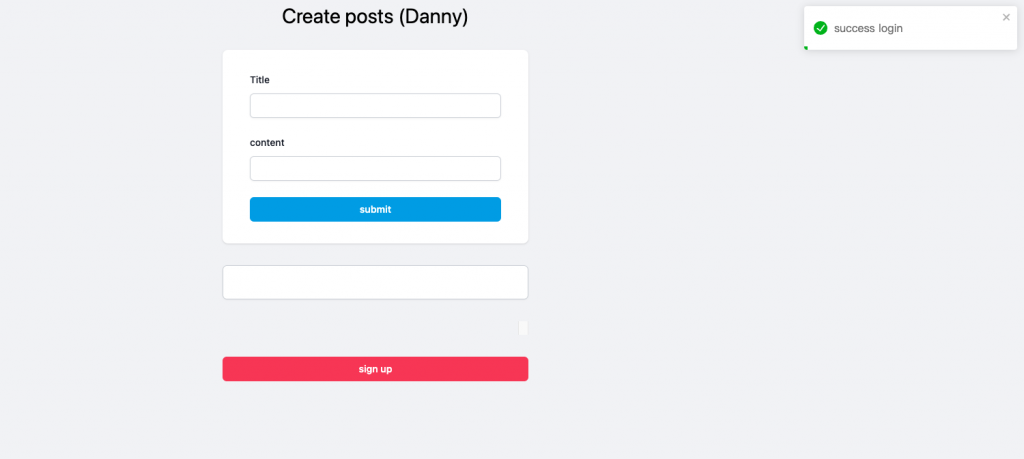
之後我們測試一下結果,如果讀者看動同一個畫面,恭喜你成功勒~
到這邊終於把 Next-auth 的主要功能介紹一遍了~明天我們就可以用 next-auth 的 session 結合 trpc 做身份驗證了~
https://github.com/nextauthjs/next-auth/tree/main/packages
https://next-auth.js.org/tutorials/creating-a-database-adapter
https://next-auth.js.org/adapters
https://github.com/Danny101201/next_demo/tree/main
✅ 前端社群 :
https://lihi3.cc/kBe0Y

 iThome鐵人賽