組件是reflex前端的建構模組,把UI分成獨立、可重複使用的部分。
reflex元件在背後包裝react元件,進而實現純 python體驗。
而組件由children 和 props 組成。
children是嵌套在組件內的文字或是reflex元件(作為位置參數傳遞)。
props影響組件的行為與外觀屬性(作為keyword參數傳遞)
而一般我們主要寫的是這樣。
def index():
    return rx.vstack(
        rx.button_group(
            rx.button('1'),
            rx.button('2')
        ),
        rx.text('3'),
        style = {'color': "green.500"},
    )
3是我們要顯示的text,而style裡面的color可以修改文本內的外觀。
不過有些組件內有特定的用法,需要稍微注意一下,比如circular_progress裡的circular_progress_label,他就是回傳一個value給他顯示控制進度調的數值。
color在哪裡都可以用。
這裡不多說,先上程式碼。
def index():
    return rx.text("Root Page")


def about():
    return rx.text("About Page")


app = rx.App()
app.add_page(index, route = "/")
app.add_page(about, route = "/about")
app.compile()
搜尋http://localhost:3000/與http://localhost:3000/about/即可看見結果。
一種叫做嵌套路由
def page_page():
    return rx.text("我是在page/page裡喔!")


app = rx.App()
app.add_page(page_page, route="/page/page")
一種叫做動態路由
# 這是官網的範例
class State(rx.State):
    @rx.var
    def post_id(self):
        return self.get_query_params().get("pid", "no pid")


def post():
    """A page that updates based on the route."""
    return rx.heading(State.post_id)


app = rx.App()
app.add_page(post, route="/post/[pid]")
app.compile()
get_query_params的解釋如下,可以透過這個函式找到先前輸入的值。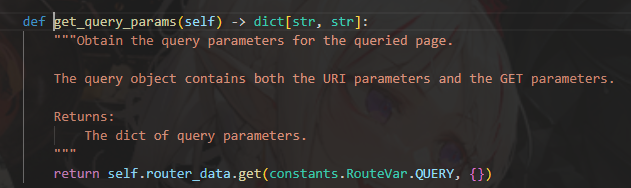
如果是多個的,官網上也有給予解釋
def post():
    """A page that updates based on the route."""
    return rx.vstack(
        rx.text(State.post_id),
    )
輸入 /post/555 55 55就可以看到下圖。
一種是 Page Metadata
def index():
return rx.text("A Beautiful App")
def about():
return rx.text("About Page")
meta = [
{"name": "theme_color", "content": "#FFFFFF"},
{"char_set": "UTF-8"},
{"property": "og:url", "content": "url"},
]
app = rx.App()
app.add_page(
index,
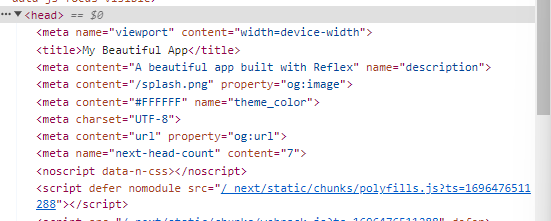
title="My Beautiful App",
description="A beautiful app built with Reflex",
image="/splash.png",
meta=meta,
)
app.add_page(about, title="About Page")
app.compile()
在這裡可以看到(右鍵 + 檢查)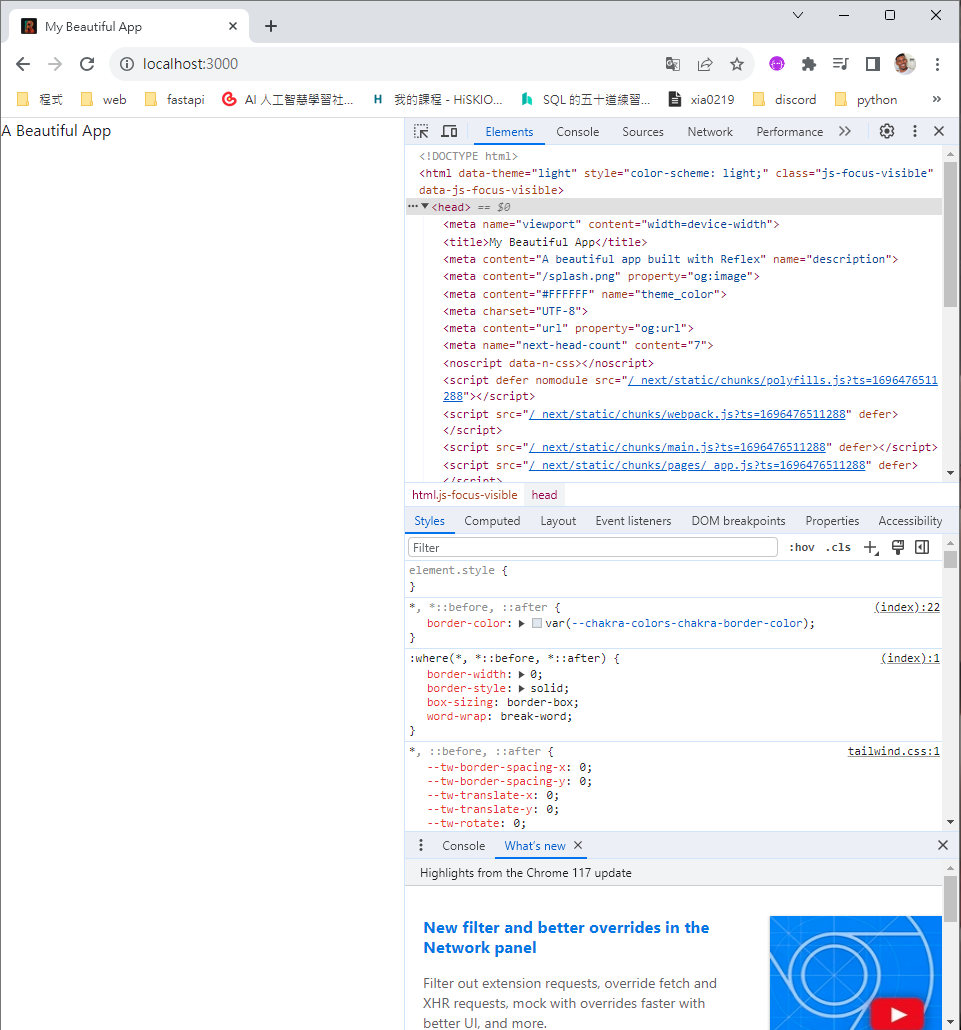
這是官網的範例,不過我沒有資料給他...這邊就隨手塞個csv或是json給他返回一個可以使用的檔都可以用。
import reflex as rx
from typing import List, Dict

class State(rx.State):
    data: Dict[str, Any]

    def get_data(self):
        # Fetch data
        self.data = fetch_data()


def index():
    return rx.text("A Beautiful App")

app = rx.App()
app.add_page(index, on_load=State.get_data)
app.compile()
還有一種語法糖。
class State(rx.State):
    pass

@rx.page(route="/", title="My Beautiful App")
def index():
    return rx.text("A Beautiful App")

@rx.page(route="/post", title="My Beautiful App post")
def index():
    return rx.text("post")

app = rx.App()
app.compile()
使用 @rx.page裝飾器來新增頁面,跟django和flask都差不多。
這裡再附上一種...因為是python,from記得拿出來用阿
# in pages/about.py
import reflex as rx

def about():
    return rx.text("About Page")

if __name__ == '__main__':
    about()
在我們平常寫程式碼的那邊寫
from pages.about import about

# the code you wirte

app = rx.App()
app.add_page(about)
app.compile()
http://localhost:3000/
http://localhost:3000/about/
複製過去本機端運行即可。
資料夾圖如下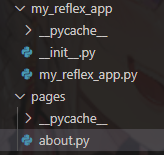


 iThome鐵人賽