大家好!今天要來教大家怎麼使用 Firebase 進行遠端推播的功能!
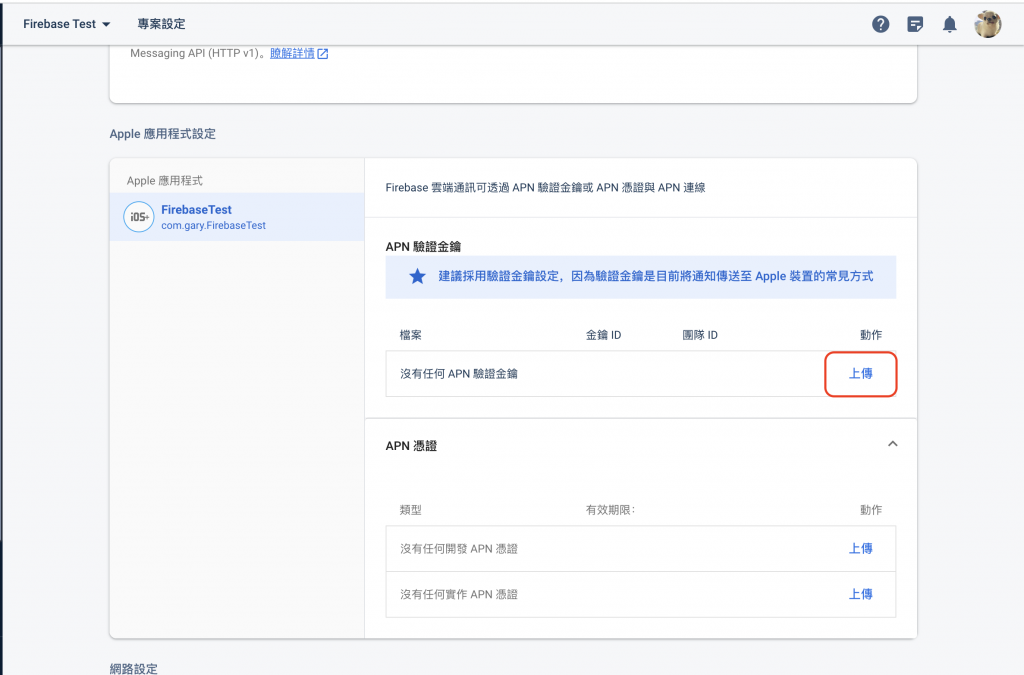
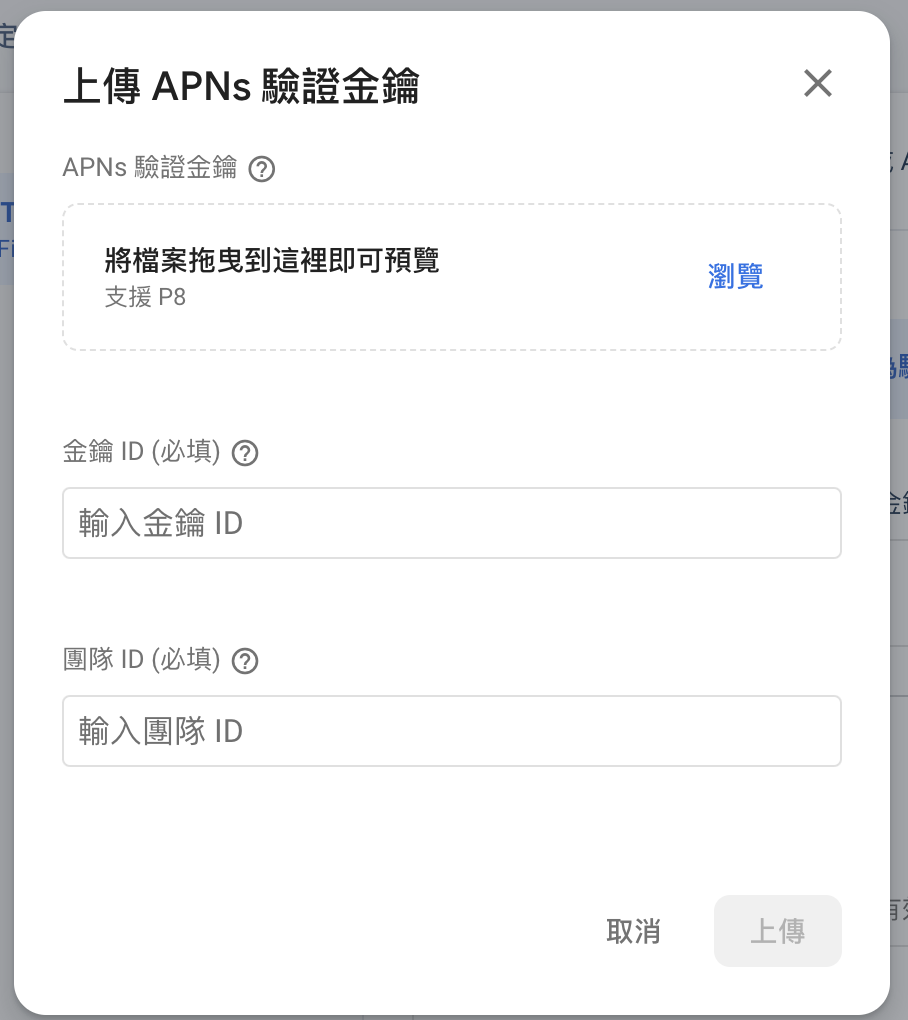
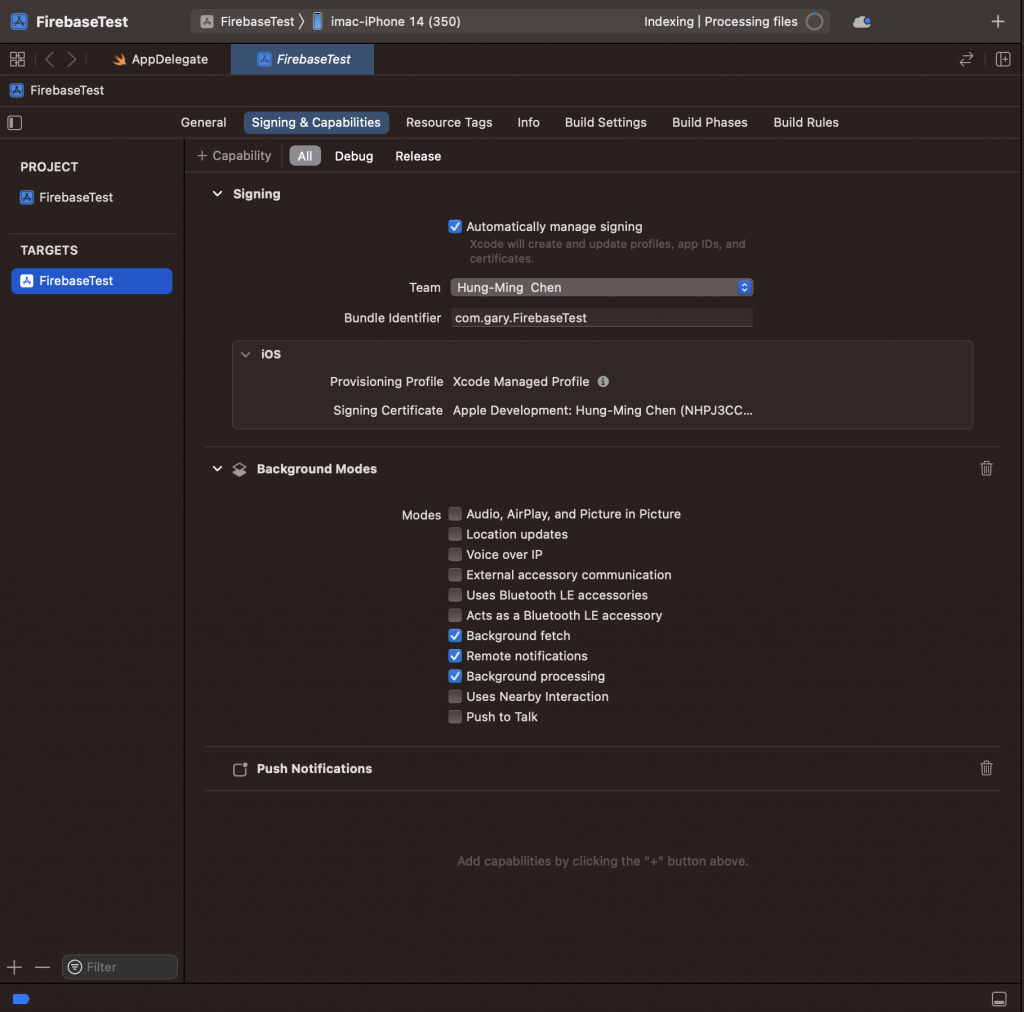
在這之前,大家可以先去看一下之前我的鐵人賽文章,先去進行遠端推播的憑證設定,以及 Firebase 專案的建立喔!
正文開始~~
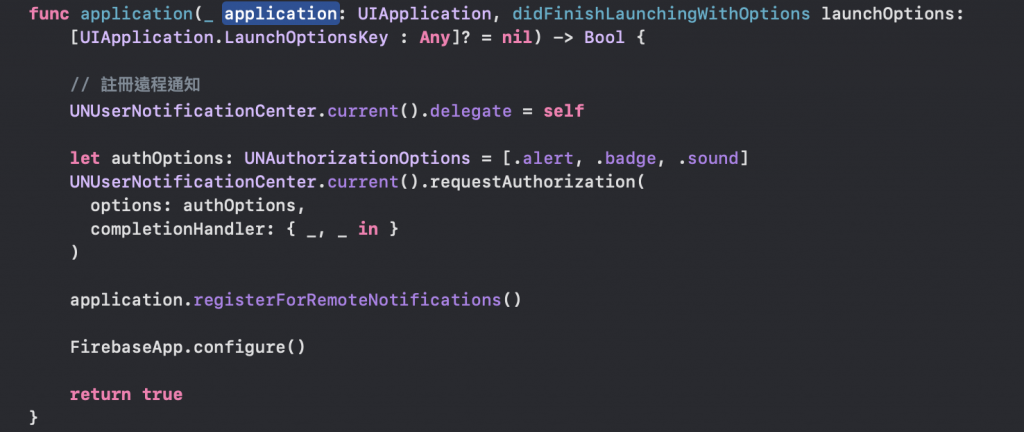
UNUserNotificationCenter.current().delegate = self

let authOptions: UNAuthorizationOptions = [.alert, .badge, .sound]
UNUserNotificationCenter.current().requestAuthorization(
  options: authOptions,
  completionHandler: { _, _ in }
)

application.registerForRemoteNotifications()
貼完會長這樣:
如下圖:
import FirebaseMessaging
如下圖:
Messaging.messaging().delegate = self
如下圖: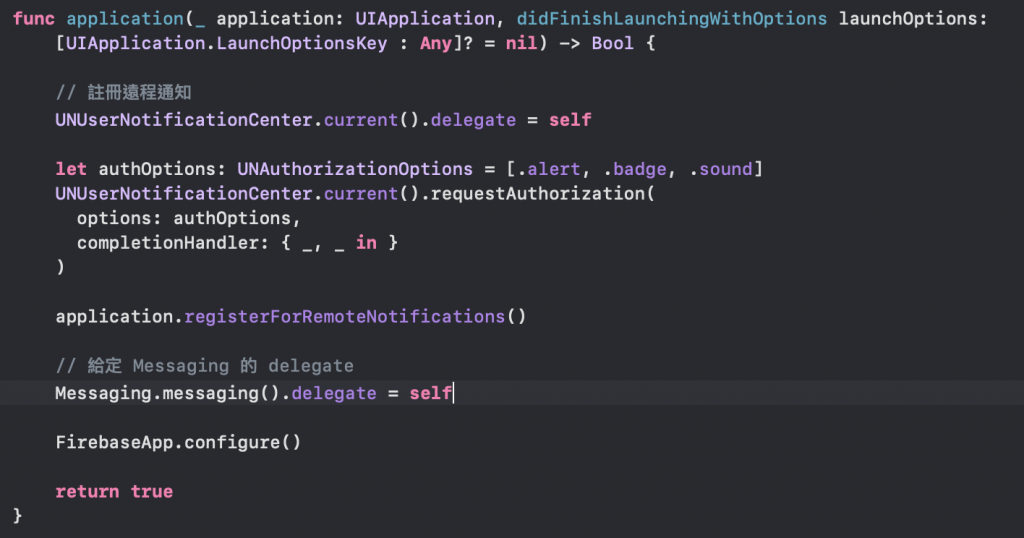
如下圖:
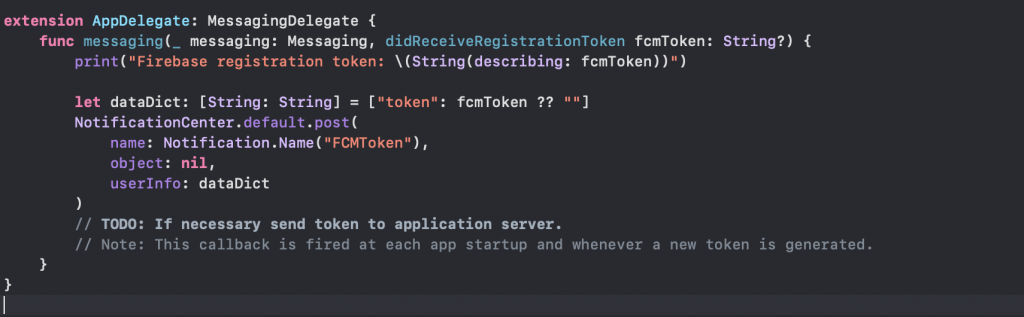
在 Message 的 Delegate 裡新增這段程式碼
func messaging(_ messaging: Messaging, didReceiveRegistrationToken fcmToken: String?) {
  print("Firebase registration token: \(String(describing: fcmToken))")

  let dataDict: [String: String] = ["token": fcmToken ?? ""]
  NotificationCenter.default.post(
    name: Notification.Name("FCMToken"),
    object: nil,
    userInfo: dataDict
  )
  // TODO: If necessary send token to application server.
  // Note: This callback is fired at each app startup and whenever a new token is generated.
}
如下圖:
extension AppDelegate: UNUserNotificationCenterDelegate {
  // Receive displayed notifications for iOS 10 devices.
  func userNotificationCenter(_ center: UNUserNotificationCenter,
                              willPresent notification: UNNotification) async
    -> UNNotificationPresentationOptions {
    let userInfo = notification.request.content.userInfo

    // With swizzling disabled you must let Messaging know about the message, for Analytics
    // Messaging.messaging().appDidReceiveMessage(userInfo)

    // ...

    // Print full message.
    print(userInfo)

    // Change this to your preferred presentation option
    return [[.alert, .sound]]
  }

  func userNotificationCenter(_ center: UNUserNotificationCenter,
                              didReceive response: UNNotificationResponse) async {
    let userInfo = response.notification.request.content.userInfo

    // ...

    // With swizzling disabled you must let Messaging know about the message, for Analytics
    // Messaging.messaging().appDidReceiveMessage(userInfo)

    // Print full message.
    print(userInfo)
  }
}
如下圖: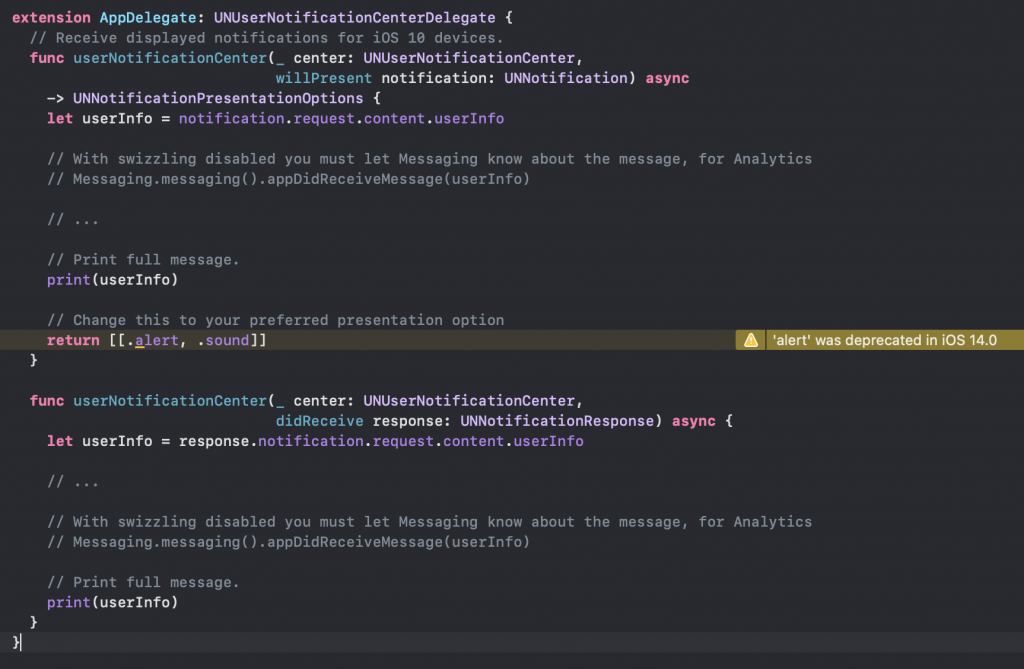
func application(_ application: UIApplication,
                 didReceiveRemoteNotification userInfo: [AnyHashable: Any]) async
  -> UIBackgroundFetchResult {
  // If you are receiving a notification message while your app is in the background,
  // this callback will not be fired till the user taps on the notification launching the application.
  // TODO: Handle data of notification

  // With swizzling disabled you must let Messaging know about the message, for Analytics
  // Messaging.messaging().appDidReceiveMessage(userInfo)

  // Print message ID.
  if let messageID = userInfo[gcmMessageIDKey] {
    print("Message ID: \(messageID)")
  }

  // Print full message.
  print(userInfo)

  return UIBackgroundFetchResult.newData
}
如下圖:
let gcmMessageIDKey = "gcm.Message_ID"
如下圖: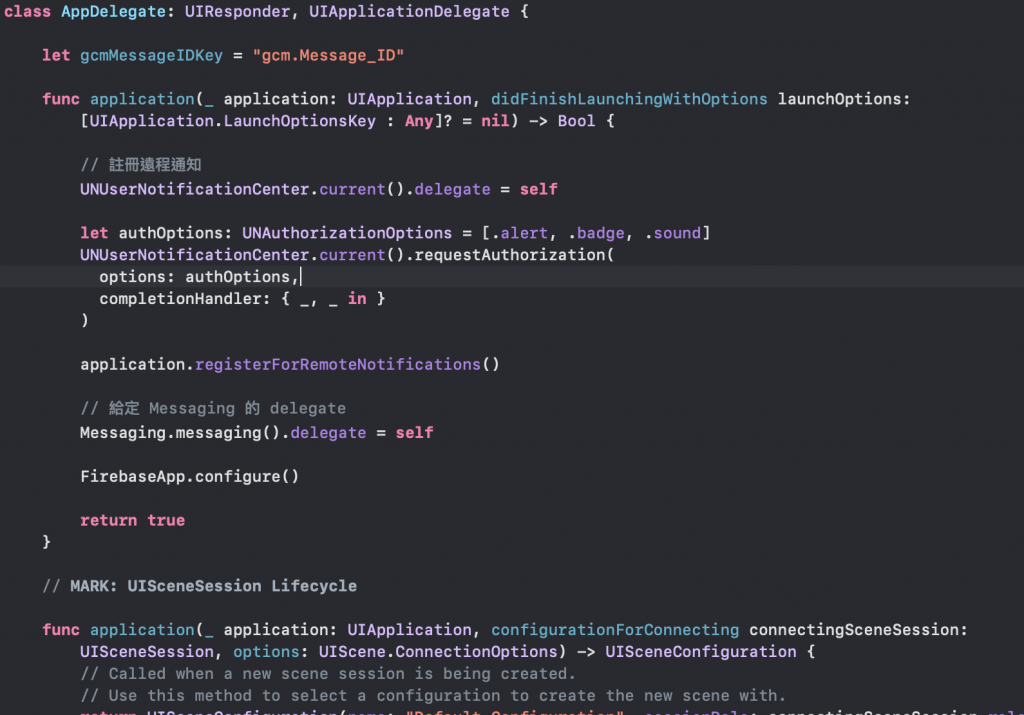


 iThome鐵人賽