
來練習刻出一台差速小車車,差速小車由車身(chassis)、左右後輪(left/right_wheel)、前輔助輪(front_wheel)組合而成。
尺寸表(單位:m)
開始寫urdf前,先把urdf_tutorial package抓下來~
sudo apt install ros-foxy-urdf-tutorial

# 檢查一下是不是可以開預設的.urdf
ros2 launch urdf_tutorial display.launch.py
這個launch主要再做的事情就是執行rviz2與執行robot_state_publisher、joint_state_publisher節點。
robot_state_publisher:機器模型的外觀與狀態描述
joint_state_publisher:控制關節的活動
    robot_state_publisher_node = Node(
        package='robot_state_publisher',
        executable='robot_state_publisher',
        parameters=[{'robot_description': robot_description}]
    )

    joint_state_publisher_node = Node(
        package='joint_state_publisher',
        executable='joint_state_publisher',
        condition=UnlessCondition(LaunchConfiguration('gui'))
    )
找個喜歡的位置新增一個空白.urdf 檔
<?xml version="1.0"?>
<robot name="ej_robot">
<!-- base_link是整台車的原點 -->
<link name="base_link"/>
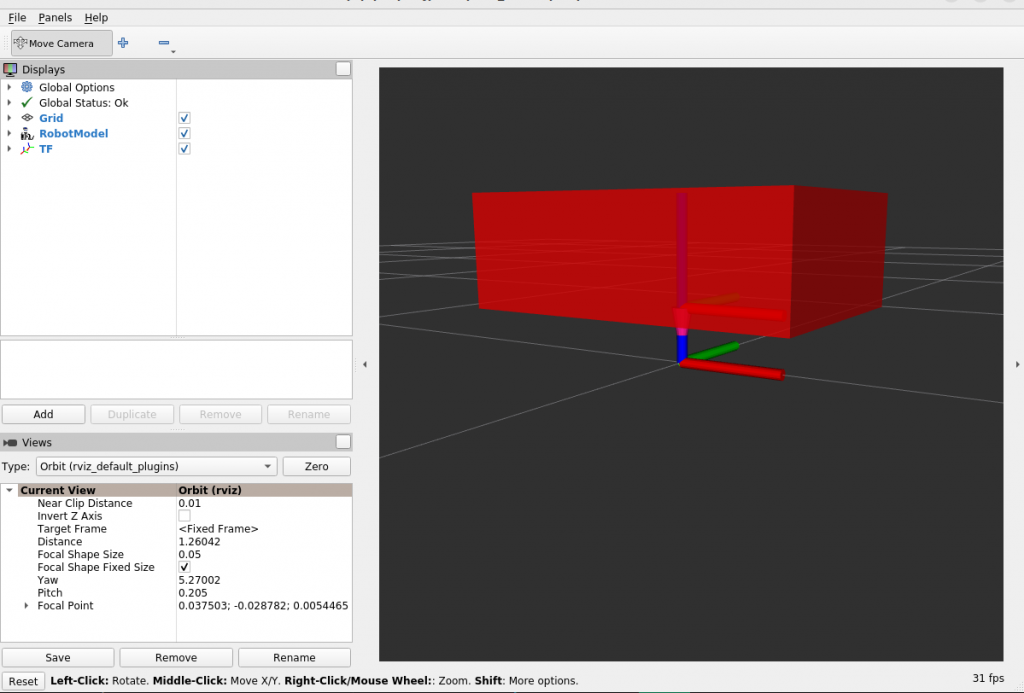
<!-- chaiss底盤基本外觀設定 -->
<link name="chaiss">
<visual>
<geometry>
<box size="0.6 0.4 0.2"/>
</geometry>
<!-- z如果為0車體會崁在地板中間 rpy是 row pitch yaw -->
<origin xyz="0 0 0.1" rpy="0 0 0"/>
</visual>
</link>
<!-- 設定原點與車體的父子TF關係 -->
<joint name="base_joint" type="fixed">
<parent link="base_link"/>
<child link="chaiss"/>
<origin xyz="0 0 0.1" rpy="0 0 0"/>
</joint>
</robot>
check_urdf ej_robot.urdf


robot name is: ej_robot
---------- Successfully Parsed XML ---------------
root Link: base_link has 1 child(ren)
    child(1):  chaiss
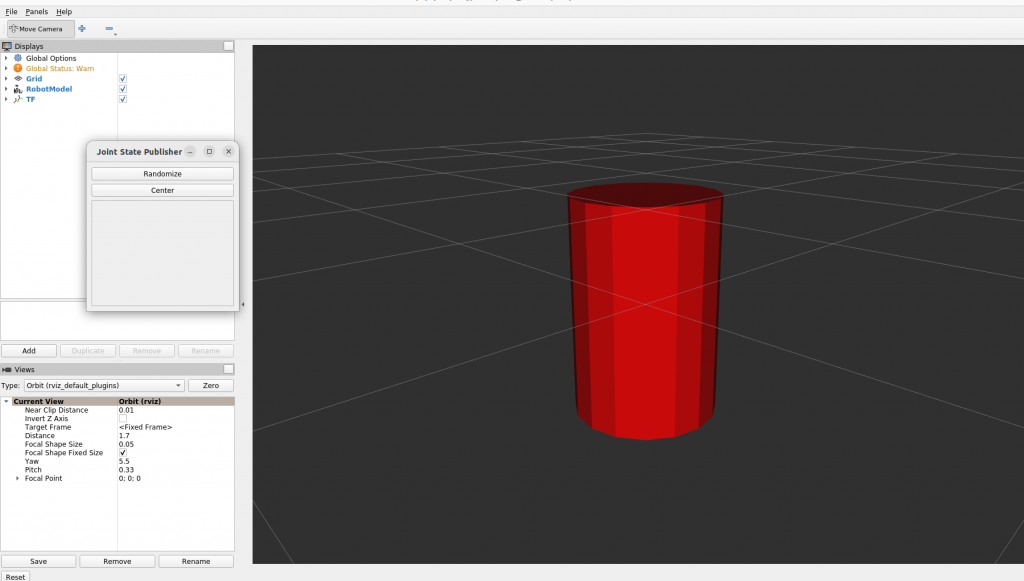
沒問題的話就可以先看看它長怎樣
ros2 launch urdf_tutorial display.launch.py model:=ej_robot.urdf
<?xml version="1.0"?>
<robot name="ej_robot">
<!-- 略 -->
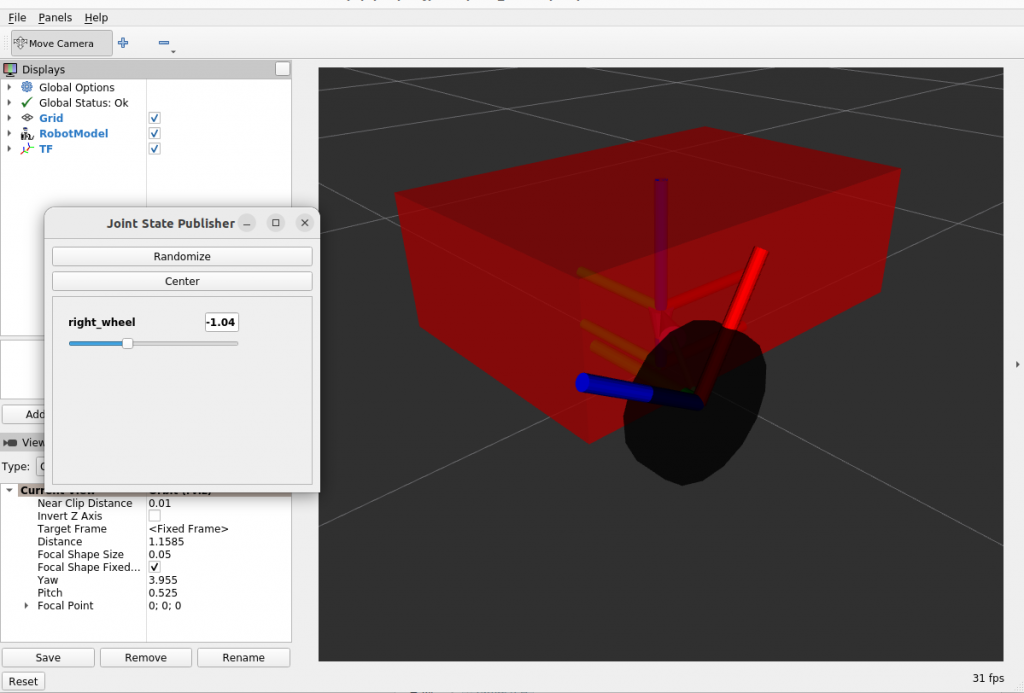
<!-- 右輪的基本設定 -->
<link name="right_wheel">
<visual>
<geometry>
<cylinder radius="0.1" length="0.05" />
</geometry>
<origin xyz="0 0 0" rpy="1.57 0 0" />
<material name="blue">
<color rgb="0.0 0.0 0.5" />
</material>
</visual>
</link>
<!-- 右輪與車底盤的關節設定 -->
<joint name="right_wheel_joint" type="continuous">
<parent link="chaiss"/>
<child link="right_wheel"/>
<origin xyz="-0.15 -0.225 0" rpy="0 0 0"/>
<axis xyz="0 1 0"/>
</joint>
</robot>
robot name is: ej_robot
---------- Successfully Parsed XML ---------------
root Link: base_link has 1 child(ren)
    child(1):  chaiss
        child(1):  right_wheel
robot name is: ej_robot
---------- Successfully Parsed XML ---------------
root Link: base_link has 1 child(ren)
    child(1):  chaiss
        child(1):  front_wheel
        child(2):  left_wheel
        child(3):  right_wheel
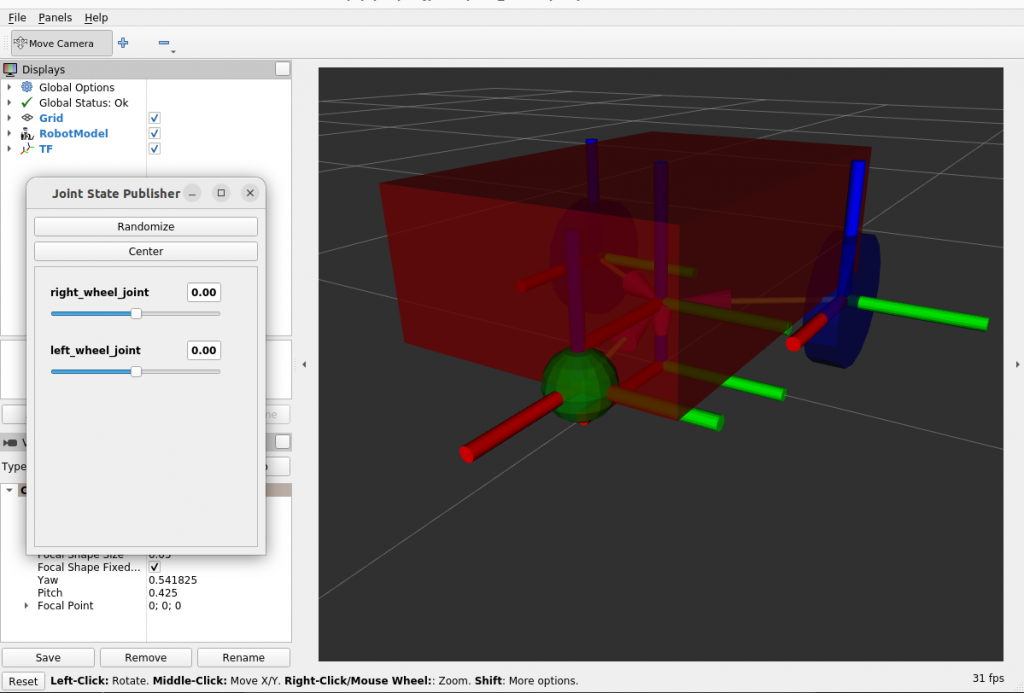
這樣外觀和關節就設定好了~
但在匯入Gazebo前還需要添加物理資訊~~明日待續!


 iThome鐵人賽