針對後端api專案新增一個Student.cs的類別程式檔案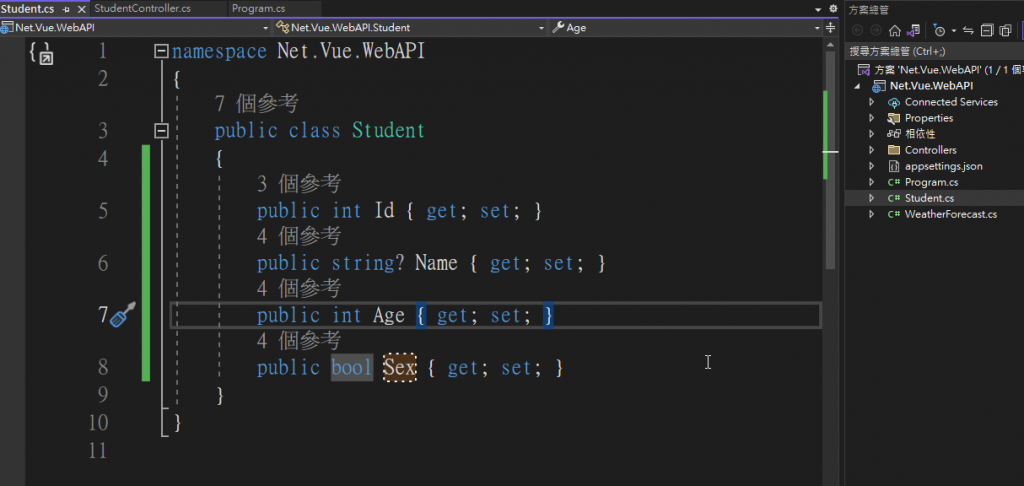
Student.cs
namespace Net.Vue.WebAPI
{
    public class Student
    {
        public int Id { get; set; }
        public string? Name { get; set; }
        public int Age { get; set; }
        public bool Sex { get; set; }
    }
}
StudentController.cs 編輯修改
using Microsoft.AspNetCore.Http;
using Microsoft.AspNetCore.Mvc;
namespace Net.Vue.WebAPI.Controllers
{
[Route("api/[controller]")]
[ApiController]
public class StudentController : ControllerBase
{
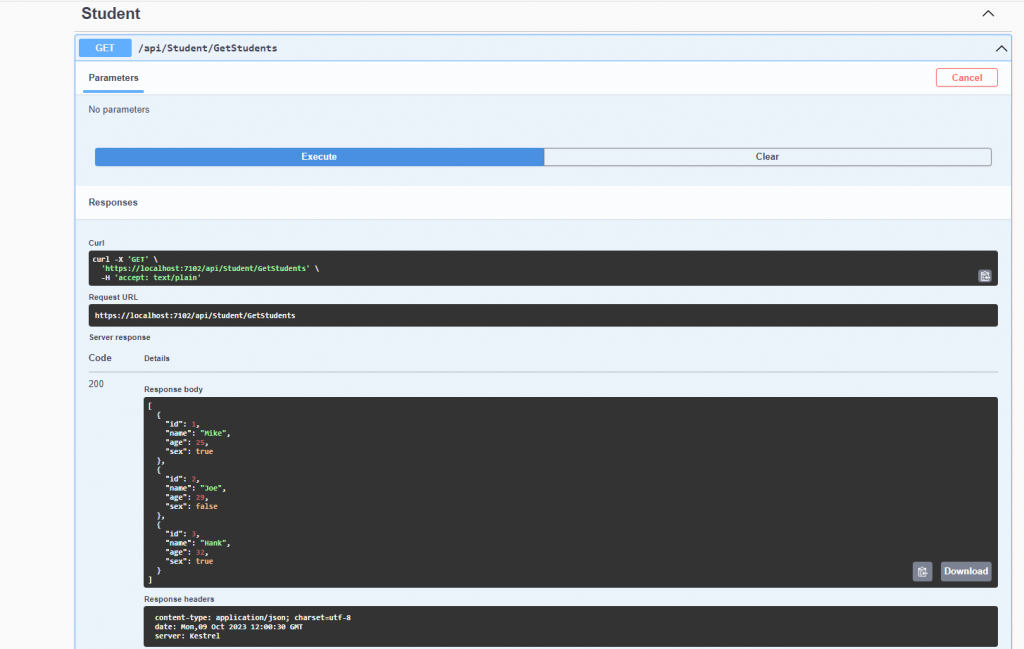
[HttpGet("GetStudents")]
public List<Student> GetStudent()
{
List<Student> list = new List<Student>()
{
new Student() {Id=1, Name="Mike",Age=25,Sex=true },
new Student() {Id=2, Name="Joe",Age=29,Sex=false },
new Student() {Id=3, Name="Hank",Age=32,Sex=true }
};
return list;
}
[HttpPost("Add")]
public int AddStudent(Student student)
{
if (student == null)
return 0;
var name = student.Name;
var age = student.Age;
var sex = student.Sex;
return 1;
}
}
}

Client發起的 HttpPost 請求,主要用於向 WebAPI 服務提交新的資料,用於新增資料的操作行為。
GetStudent()的 HttpGet 要求則是用於查詢用途。
安装路由组件
要在 Vue 中使用路由,需要安裝此元件,Vue Router 這套 Vue.js 的官方路由。
具有 Node.js 的 Vue 專案,需要使用 npm 指令安裝路由元件到 Vue 專案中。
npm install vue-router@4
vue-router 安裝完成之後,若在全域專案中使用,還需要匯入並設定一下。
對於路由的應用,我們的做法是透過路由來存取不同的 Vue 元件,每個 Vue 元件都會符合一個 URL 路徑。
當在 Vue 渲染的頁面上存取到某個 URL 路徑,就會載入對應的元件。
在 Vue 單頁應用程式中,整個專案只有一個 index.html 頁面,不會有第 2 個 html 文件,所呈現的
功能頁面都是透過路由找到元件呈現的。
首先要記得到main.js去配置router
import { createApp } from 'vue'
import App from './App.vue'
import 'bootstrap/dist/css/bootstrap.min.css'
import router from './router/router'//引用路由js
import axios from './axios/axios'

const app = createApp(App);
app.use(router);//使用路由配置
app.mount('#app');

app.config.globalProperties.$axios = axios;
設定路由,將路由元件應用到整個應用程式中。
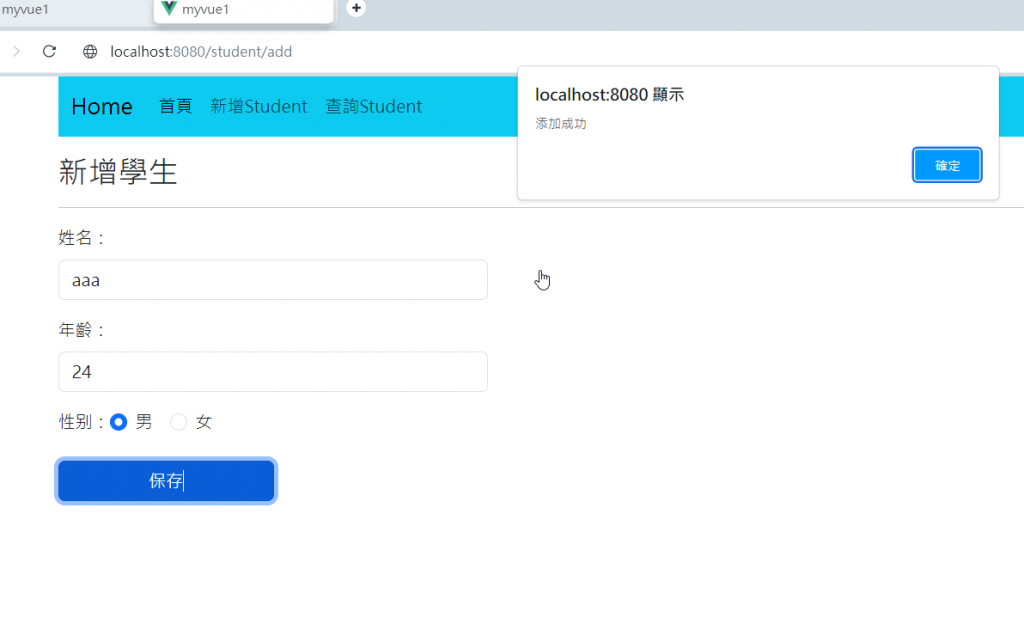
新增src/components目錄下,加入AddStudent.vue
<template>
    <h3>新增學生</h3>
    <hr />
    <div style="width:400px">
        <div class="mb-3">
            <label class="form-label">姓名:</label>
            <input type="text" v-model="studentName" id="Name" class="form-control">
        </div>
        <div class="mb-3">
            <label class="form-label">年齡:</label>
            <input type="number" v-model="studentAge" id="Age" class="form-control">
        </div>
        <div class="mb-3">
            <label class="form-label">性别:</label>
            <div class="form-check form-check-inline">
                <input class="form-check-input" type="radio" id="sex0" value="1" name="Sex" v-model="studentSex">
                <label class="form-check-label" for="sex0">男</label>
            </div>
            <div class="form-check form-check-inline">
                <input class="form-check-input" type="radio" id="sex1" checked value="0" name="Sex" v-model="studentSex">
                <label class="form-check-label" for="sex1">女</label>
            </div>
        </div>
        <div class="mb-3">
            <input value="保存" @click="add" class="btn btn-primary" />
        </div>
    </div>
</template>

<script setup>
    import API from "../axios/axios"
    import { ref } from 'vue'
    const studentName = ref('');
    const studentAge = ref(0);
    const studentSex = ref(false);
    const add = () => {
        API({
            url: '/api/Student/add',
            method: 'post',
            data: { name: studentName.value, age: studentAge.value, sex: Boolean(Number(studentSex.value)) }
        }).then((res) => {
            if (res.data == 1)
            {
                alert('加入成功');
            }
        });
    };
</script>
新增 router.js 文件於src目錄下
import { createRouter, createWebHistory } from "vue-router";
import AddStudent from "../components/AddStudent.vue";
import GetStudent from "../components/GetStudent.vue";
const router = createRouter({
    history: createWebHistory(),
    routes: [
        {
            name: 'rtAdd',
            path: '/Student/Add',
            component: AddStudent,
        },
        {
            name: 'rtGet',
            path: '/Student/Get',
            component: GetStudent,
        },
    ]
})
export default router;
對於 routes 參數的配置,是一個Array,其中存放的是{} 物件,
每個{}物件包含 3 個參數:
name:路由名,識別某個路由,唯一值。
path:URL 存取的路徑,任意設置,是虛擬的,實際上不存在。
component:指定 URL 路徑存取時呈現的組件,需要import。
新增src/components目錄下,加入GetStudent.vue
<template>
    <h3>Student List</h3>
    <hr />
    <table class="table table-bordered">
        <thead>
            <tr class="text-center">
                <td>ID</td>
                <td>Name</td>
                <td>Age</td>
                <td>Sex</td>
            </tr>
        </thead>
        <tbody>
            <tr v-for="(s,index) in students" :key="index" class="text-center">
                <td>{{s.id}}</td>
                <td>{{s.name}}</td>
                <td>{{s.age}}</td>
                <td>{{s.sex?'男':'女'}}</td>
            </tr>
        </tbody>
    </table>
</template>

<script setup>
    import API from "../axios/axios"
    import { onMounted, ref } from 'vue'
    const students = ref([]);
    const show = () => {
        API({
            url: '/api/Student/GetStudents',
            method: 'get'
        }).then((res) => students.value = res.data);
    };
    onMounted(() => {
        show();
    });
</script>
在 App.vue 中編寫template 程式碼
  <template>
    <div class="container">
      <nav class="navbar navbar-expand-lg bg-info mb-3">
        <div class="container-fluid">
          <router-link class="navbar-brand" to="/">Home</router-link>
          <button class="navbar-toggler" type="button" data-bs-toggle="collapse" data-bs-target="#navbarNavAltMarkup"
                  aria-controls="navbarNavAltMarkup" aria-expanded="false" aria-label="Toggle navigation">
                <span class="navbar-toggler-icon"></span>
          </button>
          <div class="collapse navbar-collapse" id="navbarNavAltMarkup">
            <div class="navbar-nav">
              <router-link class="nav-link active" aria-current="page" to="/">首頁</router-link>
              <router-link class="nav-link" to="/student/add">新增Student</router-link>
              <router-link class="nav-link" to="/student/get">查詢Student</router-link>
            </div>
          </div>
        </div>
      </nav>
    <router-view></router-view>
  </div>
</template>

<script setup>


</script>
vue裡面,超連結是不使用 HTML 中的元素的,而是使用Vue 提供的自訂元件 router-link 來建立連結。
使用 router-link 的好處是:在不重新載入頁面的情況下更改 URL,處理 URL 的產生。
在 router-link 元素上,使用 to 屬性指定 URL 路徑,這個 URL 路徑就是路由中配置的 path 的值。
Vue 編譯後,router-link最後還是產生供瀏覽器解析。
運行看效果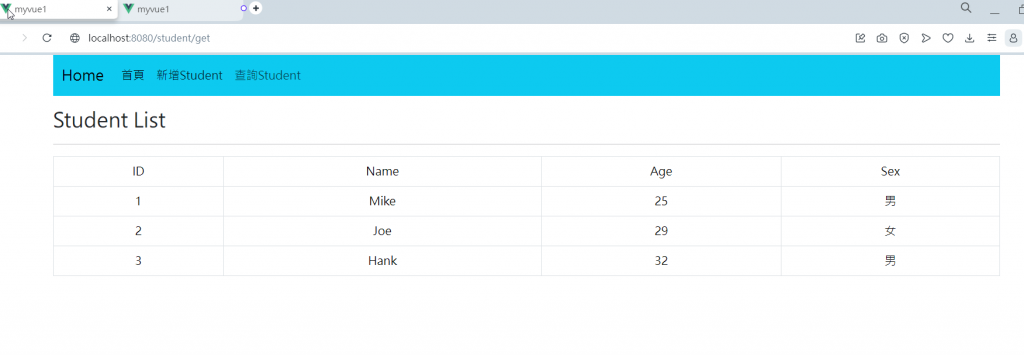
在此沒介紹串DB就是簡單模擬http針對get,post請求的互動
終於挑戰30天成功