
我們這28天已經完成了前後端的程式,今天我們要將後端的程式部署上去!
免費的,用來部署後端程式首先要先有google帳戶,登入之後點選前往控制台
點選左上角專案,新增專案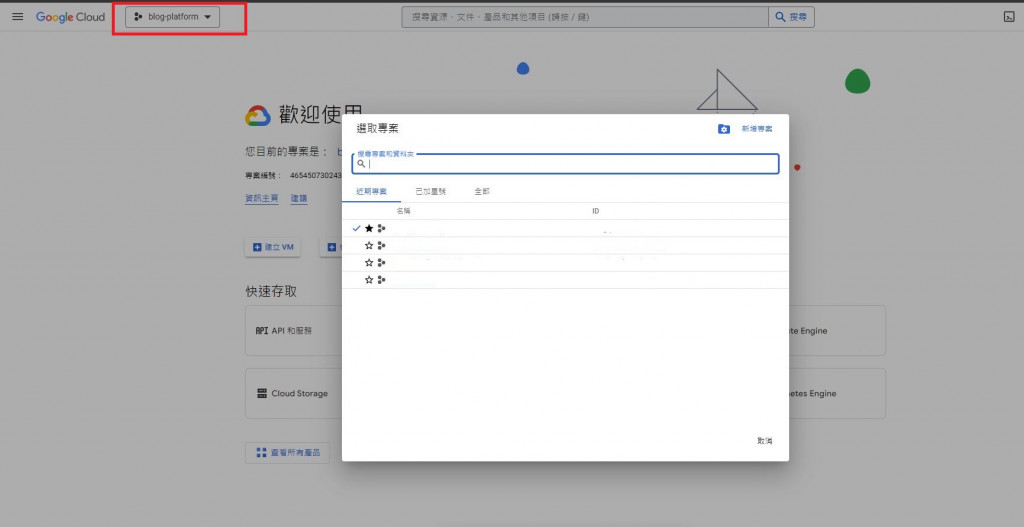
接著點選IAM與管理裡的服務帳戶,並建立服務帳戶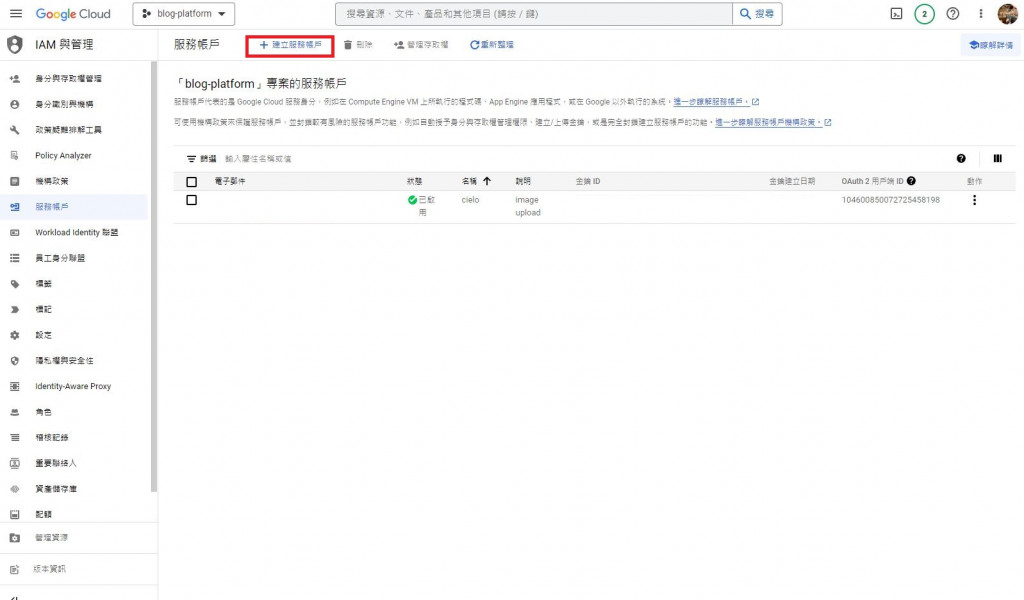
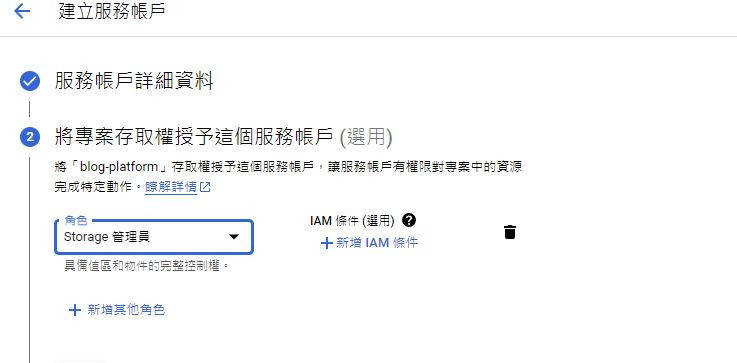
建立好服務帳戶後,要來生成金鑰,點選最右側的動作-管理金鑰
點選新增金鑰
選擇JSON格式,最後會在本機下載金鑰檔案並出現以下訊息表示金鑰生成成功。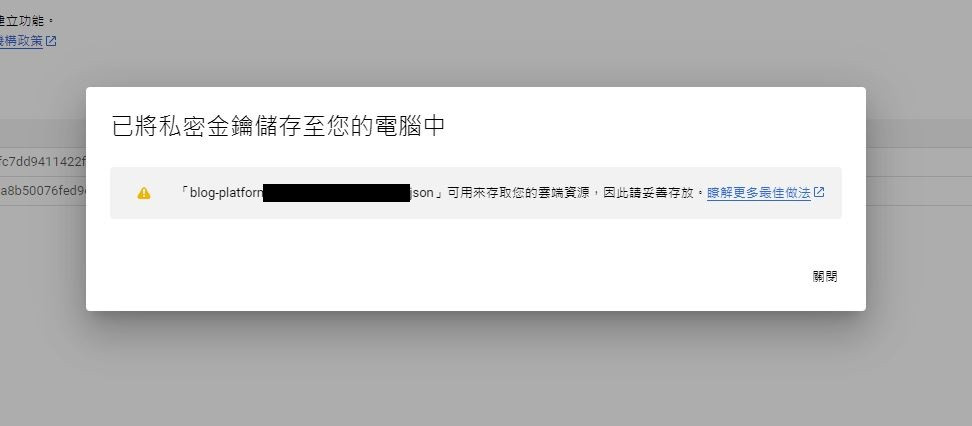
接著點選Cloud Storage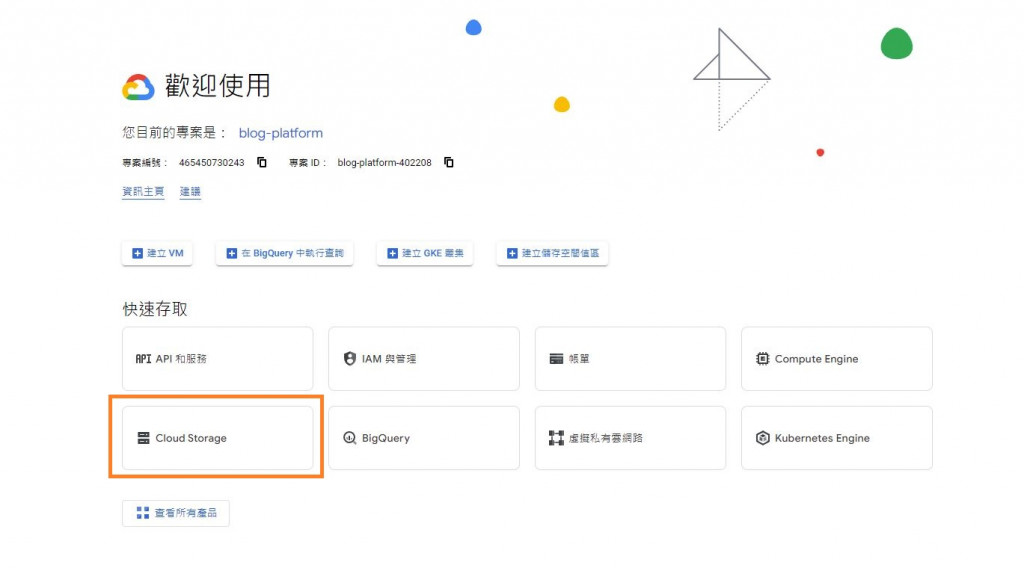
接著在值區旁邊點選建立,會進到以下畫面,填寫值區的相關資料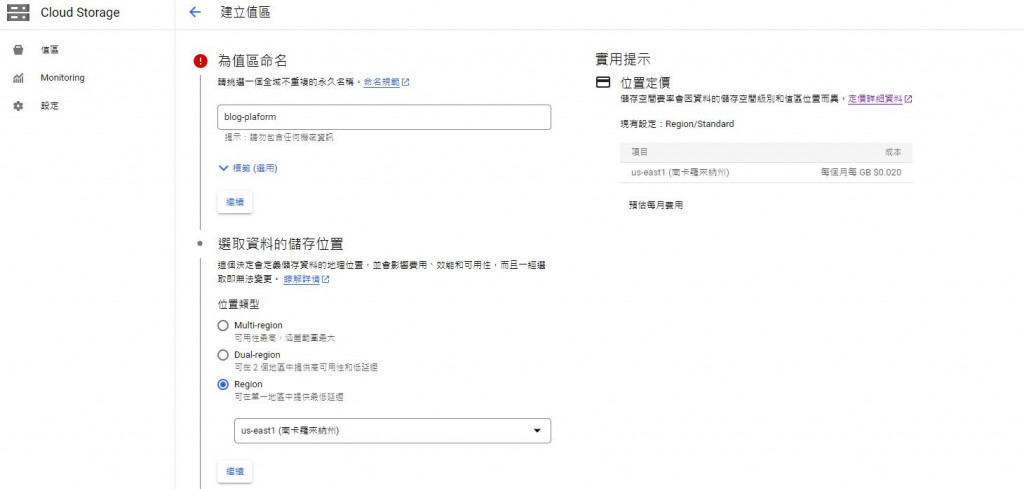
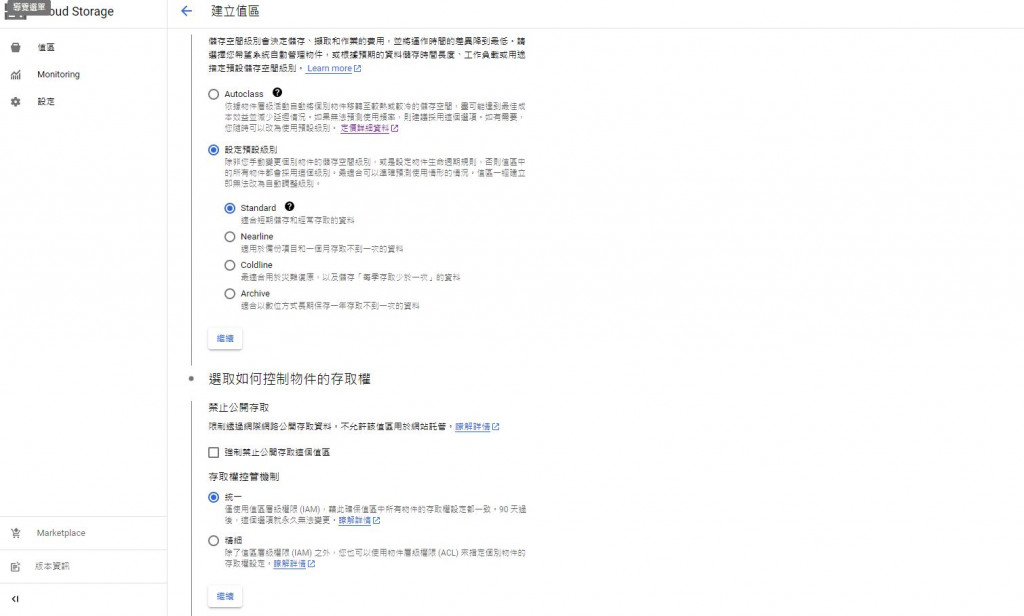
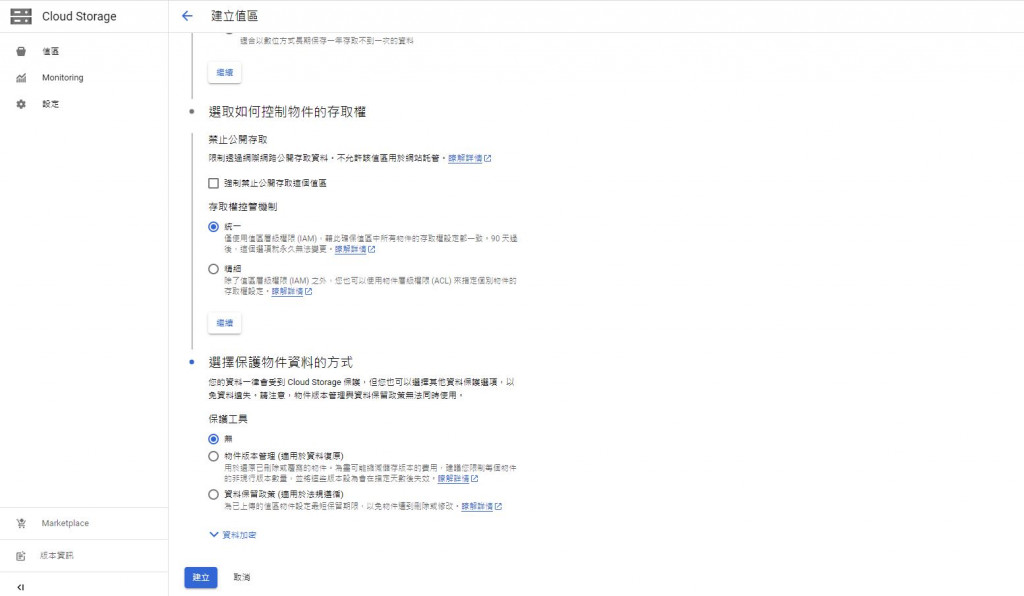
建立成功後會看到以下畫面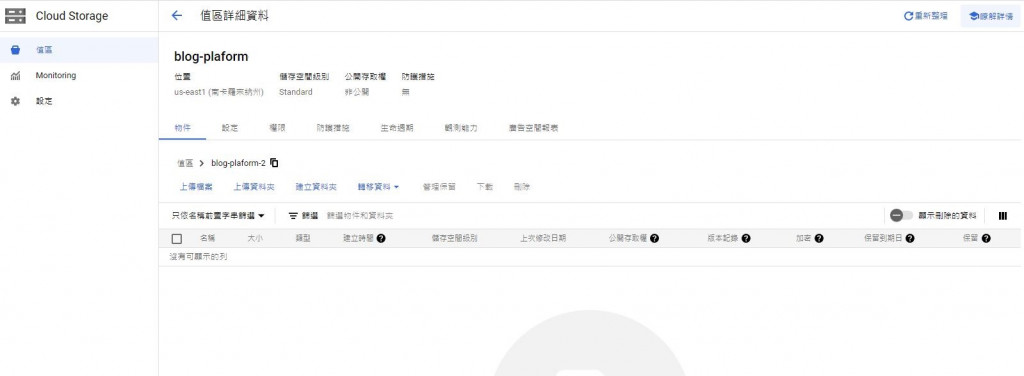
修改公開存取權
上面可以看公開存取權還是非公開,這樣我們的後端api無法取得圖片資料,所以我們要來調整存取權
點選授予存取權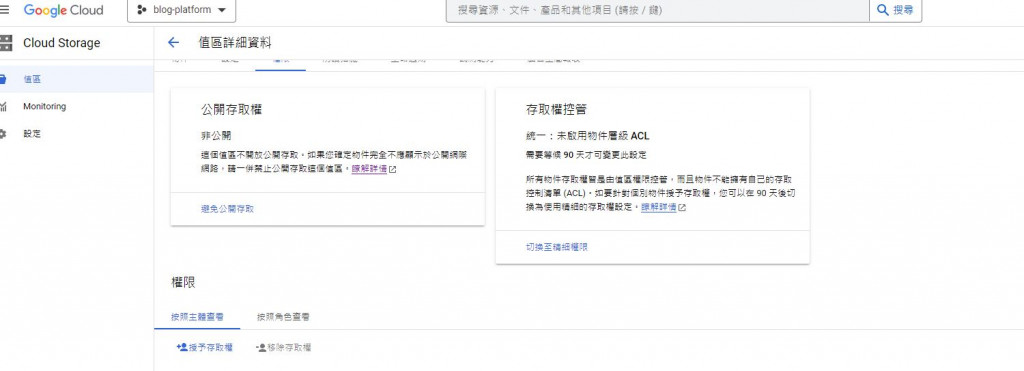
選擇主體:allUsers、角色:儲存空間物件檢視者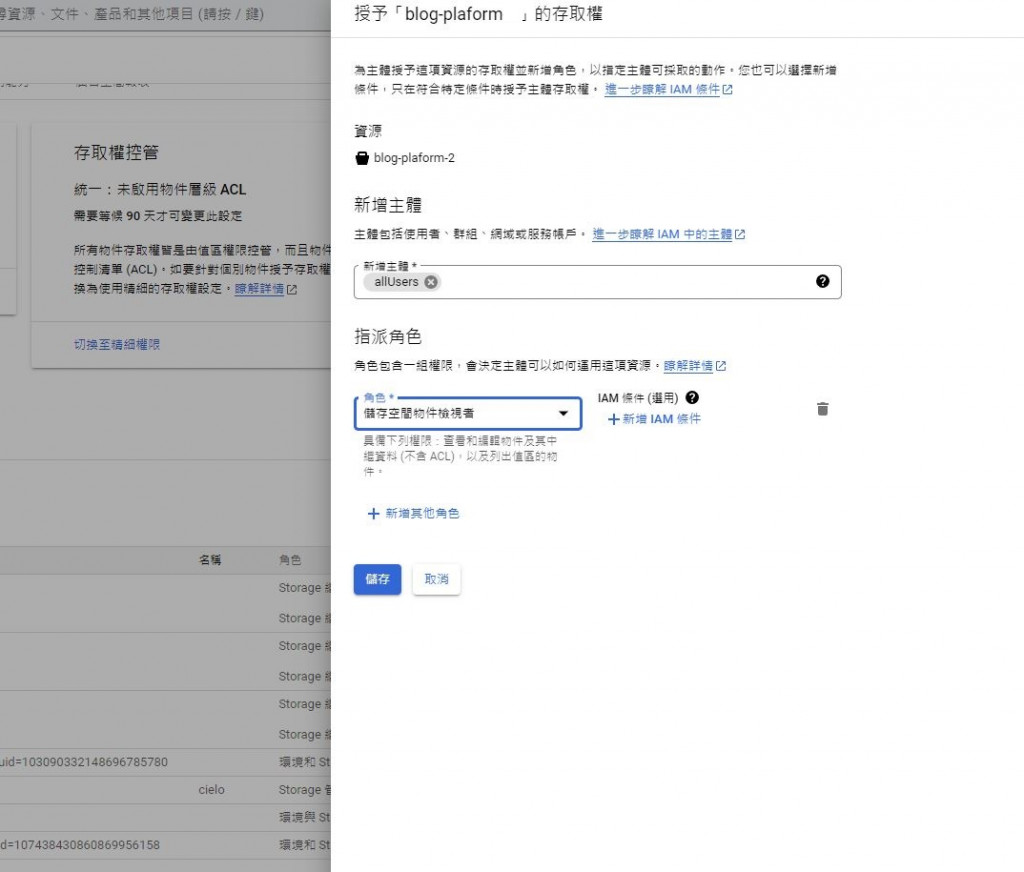
完成就可以看到我們的公開存取權變為在網際網路上公開
npm install @google-cloud/storage
我們要先去設定PORT,因為原先是帶入我們local的來源,使用express的環境變數,來帶入部署後的路徑。
設定前端環境變數
//server.js
{...}

//Connect Database
connectDB();

const corsOptions = {
    origin: process.env.FRONTEND || 'http://localhost:3000', // 設定允許的來源
    methods: 'GET,HEAD,PUT,PATCH,POST,DELETE', // 設定允許的 HTTP 方法
    optionsSuccessStatus: 204,
};
圖片上傳的路徑也要調整成google cloud storage的url
//images-controller.js
{...}
const config = require('config');
const path = require('path');
const HttpError = require('../models/http-error');
//引入google storage
const {Storage} = require('@google-cloud/storage');
//這裡的keyFilePath要抓的檔案就是剛剛前面生成的金鑰檔案,路徑是會放在專案最外層也就是blog-platform-backend下面
const keyFilePath = path.join(__dirname, '../keys.json');

exports.uploadImage =  (req, res,next) => {

    if (!req.file) {
        return next(new HttpError('No file uploaded', 400));
    }
    const storage = new Storage({
        keyFilename: keyFilePath,
        projectId: 'blog-platform-*****',
     });

    const bucket = storage.bucket('blog-platform');
    const blob = bucket.file(req.file.originalname);
    const blobStream = blob.createWriteStream();

    blobStream.on('error', (err) => {
        res.status(500).send(err);
     });

     blobStream.on('finish', () => {
        // The image URL to access the file in GCS
        const publicUrl = `https://storage.googleapis.com/${bucket.name}/${blob.name}`;
        res.status(200).json({ success: true, data: { url: publicUrl } });
     });

    blobStream.end(req.file.buffer);
};
const bucket = storage.bucket('blog-platform');
{...}
 const storage = new Storage({
        keyFilename: keyFilePath,
        projectId: 'blog-platform-*****',
 });
上面的projectId可以在這裡找到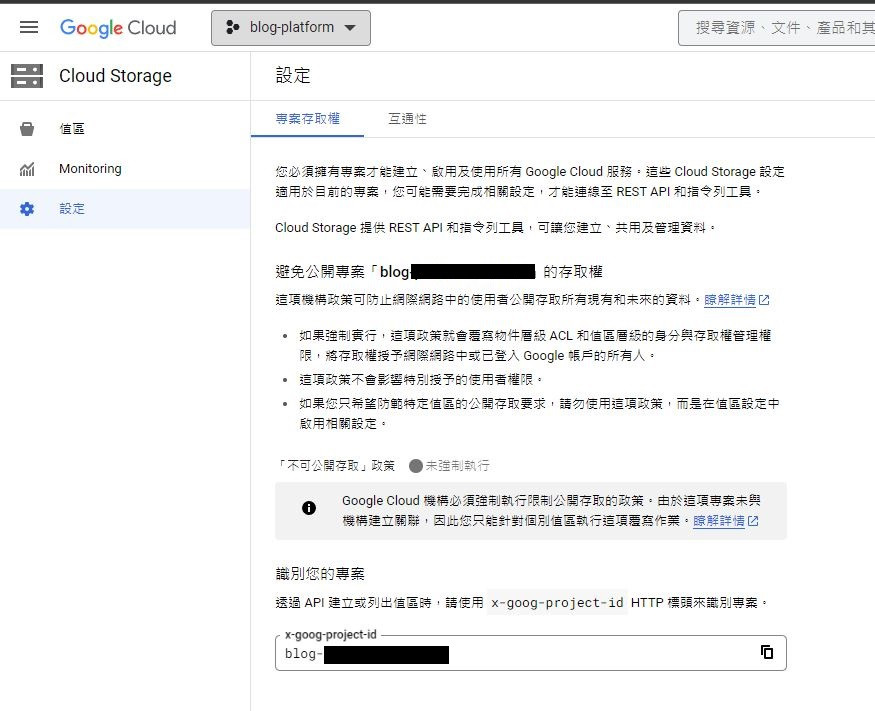
而bucket就是我們建立的值區名稱blog-platform
const express = require('express');
const multer = require('multer');
const auth = require('../../middleware/auth');
const router = express.Router();
const imageControllers = require("../../controllers/images-controller");
const config = require('config');


const multerStorage = multer.memoryStorage();  // Store the file in memory

const fileFilter = (req, file, cb) => {
  const allowedTypes = ["image/jpeg", "image/jpg", "image/png"];
  if (!allowedTypes.includes(file.mimetype)) {
    const error = new Error("不支援的檔案類型(只支援jpg、jpeg、png)");
    error.code = "LIMIT_FILE_TYPES";
    return cb(error, false);
  }
  cb(null, true);
};


const upload = multer({
  storage: multerStorage,
  fileFilter: fileFilter,
  limits:{
    fileSize: config.get("fileMaxSize")
  }
});

// Image upload route
router.post('/upload', auth, upload.single('image'), imageControllers.uploadImage, imageControllers.uploadErrorHandler);


module.exports = router;
🔺調整完記得推送到github上面
原先我們是抓取for vscode的,但我們要調整成透過driver的url
點選Drivers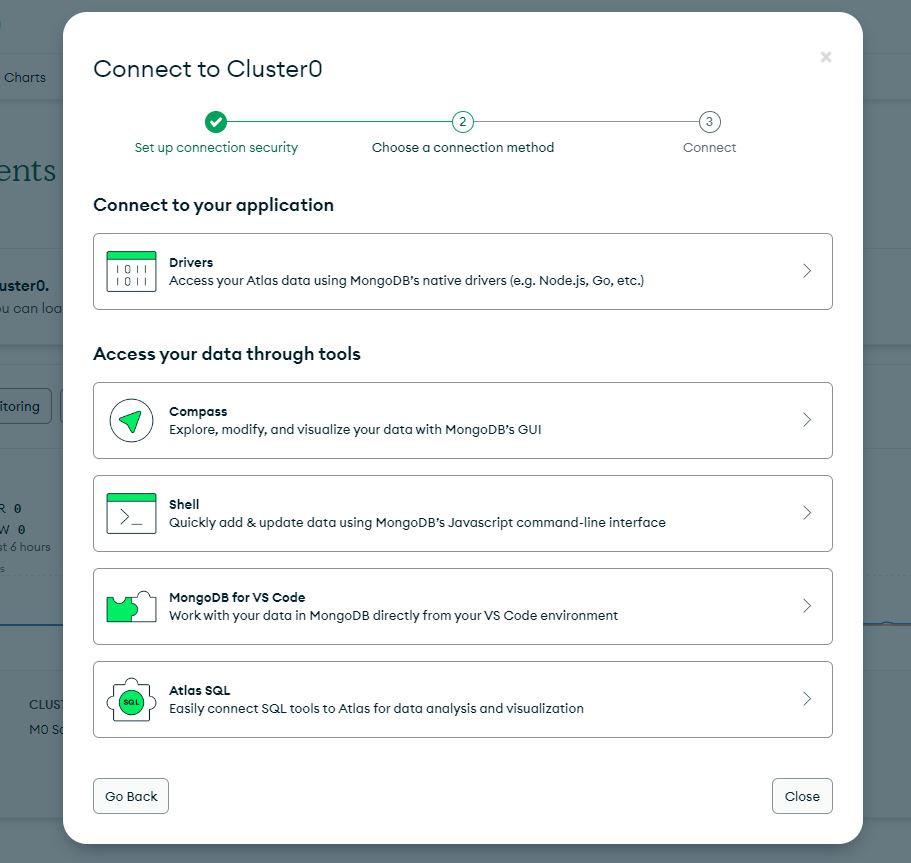
複製下面的url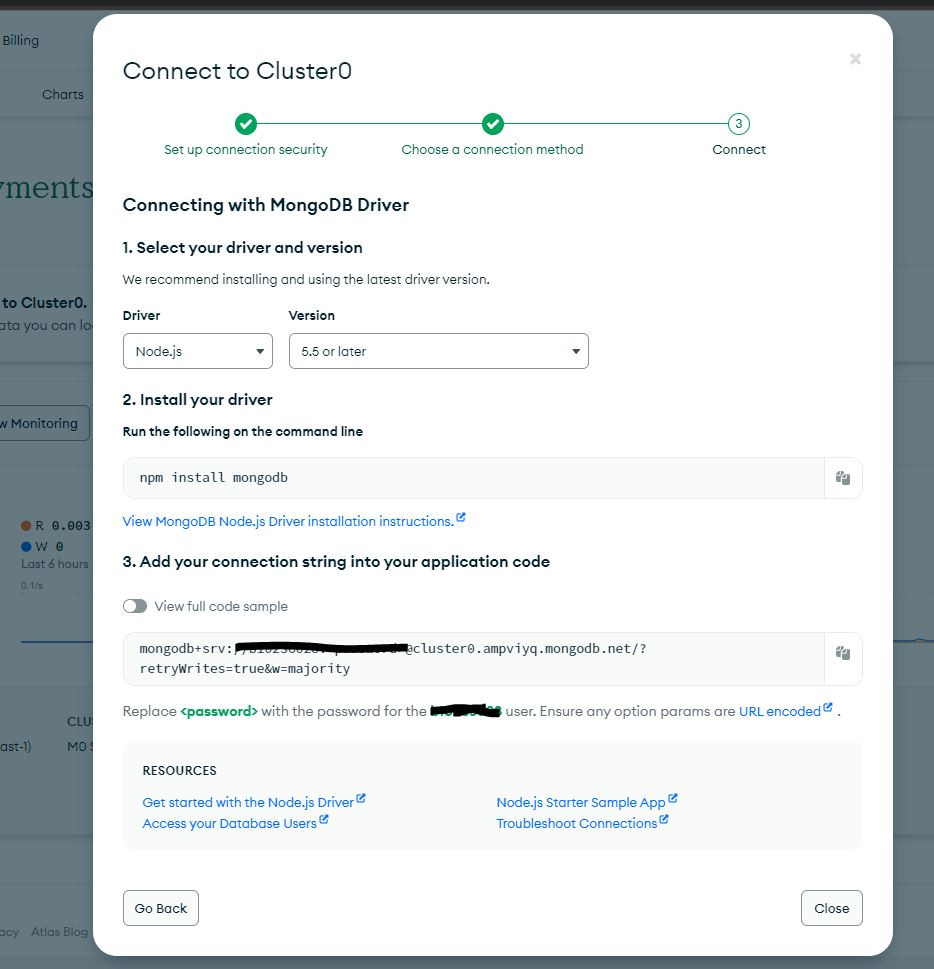
然後再回到default.json修改路徑
🔺調整完記得推送到github上面
先到render用GitHub註冊帳號
登入後,點選Web services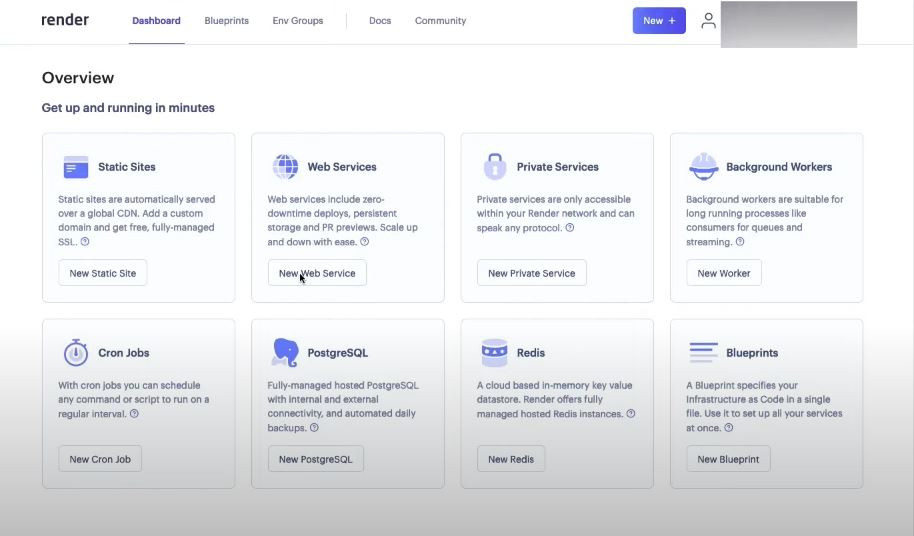
選擇Build and deploy from a Git repository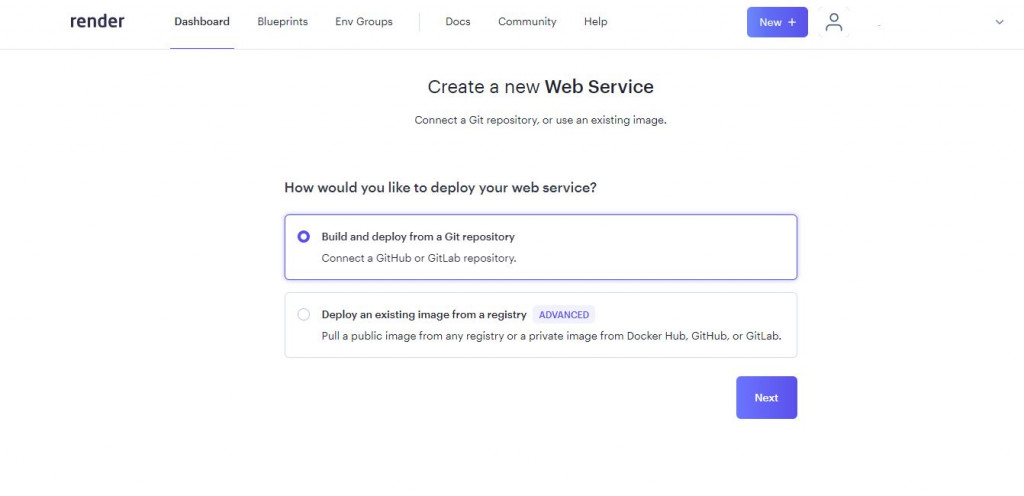
Connect a repository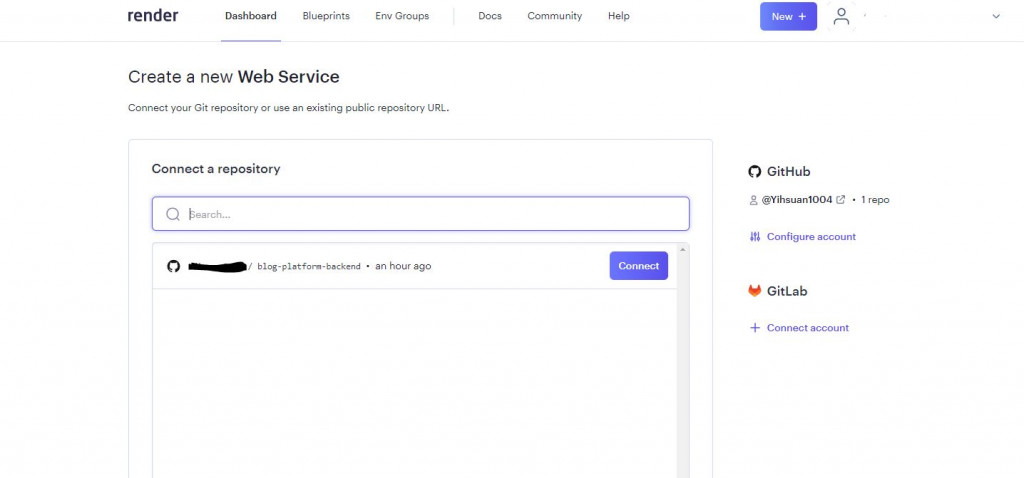
設定部署的資料和再點選Create Web Service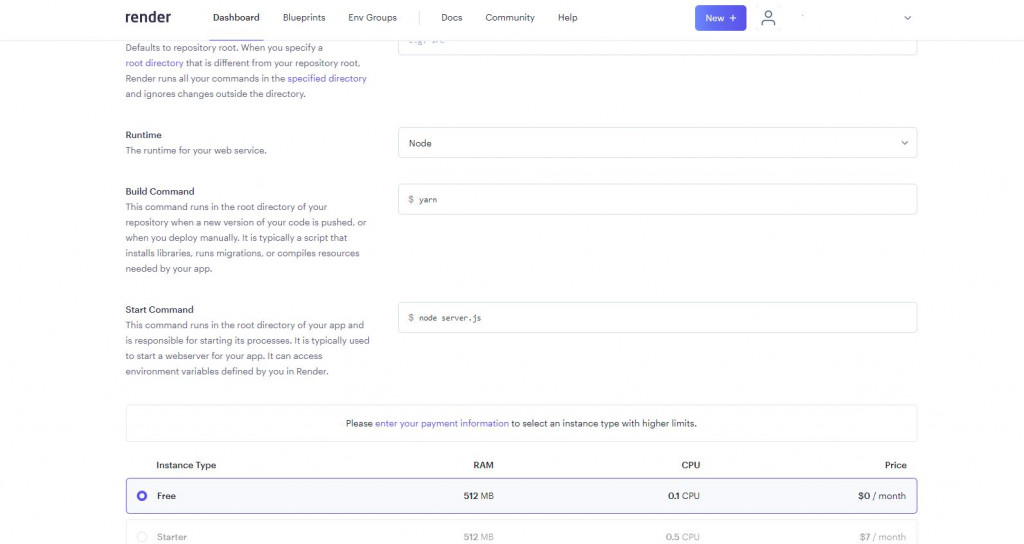
此時會看到錯誤訊息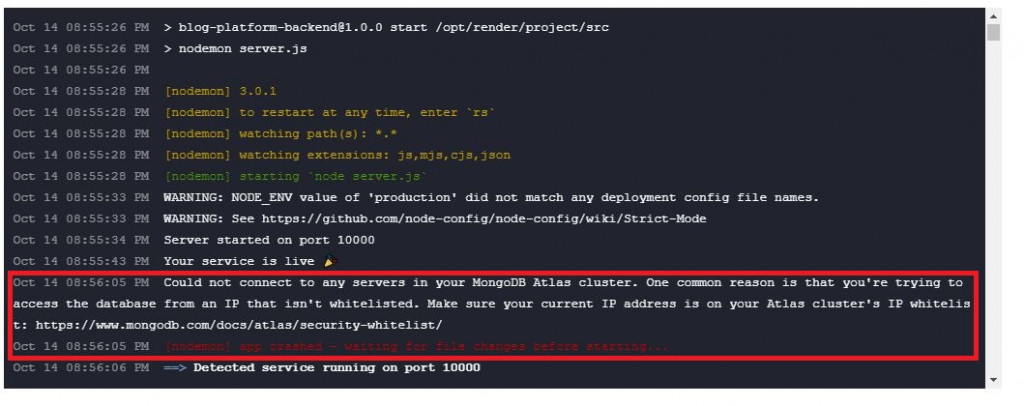
上面的訊息簡單來說就是伺服器的ip沒有被加到mongoDB的白名單裡面,所以無法存取資料庫
取得IP後到MongoDB將上面的IP都設在白名單內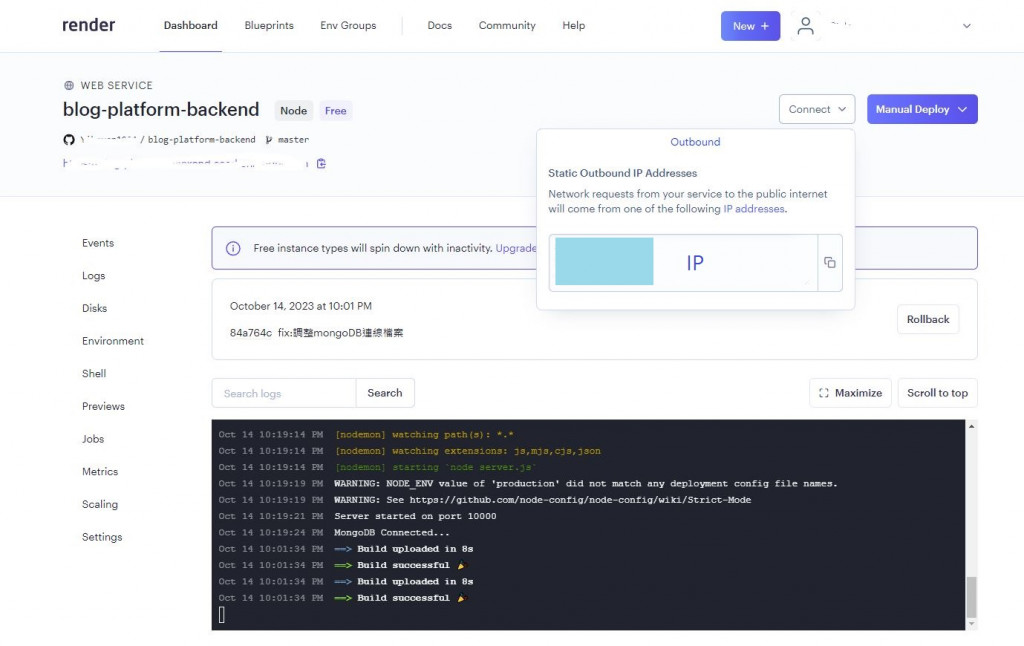
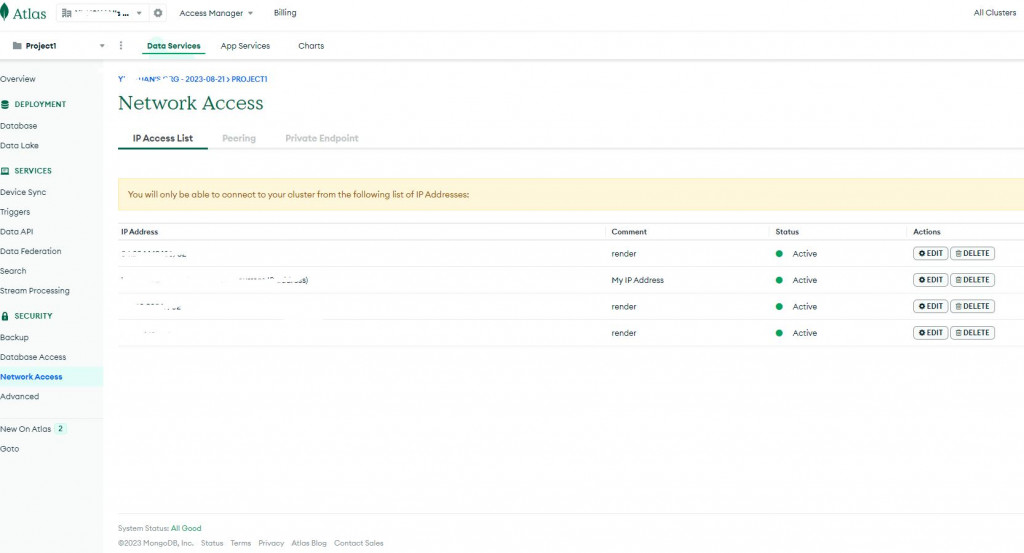
接著應該就可以成功部署了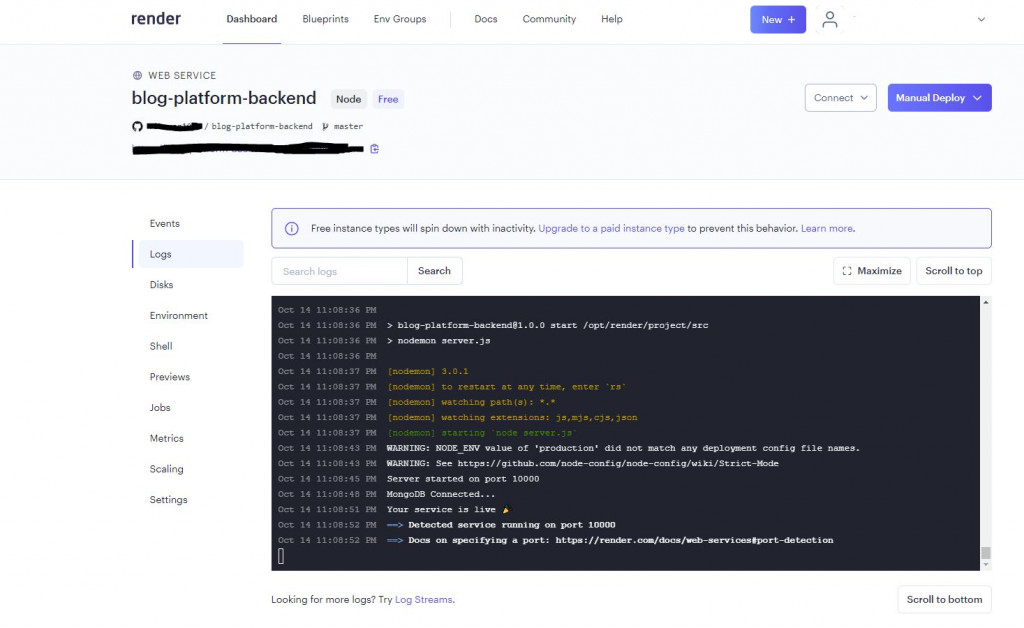
新增process.env.BACKEND的環境變數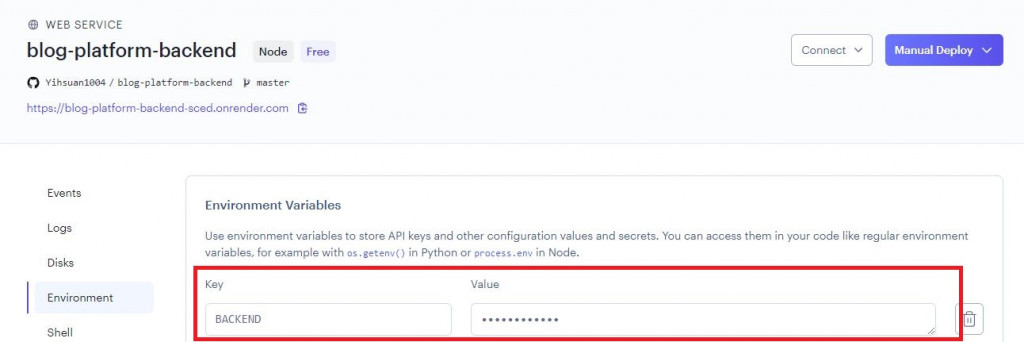
🔺因為我們有用到圖片上傳,在render需要付費解鎖Disk($7/month),才能存放上傳的圖片。
