1.文章內容頁開發
2.編輯文章功能開發

先在pages資料夾底下建立BlogPost.js
//BlogPost.js

import { useEffect,useState } from 'react';
import api from '../api/api';
import Tag  from '../components/Tag';
import { useParams } from 'react-router-dom';
import { AiOutlineEdit, AiOutlineDelete} from "react-icons/ai";

const BlogPost = props =>{
    //頁面資料
    const [data, setData] = useState([]);

    //載入中畫面的顯示設定
    const [loading, setLoading] = useState(true);

    //取得路由上的postId
    const { postId } = useParams();

    //取得當前登入使用者的id
    const currentUserId = JSON.parse(localStorage.getItem("user")).data.id;

    useEffect(() => {
        //呼叫取得文章資料的API
        api.get(`/posts/${postId}`)
        .then((result) => {
            setData(result.data);
        })
        .catch((error) => {
            alert('An error occurred:',error.message);
            console.error(error);
        })
        .finally(() => {
            //若成功取得資料則隱藏載入中畫面
            setLoading(false);
        });
    },[])

   //判斷是否顯示載入畫面
  if (loading) {
    return <div className="absolute top-1/2 left-1/2 -translate-y-1/2 -translate-x-1/2 text-4xl">
        Loading...
    </div>;
  }

    return <div className="w-[800px] mx-auto">
        <section className="max-h-80 overflow-hidden">
         <img className="w-full h-auto" src={data.coverImage}  alt='cover'/>
        </section>
        <h1 className="text-4xl font-bold  mt-8 mb-4">{data.title}</h1>
        <section className="flex items-center mb-4">
            { data.tags && data.tags.length > 0 && data.tags.map((tag,index) =>  <Tag name={tag} key={index} classes={'mr-2'}></Tag>)}
        </section>
        <section className="flex items-center justify-between">
            <div className="flex items-center mb-4">
                { data.author.coverImage ?
                    <div className="w-[32px] h-[32px] rounded-full border border-gray-200 overflow-hidden">
                        <img src={data.author.coverImage} alt="avatar" />
                    </div>:
                    <div className="w-[32px] h-[32px] rounded-full border bg-gray-400 text-white text-center leading-[32px] overflow-hidden">
                        {data.author.fullName[0]}
                    </div>
                }
                <div className="ml-4">
                    <p className="text-violet-600 text-sm">{data.author.fullName}</p>
                    <p className="text-gray-400 text-sm tracking-wider">{data.createdDate}</p>
                </div>
            </div>

           {/* 當文章作者和當前使用者一樣時,才會顯示文章編輯和刪除的功能 */}
           { currentUserId ===  data.author._id &&
            <div className="flex items-center">
                <Link to={`/edit-post/${postId}`}>
                    <button
                        className="text-m flex items-center px-2 py-1  hover:text-violet-700 duration-150 rounded text-violet-600 px-4">
                        <AiOutlineEdit/>
                        <span className="ml-1">編輯文章</span>
                    </button>
                </Link>

                <button onClick={handleDeletePost}
                    className="text-m flex items-center px-2 py-1  hover:text-gray-700 duration-150 rounded text-gray-500 px-4">
                    <AiOutlineDelete/>
                    <span className="ml-1">刪除文章</span>
                </button>
            </div> }

        </section>

        <hr className="border border-gray-100" />
        <div className="py-8 blog-content">
            {<div dangerouslySetInnerHTML={{ __html: data.content }} />}
        </div>

    </div>
}

export default BlogPost;
到App.js設定路由
import './App.css';
import { createBrowserRouter, RouterProvider } from 'react-router-dom';
import { AuthProvider } from './contexts/AuthContext';

import Login  from './pages/Login';
import Register from './pages/Register';
import RootLayout from './pages/Root';
import HomePage from './pages/Home';
//文章內容路由
import BlogPost from './pages/BlogPost';
import PostList from './pages/PostList';
import TagList  from './pages/TagList';
import EditPost from './pages/EditPost';

const router = createBrowserRouter([
  {
    path: '/',
    element: <RootLayout/>,
    children:[
      { path: '/', element: <HomePage />},
      { path: '/posts', element: <PostList />},
      { path: '/posts/:postId', element: <BlogPost />},
      { path: '/tags', element: <TagList />},
      { path: '/edit-post/new', element: <EditPost />},
    ]
  },
  {
    path: '/login',
    element: <Login/>,
  },
  {
    path: '/register',
    element: <Register/>,
  }
])

const App = () => {
  return (
    <AuthProvider>
      <RouterProvider router={router}/>
    </AuthProvider>
  );
}

export default App;
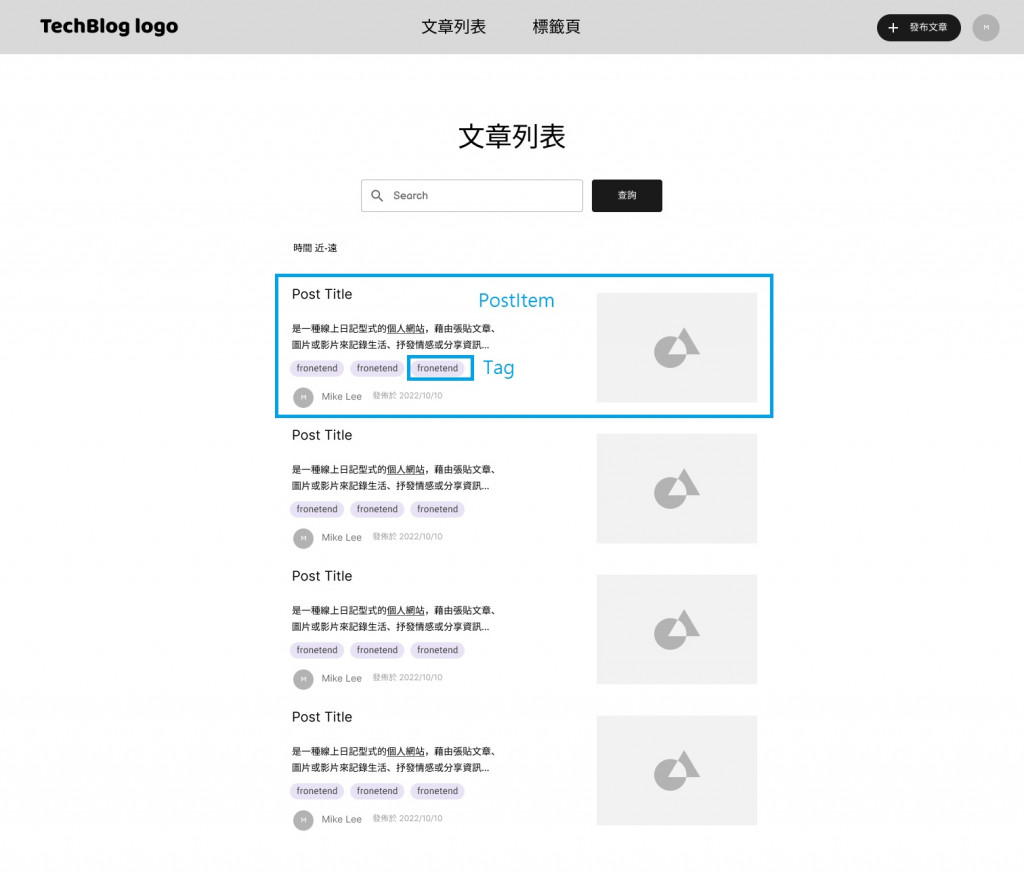
然後回到PostItem.js去設定連結到文章內容頁,當我們點擊PostItem時要能顯示文章內容。
//PostItem.js
import Tag from './Tag';
import { useEffect, useState } from 'react';
import { Link } from 'react-router-dom';

const PostItem = ({post ,id}) =>{
   (略...)
   //在最外層包上`<Link>`,並指向到文章內容的路徑。
   return (
    <Link to={`/posts/${id}`}>
         (略...)
     </Link>
   );
}

export default PostItem;
透過取得localstorage的使用者資料內的id,來和當前文章作者的id進行比對。
若相同表示此篇文章作者為當前登入的使用者,此時就可以進行編輯文章和刪除文章的動作(顯示按鈕)。
使用者為當前文章作者
使用者不為當前文章作者
const BlogPost = props =>{

 //取得當前登入使用者的id
const currentUserId = JSON.parse(localStorage.getItem("user")).data.id;
    (
return
       (略...)
           { currentUserId ===  data.author._id &&
            <div className="flex items-center">
                <Link to={`/edit-post/${postId}`}>
                    <button
                        className="text-m flex items-center px-2 py-1  hover:text-violet-700 duration-150 rounded text-violet-600 px-4">
                        <AiOutlineEdit/>
                        <span className="ml-1">編輯文章</span>
                    </button>
                </Link>

                <button onClick={handleDeletePost}
                    className="text-m flex items-center px-2 py-1  hover:text-gray-700 duration-150 rounded text-gray-500 px-4">
                    <AiOutlineDelete/>
                    <span className="ml-1">刪除文章</span>
                </button>
            </div> }
}
export default BlogPost;
按鈕功能說明
刪除會直接呼叫刪除文章的API,並在成功刪除後導回文章列表頁編輯會導到文章編輯頁,進行文章編輯動作。發布文章和編輯文章使用的是同一個頁面(EditPost.js),因為它們只差在有沒有資料和呼叫的API不同而已,這樣做的好處是能集中管理,不用多去增加一個檔案來維護,但如果兩者要處理的邏輯相差很多還是會建議分兩個檔案。
到App.js設定編輯文章的路由
import './App.css';
import { createBrowserRouter, RouterProvider } from 'react-router-dom';
import { AuthProvider } from './contexts/AuthContext';

import Login  from './pages/Login';
import Register from './pages/Register';
import RootLayout from './pages/Root';
import HomePage from './pages/Home';
import BlogPost from './pages/BlogPost';
import PostList from './pages/PostList';
import TagList  from './pages/TagList';
import EditPost from './pages/EditPost';

const router = createBrowserRouter([
  {
    path: '/',
    element: <RootLayout/>,
    children:[
      { path: '/', element: <HomePage />},
      { path: '/posts', element: <PostList />},
      { path: '/posts/:postId', element: <BlogPost />},
      { path: '/tags', element: <TagList />},
      { path: '/edit-post/new', element: <EditPost />},
      { path: '/edit-post/:postId', element: <EditPost />},
    ]
  },
  {
    path: '/login',
    element: <Login/>,
  },
  {
    path: '/register',
    element: <Register/>,
  }
])

const App = () => {
  return (
    <AuthProvider>
      <RouterProvider router={router}/>
    </AuthProvider>
  );
}

export default App;
我們在文章內容頁BlogPost.js已經取得當前文章的資料,所以點擊編輯文章的按鈕時希望能直接把 BlogPost.js取得的資料帶到EditPost.js,這樣就不用重新呼叫一次取得文章的API了。
那要怎麼做?
在
<Link>tag上加上state屬性,將要傳入的資料帶入。
<Link to={`/edit-post/${postId}`} state={data}>
    <button
        className="text-m flex items-center px-2 py-1  hover:text-violet-700 duration-150 rounded text-violet-600 px-4">
        <AiOutlineEdit/>
        <span className="ml-1">編輯文章</span>
    </button>
</Link>
接著到
EditPost.js透過useLocation取得route傳過來的資料
//EditPost.js

import { useNavigate,useLocation } from "react-router-dom";

const EditPost = (props) => {
  //取得從文章內容路由傳進來的資料
  const location = useLocation();
  const passedData = location.state;
  (略...)
}
接著要把取得的資料放到頁面上
//EditPost.js

import { useNavigate,useLocation } from "react-router-dom";

const EditPost = (props) => {
  //取得從文章內容路由傳進來的資料
  const location = useLocation();
  const passedData = location.state;

   useEffect(() => {
    //如果有資料,則將資料顯示在畫面上(表示正在編輯)
    if (passedData) {
        setTitle(passedData.title || '');
        setContent(passedData.content || '');
        setTags(passedData.tags || []);
        setImageUrl(passedData.coverImage || '');
    }
   }, [passedData]);
  (略...)
}
然後在現有程式新增updatePost的方法
 //更新文章的API
  const updatePost = async (imageUrl) => {
    try {
      const postData = {
        title,
        content,
        coverImage: imageUrl,
        authorId: authorId,
        tags,
      };

      await api.put(`/posts/${passedData._id}`, postData);

    } catch (error) {
      throw error;
    }
  };
另外也要調整最下方的按鈕文字
 <button type="submit" className="bg-violet-600 text-white px-6 py-2 rounded disabled:opacity-50" disabled={loading || !formIsValid}>
            {loading ? 'Uploading...' : passedData ? 'Update' : 'Submit'}
 </button>
import React, { useState, useMemo,useEffect } from "react";
import { useNavigate,useLocation } from "react-router-dom";
import { TagsInput } from "react-tag-input-component";
import ReactQuill from "react-quill";
import 'react-quill/dist/quill.snow.css';
import api from '../api/api';
import useInput from "../hooks/useInput";
import { AiOutlineFileAdd} from "react-icons/ai";


const EditPost = (props) => {
  const navigate = useNavigate();

  const validateRequired = (value) => {
    if (value.trim() === '') {
      return { isValid: false };
    }
    return { isValid: true };
  };

  const validateContent = (content) =>{
    const parser = new DOMParser();
    const doc = parser.parseFromString(content, 'text/html');
    const textContent = doc.body.textContent || "";
    // 檢查是否有非空白字符
    return textContent.trim().length > 0;
  }

  const {
    value: title,
    isValid: titleIsValid,
    hasError: titleInputHasError,
    valueChangeHandler: titleChangeHandler,
    inputBlurHandler: titleBlurHandler,
    setEnteredValue: setTitle
  } = useInput(validateRequired);


  const [file, setFile] = useState(null);

  const [loading, setLoading] = useState(false);

  const [tags, setTags] = useState([]);
  const [tagsTouched, setTagsTouched] = useState(false);

  const [imageUrl, setImageUrl] = useState('');


  const [content, setContent] = useState("");
  const [contentTouched, setContentTouched] = useState(false);

  const tagsIsValid = tags.length > 0 ;
  const tagsInputIsInValid = !tagsIsValid && tagsTouched;

  const contentIsValid = validateContent(content) ;
  const contenttIsInValid = !contentIsValid && contentTouched;

  //取得從文章內容路由傳進來的資料
  const location = useLocation();

  const passedData = location.state;


  useEffect(() => {
    //如果有資料,則將資料顯示在畫面上(表示正在進行編輯)
    if (passedData) {
        setTitle(passedData.title || '');
        setContent(passedData.content || '');
        setTags(passedData.tags || []);
        setImageUrl(passedData.coverImage || '');
    }
}, [passedData]);


  let formIsValid = false;

  if (titleIsValid && tagsIsValid && contentIsValid ) {
    formIsValid = true;
  }


  const handleTagsInputBlur  = () =>{
    setTagsTouched(true);
  }

  //onChange事件可以拿到 (content, delta, source, editor)
  const handleContentChange = (value, delta) => {
    setContent(value);
  };


  const handleContentBlur = (previousRange, source, editor) => {
    setContentTouched(true);
  };

  const authorId = JSON.parse(localStorage.getItem("user")).data.id;

  const modules = useMemo(() => ({
    toolbar: [
        [{ header: [1, 2, 3, false] }],
        [{ font: [] }],
        [
            "bold",
            "italic",
            "underline",
            "strike",
            "blockquote",
            "code-block",
            "link",
            { align: [] },
        ],
    ]
  }), []);

  const onFileChange = (e) =>{
    const selectedFile = e.target.files[0];
    console.log(selectedFile);
    setFile(selectedFile);

    // 如果使用者選擇了圖片,則生成一個預覽URL並設定它
    if (selectedFile) {
      const reader = new FileReader();
      reader.onload = function(event) {
        setImageUrl(event.target.result);
      }
      reader.readAsDataURL(selectedFile);
    }
  }

  const uploadImage = async () => {
    const formData = new FormData();
    formData.append('image', file);

    try {
      const response = await api.post('/images/upload', formData, {
        headers: {
          'Content-Type': 'multipart/form-data',
        }
      });
      return response.data.data.url;
    } catch (error) {
      throw error;
    }
  };


  const createPost = async (imageUrl) => {
    try {
      const postData = {
        title,
        content,
        coverImage: imageUrl,
        authorId: authorId,
        tags,
      };

      await api.post('/posts', postData);

    } catch (error) {
      throw error;
    }
  };

  //更新文章的API
  const updatePost = async (imageUrl) => {
    try {
      const postData = {
        title,
        content,
        coverImage: imageUrl,
        authorId: authorId,
        tags,
      };

      await api.put(`/posts/${passedData._id}`, postData);

    } catch (error) {
      throw error;
    }
  };


  const onSubmit = async (e) =>{
    e.preventDefault();
    if(file === null){
      alert('Please select cover image!');
      return;
    }
    setLoading(true);
    try {
      const imageUrl = await uploadImage();
      //透過有沒有passedData判斷是否為編輯
      if(passedData){
        //有passedData,表示是更新
        await updatePost(imageUrl);
        alert('Post update successfully!');
      } else {
        //沒有passedData,表示是發布
        await createPost(imageUrl);
        alert('Post created successfully!');
      }
      navigate("/");
    } catch (error) {
      console.error("An error occurred:", error);
      alert('An error occurred:',error.message);
    } finally {
      setLoading(false);
    }
  }

  const titleInputClasses = titleInputHasError ? 'border-red-500 focus:ring-red-500' : 'border-slate-300 focus:ring-sky-500'  ;
  const tagsInputClasses = tagsInputIsInValid ? 'border-red' : 'border-slate';
  const contentClasses = contenttIsInValid ? 'border border-red-500 focus:border-red-500' : '';

  return (
    <div className="w-screen py-16">
      <form className="w-[720px] mx-auto pb-20 pt-10" onSubmit={onSubmit}>
        <h1 className=" mb-4 text-4xl text-black custom-font text-center">Create Post</h1>
        <div className="mb-8">
          <h3 className="text-xl mb-1">Title</h3>
          <input
            type="text"
            value={title}
            placeholder="請輸入文章標題"
            onChange={titleChangeHandler}
            onBlur={titleBlurHandler}
            className={`mt-1 block w-full px-3 py-2 bg-white border
                     rounded-md text-sm shadow-sm placeholder-slate-400
                    focus:outline-none focus:ring-1 ${titleInputClasses}`}

          />
          {titleInputHasError && <p className="text-red-500 text-sm">Title is required</p>}
        </div>
        <div className="mb-8">
          <h3 className="text-xl mb-1">Tags</h3>
          <TagsInput
            value={tags}
            classNames={{ input: tagsInputClasses}}
            onChange={setTags}
            onBlur={handleTagsInputBlur}
            name="tags"
            placeHolder="輸入文章分類"
          />
          { tagsInputIsInValid  &&  <p className="text-red-500 text-sm">Please enter at least one tag</p>}
        </div>
        <div className="mb-8">
          <h3 className="text-2xl mb-1">Cover Image</h3>
          <div>
            { imageUrl && <img className="mb-4" src={imageUrl} alt="cover"/>}
            <label className="text-violet-600 flex items-center cursor-pointer w-[130px] py-2 px-4 rounded border border-violet-600 hover:border-violet-800 hover:text-violet-800">
                <AiOutlineFileAdd/>
                <span>Select File</span>
              <input
                className="hidden"
                type="file"
                accept="image/jpeg, image/png"
                onChange={onFileChange}
              />
            </label>
          </div>


        </div>
        <div className="mb-8">
          <h3 className="text-2xl mb-1">Content</h3>
            <ReactQuill
                theme="snow"
                placeholder="Enter your rich text edtior"
                modules={modules}
                value={content}
                className={contentClasses}
                onBlur={handleContentBlur}
                onChange={handleContentChange}
            />
          {contenttIsInValid && <p className="text-red-500 text-sm">Please enter valid content</p>}
        </div>
        <div className="text-right">
          <button type="submit" className="bg-violet-600 text-white px-6 py-2 rounded disabled:opacity-50" disabled={loading || !formIsValid}>
            {loading ? 'Uploading...' : passedData ? 'Update' : 'Submit'}
          </button>
        </div>
      </form>
    </div>
  );
};

export default EditPost;