寫程式不免俗要來個 Hello World,依據開發 Spring Boot 程式的經驗,我們只需定義變數,並透過自動注入的機制就能開始使用,為了測試方便直接寫個 API
@RestController
@RequiredArgsConstructor
public class AiController {
	private final ChatClient chatClient;  //使用建構子自動注入

	@GetMapping("/chat")
	public String chat(String prompt) {
		return chatClient.call(prompt);
	}
}
@RestController : 專門用來開發 API 的標註
@RequiredArgsConstructor : Lombok 提供的快速標註,可幫我們寫一個建構子並將 final 變數當作參數
@GetMapping 函式的參數若沒特別指定,就會以參數名稱作為URL後的變數,此例可以在網址輸入 /chat?prompt=xxx 傳入參數
沒想到一執行就直接跳出錯誤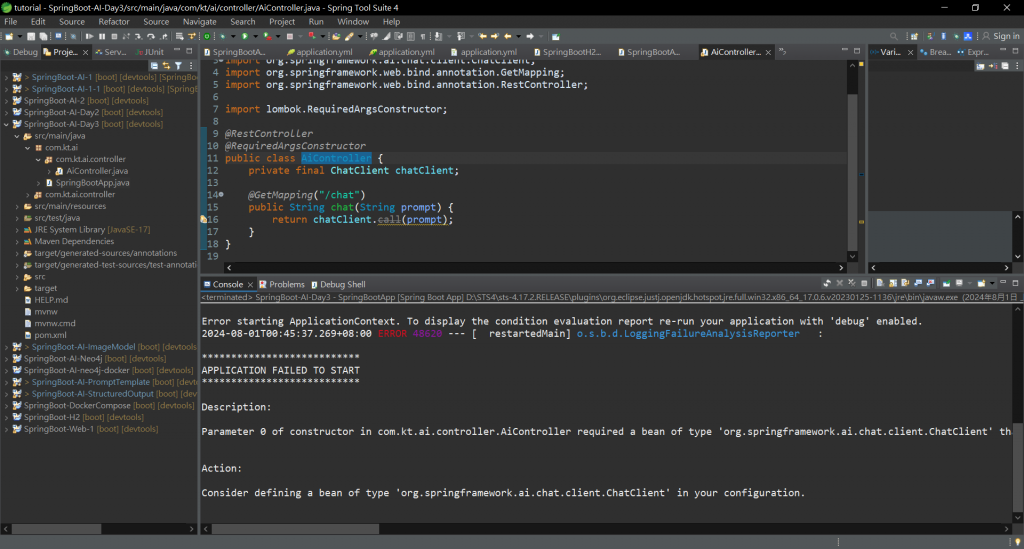
看看 log,甚麼?!系統找不到這個 Bean
required a bean of type 'org.springframework.ai.chat.client.ChatClient' that could not be found.
查資料才發現 Spring AI 做了大幅度的異動(官方完整異動說明)
Upgrading to 1.0.0.M1
On our march to release 1.0.0 M1 we have made several breaking changes. Apologies, it is for the best!
ChatClient changes
A major change was made that took the 'old'
ChatClientand moved the functionality intoChatModel. The 'new'ChatClientnow takes an instance ofChatModel.
This was done do support a fluent API for creating and executing
prompts in a style similar to other client classes in the Spring
ecosystem, such asRestClient,WebClient, andJdbcClient. Refer to the JavaDoc for more information on the Fluent API, proper reference documentation is coming shortly.We renamed the 'old'
ModelClienttoModeland renamed implementing classes, for exampleImageClientwas renamed toImageModel. TheModelimplementation represent the portability layer that converts between the Spring AI API and the underlying AI Model API.
簡單的說為了與 Spring 其他模組的命名原則一樣,原本的 ChatClient 改成 ChatModel,而新的 ChatClient 則可以做更複雜的應用
最簡單的修正就是將 ChatClient 改成 ChatModel,其實在昨天的程式也能看出一些端倪,當還沒設定 API key 時,系統報的錯誤就是 openAiChatModel 找不到 API key 設定
改成 ChatModel 後馬上就能正常啟動,網路上目前還是一堆舊寫法的教學,大家要特別注意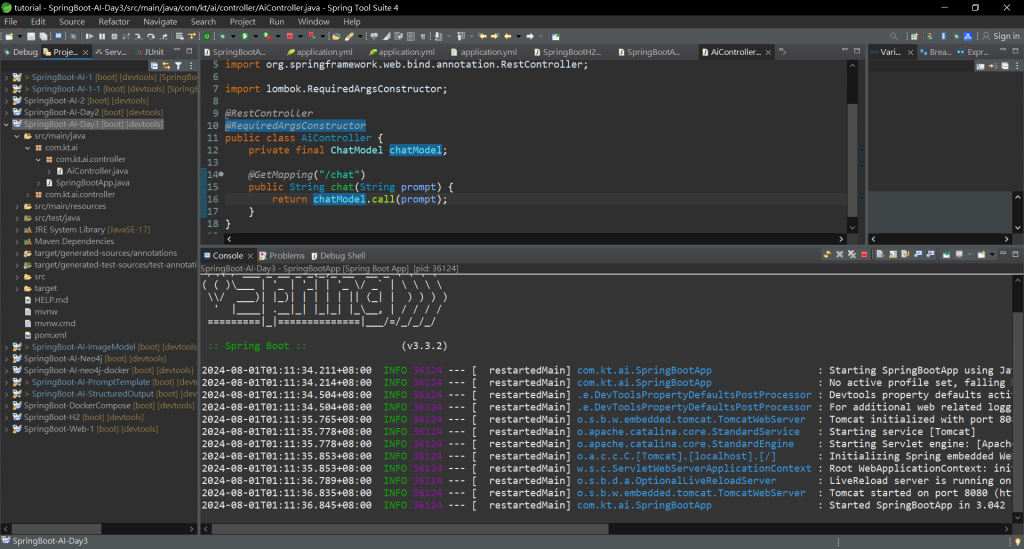
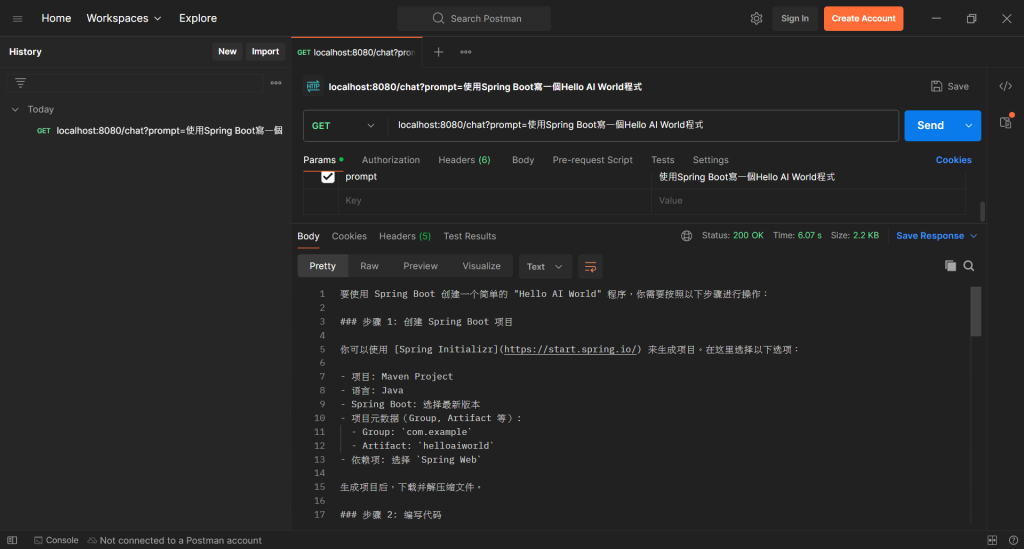
下面直接使用 Postman 進行測試,大家看看效果吧
URL: http://localhost:8080/chat?prompt=使用Spring Boot寫一個Hello AI World程式
總結今天學到的內容:
今天的程式碼
https://github.com/kevintsai1202/SpringBoot-AI-Day3.git
凱文大叔使用 Java 開發程式超過 20 年,對於 Java 生態非常熟悉,曾使用反射機制開發 ETL 框架,對 Spring 背後的原理非常清楚,目前以 Spring Boot 作為後端開發框架,前端使用 React 搭配 Ant Design
下班之餘在 Amazing Talker 擔任程式語言講師,並獲得學員的一致好評
最近剛成立一個粉絲專頁-凱文大叔教你寫程式 歡迎大家多追蹤,我會不定期分享實用的知識以及程式開發技巧
想討論 Spring 的 Java 開發人員可以加入 FB 討論區 Spring Boot Developer Taiwan
我是凱文大叔,歡迎一起加入學習程式的行列