k8slab/
│
├── app.py
├── coco_predictions.pth
└── templates/
    └── index.html
app.py處理圖像上傳、推斷和返回結果的後端邏輯。
在這個應用程式中,我們首先導入了必要的Library。
Flask 用來建立 web 應用程序,torch 和 torchvision 負責載入模型和進行推斷,PIL 用於處理圖像,而 io 則處理二進位資料。
接著,我們建立了 Flask 應用,通過 app = Flask(__name__) 初始化應用程序。這一步確保我們的應用可以處理 web 請求和響應。
在模型載入部分,我們創建了自定義的 MaskRCNN 模型類別實例,並通過 model.load_state_dict(torch.load('coco_predictions.pth')) 從本地載入預訓練的模型權重。這樣,我們就準備好使用這個模型進行圖像推斷了。
@app.route('/')
def index():
    return render_template('index.html')
@app.route('/upload', methods=['POST'])
def upload_file():
    if 'file' not in request.files:
        return 'No file part'
    file = request.files['file']
    if file.filename == '':
        return 'No selected file'

    # Read the image
    image = Image.open(file.stream).convert("RGB")

    # Save the original image
    original_image_path = 'static/original_image.png'
    image.save(original_image_path)

    # Apply transformation
    image_tensor = transform(image).unsqueeze(0).to(device)

    # Perform inference
    with torch.no_grad():
        prediction = model(image_tensor)

    # Draw predictions on the image
    draw = ImageDraw.Draw(image)
    boxes = prediction[0]['boxes'].cpu().numpy()
    labels = prediction[0]['labels'].cpu().numpy()
    scores = prediction[0]['scores'].cpu().numpy()

    results = []
    for box, label, score in zip(boxes, labels, scores):
        if score > 0.5:  # You can adjust this threshold
            draw.rectangle(box.tolist(), outline='red', width=3)
            draw.text((box[0], box[1]), f'Label: {label}, Score: {score:.2f}', fill='red')
            results.append({'label': int(label), 'score': float(score)})

    # Save the result image
    predicted_image_path = 'static/predicted_image.png'
    image.save(predicted_image_path)

    # Return image URLs and results as JSON
    return jsonify({
        'original_image_url': original_image_path,
        'predicted_image_url': predicted_image_path,
        'results': results
    })
我們設置了兩個 API 路由:
@app.route('/') 用於處理根目錄的 GET 請求,返回一個 HTML 表單供用戶上傳圖像;@app.route('/upload', methods=['POST']) 用來處理圖像上傳的 POST 請求。
當收到圖像上傳請求時,我們會讀取圖像,將其轉換為 Tensor,然後使用模型進行推斷。
推斷完成後,我們將原始圖像和預測後的圖像儲存到 static 目錄中,並返回圖像 URL 和預測結果的 JSON 數據。
最後,我們啟動了 Flask 伺服器,通過 app.run(debug=True) 開啟調試模式,以便於在開發過程中快速找到和修正問題。
index.html<body>
<h1>Upload Image for Inference</h1>
<form id="upload-form" action="/upload" method="post" enctype="multipart/form-data">
<input type="file" name="file" accept="image/*" required>
<button type="submit">Upload and Infer</button>
</form>
<div class="container">
<div class="image-container">
<h2>Original Image</h2>
<img id="original-image" src="static/ddd.jpeg" alt="Original Image">
</div>
<div class="image-container">
<h2>Predicted Image</h2>
<img id="predicted-image" src="static/ddd.jpeg" alt="Predicted Image">
</div>
</div>
<div id="prediction-results">
<h2>Prediction Results</h2>
<ul id="results-list"></ul>
<div id="class-summary" class="class-summary"></div>
</div>
<script>
// Mapping of MS COCO class IDs to class names
const cocoClassNames = {
1: "person",
2: "bicycle",
3: "car",
4: "motorcycle",
5: "airplane",
6: "bus",
7: "train",
8: "truck",
9: "boat",
10: "traffic light",
11: "fire hydrant",
12: "stop sign",
13: "parking meter",
14: "bench",
15: "bird",
16: "cat",
17: "dog",
18: "horse",
19: "sheep",
20: "cow",
21: "elephant",
22: "bear",
23: "zebra",
24: "giraffe",
25: "backpack",
26: "umbrella",
27: "handbag",
28: "tie",
29: "suitcase",
30: "frisbee",
31: "skis",
32: "snowboard",
33: "sports ball",
34: "kite",
35: "baseball bat",
36: "baseball glove",
37: "skateboard",
38: "surfboard",
39: "tennis racket",
40: "bottle",
41: "wine glass",
42: "cup",
43: "fork",
44: "knife",
45: "spoon",
46: "bowl",
47: "banana",
48: "apple",
49: "sandwich",
50: "orange",
51: "broccoli",
52: "carrot",
53: "hot dog",
54: "pizza",
55: "donut",
56: "cake",
57: "chair",
58: "couch",
59: "potted plant",
60: "bed",
61: "dining table",
62: "toilet",
63: "TV",
64: "laptop",
65: "mouse",
66: "remote",
67: "keyboard",
68: "cell phone",
69: "microwave",
70: "oven",
71: "toaster",
72: "sink",
73: "refrigerator",
74: "book",
75: "clock",
76: "vase",
77: "scissors",
78: "teddy bear",
79: "hair drier",
80: "toothbrush"
};
document.getElementById('upload-form').onsubmit = function(event) {
event.preventDefault();
const formData = new FormData(this);
fetch('/upload', {
method: 'POST',
body: formData
})
.then(response => response.json())
.then(data => {
document.getElementById('original-image').src = data.original_image_url;
document.getElementById('predicted-image').src = data.predicted_image_url;
const resultsList = document.getElementById('results-list');
const classSummary = document.getElementById('class-summary');
resultsList.innerHTML = '';
classSummary.innerHTML = '';
// Track the count of bounding boxes for each class
const classCounts = {};
data.results.forEach(result => {
const className = cocoClassNames[result.label] || `Unknown (${result.label})`;
const listItem = document.createElement('li');
listItem.textContent = `Class: ${className}, Probability: ${result.score.toFixed(2)}`;
resultsList.appendChild(listItem);
if (!classCounts[className]) {
classCounts[className] = 0;
}
classCounts[className]++;
});
// Display the number of bounding boxes for each class
Object.keys(classCounts).forEach((className, index) => {
const summaryItem = document.createElement('p');
summaryItem.textContent = `#${index + 1} item that is ${className}: ${classCounts[className]} bounding boxes`;
classSummary.appendChild(summaryItem);
});
})
.catch(error => {
console.error('Error:', error);
});
};
</script>
</body>
</html>
提供用戶界面來上傳圖像和顯示結果,包括原始圖像、預測圖像和預測資訊。
我們設置了一個上傳表單,用戶可以通過 <form> 標籤來選擇並提交圖像文件。
表單的 action 屬性設為 /upload,這意味著當表單提交時,請求會發送到 Flask 應用的 /upload 路由。
表單使用 method="post" 來指定 POST 方法,並設定 enctype="multipart/form-data" 以處理文件上傳。
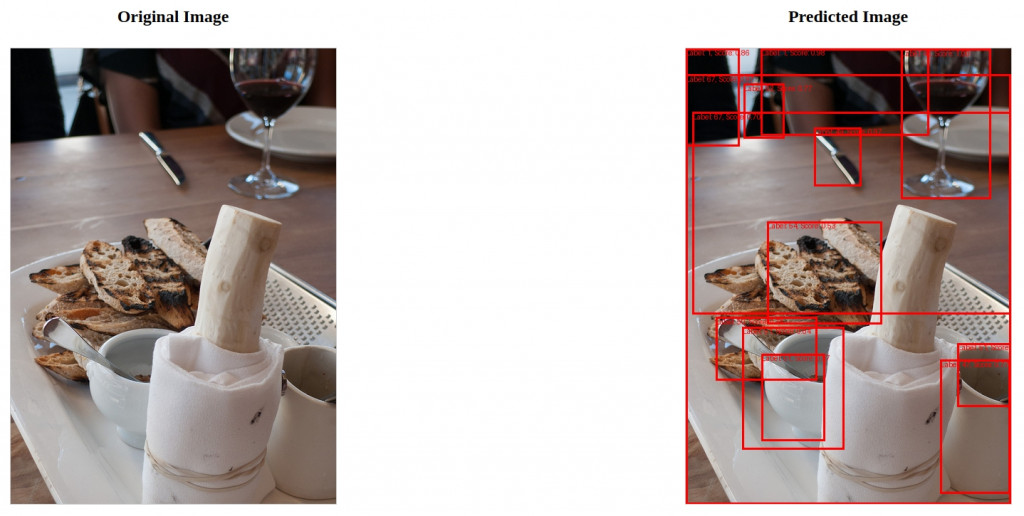
在網頁上,我們展示了上傳的原始圖像和模型預測後的圖像。
這些圖像分別由 <img> 標籤顯示,id="original-image" 和 id="predicted-image" 用於區分原始圖像和預測圖像。
預測結果的顯示由 JavaScript 負責處理。當 Flask 返回預測結果時,JavaScript 會更新網頁上的資訊。
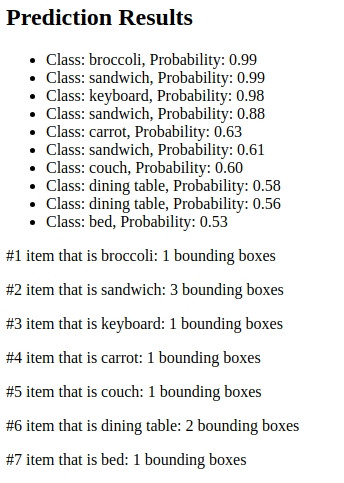
resultsList 顯示每個預測類別及其對應的概率,classSummary 則展示每個類別的邊界框數量,格式為 #number item that is #class_name。
JavaScript 還監聽表單提交事件,發送圖像上傳請求並處理伺服器的回應。
它會更新網頁上的圖像和預測結果,並使用 cocoClassNames 對象將預測類別 ID 轉換為易於理解的名稱,計算每個類別的邊界框數量,以便顯示在網頁上。
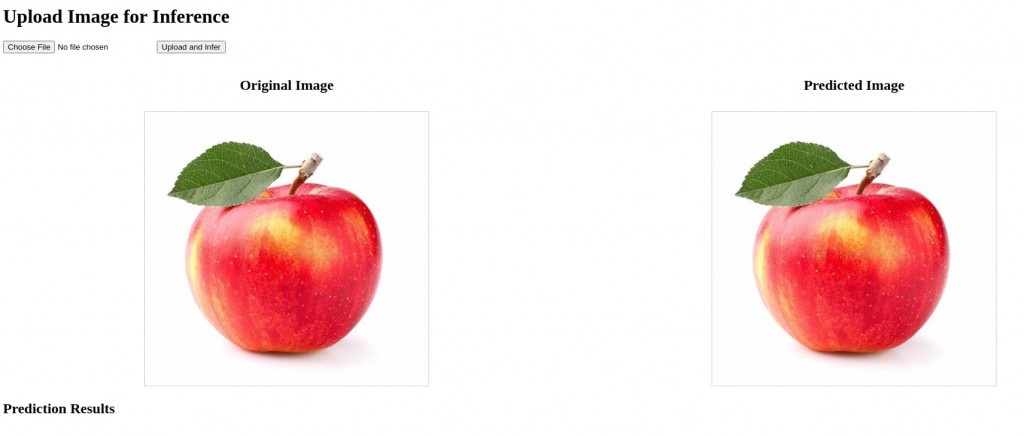
以下是執行 Flask Web 的初始畫面
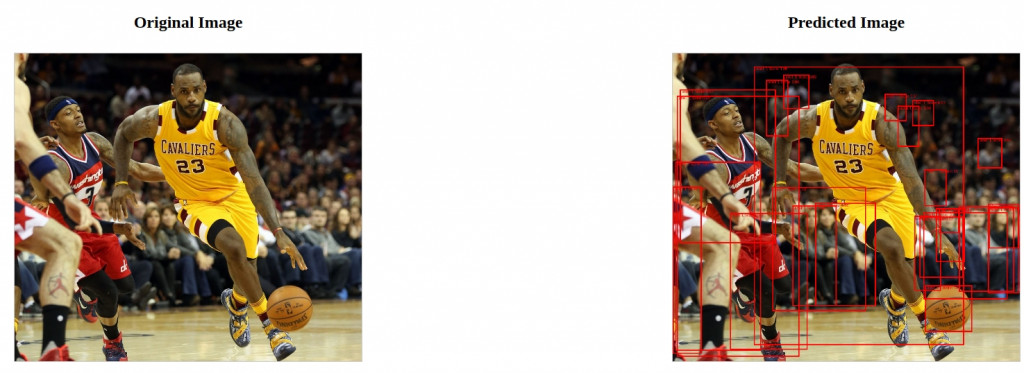
之後我們可以測試幾張圖片,首先是 MSCOCO 訓練集
以下是比對前跟比對後結果
接著輸出各個物件之比對結果,包括機率、該物件類別、有幾個 BBox
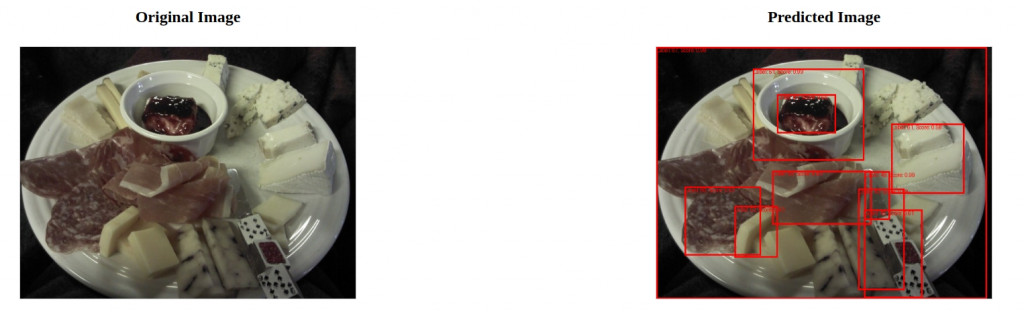
接著比對 MSCOCO 測試集
或是其他來源圖片