除了用常見的Font Awesome套件以外,接下來要額外介紹的是 vite-plugin-svg-icons 套件,以往我們在使用 icon 都會優先想到 Font Awesome 這個知名的網站來進行 icon 的引用,然後因為 Font Awesome的圖標需要個別引用,如果之後專案變得複雜化,需要飲用大量的 icon,就會讓 main.js 變得相當複雜,因此我們這邊特別教學用 vite-plugin-svg-icons 套件來進行 icon 的製作:
首先是安裝指令:
npm i vite-plugin-svg-icons -D
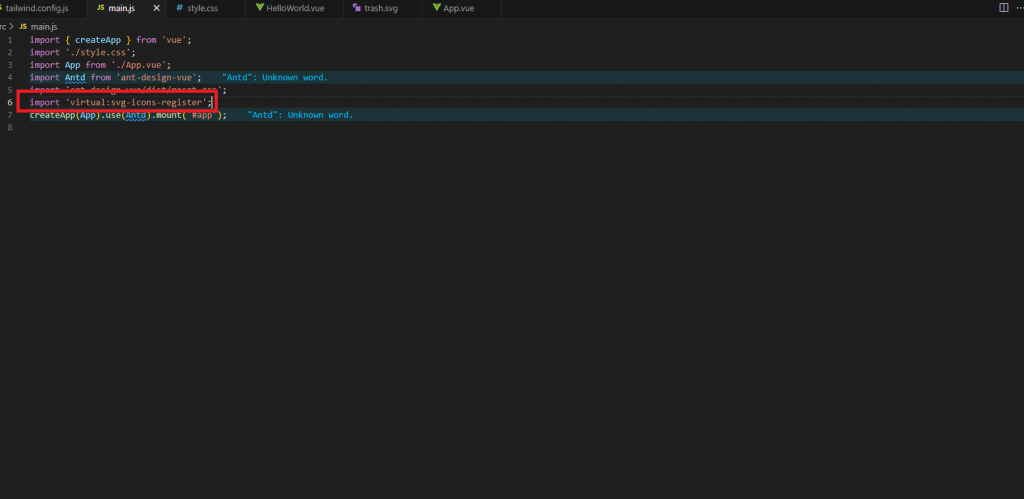
接下來我們也需要在main.js進行配置:

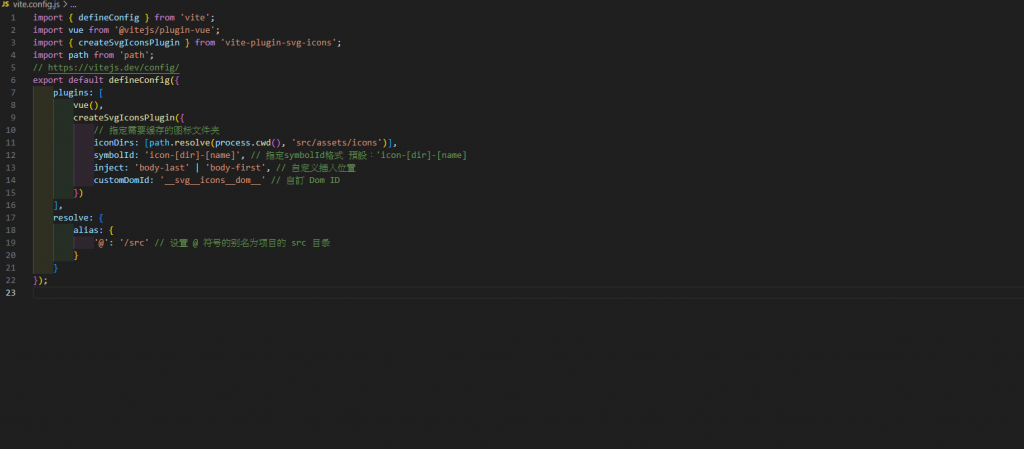
除此之外我們還需要在vite.config.js 進行相關的設定:

基本上就大功告成了,這時候我們就可以來試看看了
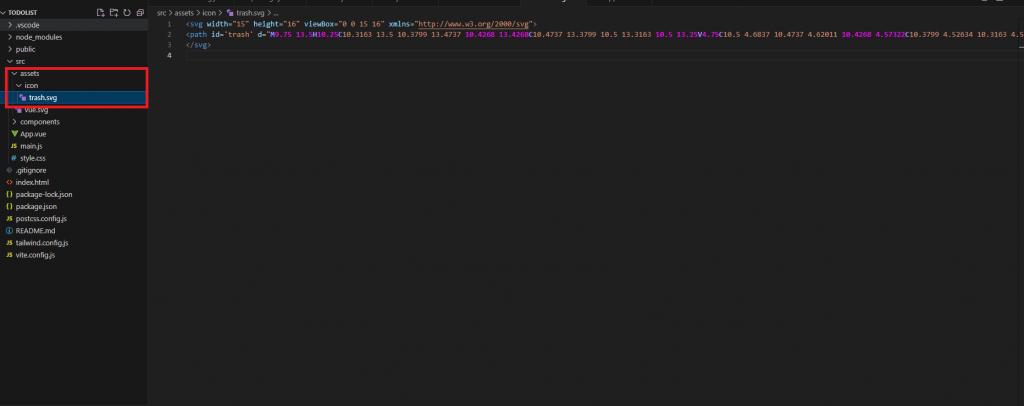
首先我們在 src 的 asset 資料夾創建一個 icons 的資料夾,並且在網路上找一個垃圾筒的 svg 圖片:

接下來我們在 components 資料夾中新增一個叫做 svgIcon.vue 的檔案,內容是:
<template>
	<svg aria-hidden="true" :class="['svg-icon', className]" :style="{ width: size + 'px', height: size + 'px' }">
		<use :href="`#icon-${icon}`" />
	</svg>
</template>

<script setup>
defineProps({
	icon: {
		type: String,
		required: true
	},
	className: {
		type: String,
		default: ''
	},
	size: {
		type: Number,
		default: 16
	}
});
</script>

<style>
.svg-icon {
	vertical-align: middle;
	fill: currentColor;
	overflow: hidden;
	color: gray;
}
</style>
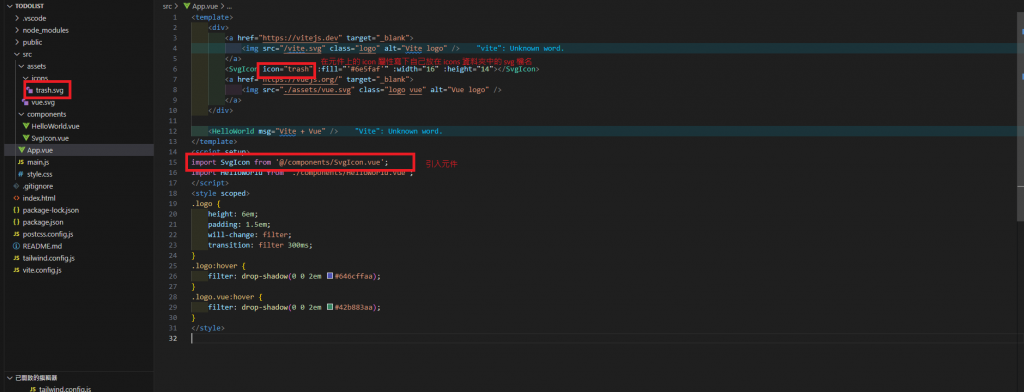
接下來我們只需要將該元件引入我們想要的檔案,並且在該元件的 icon 屬性給予我們存在 icons 資料夾中該 icon 的檔名就可以摟!

讓我們看一下畫面:

確認icon有出現之後就大功告成摟!
