iT邦幫忙

2024 iThome 鐵人賽

DAY 3
0
Modern Web

30天打造個人簡易旅遊網站系列 第 3

Day 3 : 常用的Git指令

  • 分享至 

  • xImage
  •  

今天要來說明如何在終端機下Git指令讓我們可以把本地端的程式碼上傳至Github上,另外也會補充幾個在vscode中實用的版本管理延伸模組,那我們就開始吧!

步驟一:建立Github專案

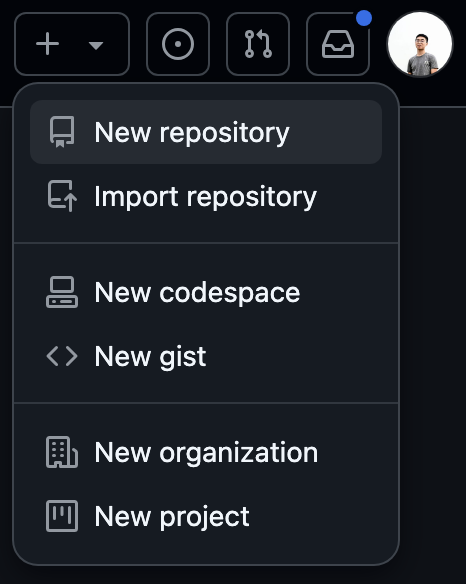
  1. 點擊右上角 New repository
    https://ithelp.ithome.com.tw/upload/images/20240916/20169447c1DcPVgDX9.png

  2. 填入repository name,勾選add a readme file後點選create repository
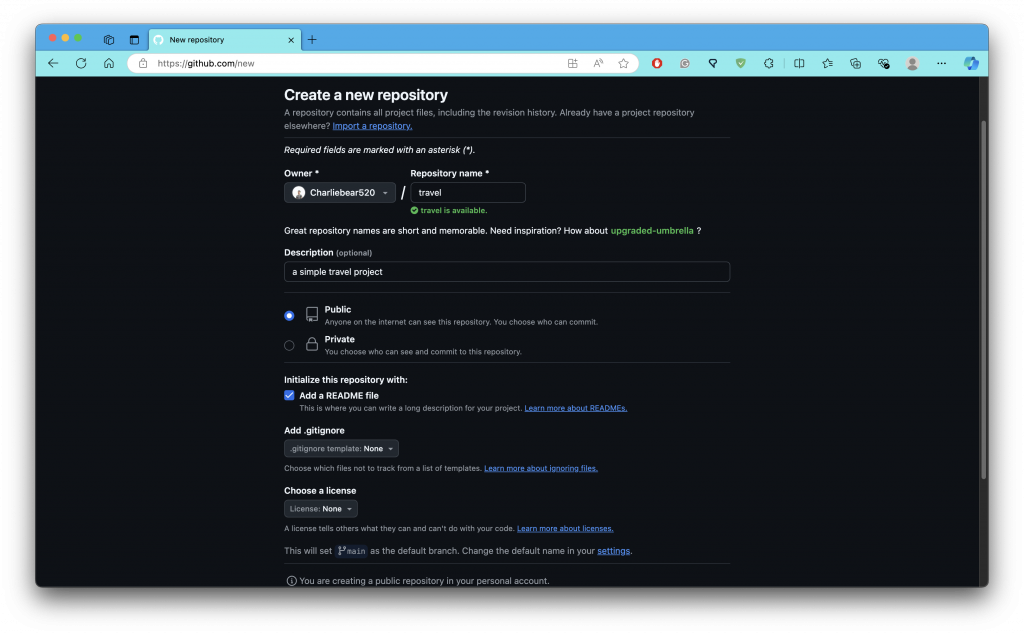
    https://ithelp.ithome.com.tw/upload/images/20240916/20169447tYvf8pdjUY.png

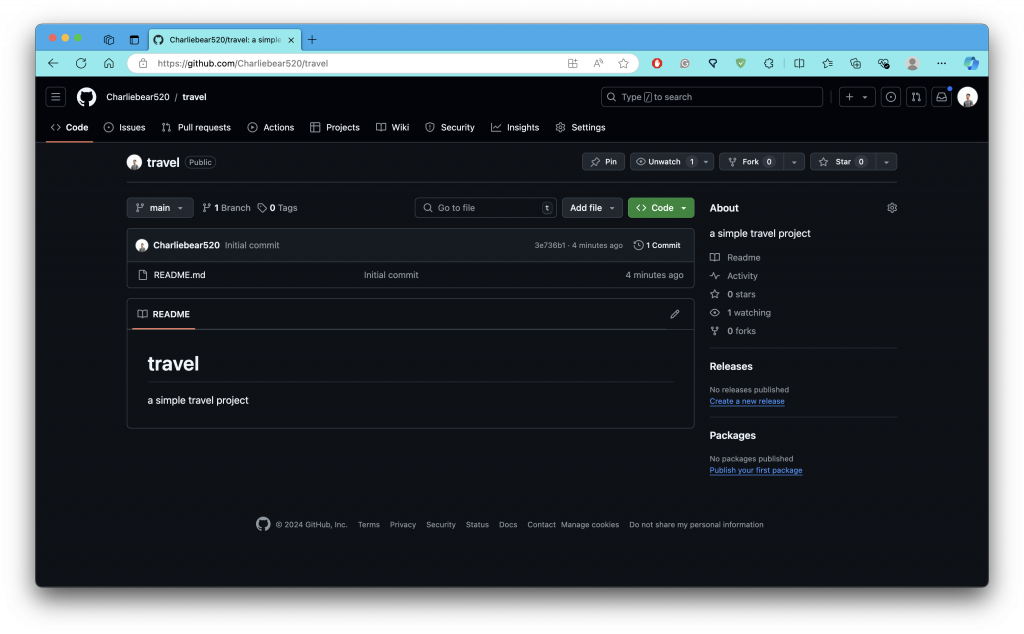
  3. 建立成功!
    https://ithelp.ithome.com.tw/upload/images/20240916/20169447EclEeGnmoi.png

步驟二

把我們本地端檔案推到遠端Github上.

打開終端機,依序執行:

  1. git init (git 初始化)
  2. git add . (把所有更動的檔案暫存)
  3. git commit -m "修改說明" (提交更新)
  4. git status (查看目前目錄的狀態)
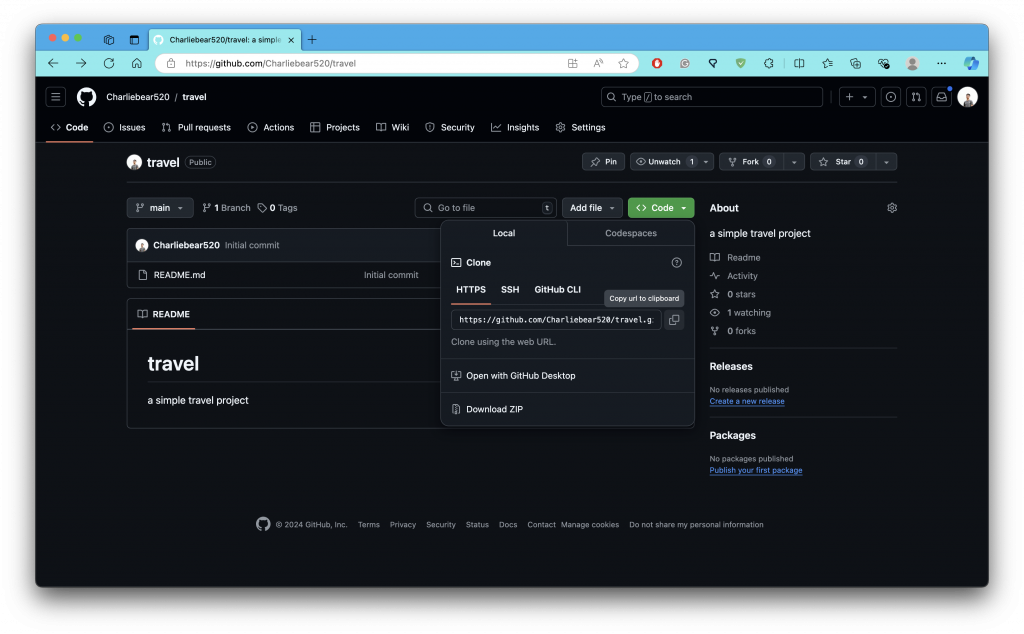
  5. git remote add origin "遠端數據庫" (加入遠端節點)
    遠端數據庫的URL需要到Github上查詢
    https://ithelp.ithome.com.tw/upload/images/20240916/20169447ilydFGBey5.png
  6. git push -u origin main (將本地資料庫推上遠端origin資料庫的main分支)
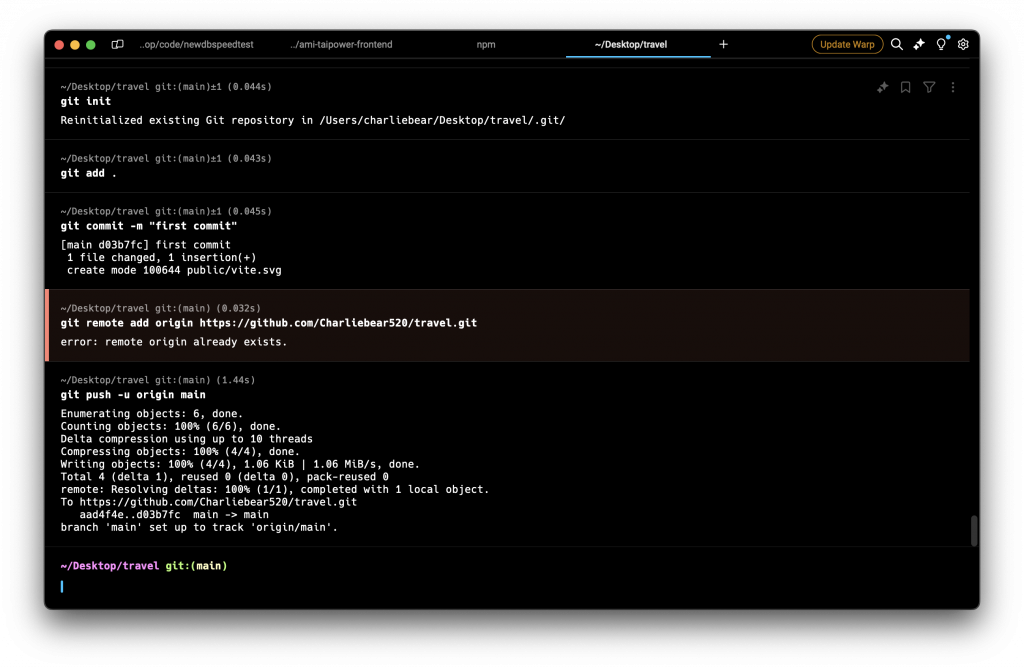
    https://ithelp.ithome.com.tw/upload/images/20240916/20169447Zccu9nIxJ7.png

步驟三

打開Github,確認是否有提交成功!
https://ithelp.ithome.com.tw/upload/images/20240916/20169447uTL9zNZufi.png

Git Graph

安裝Github 延伸模組 -Git Graph

Git Graph可以把Git的分枝樹狀結構視覺化,方便追蹤每次的版本更新狀況
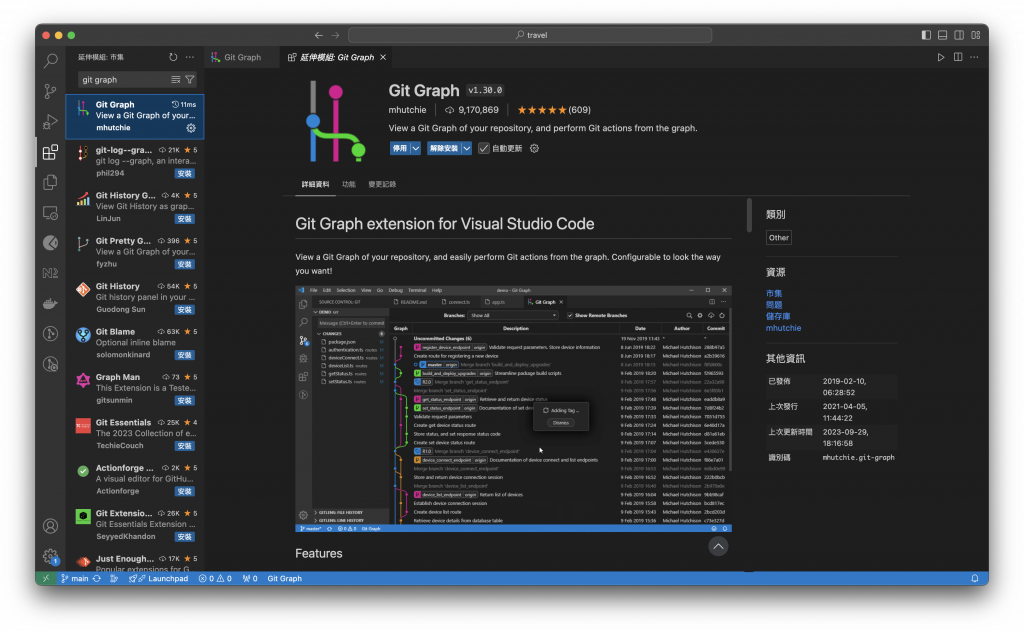
https://ithelp.ithome.com.tw/upload/images/20240916/20169447nbBBsEli7J.png
示意圖:
https://ithelp.ithome.com.tw/upload/images/20240916/20169447wAreBBJ1XL.png

不錯的參考資源:
[第二週] Git 本地端連結遠端操作(GitHub). GitHub 是什麼 | by MiaHsu | Medium


今天的內容就到這邊了啦!在團隊協作中,git版本管理算是非常重要的一個技能,如果是多人開發,也建議去了解git branch , git merge等用法,當然如果不習慣在終端機下指令,直接使用GUI去操作也是一種方法,就看個人需求了!


上一篇
Day 2 :環境建置
下一篇
Day 4 :Galileo AI
系列文
30天打造個人簡易旅遊網站30
圖片
  直播研討會
圖片
{{ item.channelVendor }} {{ item.webinarstarted }} |
{{ formatDate(item.duration) }}
直播中

尚未有邦友留言

立即登入留言