接下來幾天,為了更加理解要如何使用 X-Cube-AI,會開始分析前面產出的原始碼。
首先先來了解一下程式碼檔案的架構,下圖是如果使用 CubeMX 產出,會有這兩個跟 AI 息息相關的檔案: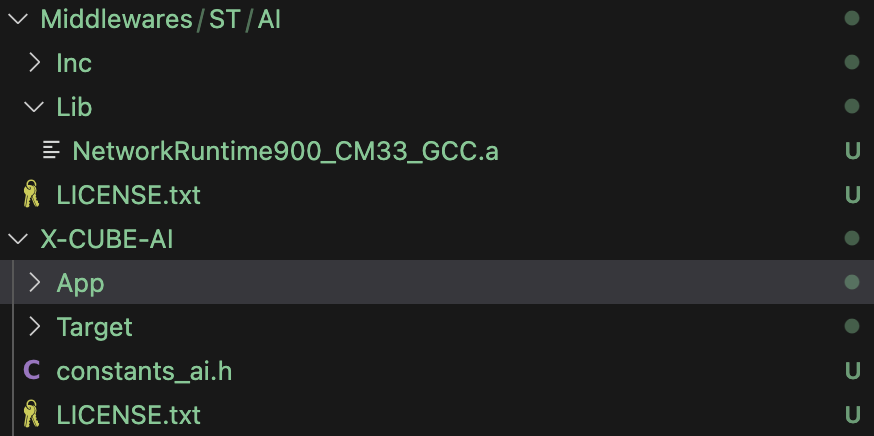
其中:
打開 X-CUBE-AI/App 資料夾以後,其中以 "network_" 為開頭的,(或是看你的 model 是命名什麼)就是本次的 model 相關程式,而其他的分別則是 Application template 或是平台相關 porting 程式。
接下來我們先打開位於 Core/Src 下的 main.c,來看看到底程式一開始都是怎麼開始呼叫的。(Startup相關程式並沒有被修改到,所以沒有在主程式呼叫之前額外呼叫什麼,請安心食用)
底下先先簡單擷取 main.c 中的 main():
int main(void)
{
  // ...
  // 此處省略大量初始化呼叫
  MX_X_CUBE_AI_Init();       // <-- 這邊開始進行 AI 的 Initialization
  // ...

  while (1)
  {
    MX_X_CUBE_AI_Process(); // <-- 這邊開始進行 AI Application Process
  }
}
接著進入 MX_X_CUBE_AI_INIT(); 中一探究竟,程式碼在 app_x-cube-ai.c 底下:
void MX_X_CUBE_AI_Init(void)
{
    MX_UARTx_Init();            // <-- 這邊先 Initialization UART 以便輸出結果
    aiSystemPerformanceInit();  // <-- 這邊進行 Performance Test 程式的程式
}
接著進入 aiSystemPerformanceInit(),在 aiSystemPerformance.c 中:
int aiSystemPerformanceInit(void)
{
  LC_PRINT("\r\n#\r\n");
  LC_PRINT("# %s %d.%d\r\n", _APP_NAME_ , _APP_VERSION_MAJOR_,
      _APP_VERSION_MINOR_ );
  LC_PRINT("#\r\n");

  systemSettingLog();

  crcIpInit();
  cyclesCounterInit();

  aiInit();

  srand(3); /* deterministic outcome */

  return 0;
}
首先可以先看到以 LC_ 為開頭的三行程式,以及 systemSettingLog(),實際上就只是在印出一些系統訊息,而 LC 是代表 Low cost,主要是用來實現低成本的資料輸出,相關程式可以去看 lc_print.c/lc_print.h 這兩個檔案。
而 crcIpInit()和 cyclesCounterInit() 分別為打開 CRC 的 clock 以及為了次是 Performance 打開的 dwt counter,這邊也先略過,主要專注接下來的 aiInit()
再開啟同樣位於 aiSystemPerformance.c 中的 aiInit() 後,可以看到如下:
static int aiInit(void)
{
  int res = -1;
  const char *nn_name;
  int idx;

  aiPlatformVersion();

  /* Reset the contexts -------------------------------------------- */
  for (idx=0; idx < AI_MNETWORK_NUMBER; idx++) {
    net_exec_ctx[idx].handle = AI_HANDLE_NULL;
  }

  /* Discover and initialize the network(s) ------------------------ */
  LC_PRINT("Discovering the network(s)...\r\n");

  idx = 0;
  do {
    nn_name = ai_mnetwork_find(NULL, idx);
    if (nn_name) {
      LC_PRINT("\r\nFound network \"%s\"\r\n", nn_name);
      res = aiBootstrap(&net_exec_ctx[idx], nn_name);
      if (res)
        nn_name = NULL;
    }
    idx++;
  } while (nn_name);

  return res;
}
當執行到 aiPlatformVersion() 時,基本上一開始所有的資料就會都輸出出來,對應到的就是 UART 輸出的底下這段:
#
# AI system performance 7.1
#
Compiled with GCC 13.3.1
STM32 device configuration...
 Device       : DevID:0x0482 (STM32U575/585) RevID:0x2001
 Core Arch.   : M33 - FPU  used
 HAL version  : 0x01060000
 SYSCLK clock : 160 MHz
 HCLK clock   : 160 MHz
 ICACHE       : True
 Timestamp    : SysTick + DWT (delay(1)=1.004 ms)

AI platform (API 1.1.0 - RUNTIME 9.0.0)
接著開始進入建立 network instance 的過程,首先會先尋找是否包含 network 資料,就是使用 ai_mnetwork_find(NULL, idx) 進行尋找,若有找到則會傳入 aiBootstrap(&net_exec_ctx[idx], nn_name) 開始建立 Network。
這邊的 aiBootstrap 會經過幾個階段:
ai_mnetwork_create(nn_name, &ctx->handle, NULL)
ai_mnetwork_get_report(ctx->handle, &ctx->report)
ai_mnetwork_init(ctx->handle)
aiPrintNetworkInfo(&ctx->report)
這四個階段,然後完成初始化。
但再更深入的去看這幾個函數做了什麼之前,我們先來看一個在 app_x-cube-ai.h 底下定義的結構體 ai_network_entry_t:
typedef struct {
    const char *name;
    ai_buffer *config;
    ai_bool (*ai_data_params_get)(ai_network_params* params);
    ai_bool (*ai_get_report)(ai_handle network, ai_network_report* report);
    ai_error (*ai_create)(ai_handle* network, const ai_buffer* network_config);
    ai_error (*ai_get_error)(ai_handle network);
    ai_handle (*ai_destroy)(ai_handle network);
    ai_bool (*ai_init)(ai_handle network, const ai_network_params* params);
    ai_i32 (*ai_run)(ai_handle network, const ai_buffer* input, ai_buffer* output);
    ai_i32 (*ai_forward)(ai_handle network, const ai_buffer* input);
    ai_handle * activations;
} ai_network_entry_t;
這個結構體是用來記錄並儲存 neural network 資訊的,並且透過 function pointer 存儲執行的方法。
接著可以看到在 app_x-cube-ai.c 底下透過 const 定義的資料:
static const ai_network_entry_t networks[AI_MNETWORK_NUMBER] = {
    {
        .name = (const char *)AI_NETWORK_MODEL_NAME,
        .config = AI_NETWORK_DATA_CONFIG,
        .ai_get_report = ai_network_get_report,
        .ai_create = ai_network_create,
        .ai_destroy = ai_network_destroy,
        .ai_get_error = ai_network_get_error,
        .ai_init = ai_network_init,
        .ai_run = ai_network_run,
        .ai_forward = ai_network_forward,
        .ai_data_params_get = ai_network_data_params_get,
        .activations = data_activations0
    },
};
而這邊每個資料就可以在 refer 到 network 相關的程式碼(就是前面說的開頭名稱是 network_ 檔案相關的程式)。
那今天就先分析到這邊,明天繼續拆解初始化神經網路的細節程式。