在前一篇的demo中,我們了解到Sentry在NodeJS+express的應用中,是用Sentry.setupExpressErrorHandler(app)來獲取應用中的錯誤。那麼為何要在所有controller之後才呼叫Sentry的錯誤處理中間件呢?這就要聊到express middleware的機制。
一般來說,middleware可以分為三種主要類型:
例如常見的
app.use(express.json());  // 處理 JSON body
app.use(cors());  // 處理 CORS
app.use(logger('dev'));  // 請求日誌
這些通常會放在controller之前,因為無論是什麼路由,這些操作都需要執行。
這些 middleware 只應用於某些路由,比如身份驗證、權限檢查或自定義邏輯處理。這些 middleware 可以和路由處理器一起使用,放置在相應的路由之前。
// 只對 `/admin` 路由進行身份驗證
app.use('/admin', authenticateAdmin);
app.get('/admin/dashboard', (req, res) => {
    res.send('Welcome to the admin dashboard');
});
這類 middleware 必須放在所有路由和其他 middleware 之後,因為它需要捕捉前面的 controller 或 middleware 未處理的錯誤。放在最後確保錯誤可以被集中處理,避免應用崩潰。
// 所有路由和controller之後
app.use((err, req, res, next) => {
    console.error(err.stack);
    res.status(500).send('Something broke!');
});
所以Sentry.setupExpressErrorHandler(app);才需要放在所有controller之後,為了就是收集所有錯誤、並上傳到Sentry。
既然了解 Sentry.setupExpressErrorHandler就是express middleware的使用,就可以簡單寫一個了:
class SelfSentry {
    static setupExpressErrorHandler(expressApp) {
        expressApp.use(this._expressErrorHandler());
    }

    static _expressErrorHandler() {
        return (err, req, res, next) => {
            // 這邊就是處理Sentry上報error的邏輯,目前先console出來
            console.log('----in SelfSentry error middleware');
            console.error(err.stack);
            next(error);
        };
    }
}

module.exports = {
    SelfSentry,
};
然後我們來demo看看,運行看看有沒有捕捉到:
const express = require('express');
const cors = require('cors');

const { SelfSentry } = require('./self-sentry');

const app = express();
const PORT = 3060;

app.use(cors());

app.get('/', (req, res) => {
    res.send('hello self error catcher');
});

app.get('/demo-error', (req, res) => {
    throw new Error('---Mock Error');
});

SelfSentry.setupExpressErrorHandler(app);

app.listen(PORT, () => {
    console.log(`server on http://localhost:${PORT}`);
});
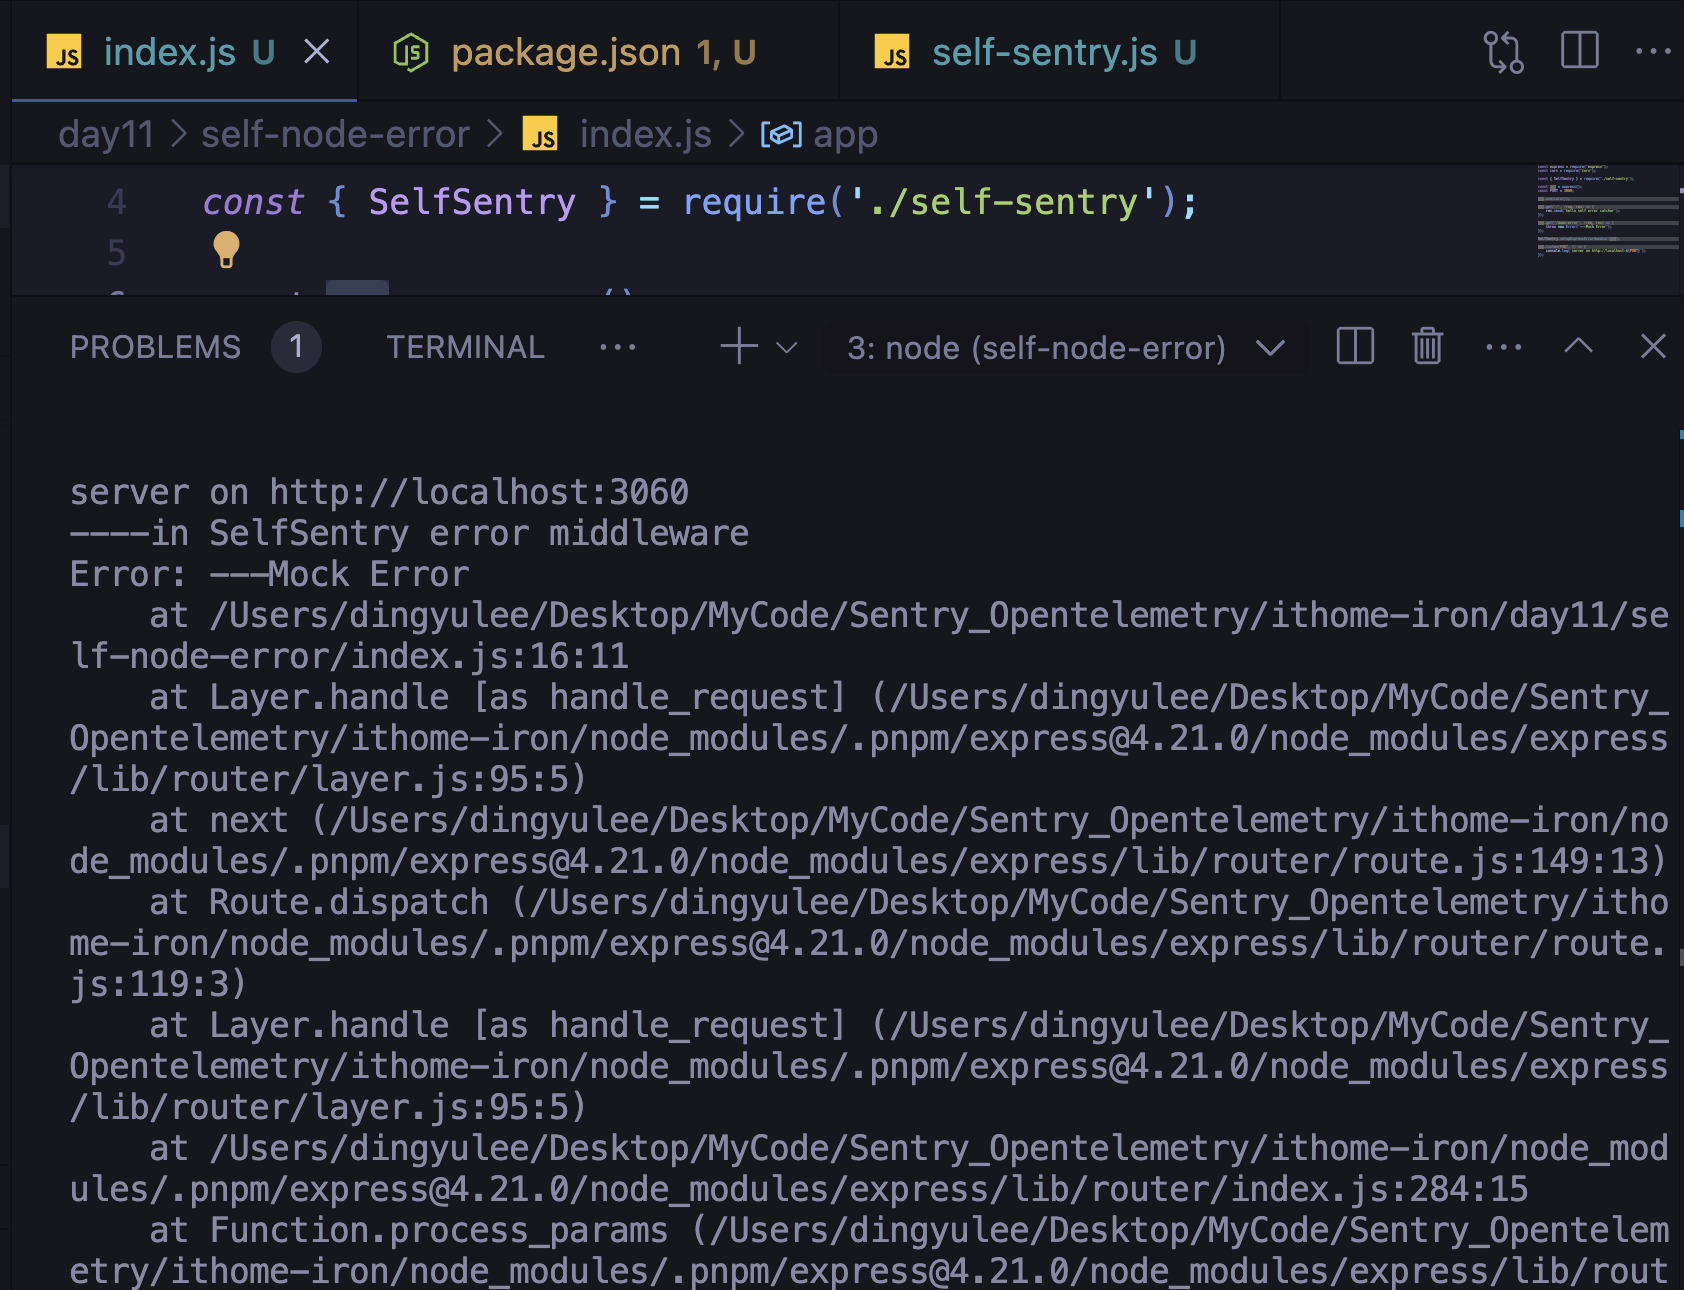
terminal console:

可以看到拋出的Mock Error已經被我們的錯誤捕捉middleware給捕獲、並console出來。
如果光是記錄以上error,其實對於開發者來說也是不太清楚。我們可以再進一步把捕獲的Error來結構化。假設我們想要知道以下內容
我們該如何獲取?在JS中其實都可以透過 err.stack來解析。
err.stack是 Error 物件中的屬性、為一個字符串(也就是上面截圖中一大串的 error console),這個字符串就是包含了該錯誤的呼叫堆疊(stack trace)。我們可以先透過解析這一個字符串來獲得發成錯誤的file---
const stackLines = stack.split('\n');
const relevantLine = stackLines.find((line) => line.includes('at '));
會獲取在 error stack 中觸發錯誤的程式入口
該字符串會長這樣: at {filePath}:{line}:{column}
所以我們再解析該 line,就可以獲得文件的確切位置、和發生錯誤的程式碼的行列:
const match = relevantLine.match(/at\s+(.+):(\d+):(\d+)/);
if (match) {
    return {
        fileName: match[1],
        lineNumber: match[2],
        columnNumber: match[3],
    };
}
透過上述的解析,我們獲取到了文件位置
以及發生錯誤的程式碼行列數,接著就可以讀取文件來獲得確切發生錯誤的程式碼了:
const fullPath = path.resolve(fileName);
const fileContent = fs.readFileSync(fullPath, 'utf-8');
const lines = fileContent.split('\n');

// 發生錯誤的程式碼
ines[errorLine - 1];
接下來,我們可以改寫之前的SDK,在捕獲錯誤的時候獲取到該程式碼:
static _expressErrorHandler() {
    return (err, req, res, next) => {
        // 這邊就是處理Sentry上報error的邏輯,目前先console出來
        console.log('----in SelfSentry error middleware');
        //console.error(err.stack);

        // 解析stack,獲取fileName和errorLine
        const stackInfo = err.stack ? parseStack(err.stack) : {};

        if (stackInfo.fileName) {
            const errorSnippet = getCodeSnippet(
                stackInfo.fileName,
                stackInfo.lineNumber,
            );

            const errorRecord = {
                errorType: err.name,
                errorMsg: err.message,
                errorFile: stackInfo.fileName,
                errorCode: errorSnippet.trim(),

                // TODO: 其他想記錄的屬性
            };
            console.error(errorRecord);
        }
        next(err);
    };
}
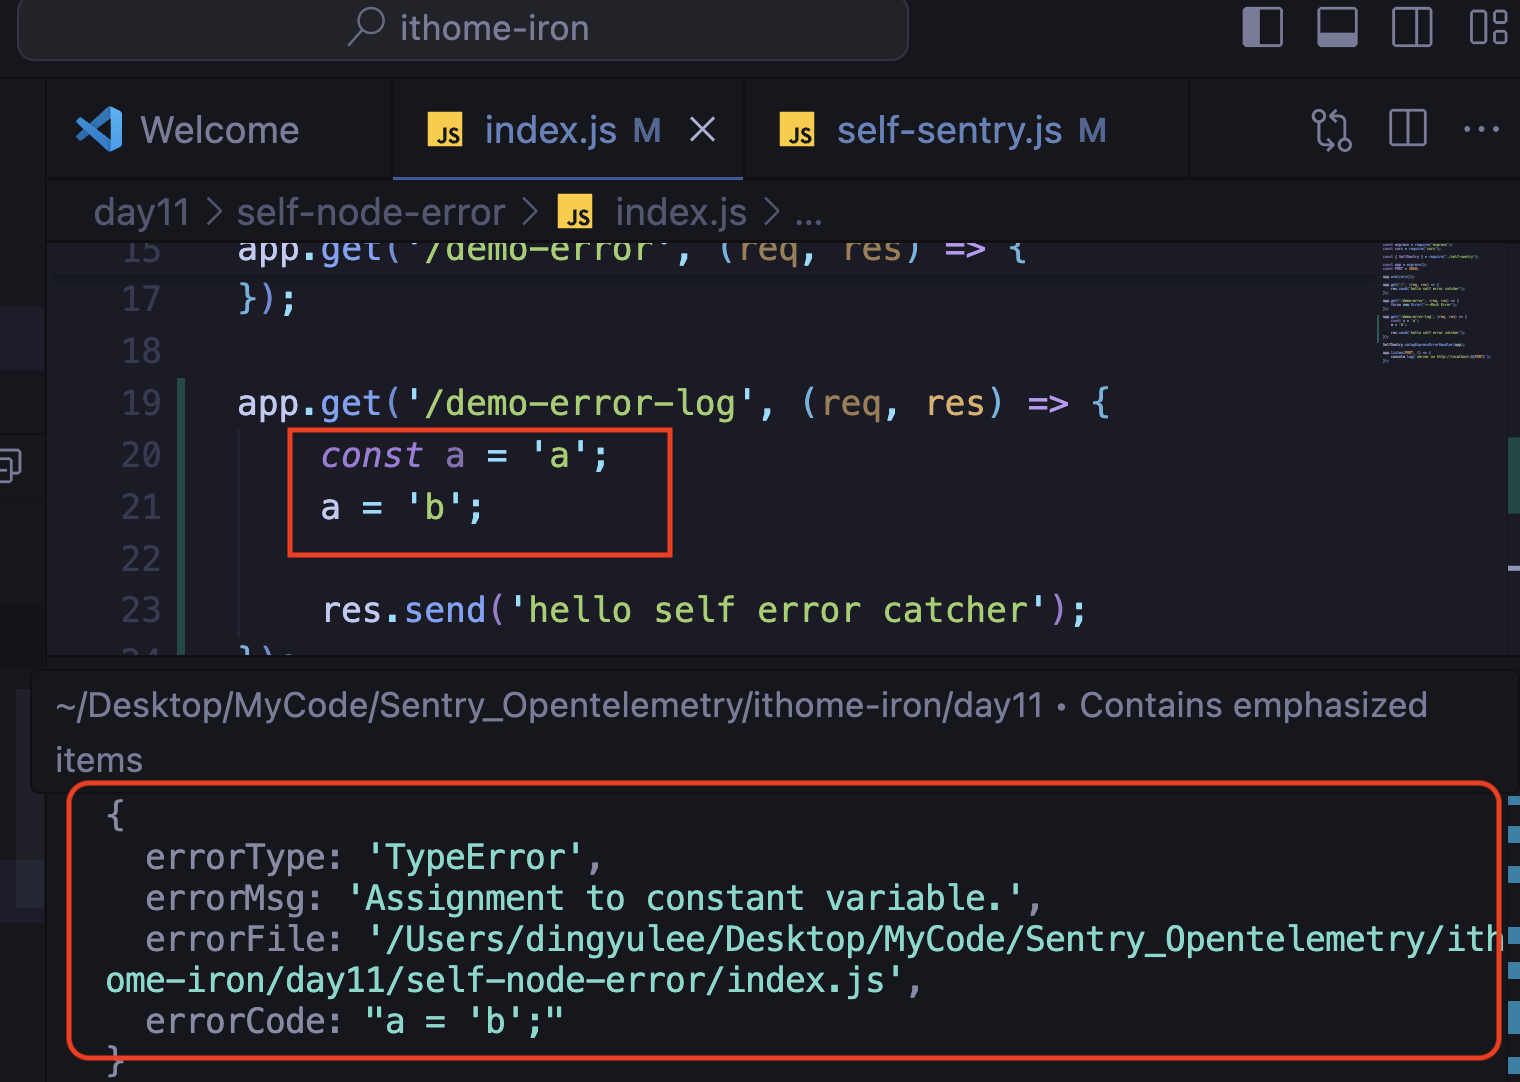
寫個錯誤來打印一下:
app.get('/demo-error-log', (req, res) => {
    const a = 'a';
    a = 'b';

    res.send('hello self error catcher');
});
SDK 捕獲結果:

今天這一篇,我們手寫了一個sdk,仿照Sentry的方式宣告、並成功捕獲了錯誤。本文的完成程式碼可以查看Github repository
接下來,我們將聊聊Sentry對後端服務的性能監控。
packages/node/src/integrations/tracing/express.ts

有機會,希望大大能分享一下關於 Log 與 Logging
Log 如果遇到error stack trace 能否只取最後一兩層。
然後平時的 Log 都能帶上是那一行程式。
最後就是別像圖上那些多行且沒結構化,而是一行有結構化。
感謝雷N大的建議~
目前先補上有關error info stucture,跟error有關程式碼的部分XD