今天我們要來實作 Account Service 的 Login 功能,並且將數據存到 Memory 內來測試。
syntax = "proto3";

option csharp_namespace = "Account.Grpc";

service AccountGrpcService {
  rpc Register (RegisterRequest) returns (AuthenticationResponse);
  rpc Login (LoginRequest) returns (AuthenticationResponse);
}

message RegisterRequest {
  string FirstName = 1;
  string LastName = 2;
  string Email = 3;
  string Password = 4;
}

message LoginRequest {
  string Email = 1;
  string Password = 2;
}

message AuthenticationResponse {
  string Id = 1;
  string FirstName = 2;
  string LastName = 3;
  string Email = 4;
  string Token = 5;
}
GrpcAccountService public override Task<AuthenticationResponse> Login(LoginRequest request, ServerCallContext context)
{
var result = _accountService.Login(request.Email, request.Password);
var response = new AuthenticationResponse()
{
Id = result.Id.ToString(),
FirstName = result.FirstName,
LastName = result.LastName,
Email = result.Email,
Token = result.Token
};
return Task.FromResult(response);
}
AccountServicenamespace Account.Application;
public interface IAccountService
{
AuthenticationResult Register (string FirstName, string lastName, string email, string password);
AuthenticationResult Login (string email, string password);
}
    public AuthenticationResult Login(string email, string password)
    {
        var user = _users.FirstOrDefault(u => u.Email == email);

        if (user == null)
            throw new ArgumentException("Email address not exists");
        if (!user.VerifyPassword(password))
            throw new ArgumentException("Permission denied");

        return new AuthenticationResult(
            user.Id.Value,
            user.FirstName,
            user.LastName,
            user.Email,
            "token"
        );
    }
為了測試,我們需要把 User 資料先存在記憶體中,為此我們還做一下 Infrastructure 的 Repository。
先把 AccountService.cs 內的 _users 變成 _userRepository,並規劃一個 IUserRepository 擁有 GetUserByEmail 和 Add 的功能,實作如下:
using Account.Domain.Aggregates;

namespace Account.Application;

public class AccountService : IAccountService
{
    private readonly IUserRepository _userRepository;

    public AccountService(IUserRepository userRepository)
    {
        _userRepository = userRepository;
    }

    public AuthenticationResult Login(string email, string password)
    {
        var user = _userRepository.GetUserByEmail(email);

        if (user == null)
            throw new ArgumentException("Email address not exists");
        if (!user.VerifyPassword(password))
            throw new ArgumentException("Permission denied");

        return new AuthenticationResult(
            user.Id.Value,
            user.FirstName,
            user.LastName,
            user.Email,
            "token"
        );
    }

    public AuthenticationResult Register(string firstName, string lastName, string email, string password)
    {
        if (_userRepository.GetUserByEmail(email) is not null)
            throw new ArgumentException("Email address already exists");

        var user = User.Create(firstName, lastName, email, password);

        _userRepository.Add(user);

        return new AuthenticationResult(
            user.Id.Value,
            user.FirstName,
            user.LastName,
            user.Email,
            "token"
        );
    }
}
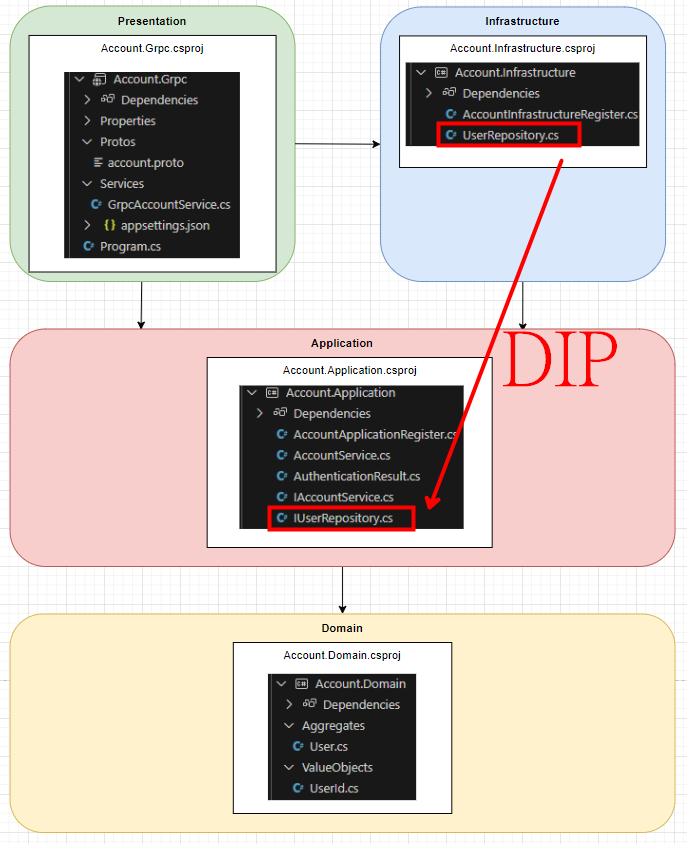
IUserRepository在實作 IUserRepository 之前,我想先問大家一個重要的問題:這個介面應該放在哪個專案中?
三...
二...
一...
答案是,我們應該將它實作在 Application Layer。
為什麼呢?直覺上,Repository 應該要放在 Infrastructure Layer 對吧?但根據 Clean Architecture 的原則,內部不應依賴於外部層。
也就是說,在 Account.Application 的任何程式碼都不應該依賴 Account.Infrastructure 的程式碼。
然而,Repository 是與資料庫相關的,通常需要位於 Infrastructure 層,這時該怎麼辦?答案是,我們可以建立一個介面。
雖然 Application 需要依賴 Infrastructure 層的 Repository 來存取資料庫,但架構上並不允許這樣做。因此,我們可以在 Application 層建立一個 IUserRepository,讓 Application 中的所有操作都只針對這個介面。
接著,在 Infrastructure 層實作 UserRepository 並繼承 IUserRepository,以實現具體的資料庫操作。如此一來,專案的依賴方向將變為 Infrastructure 層依賴 Application 層。
這就是依賴反轉原則(Dependency Inversion Principle,DIP)。
那這樣做有什麼好處呢?為什麼 Clean Architecture 強調這一點?
最大的好處在於未來的靈活性。例如,當你想將 UserRepository 的實作從 EF 換成 Dapper,或將資料庫從 MSSQL 換成 MongoDB,你只需替換為 UserRepositoryDapper 或 UserRepositoryMongoDB 即可。
Application 層的程式碼依然會依賴 IUserRepository 介面,因此這些變更不會影響到 Application 的程式碼基礎。
接著我們可以繼續實作,接下來在 Account.Application 中新增 IUserRepository.cs。
using Account.Domain.Aggregates;
using Common.Library.Seedwork;

namespace Account.Application;

public interface IUserRepository : IRepository<User>
{
    User? GetUserByEmail(string email);
    void Add(User user);
}
UserRepository接著我們在 Account.Infrastructure 內建立 UserRepository.cs,並實作。我們把先前的 List<User> 實作在此,並暫時的放到 Memory 中存起來。
using Account.Application;
using Common.Library.Seedwork;

namespace Account.Infrastructure;

public class UserRepository : IUserRepository
{
    private static readonly List<Domain.Aggregates.User> _users = new();

    public IUnitOfWork UnitOfWork { get; }

    public Domain.Aggregates.User? GetUserByEmail(string email)
    {
        return _users.SingleOrDefault(u => u.Email == email);
    }

    public void Add(Domain.Aggregates.User user)
    {
        _users.Add(user);
    }
}
接著,我們要把 UserRepository 的服務註冊到 DI Container 中,就需要一個 Infrastructure 的 Register AccountInfrastructureRegister,
using Account.Application;
using Microsoft.Extensions.DependencyInjection;

namespace Account.Infrastructure;

public static class AccountInfrastructureRegister
{
    public static IServiceCollection AddAccountInfrastructure(this IServiceCollection services)
    {
        services.AddScoped<IUserRepository, UserRepository>();

        return services;
    }
}
並且在 Presentation Layer Account.Grpc 的 Program.cs 注入 AddAccountInfrastructure
using Account.Application;
using Account.Grpc.Services;
using Account.Infrastructure;

var builder = WebApplication.CreateBuilder(args);

// Add services to the container.
builder.Services.AddGrpc();
builder.Services.AddGrpcReflection();
builder.Services
.AddAccountApplication()
.AddAccountInfrastructure();

var app = builder.Build();

// Configure the HTTP request pipeline.
app.MapGrpcService<GrpcAccountService>();
app.MapGrpcReflectionService();

app.Run();
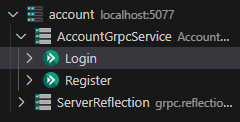
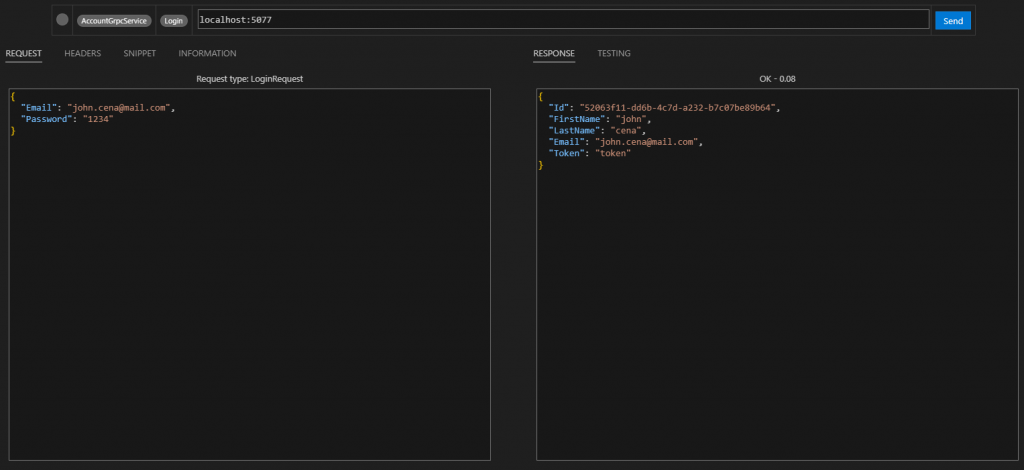
再次執行 dotnet run 之後去 gRPC Clicker,會發現 AccountGrpcService 內已經多一個 Login 的 Endpoint
我們可以先使用 Register 註冊一組帳號 john.cena@mail.com
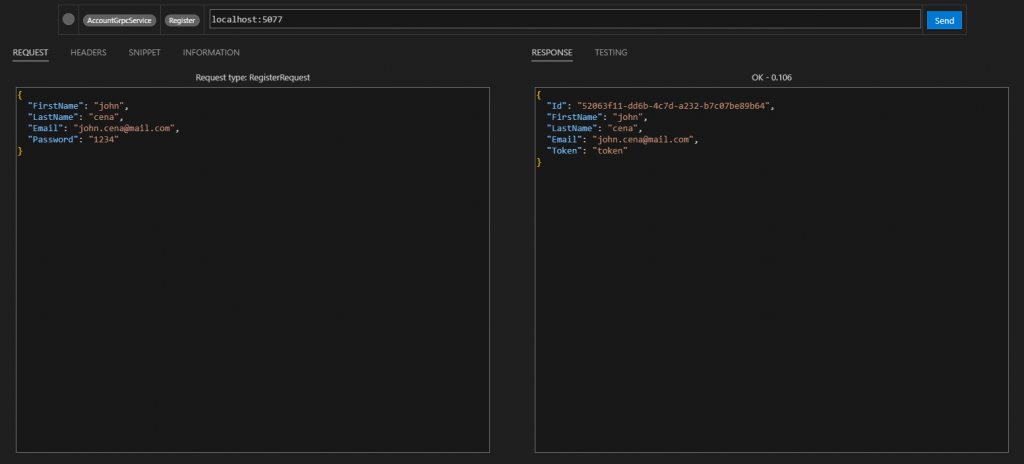
然後輸入帳號密碼確認是否拿到同一 GUID 的帳號
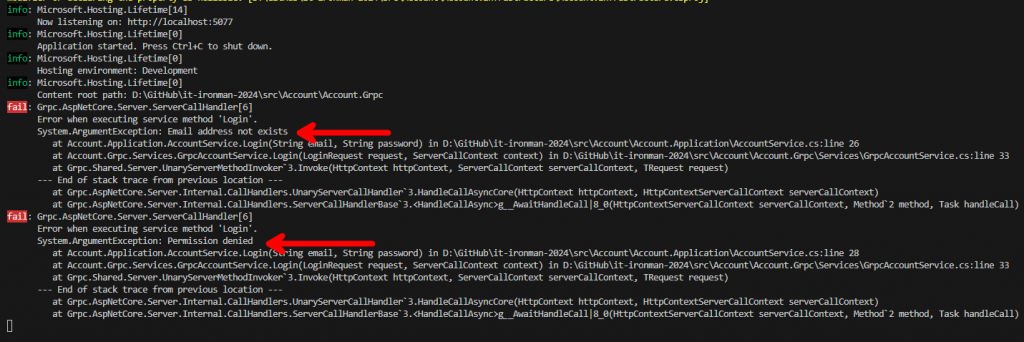
我們也可以故意輸入錯誤資料來看流程是否正常,然後想想未來該如何做 Error Handling。
最後,來一張圖吧,明天就介紹甚麼事 JWT 跟 Authentication,內容應該會不少,想想就頭大。