Terraform 的誕生很大程度上源於人們逐漸對手動操作基礎設施平台(如 AWS、GCP)的管理感到吃力,隨著架構日益複雜,這種手動操作往往超出了團隊的負擔。當我們需要重新搭建基礎設施時,往往耗時耗力,只能從團隊成員殘存的零碎文件中拼湊出真實的面貌。這種情境如果放到 Grafana 上也是同樣的道理,我們面對來自不同團隊、對 Grafana 熟悉度各異的資源注入時,無論是 Dashboard、Folder 還是 Alert,所感受到的混亂不亞於當初接手雜亂無章的基礎設施。而兩者最大的共同點就是都可以通過 Terraform 實現良好的設定檔管理。因此,接下來我們將進入如何使用 Terraform 有效管理 Grafana 的進階應用章節,請抓緊,我們準備起飛!

Terraform 是一款由 HashiCorp 開發的強大基礎設施即代碼(Infrastructure as Code,IaC)工具,也是目前 DevOps/SRE 社群中最受歡迎也最多人在使用的基礎架構管理工具。其核心理念是通過程式碼來定義、預覽和部署基礎設施,而非依賴手動操作或腳本,這也是我們選擇其作為管理 Grafana 的原因之一。
這種方法帶來了幾個關鍵優勢:
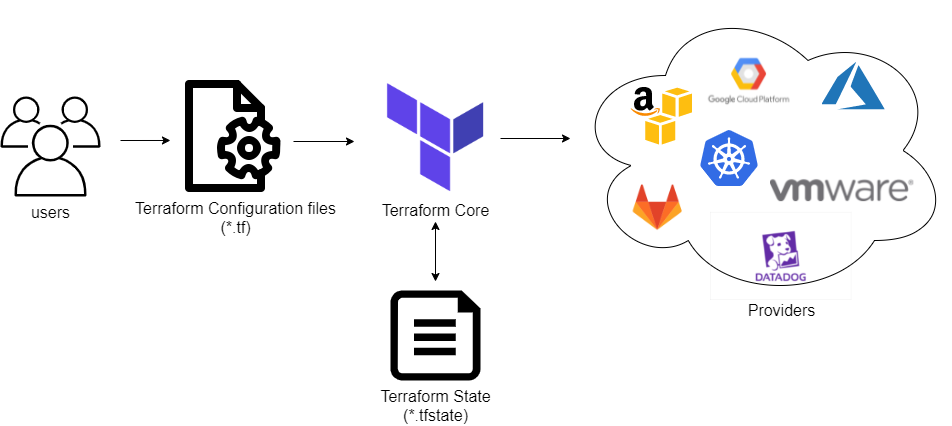
Terraform 的工作流程主要包含三個階段:
讓我們深入了解每個階段:
在這個階段,開發者使用 HCL 或 JSON 來描述期望的基礎設施狀態。HCL 是 Terraform 的首選語言,因為它非常易讀和易寫。
例如:
resource "aws_instance" "example" {
  ami           = "ami-0c55b159cbfafe1f0"
  instance_type = "t2.micro"
  tags = {
    Name = "ExampleInstance"
  }
}
這段程式碼非常簡單明瞭的定義了一個 AWS EC2 實例。
執行 terraform plan 命令時,Terraform 會:
這個階段不會實際修改任何基礎設施,而是提供了一個預覽,讓你可以在實際應用更改之前審查它們。
而我們將上面的 EC2 設定運作後,期望會出現以下結果:
Terraform will perform the following actions:

  # aws_instance.example will be created
  + resource "aws_instance" "example" {
      + ami                          = "ami-0c55b159cbfafe1f0"
				// ...
      + instance_type                = "t2.micro"
      + tags                         = {
          + "Name" = "ExampleInstance"
        }
				// ...
    }

Plan: 1 to add, 0 to change, 0 to destroy.
執行 terraform apply 命令時,Terraform 會:
auto-approve 標誌)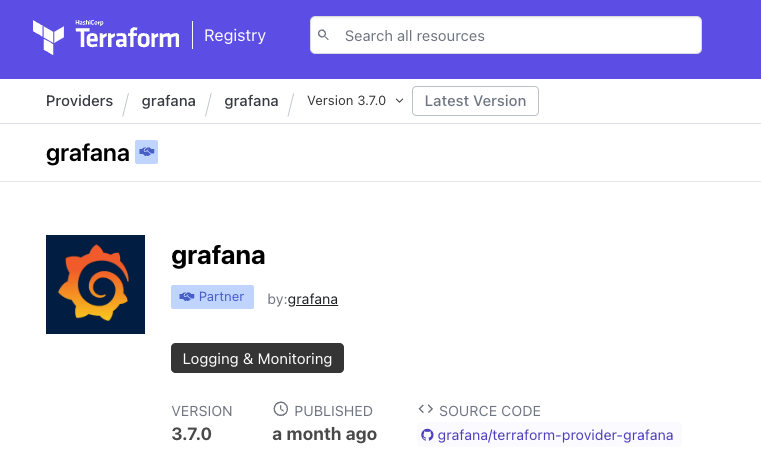
接下來我們就要實際透過 Terraform 的 Grafana Provider 當作我們實踐 Grafana IaC 的媒介。Grafana Provider 是 Terraform 的一個擴展,它允許使用者通過 Terraform 設定來管理 Grafana 資源。這種整合為 Grafana 的設定管理帶來了 IaC 的所有優勢。使用 Grafana Provider,你可以以聲明式的方式管理 Grafana 的各種資源,確保設定的一致性和可重複性。
使用 Grafana Provider 的入門方式與其他在 Terraform 中的 Provider 資源並無太大差異。首先,我們需要對即將搭建的基礎設施中的各類 Grafana 資源有充分的了解,包括 Dashboard、Datasource、Folder 和 Alert 等。熟悉這些資源之後,我們要將它們逐一分類拆解,確保每個部分的配置能夠清楚定義。
接下來,我們可以充分利用 Terraform 提供的高效語法功能,如模組化管理、迭代和條件語句,來優雅地將這些資源整合在一起。這不僅使得基礎設施的自動化配置變得更加簡單且具可讀性,也為未來的維護和擴展提供了更靈活的框架。
以下是 Grafana OSS 版本中提供的 Resource:
Grafaba OSS:
Grafana Alerting:
現在,我們將所有的 Grafana Provider 資源收斂成四個部分:
如此一來,我們就能將 Grafana 的資源管理化繁為簡,根據不同的功能需求進行系統化的處理。這種方式不僅使我們能夠輕鬆管理使用者、團隊和權限配置,還能通過 Terraform 提供的語法高效地定義和部署 Datasource、Dashboard 和 Folder 等關鍵資源。同時,針對 Alert 規則的精細化設置也能幫助我們在 Grafana 中實現全面且靈活的監控告警系統,確保即時通知和可靠的告警機制。
首先,讓我們將安裝在本地 Kubernetes 叢集中的 Grafana 端點暴露出來:
kubectl port-forward service/grafana 3000:80 -n grafana
------
Forwarding from 127.0.0.1:3000 -> 3000
Forwarding from [::1]:3000 -> 3000
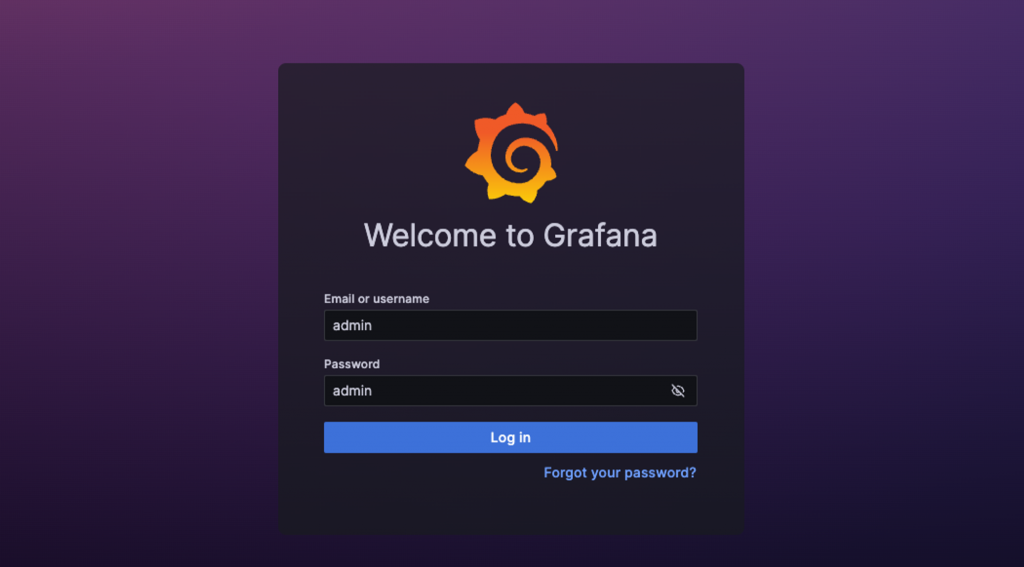
我們就能在本機中的 localhost:3000 成功查看到登入介面,這也代表我們的 Terraform Grafana Provider 可以透過這個端點管理該 Grafana 資源。
接下來,這裡是一個基本的 Grafana Provider 設定範例:
# main.tf
terraform {
  required_providers {
    grafana = {
      source  = "grafana/grafana"
      version = "~> 3.7.0"
    }
  }
}

provider "grafana" {
  url  = "http://localhost:3000"
  auth = "admin:admin" # apikey or accountname:password
}

resource "grafana_folder" "example_folder" {
  title = My Example Folder
}

resource "grafana_dashboard" "example_dashboard" {
  folder      = grafana_folder.example_folder.id
  config_json = jsonencode({
    "title" : My Example Dashboard,
    "uid" : "example-dashboard",
    "panels" : [
      {
        "id" : 1,
        "title" : "Example Panel",
        "type" : "graph",
        "datasource" : "Prometheus",
        "targets" : [
          {
            "expr" : "up",
            "refId" : "A"
          }
        ]
      }
    ]
  })
}
現在我們就能夠使用 Terraform 指令執行 Init 以及 Apply 來安裝套用 Grafana 設定:
terraform init
terraform apply
---
Terraform used the selected providers to generate the following execution plan. Resource actions are indicated with the following
symbols:
  + create

Terraform will perform the following actions:

  # grafana_dashboard.example_dashboard will be created
  + resource "grafana_dashboard" "example_dashboard" {
      + config_json  = jsonencode(
            {
              + panels = [
                  + {
                      + datasource = "Prometheus"
                      + targets    = [
                          + {
                              + expr  = "up"
                              + refId = "A"
                            },
                        ]
                      + title      = "Example Panel"
                      + type       = "graph"
                    },
                ]
              + title  = "My Example Dashboard"
              + uid    = "example-dashboard"
            }
        )
      + dashboard_id = (known after apply)
      + folder       = (known after apply)
      + id           = (known after apply)
      + slug         = (known after apply)
      + uid          = (known after apply)
      + url          = (known after apply)
      + version      = (known after apply)
    }

  # grafana_folder.example_folder will be created
  + resource "grafana_folder" "example_folder" {
      + id    = (known after apply)
      + title = "My Example Folder"
      + uid   = (known after apply)
      + url   = (known after apply)
    }

Plan: 2 to add, 0 to change, 0 to destroy.

Do you want to perform these actions?
  Terraform will perform the actions described above.
  Only 'yes' will be accepted to approve.

  Enter a value: yes

grafana_folder.example_folder: Creating...
grafana_folder.example_folder: Creation complete after 0s [id=12]
grafana_dashboard.example_dashboard: Creating...
grafana_dashboard.example_dashboard: Creation complete after 0s [id=example-dashboard]

Apply complete! Resources: 2 added, 0 changed, 0 destroyed.
看到 Terraform 執行成功的指示後,我們也能即時在 localhost:3000/dashboards 端口中,查看設定資源部署的情況:
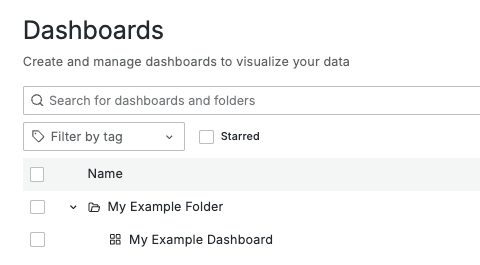
大功告成!恭喜你已經成功的進入 Grafana IaC 的領域,透過程式碼設定來控制 Grafana 資源。在此範例中我們指定了 Grafana Provider 和其版本、建立了一個 Folder 並且在其之下建立了一個 Dashboard。
透過本章節,我們了解了如何使用 Terraform 管理 Grafana 資源,並逐步實現將 Grafana 完整納入基礎設施即代碼(IaC)的範疇。在現代 DevOps 團隊中,基礎設施管理的自動化和可重複性至關重要,透過 Terraform,我們可以有效地管理 Grafana 的 Dashboard、Datasource、Alert 等資源,確保配置的一致性和版本控制。
從 Grafana Provider 的安裝、資源的定義,到將其與 Kubernetes 等其他基礎設施無縫結合,我們已經掌握了這一強大工具的基本使用方式。這不僅提高了我們的工作效率,也減少了傳統手動操作中容易出現的錯誤與混亂。
References:
