馬上來接續昨天的進度!我們刻好商品SFC、也測試父組件傳遞資料顯示正常,今天來處理商品數量和購物車icon,沒問題就直接開始囉!

畫面上我們有四個商品,能各自對商品數量進行增刪的動作。我們創建一個Array(showCount)並利用product.id去對應每個商品在介面顯示的狀態:
//Product.vue
 //用來裝每個產品在介面顯示的數量
 const showCount = ref([])
 //動態指定Array大小
 showCount.length = props.products.length
 for (var i = 0; i < showCount.length; i++) {
     //預塞值為0
     showCount.value[i] = 0
 }
 //綁定showCount,陣列key值從0開始,比product.id小1
 <input type="text" v-model="showCount[product.id-1]"/>
◎注意: 塞值時應記得指定.value,避免被解構(沒加value也會賦值但會解構)
處理好裝載的容器之後,就是我們的「+」數量增加button的功能撰寫…等等!不是單純showCount[product.id-1]++就結束囉!
store欄位,意即新增時必須注意到上限的問題!//ShoppingCartView.vue
const products = ref([
{
id: 1,
name: '純淨的牛奶',
price: 60,
img: '../../src/assets/milk.jpg',
store: 20
},
...
])
@click做新增的動作//Product.vue
function addCount(id) {
if (props.products[id].store <= showCount.value[id]) {
alert("已超出庫存!")
} else {
showCount.value[id] += 1
}
}
...
<button class="btnMath" @click="addCount(product.id-1)">+</button>
同理可見,數量增加有上限的門檻,也會有下限的問題!負數就不合理了~
//Product.vue
  function minusCount(id) {
      if (showCount.value[id] < 1) {
          alert("數量不能為負!")
      } else {
          showCount.value[id] -= 1
      }
  }
  ...
  <button class="btnMath" @click="minusCount(product.id-1)">–</button>
除了按鈕的加加減減以外,使用者也能夠直接更改數量,當然別忘記這裡也要進行控管:
//Product.vue
  function checkCount(id) {
      if (showCount.value[id] < 1) {
          showCount.value[id]=0
          alert("數量不能為負!")
      }
      if (props.products[id].store <= showCount.value[id]) {
          showCount.value[id] = props.products[id].store
          alert("已超出庫存!")
      }
  }
  //綁定@change
  <input type="text" @change="checkCount(product.id-1)" v-model="showCount[product.id-1]"/>

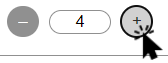
▲介面上的商品數量可以任意調整互不影響!
搞定好商品選擇頁之後,我們需要購物車icon來串接兩個組件(Product.vue、Cart.vue),所以先回到父組件:
//ShoppingCartView.vue

<div v-show="cartShow" class="remindChat"><text>還沒有商品喔!</text></div>
<img id="cartIcon" @click="checkCart" @mouseover="darkCart" @mouseout="lightCart" :src="imgSrc">

...
  .remindChat {
      z-index: 8;
      position: fixed;
      right: 2%;
      bottom: 9%;
      width: 120px;
      height: 120px;
      background-image: url(@/assets/chattingPic.svg);
      display: flex;
      justify-content: center;
      align-items: center;
      color: white;
      padding-bottom: 15px;
  }
  #cartIcon {
      z-index: 5;
      position: fixed;
      right: 3%;
      bottom: 4%;
  }
這邊我新增了一個小icon:
@mouseover和@mouseout事件是為了切換兩張圖片,讓元素看起來更有互動感@click事件就是我們進入購物車介面的開關//ShoppingCartView.vue
//響應式圖片位置
const imgSrc = ref('./src/assets/cartIcon.svg')
//提示視窗是否開啟
const cartShow = ref(true)
//滑鼠進入時觸發
function darkCart() {
imgSrc.value = './src/assets/cartIcon2.svg'
}
//滑鼠離開時觸發
function lightCart() {
imgSrc.value = './src/assets/cartIcon.svg'
cartShow.value = false
}
//點擊購物車觸發開啟購物車
function checkCart() {
...
}
▲上面我使用了cartShow這個參數,用來判斷之後如果沒有商品在購物車裡會跳出的提示文字

雖然靠自己摸索真的是在一些莫名的地方卡關很久,成果也是滿滿的菜味~不過還是覺得很棒啦!明天要一鼓作氣完成剩下的購物車介面還要實現把所有資料串在一起!(充滿幹勁)
參考資料
vue.js mouse over change the image

