昨天開始介紹 Web 應用框架 Flask,踏入了另一個領域!今天要來介紹第二個網頁應用框架 FastAPI,會使用與昨天類似的形式介紹 FastAPI,將實作換成 FastAPI 寫法,並介紹 FastAPI 和 Flask 兩者差異之處。
FastAPI 為 2018 年發布的網頁應用框架,透過 Pydantic 進行數據驗證與管理,使用輕量的 ASGI 框架 Starlette 建構,並透過 ASGI 伺服器 Uvicorn 運行 FastAPI 應用。和昨日相同,今天會使用 FastAPI 寫一支程式,把之前訓練好的影像分類模型,製作 API 供使用者上傳影像進行推論,並得到推論結果的類別和對應的信心值。
首先介紹基本的使用方法。
from fastapi import FastAPI
import uvicorn

app = FastAPI()

@app.get("/")
def hello_world():
    return "Hello, World!"

uvicorn.run(app)
定義函式 hello_world() 回傳「Hello, World!」字串,並使用 uvicorn 開啟網頁。
執行後會得到網址 http://127.0.0.1:8000/ ,進入畫面如下:
💡FastAPI 預設以 JSON 格式傳回內容,所以會在結果看到雙引號,以及 FastAPI 不接受 __name__ 作為參數。
將昨天的實作程式碼,改成使用 FastAPI 的版本:
from fastapi import FastAPI, File, UploadFile
from tensorflow.keras.models import load_model
from tensorflow.keras.preprocessing import image
import numpy as np
from PIL import Image
import io
import nest_asyncio
import uvicorn

# 設置 FastAPI 應用
app = FastAPI()

# 載入影像分類模型
model = load_model('your_model_path.h5')

# 定義根目錄
@app.get("/")
def home():
    return "Welcome!"

# 定義推論影像函式
def predict_image(img: Image.Image):
    img = img.resize((256, 256))
    img_array = image.img_to_array(img)
    img_array = np.expand_dims(img_array, axis=0)
    prediction = model.predict(img_array)
    return prediction

# 定義 /predict/ 目錄
@app.post("/predict/")
async def predict(file: UploadFile = File(...)):
    img = Image.open(io.BytesIO(await file.read()))
    prediction = predict_image(img)
    confidence = prediction[0]
    predicted_index = np.argmax(confidence)

    # 定義分類類別名稱和信心值
    class_names = ['black', 'grizzly', 'panda', 'polar', 'teddy']
    predicted_class = class_names[predicted_index]
    confidence = confidence[predicted_index]

    # 回傳分類類別名稱和信心值
    return {"predicted_class": predicted_class,
                    "confidence": round(float(confidence), 3)}

uvicorn.run(app)
async def:定義非同步函式(Asynchronous Function),可以在函式內使用 await 調用其他非同步函式,表示在等待某些操作,如網路請求時,可以繼續執行其他任務。UploadFile:FastAPI 用來處理文件上傳的類型。到終端機執行下列指令,your_image_path 換成自己的影像路徑:
curl -X POST "http://127.0.0.1:8000/predict/" -F "file=@your_image_path"
即將影像上傳到 http://127.0.0.1:8000/predict/ 這個頁面進行推論。
執行結果範例:
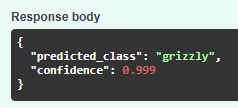
{"predicted_class":"grizzly","confidence":0.999}
得到上傳的影像推論結果和信心值。
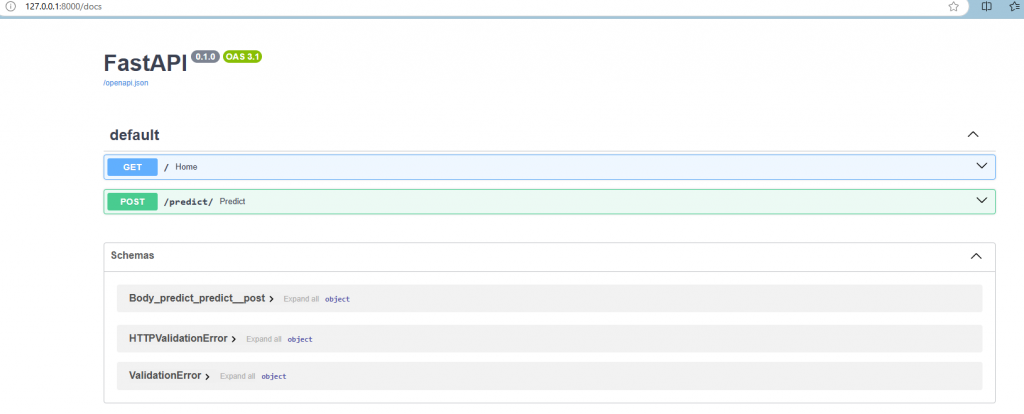
FastAPI 還有提供 Swagger UI 的 API 文件功能,在開發程式的過程中可以即時查看和測試 API,進入方法為切換到 docs 目錄(http://127.0.0.1:8000/docs ),頁面如下:
例如展開 POST 區塊,點選右側「Try it out」,在 Request body 的 file 上傳影像,點選下方的 Execute,就可以在 Responses 中的 Response body 看到推論結果:
這兩天分別介紹兩種網頁框架,可以依照需求去選擇使用,明天會介紹使用 UI 方式來部署模型,畫面會更加靈活!
