
那我們接續昨天OpenAI API的介紹與API KEY的申請後,今天就直接切入正題吧 !!
application.properties新增以下設定openai.model=gpt-3.5-turbo
openai.api.url=https://api.openai.com/v1/chat/completions
openai.api.key={YOUR OPENAI API KEY}
我們從底下的範例就可以看到,我們如果需要發Request去問這支API的時候,需要利用Bearer的方式帶上自己的OPENAI_API_KEY
curl https://api.openai.com/v1/chat/completions \
  -H "Content-Type: application/json" \
  -H "Authorization: Bearer $OPENAI_API_KEY" \
  -d '{
     "model": "gpt-3.5-turbo",
     "messages": [{"role": "user", "content": "Say this is a test!"}],
     "temperature": 0.7
   }'
由上面範例可以看到我們需要戴上OPENAI_API_KEY去發送請求,所以我們就來新增一個Config來加上我們的金鑰
@Value去讀到application.properties設定的openai.api.key@Qualifier可以用來指定注入的@Bean的名字,可以避免同時有兩個同樣類型的Bean存在的問題import org.springframework.beans.factory.annotation.Qualifier;
import org.springframework.beans.factory.annotation.Value;
import org.springframework.context.annotation.Bean;
import org.springframework.context.annotation.Configuration;
import org.springframework.web.client.RestTemplate;
@Configuration
public class ChatGPTConfig {
@Value("${openai.api.key}")
private String apiKey;
@Bean
@Qualifier("openaiRestTemplate")
RestTemplate restTemplate() {
RestTemplate restTemplate = new RestTemplate();
restTemplate.getInterceptors().add((request, body, execution) -> {
request.getHeaders().add("Authorization", "Bearer " + apiKey);
return execution.execute(request, body);
});
return restTemplate;
}
我們依照官網教學的範例,來新增對應的Model來去接資料
{
    "id": "chatcmpl-abc123",
    "object": "chat.completion",
    "created": 1677858242,
    "model": "gpt-3.5-turbo",
    "usage": {
        "prompt_tokens": 13,
        "completion_tokens": 7,
        "total_tokens": 20,
        "completion_tokens_details": {
            "reasoning_tokens": 0
        }
    },
    "choices": [
        {
            "message": {
                "role": "assistant",
                "content": "\n\nThis is a test!"
            },
            "logprobs": null,
            "finish_reason": "stop",
            "index": 0
        }
    ]
}
@Data
@Builder
@NoArgsConstructor
@AllArgsConstructor
public class ChatRequest {

    private String model;
    private List<Message> messages;
    private int n;
    private double temperature;

    public ChatRequest(String model, String prompt) {
        this.model = model;

        this.messages = new ArrayList<>();
        this.messages.add(new Message("user", prompt));
    }
}
-----------------------------------------------------------
@Data
@AllArgsConstructor
@NoArgsConstructor
public class ChatResponse {

    private List<Choice> choices;

    @Data
    @AllArgsConstructor
    @NoArgsConstructor
    public static class Choice {
        private int index;
        private Message message;
    }
}
----------------------------------------------------------
@Data
@NoArgsConstructor
@AllArgsConstructor
public class Message {

    private String role;
    private String content;

}
@Value來讀取設定值,另外注入我們在config設定的openaiRestTemplate來藉此發送請求restTemplate.postForObject(apiUrl, request.build(), ChatResponse.class);來發送請求跟接回Response@RestController
@RequestMapping("/api/v1")
@Slf4j
public class ChatAPIController {
@Qualifier("openaiRestTemplate")
@Autowired
private RestTemplate restTemplate;
@Value("${openai.model}")
private String model;
@Value("${openai.max-completions}")
private int maxCompletions;
@Value("${openai.temperature}")
private double temperature;
@Value("${openai.api.url}")
private String apiUrl;
@PostMapping("/chat")
public ChatResponse chat(@RequestParam("prompt") String prompt) {
/* Initialize variables */
ChatResponse chatResponse = null;
List<Message> ChatMessages = new ArrayList<>();
ChatRequest.ChatRequestBuilder request = ChatRequest.builder();
try {
/* Add user prompt to chat messages */
ChatMessages.add(new Message("user", prompt));
/* Build chat request */
request
.model(model)
.messages(ChatMessages)
.n(maxCompletions)
.temperature(temperature);
/* Send chat request */
chatResponse = restTemplate.postForObject(apiUrl, request.build(), ChatResponse.class);
} catch (Exception e) {
log.error("error : {}", e.getMessage());
}
return chatResponse;
}
}
接著我們就來用PostMan試試看吧 !!!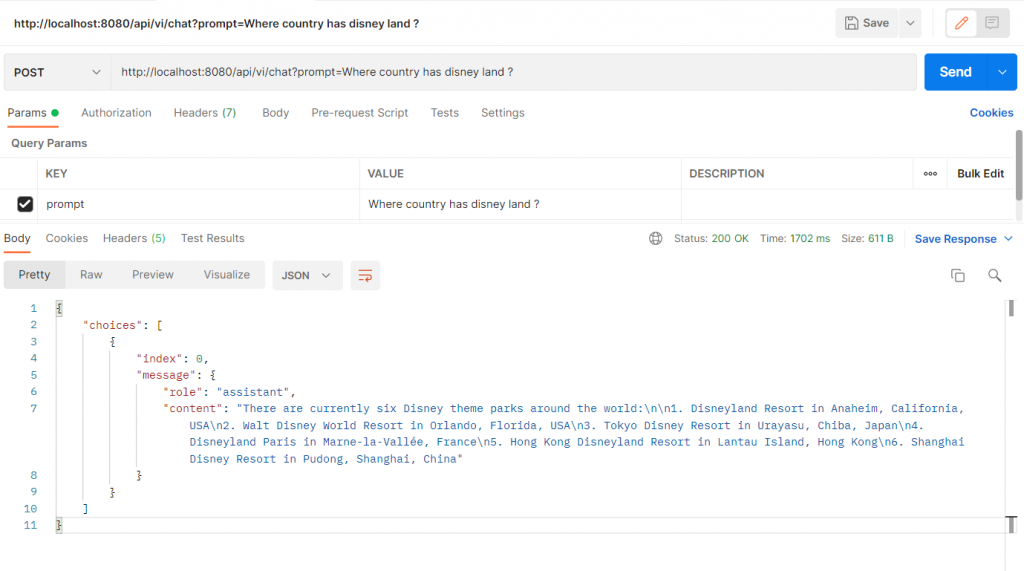
我們整合了Spring boot來使用OpenAI API,讓我們讓自己撰寫的應用程式更輕鬆的使用AI功能,今天的範例是使用Chat相關的API,大家有機會不仿也可以試試看Image API ....相關應用吧 
