Greetings~ 鐵匠史密斯在此,
前十天我們奠定了畫面、玩家、地圖等基礎後,終於要進入重頭戲 - Ray Casting
還記得Day 9 的 screen 以及 AoV 的對應關係圖嗎?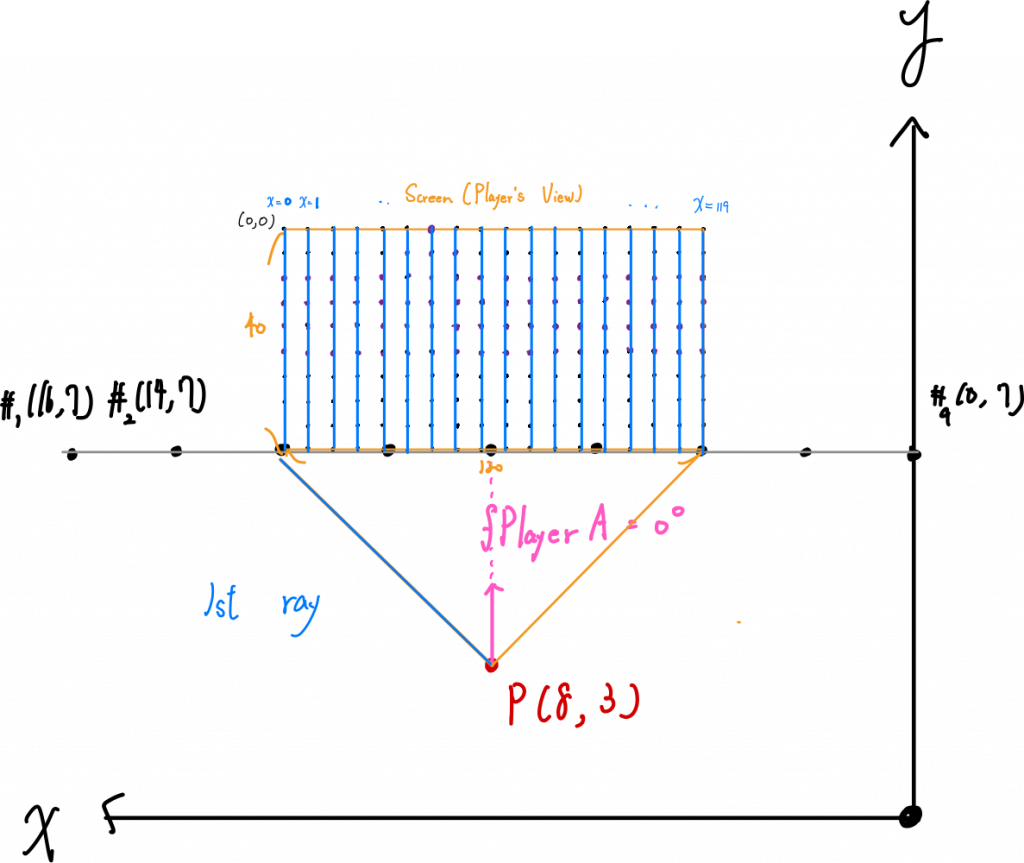
我們知道: screen 有幾行,我們玩家的人眼就要射出幾道光,直到牆壁為止
接下來,我們從第一道光開始解析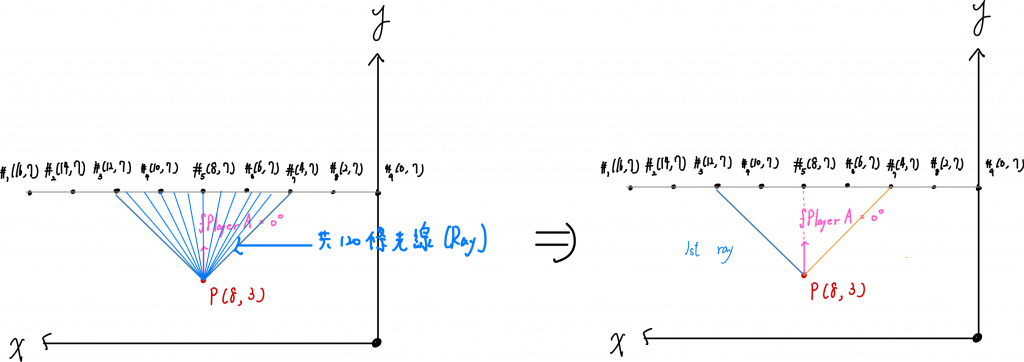
我們再近看一下我們的 screen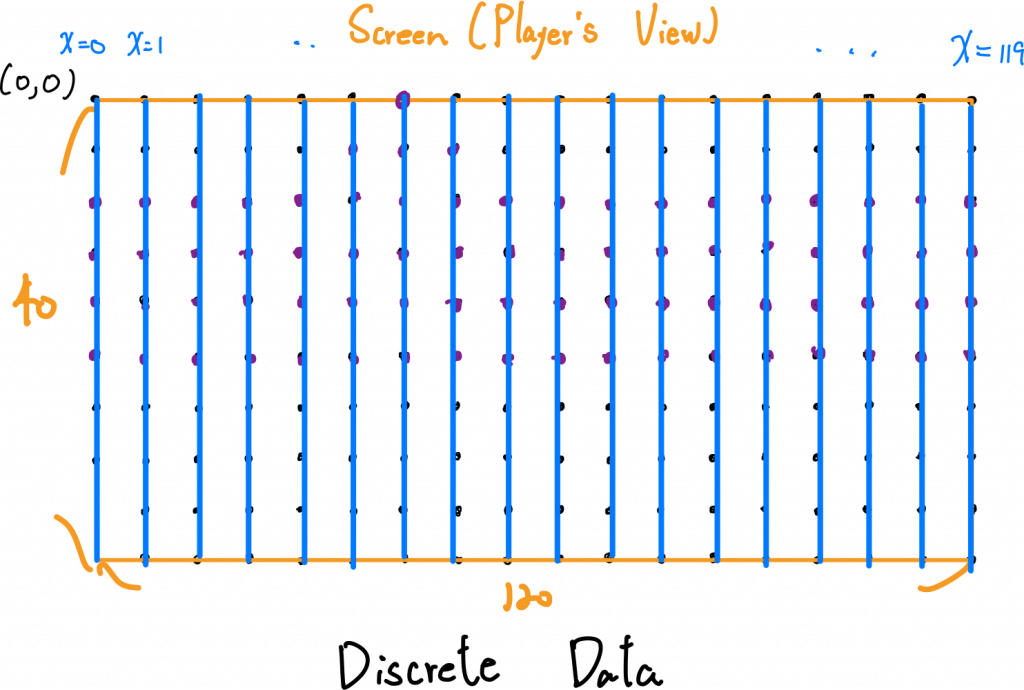
已知目前 screen 有 120 行,我們需要算共 120 道光
這 120 道光是由玩家的視野範圍AOV = 45 [degree] 所看出的景象。
我們已玩家的方向fPlayer = 0 為中心,左右視角分為正/負
最左半邊為 -AOV/2,最右半邊為 AOV/2
所以,第一道光,其角度為 -22.5 [degree]
並依照比例: screen有幾等分 -> AOV 就要切為幾等分
往順時鐘陸續地增加 x * AOV/ScreenWidth [degree]
就得出:
// Axis going across the screen
for (int x = 0; x < nScreenWidth; x++)
{
    // for each column, calculate the projected ray angle into the world space
    float fRayAngle{ (fPlayerA - fAOV / 2.0f) + ((float)x /(float)nScreenWidth) * fAOV };
}
其中 (float) 是做型別轉換,因為 x 以及 nSreenWidth 初始化均為 int,如果兩個整數相除,其結果也會轉成整數(捨棄小數點),我們需要避免整數除法
3 / 10 // 結果是 0,不是 0.3
計算公式以及示意圖如下圖所示: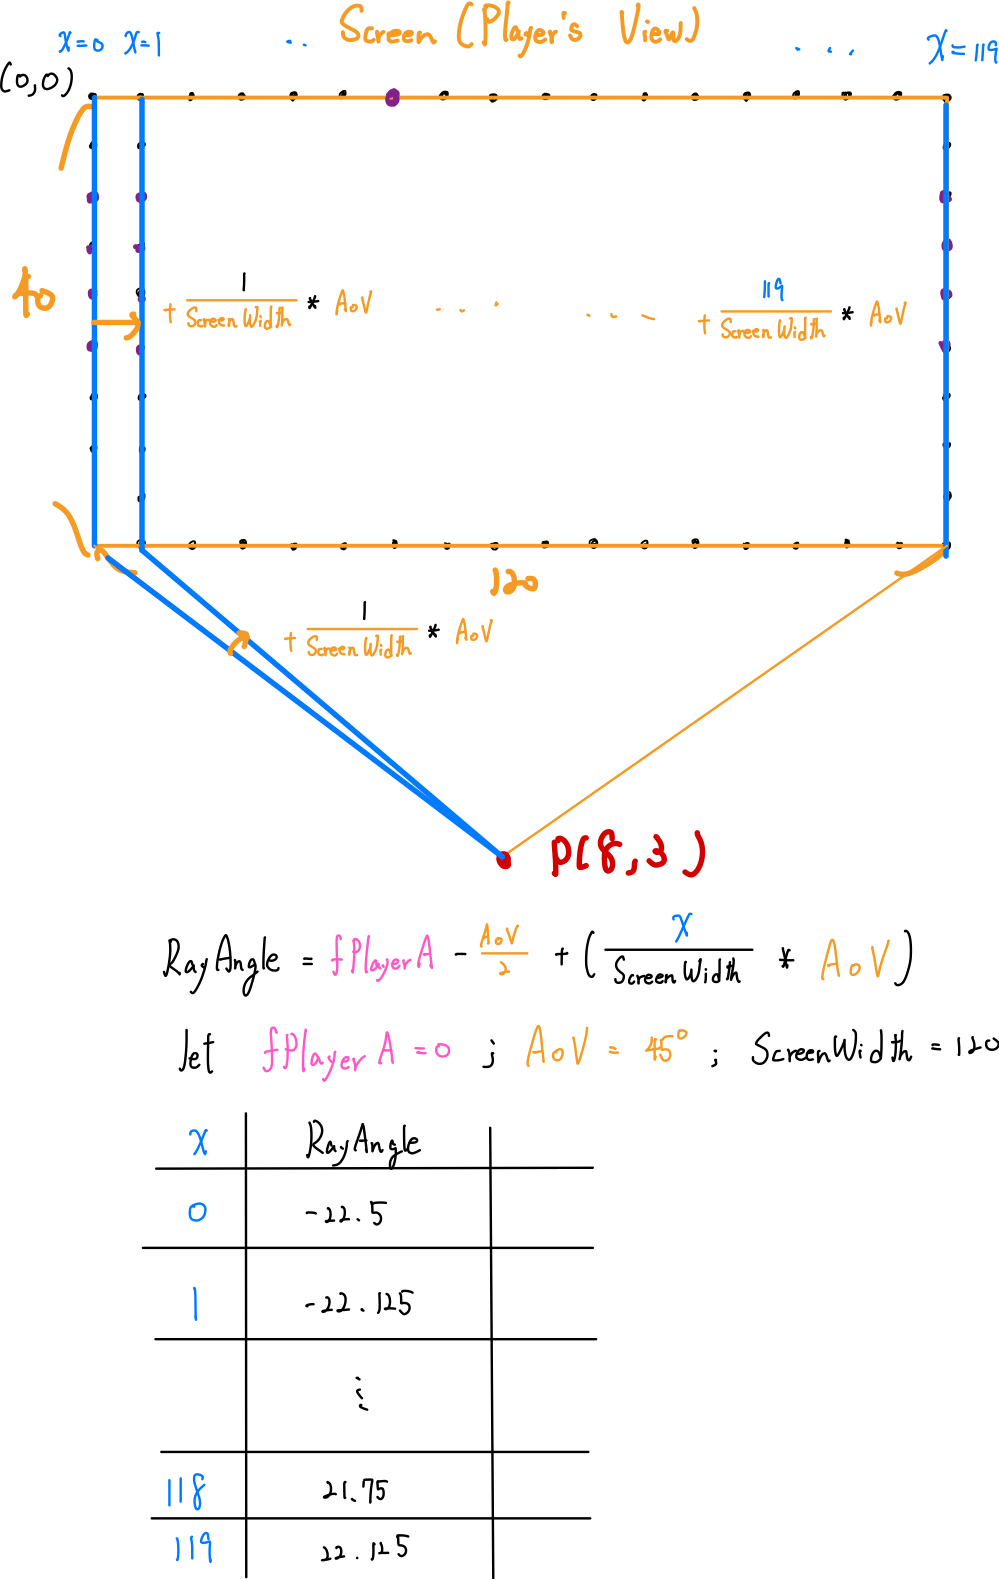
screen 的寬度決定了要發射幾條光線screen 分幾等分, AOV 就分幾等份fPlayerA - AOV/2 開始,依序增加今日我們知道了如何計算玩家射出至牆壁的光的角度,明日會推導光如何一步一步地測試玩家以及牆壁之間的距離
目前的code 如下:
#include <iostream>
#include <Windows.h>
#include <string>
using namespace std;

int nMapWidth { 16 };
int nMapHeight { 16 };

float fPlayerX{ 8.0f };
float fPlayerY{ 3.0f };
float fPlayerA{ 0.0f }; // Player angle in radians

float fAOV{ 3.14159f / 4.0f }; // Angle of view in radians

int main()
{
    const int nScreenWidth { 120 };
    const int nScreenHeight { 40 };

    // Create the canvas
    wchar_t* screen{ new wchar_t[nScreenWidth * nScreenHeight] };
    // Create elements in screen
    for (int i = 0; i < nScreenWidth * nScreenHeight; i++)
    {
        if (i < 1200)
            screen[i] = L' ';
        else
            screen[i] = L'%';
    }
    screen[nScreenWidth * nScreenHeight - 1] = '\0'; // null terminator


    // Create console handler (custom screen buffer)
    HANDLE hConsole{ CreateConsoleScreenBuffer(
        GENERIC_READ | GENERIC_WRITE, 0, NULL, CONSOLE_TEXTMODE_BUFFER, NULL) };
    // Set Active Screen Buffer so that console will show this buffer first
    SetConsoleActiveScreenBuffer(hConsole);
    DWORD dwBytesWritten{ 0 };


    // Create world map
    std::wstring map{};

    map += L"################";
    map += L"#..............#";
    map += L"#..............#";
    map += L"#..............#";
    map += L"#..............#";
    map += L"#..............#";
    map += L"#..............#";
    map += L"#..............#";
    map += L"#..............#";
    map += L"#..............#";
    map += L"#..............#";
    map += L"#..............#";
    map += L"#..............#";
    map += L"#..............#";
    map += L"#..............#";
    map += L"################";

    while (true) {
        // Axis going across the screen
        for (int x = 0; x < nScreenWidth; x++)
        {
            // for each column, calculate the projected ray angle into the world space
            float fRayAngle{ (fPlayerA - fAOV / 2.0f) + ((float)x / (float)nScreenWidth) * fAOV };
        }
        // Write cavas into console to show screen
        WriteConsoleOutputCharacter(hConsole, screen, nScreenWidth * nScreenHeight, { 0,0 }, &dwBytesWritten);
    }
    return 0;

}
還有幾里路,
我們繼續走下去~

