題外話時間:我以為可以連續寫兩天,然後隔天就不用寫..
結果就是我鐵人賽斷了..好好笑
接續 Day 3:英雄已經把「樹」寫進日記(commit),現在他的冒險記錄已經安全存檔。
接下來,英雄需要招募會自己動的隊友,讓他們在背後幫忙巡邏、測試、建置、部署,這樣英雄才能專注於更大的挑戰。
Github Actions's Docs
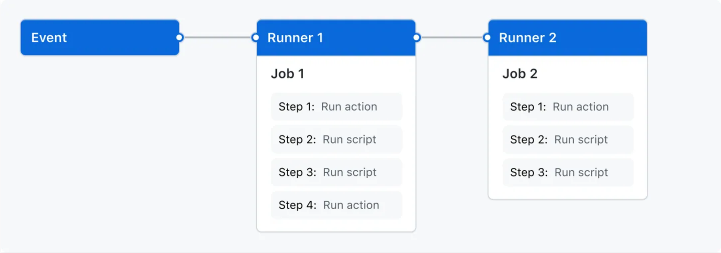
記法口訣:「誰觸發 → 在哪跑 → 做什麼 → 產出給誰 → 誰准上線」
Triggers → Runners → Steps → Artifacts/SARIF → Environments/Approvals
push/PR 就自動建置、測試、Lint,保護主線。on: push、on: pull_request(可加 schedule 夜巡)。負責:在 CI 裡掃壞蛋,PR 直接標行數。
分工:
npm audit
你會看到:PR 上的警告泡泡、Code scanning alerts(靠 SARIF 上傳)。
push、手動 workflow_dispatch、或接在 CI 後用 needs:。push、pull_request、schedule(cron)、workflow_dispatch(手動)、paths/paths-ignore(只盯特定路徑)。ubuntu-latest / windows-latest / macos-latest 或 self-hosted(需要 GPU/內網)。strategy.matrix 一次測多版本(如 Node 18/20)。dist/、測試報告、ZAP 報告、SARIF 打包,交下一站或留檔。npm ci 最穩。staging/production 分流、人工核准、最小權限。pages: write/id-token: write(OIDC 免長期金鑰)。到 GitHub 右上角 New repository
superhero-base(或你的專案名)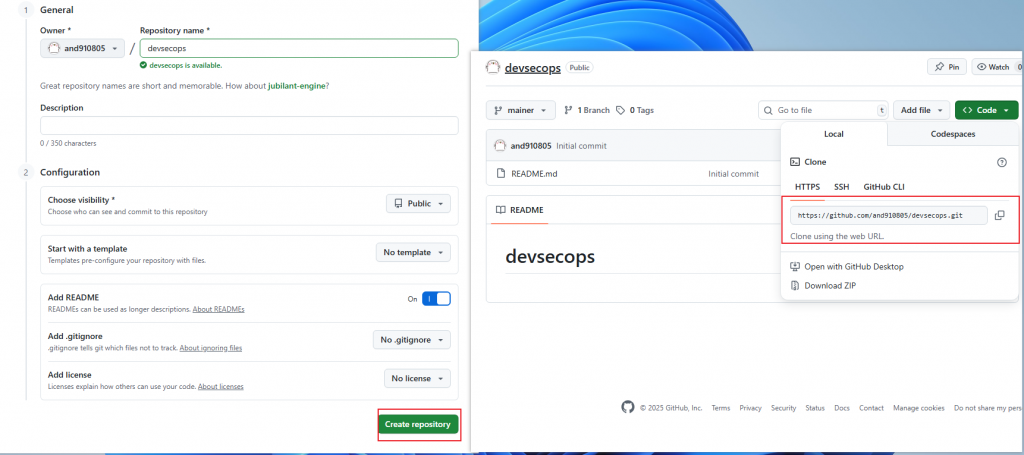
接續Day 3的英雄冒險,我們現在要將本地的冒險記錄與遠端總部同步,讓英雄的隊友也能加入。
Windows PowerShell or Git Bash
cd $HOME\Desktop #看你要在哪個資料夾
git clone https://github.com/<你的帳號>/<你的 repo 名>.git
cd <你的 repo 名>
git status
macOS / Linux
cd ~/Desktop #看你要在哪個資料夾
git clone https://github.com/<你的帳號>/<你的 repo 名>.git
cd <你的 repo 名>
git status
看到
On branch main(或master)就表示這裡已是 Git 專案(有.git)。現在我們來擴大冒險,把一個簡單的網站頁面放進去,讓英雄的隊友幫忙檢查和部署。
hint:
index.html是檔案,不是資料夾。為了乾淨,我們把網站檔放在site/目錄,再部署那個資料夾。
site/index.htmlWindows PowerShell
# 在 repo 根目錄執行
New-Item -ItemType Directory -Path site -Force | Out-Null
@"
<!doctype html>
<html lang="zh-Hant">
  <head>
    <meta charset="utf-8"/>
    <meta name="viewport" content="width=device-width,initial-scale=1"/>
    <title>英雄基地</title>
  </head>
  <body style="font-family: system-ui; padding: 2rem;">
    <h1>Hero Base</h1>
    <p>test:第一個頁面 </p>
  </body>
</html>
"@ | Set-Content -Path site/index.html -Encoding UTF8
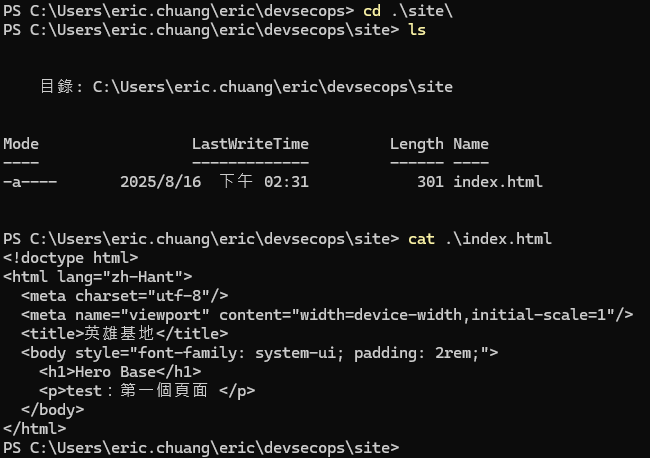
先確認:
- 檔案都放在「專案根目錄」底下,不要進
.git/建任何東西。- 只保留「自己寫的」部署流程;若 GitHub 自動產生
pages-build-deployment.yml,請刪掉,避免推一次跑三個流程。- Repo → Settings → Actions → General:允許 GitHub Actions。
- Repo → Settings → Pages → Build and deployment:Source = GitHub Actions。
每次 push/PR,確認 site/index.html 存在,再用 tidy 做基本 HTML 語法檢查。
建立 .github/workflows/ci.yml:
name: Hero CI (static)

on:
  push:
    branches: [ "main" ]        # ← 你的分支不是 main 就改這裡
  pull_request:
    branches: [ "main" ]
  workflow_dispatch:

jobs:
  validate:
    runs-on: ubuntu-latest
    permissions:
      contents: read
    steps:
      - name: Checkout
        uses: actions/checkout@v4

      - name: 確認 index.html 存在
        run: |
          test -f site/index.html || (echo "找不到 site/index.html"; exit 1)

      - name: HTML 語法檢查
        run: |
          sudo apt-get update
          sudo apt-get install -y tidy
          tidy -qe site/index.html
小提醒:
site/index.html至少要有一個標題或段落。
把 site/ 當作要發佈的網站根目錄。只要 CI 成功、推到主分支就自動部署。
建立 .github/workflows/deploy-pages.yml:
name: Deploy to GitHub Pages

on:
  push:
    branches: [ "main" ]        # ← 你的分支不是 main 就改這裡
  workflow_dispatch:

permissions:
  contents: read
  pages: write
  id-token: write

jobs:
  upload:
    runs-on: ubuntu-latest
    steps:
      - name: Checkout
        uses: actions/checkout@v4
      - name: 上傳 site 作為部署產物
        uses: actions/upload-pages-artifact@v3
        with:
          path: site              # 確保這裡指向 site/,且裡面有 index.html

  deploy:
    needs: upload
    runs-on: ubuntu-latest
    environment:
      name: github-pages         # URL 會自動帶入,這裡不用手填
    steps:
      - name: 部署到 Pages
        id: deploy
        uses: actions/deploy-pages@v4
注意:不要在
environment:裡加url: ${{ steps.deploy.outputs.page_url }}。這行會在 job 還沒跑前就引用輸出,容易出錯。GitHub 會自動把部署後的網址掛在 environment 上。
若尚未設定 Git 身分,先設定一次(全域):
git config --global user.name  "你的 GitHub 使用者名稱"
git config --global user.email "你的 GitHub 註冊 email"
只想在這個 repo 設定就把 --global 拿掉。
然後提交並推送到你的主分支(這裡以 main 為例):
git add .github/workflows/ci.yml .github/workflows/deploy-pages.yml site/index.html
git commit -m "add minimal CI and Pages deploy"
git push -u origin main
到 GitHub → Actions:
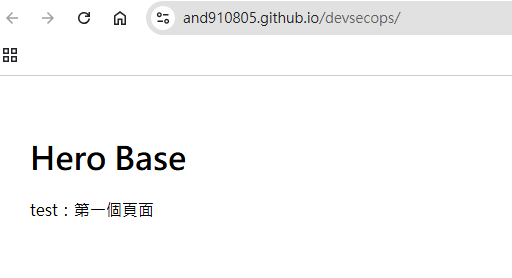
Hero CI (static) 執行並通過。Deploy to GitHub Pages 完成,最後一步會顯示網站 URL:https://<你的帳號>.github.io/<repo 名>/
你的主分支不是
main(例如master)的話,請把上面 YAML 和git push的分支名稱一起改掉。
部署出現 README 畫面而不是 index.html
site/ 裡沒 index.html,或另一個舊的 pages-build-deployment.yml 把 README 部署上去。site/index.html 存在;刪掉 .github/workflows/pages-build-deployment.yml;重新推送。Deploy 工作報 404:「Ensure GitHub Pages has been enabled」
environment.url 相關錯誤
environment: 欄位手動引用了 steps.deploy.outputs.page_url。url:,GitHub 會自動掛上部署網址。這次 push 觸發了三個 workflow
deploy-pages.yml、ci.yml,以及 GitHub 自動產生的 pages-build-deployment.yml。ci.yml 和 deploy-pages.yml。Git 無法 commit:「Please tell me who you are」
user.name / user.email。在 Git Bash 用 echo "<!-- redeploy -->" 報 event not found
! 觸發歷史展開。echo '<!-- redeploy -->' >> site/index.html,或 printf '%s\n' '<!-- redeploy -->' >> site/index.html。Windows 換行警告 LF will be replaced by CRLF
不是錯誤,可忽略。若想統一,可在 repo 放 .gitattributes:
* text=auto
*.yml  text eol=lf
*.html text eol=lf
Repo → Settings → Branches → Add rule(對你的主分支)
Hero CI (static)
搞定!


 iThome鐵人賽