今天本篇要以實作的程式碼,示範如何將已知的物件定位與尺寸資料,轉換為可在 BIM 軟體中開啟的 IFC 模型檔案的整個流程步驟。
首先,開啟Colab頁面:https://colab.research.google.com/ 並新增筆記本。
Step1:安裝ifcopenshell。
# 1.安裝ifcopenshell
!pip install ifcopenshell
Step2:匯入必要模組與輸出設定。
# 2.匯入必要模組與輸出設定
import ifcopenshell
import ifcopenshell.api
import numpy as np
from google.colab import drive

# 掛載 Google Drive(輸出檔案)
drive.mount('/content/drive')

# 設定輸出路徑(Colab 會存到 Google Drive)
OUTPUT_PATH = "/content/drive/MyDrive/demo_doors.ifc"

# 簡化示範預設類別
# ================================================
# 在真實應用中,這裡會讀取 YOLO 的標註檔案
# 並取得物件中心點座標 (cx, cy) 與分類編號
# ================================================
CLASS_DIM = {
    0: ("單開門", 90, 210),
    1: ("雙開門", 180, 210),
}
demo_detections = [
    (0, 1000, 2000),  # 單開門
    (1, 2500, 3000),  # 雙開門
    (0, 4000, 1500)   # 單開門
]
Step3:建立 IFC 專案結構。
# 3. 建立 IFC 專案結構(本程式僅為示例)
ifc = ifcopenshell.api.run("project.create_file")
project = ifcopenshell.api.run("root.create_entity", ifc, ifc_class="IfcProject", name="Demo_IFC_Project")
site = ifcopenshell.api.run("root.create_entity", ifc, ifc_class="IfcSite", name="Site")
building = ifcopenshell.api.run("root.create_entity", ifc, ifc_class="IfcBuilding", name="Building")
storey = ifcopenshell.api.run("root.create_entity", ifc, ifc_class="IfcBuildingStorey", name="Storey")
ifcopenshell.api.run("aggregate.assign_object", ifc, products=[site], relating_object=project)
ifcopenshell.api.run("aggregate.assign_object", ifc, products=[building], relating_object=site)
ifcopenshell.api.run("aggregate.assign_object", ifc, products=[storey], relating_object=building)

# 設定單位(公分)
length_unit = ifcopenshell.api.run("unit.add_si_unit", ifc, unit_type="LENGTHUNIT", prefix="CENTI")
ifcopenshell.api.run("unit.assign_unit", ifc, units=[length_unit])

# 幾何表示環境
context = ifcopenshell.api.run("context.add_context", ifc, context_type="Model")
body_ctx = ifcopenshell.api.run("context.add_context", ifc, context_type="Model",
                                context_identifier="Body", target_view="MODEL_VIEW", parent=context)
# 建立 IfcDoor
for idx, (class_id, cx, cy) in enumerate(demo_detections, start=1):
    name, door_w, door_h = CLASS_DIM[class_id]
    door = ifcopenshell.api.run("root.create_entity", ifc, ifc_class="IfcDoor", name=f"{name}_{idx}")

    # 位置(以中心點為基準)
    origin_x = cx - door_w / 2
    origin_y = cy
    origin_z = 0.0
    matrix = np.eye(4)
    matrix[0, 3] = origin_x
    matrix[1, 3] = origin_y
    matrix[2, 3] = origin_z
    ifcopenshell.api.run(
        "geometry.edit_object_placement", ifc,
        product=door, matrix=matrix, is_si=False,
        should_transform_children=True
    )

    # 幾何外型
    rep = ifcopenshell.api.run("geometry.add_door_representation", ifc, context=body_ctx,
                               overall_height=door_h, overall_width=door_w)
    if rep:
        ifcopenshell.api.run("geometry.assign_representation", ifc, product=door, representation=rep)

    # 加入樓層與屬性
    ifcopenshell.api.run("spatial.assign_container", ifc, relating_structure=storey, products=[door])
    pset = ifcopenshell.api.run("pset.add_pset", ifc, product=door, name="DoorDimensions")
    ifcopenshell.api.run("pset.edit_pset", ifc, pset=pset, properties={
        "Width": door_w,
        "Height": door_h
    })
Step4:儲存 IFC。
# 4. 儲存 IFC
ifc.write(OUTPUT_PATH)
print(f"✅  IFC 已輸出到 Google Drive: {OUTPUT_PATH}")
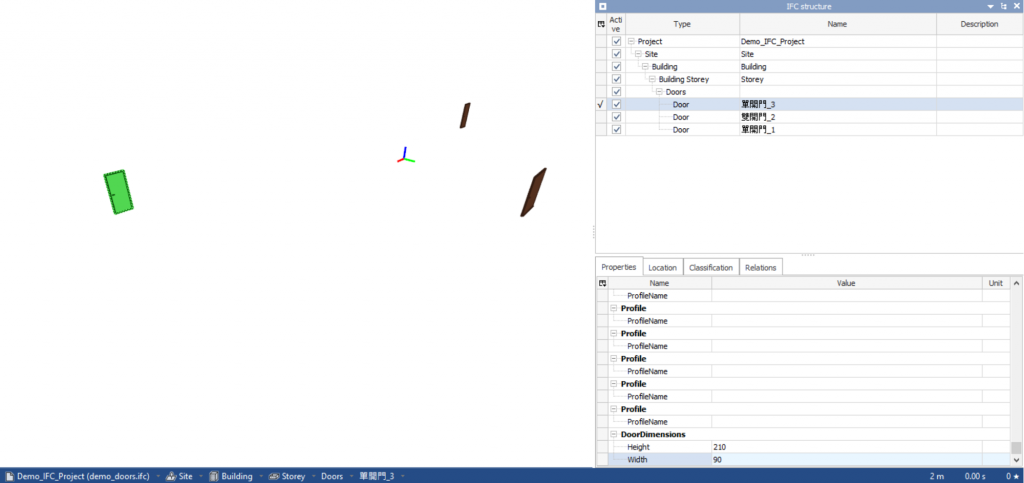
圖20.1 門物件偵測示範成果圖(測試資料)
前一節是以測試資料所呈現的成果,而以下示範圖片則是採用我實際以 YOLO 偵測建築平面圖所獲得的成果。不過程式碼較為冗長,僅顯示 YOLO 偵測結果自動化轉換的結果,但整體IFC建構流程概念都是與示例相同的。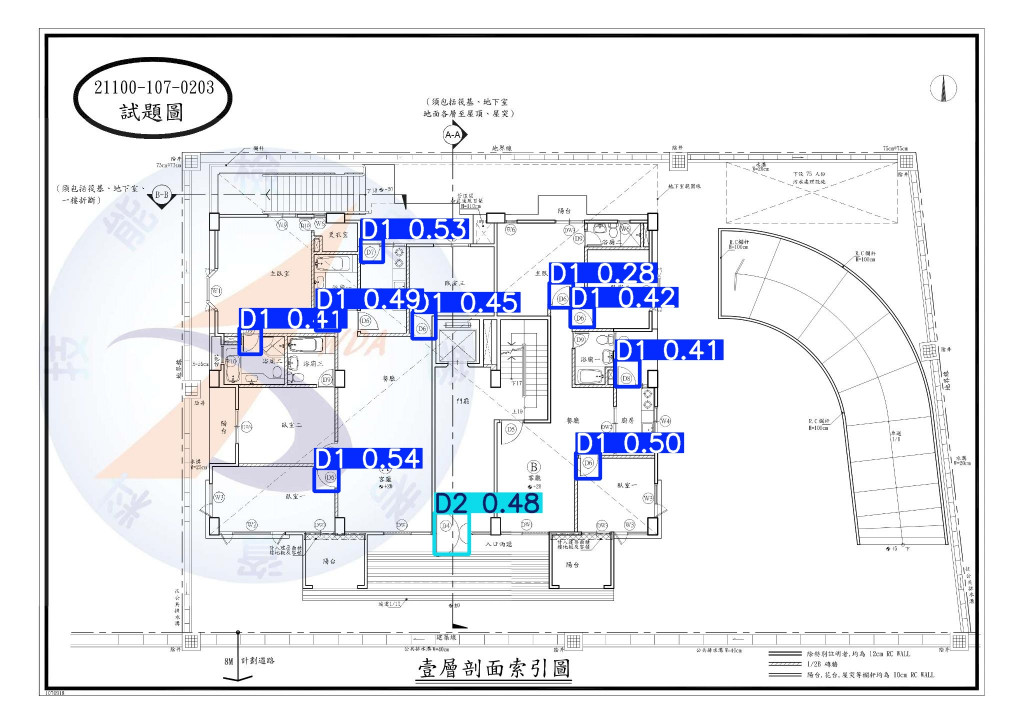
圖20.2 門物件偵測案例成果圖(YOLO 預測平面圖)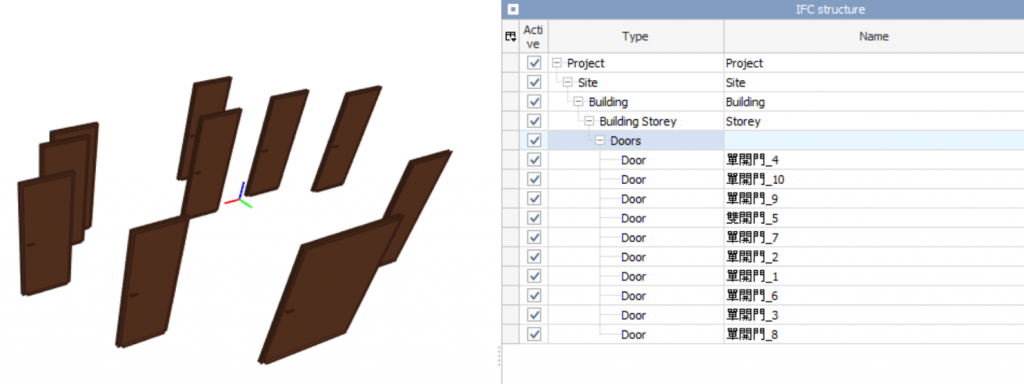
圖20.3 門物件偵測案例成果圖(YOLO 轉 IFC 實測)
今天透過實際的案例,從YOLO預測結果輸入資料,再到輸出可在 BIM 軟體中開啟的 IFC 模型檔案的基本流程。雖然本案例採用了簡化的測試資料,實務專案中的真實資料處理與自動化轉換往往更為複雜,但核心概念與流程相同。這也進一步驗證了自動化建模在建築資訊數據流中的可行性與發展潛力。
下一篇,我們繼續來看如何將文字辨識結果也納入BIM模型資訊中,待續…

