| 元件 | 最低建議版本 |
|---|---|
| 作業系統 | Ubuntu 22.04 / 24.04 LTS 以上或 Debian 11 / 12 以上 |
| Web 伺服器 | Apache2 |
| 資料庫 | MariaDB 10.11 |
| PHP | PHP 8.3 以上 |
Apache 服務sudo apt -y install apache2
Apache 服務sudo systemctl enable --now apache2
apt install -y apt-transport-https lsb-release ca-certificates wget
wget -O /etc/apt/trusted.gpg.d/php.gpg https://packages.sury.org/php/apt.gpg
echo "deb https://packages.sury.org/php/ $(lsb_release -sc) main" > /etc/apt/sources.list.d/sury-php.list && apt update
sudo apt -y install re2c gcc curl libapache2-mod-php8.3 php8.3 php8.3-{mysqlnd,pdo,xml,mbstring,fpm,mysql,gd,cli,opcache,curl,ldap,odbc,xmlrpc,soap,intl,zip,common,imap,bz2}
vim /etc/php/8.3/cli/php.ini 設定檔修改前
;cgi.fix_pathinfo=1
修改後
cgi.fix_pathinfo=0
修改時區
[Date]
修改前
;date.timezone =
修改後
date.timezone = Asia/Taipei
; 記憶體用量上限
memory_limit = 512M
; Script執行時間上限(單位:秒)
max_execution_time = 600
; Script處理資料時間上限(單位:秒)
max_input_time = 600
; Socket無回應斷線時間(單位:秒)
default_socket_timeout = 600
# 指令修改
sed -i "s|^;cgi.fix_pathinfo=1.*$|cgi.fix_pathinfo=0|" /etc/php/8.3/cli/php.ini
sed -i "s|^;cgi.fix_pathinfo=1.*$|cgi.fix_pathinfo=0|" /etc/php/8.3/apache2/php.ini
sed -i "s|^;date.timezone =.*$|date.timezone = Asia/Taipei|" /etc/php/8.3/cli/php.ini
sed -i "s|^;date.timezone =.*$|date.timezone = Asia/Taipei|" /etc/php/8.3/apache2/php.ini
sed -i "s|^upload_max_filesize = 2M.*$|upload_max_filesize = 1024M|" /etc/php/8.3/cli/php.ini
sed -i "s|^upload_max_filesize = 2M.*$|upload_max_filesize = 1024M|" /etc/php/8.3/apache2/php.ini
sed -i "s|^post_max_size = 8M.*$|post_max_size = 1024M|" /etc/php/8.3/cli/php.ini
sed -i "s|^post_max_size = 8M.*$|post_max_size = 1024M|" /etc/php/8.3/apache2/php.ini
sed -i "s|^memory_limit = 128M.*$|memory_limit = 512M|" /etc/php/8.3/cli/php.ini
sed -i "s|^memory_limit = 128M.*$|memory_limit = 512M|" /etc/php/8.3/apache2/php.ini
sed -i "s|^max_execution_time = 30.*$|max_execution_time = 600|" /etc/php/8.3/cli/php.ini
sed -i "s|^max_execution_time = 30.*$|max_execution_time = 600|" /etc/php/8.3/apache2/php.ini
sed -i "s|^max_input_time = 60.*$|max_input_time = 600|" /etc/php/8.3/cli/php.ini
sed -i "s|^max_input_time = 60.*$|max_input_time = 600|" /etc/php/8.3/apache2/php.ini
sed -i "s|^default_socket_timeout = 60.*$|default_socket_timeout = 600|" /etc/php/8.3/cli/php.ini
sed -i "s|^default_socket_timeout = 60.*$|default_socket_timeout = 600|" /etc/php/8.3/apache2/php.ini
sudo apt-get install apt-transport-https curl -y
sudo mkdir -p /etc/apt/keyrings
sudo curl -o /etc/apt/keyrings/mariadb-keyring.pgp 'https://mariadb.org/mariadb_release_signing_key.pgp'
vim /etc/apt/sources.list.d/mariadb.sources
# MariaDB 10.11 repository list - created 2024-07-19 03:27 UTC
# https://mariadb.org/download/
X-Repolib-Name: MariaDB
Types: deb
# deb.mariadb.org is a dynamic mirror if your preferred mirror goes offline. See https://mariadb.org/mirrorbits/ for details.
# URIs: https://deb.mariadb.org/10.11/debian
URIs: https://ftp.ubuntu-tw.org/mirror/mariadb/repo/10.11/debian
Suites: bookworm
Components: main
Signed-By: /etc/apt/keyrings/mariadb-keyring.pgp
sudo apt-get update && sudo apt-get install mariadb-server -y
sudo systemctl enable --now mariadb
mariadb-secure-installation 那 MariaDB 10.4 以下還是可以用 mysql_secure_installation 來執行, MaridDB 官方說明
mariadb-secure-installation   # 設定資料庫的root密碼

NOTE: RUNNING ALL PARTS OF THIS SCRIPT IS RECOMMENDED FOR ALL MariaDB
      SERVERS IN PRODUCTION USE!  PLEASE READ EACH STEP CAREFULLY!

In order to log into MariaDB to secure it, we'll need the current
password for the root user. If you've just installed MariaDB, and
haven't set the root password yet, you should just press enter here.

Enter current password for root (enter for none):
OK, successfully used password, moving on...

Setting the root password or using the unix_socket ensures that nobody
can log into the MariaDB root user without the proper authorisation.

You already have your root account protected, so you can safely answer 'n'.

Switch to unix_socket authentication [Y/n]    <----- 直接按下 enter 鍵
Enabled successfully!
Reloading privilege tables..
 ... Success!


You already have your root account protected, so you can safely answer 'n'.

Change the root password? [Y/n]               <----- 直接按下 enter 鍵
New password:                                 <----- 輸入 root 密碼
Re-enter new password:                        <----- 再次輸入 root 密碼
Password updated successfully!
Reloading privilege tables..
 ... Success!


By default, a MariaDB installation has an anonymous user, allowing anyone
to log into MariaDB without having to have a user account created for
them.  This is intended only for testing, and to make the installation
go a bit smoother.  You should remove them before moving into a
production environment.

Remove anonymous users? [Y/n]
 ... Success!

Normally, root should only be allowed to connect from 'localhost'.  This
ensures that someone cannot guess at the root password from the network.

Disallow root login remotely? [Y/n]
 ... Success!

By default, MariaDB comes with a database named 'test' that anyone can
access.  This is also intended only for testing, and should be removed
before moving into a production environment.

Remove test database and access to it? [Y/n]
 - Dropping test database...
 ... Success!
 - Removing privileges on test database...
 ... Success!

Reloading the privilege tables will ensure that all changes made so far
will take effect immediately.

Reload privilege tables now? [Y/n]
 ... Success!

Cleaning up...

All done!  If you've completed all of the above steps, your MariaDB
installation should now be secure.

Thanks for using MariaDB!
MariaDB root 可空白登入問題排除
use mysql;

select user, plugin from user;
如果查出來結果是 unix_socket 就要修改模式
修改為 mysql_native_password
ALTER USER root@localhost IDENTIFIED VIA mysql_native_password;
SET PASSWORD = PASSWORD("password");
mariadb -u root -p
CREATE DATABASE ocsweb CHARACTER SET utf8mb4 COLLATE utf8mb4_unicode_ci;
GRANT ALL PRIVILEGES ON ocsweb.* TO 'ocs'@'localhost' IDENTIFIED BY 'New-Password';  <----要修改 New-Password 密碼
FLUSH PRIVILEGES;
sudo apt -y install perl libxml-simple-perl libcompress-zlib-perl libdbi-perl libdbd-mysql-perl libnet-ip-perl libsoap-lite-perl libio-compress-perl libapache-dbi-perl libapache2-mod-perl2 libapache2-mod-perl2-dev libdbd-mysql-perl libnet-ip-perl libxml-simple-perl libarchive-zip-perl libapache-db-perl

sudo cpan install XML::Entities Apache2::SOAP Net::IP Apache::DBI Mojolicious Switch Plack::Handler Archive::Zip
OCS 金鑰curl -sS http://deb.ocsinventory-ng.org/pubkey.gpg | sudo apt-key add -
echo "deb http://deb.ocsinventory-ng.org/debian/ $(lsb_release -sc) main" | sudo tee /etc/apt/sources.list.d/ocsinventory.list
OCS 服務sudo apt update && sudo apt install ocsinventory-server -y
2.12.3,以照當時所下載新版為主。wget https://github.com/OCSInventory-NG/OCSInventory-ocsreports/releases/download/2.12.3/OCSNG_UNIX_SERVER-2.12.3.tar.gz
tar -xvzf OCSNG_UNIX_SERVER-*.tar.gz
cd OCSNG_UNIX_SERVER-2.12.3
mkdir -p /var/www/html
./setup.sh
# 預設路徑如下,必要修改到其他路徑這是給 web 服務用的,不然無法連線或者修改設定檔
Where to copy Administration Server static files for PHP Web Console
[/usr/share/ocsinventory-reports]?

# 這是修改後給予的路徑
Where to copy Administration Server static files for PHP Web Console
[/usr/share/ocsinventory-reports]?/var/www/html
enter 鍵到跟上面文字一樣時要注意一下,請修改成自己常放用的 WEB 目錄位飛略過
+----------------------------------------------------------+
| Checking for Administration Server directories... |
+----------------------------------------------------------+
略過
Where to copy Administration Server static files for PHP Web Console
[/usr/share/ocsinventory-reports] ?/var/www/html <------ 修改 PHP 目錄位置
OK, using directory /var/www/html to install static files ;-)
略過
+----------------------------------------------------------------------+
| OK, Administration server installation finished ;-) |
| |
| Please, review /etc/apache2/conf-available/ocsinventory-reports.conf |
| to ensure all is good and restart Apache daemon. |
| |
| Then, point your browser to http://server//ocsreports |
| to configure database server and create/update schema. |
+----------------------------------------------------------------------+
Setup has created a log file /root/OCSNG_UNIX_SERVER-2.12.3/ocs_server_setup.log. Please, save this file.
If you encounter error while running OCS Inventory NG Management server,
we can ask you to show us its content !
DON'T FORGET TO RESTART APACHE DAEMON !
Enjoy OCS Inventory NG ;-)
# 注意剛剛如果有修改路徑的話,後面的路徑要指向剛剛你所設定的路徑
chmod -R 766 /var/www/html/ocsreports

# 只給 apache 服務使用,路徑要注意如有修改記得要改
chown -R www-data:www-data /var/www/html/ocsreports
# 此路徑不用改,因為是預設
chown -R www-data:www-data /var/lib/ocsinventory-reports/

# 注意剛剛如果有修改路徑的話,後面的路徑要指向剛剛你所設定的路徑
chcon -R -t httpd_sys_rw_content_t /var/www/html/ocsreports
Apache 服務systemctl restart apache2
http://<IP或主機名稱>/ocsreports (站台位置)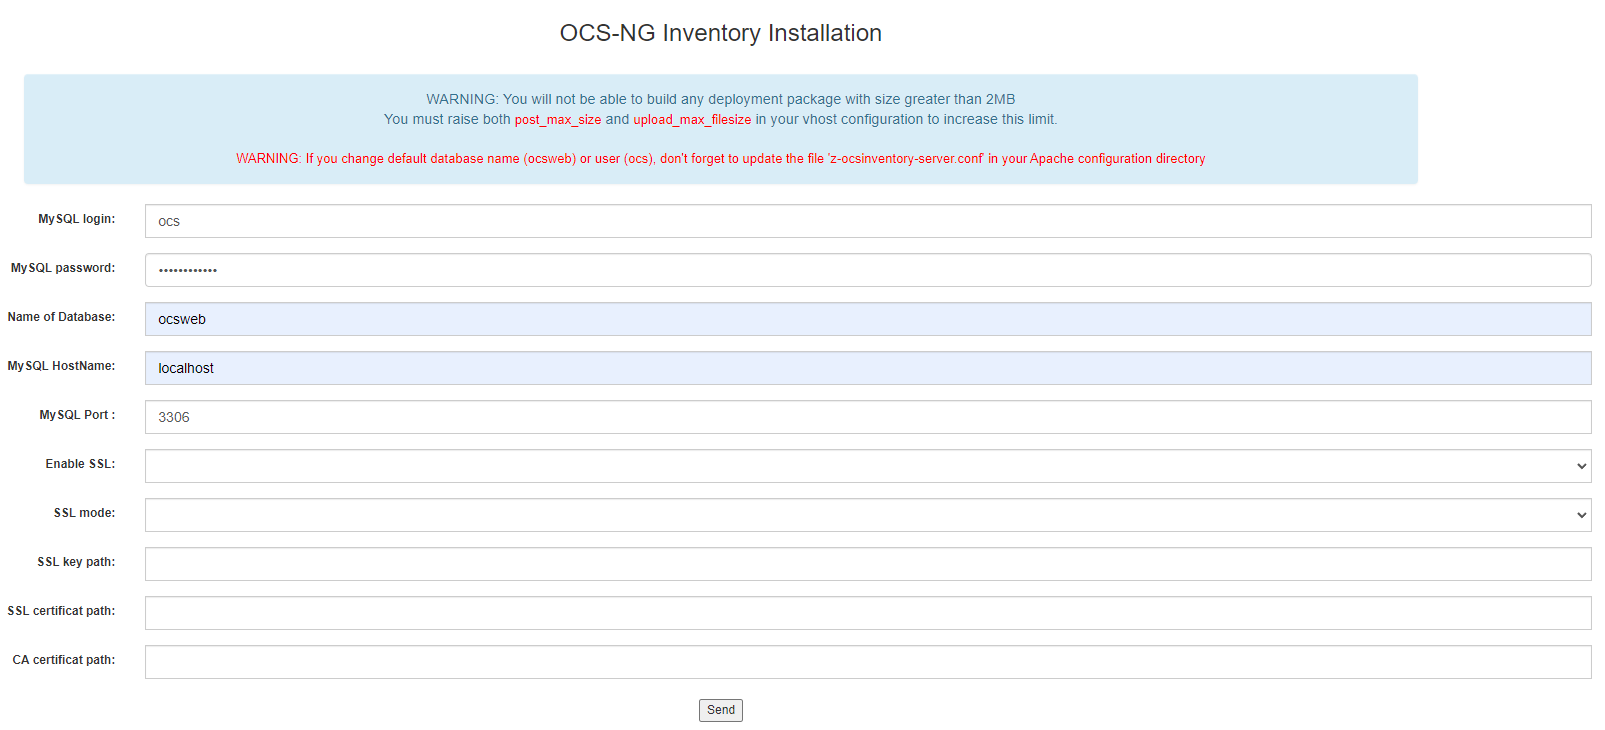
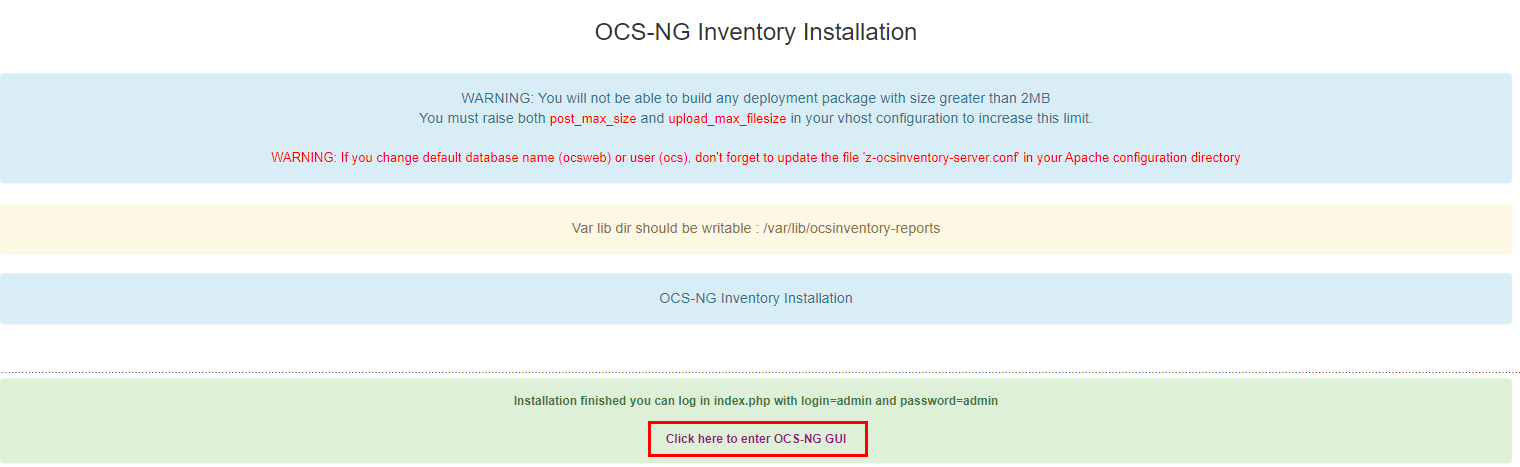
Click here to enter OCS-NG GUI
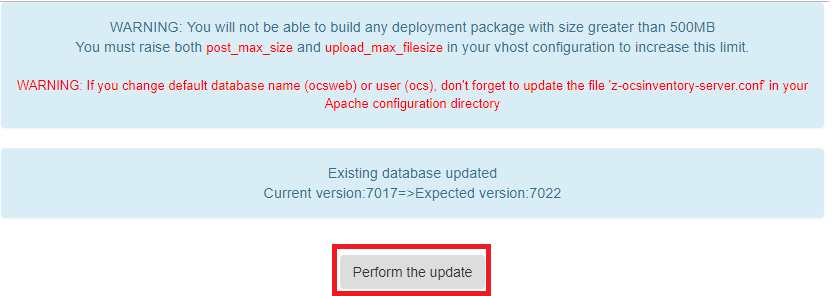
Perform the update
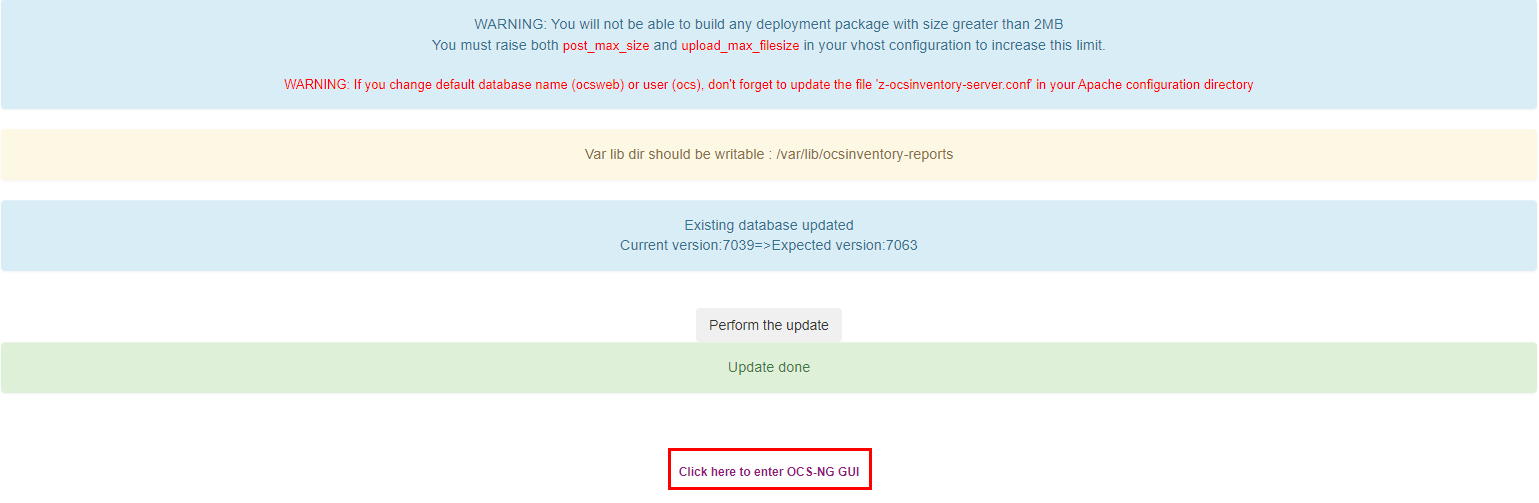
Click here to enter OCS-NG GUI
install.php,修改管理者密碼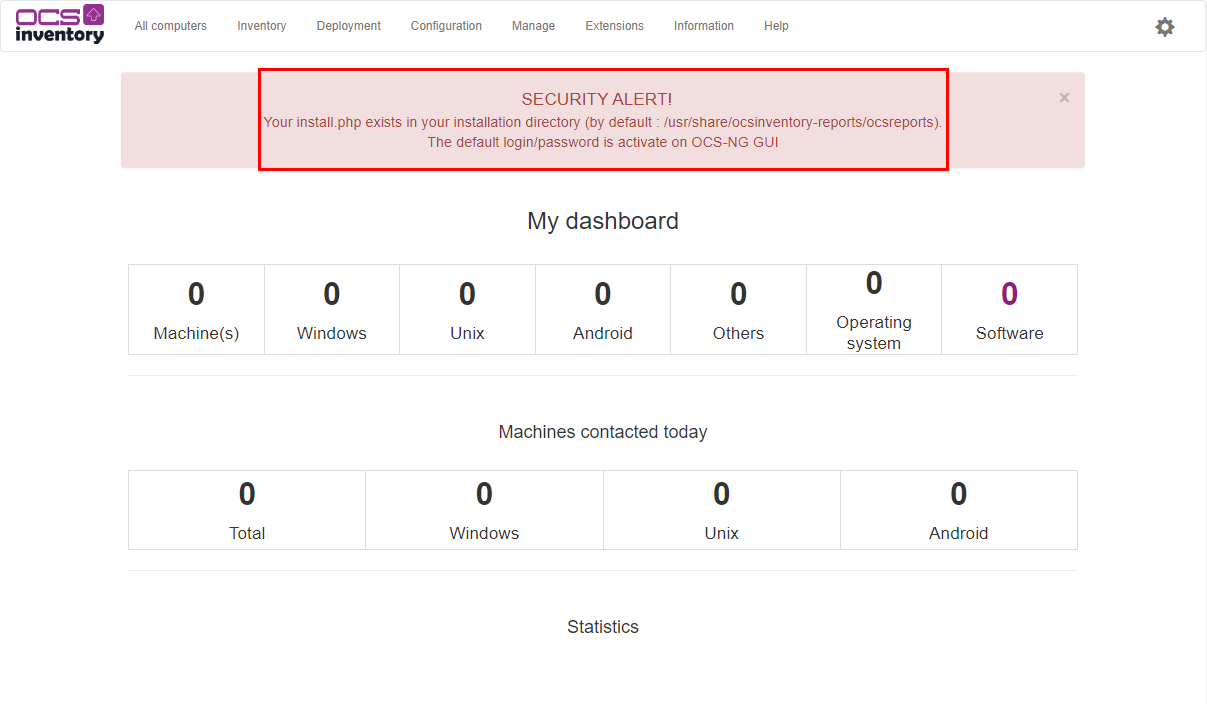


 iThome鐵人賽