昨天的 AR 魔杖像是被黑魔法禁錮住的結果(或是2D版沙丘魔堡的護盾?),今天的目標是把它解放出來。
先回顧昨天的寫法:
import SwiftUI
import RealityKit
import ARKit

@available(iOS 18.0, *)
struct RealityCameraView: View {

    var body: some View {
        RealityView { content in
            content.camera = .spatialTracking

            guard let uiImage = UIImage(named: "Wand.png"),
                  let texture = try? TextureResource.generate(from: uiImage.cgImage!, options: .init(semantic: .color)) else {
                return
            }

            let mesh = MeshResource.generatePlane(width: 0.04, height: 0.25)
            var material = SimpleMaterial()
            material.color = .init(texture: .init(texture))

            let entity = ModelEntity(mesh: mesh, materials: [material])
            entity.components.set(BillboardComponent())

            let anchor = AnchorEntity(.camera)
            entity.position = [0, 0, -0.4]
            anchor.addChild(entity)

            content.add(anchor)
        }

        .ignoresSafeArea()
    }
}
昨天在試的時候,一直針對 TextureResource.generate(from:withName:options:) 去調整 options 中的 TextureResource.CreateOptions。但都沒有辦法使平面的底色去除。
又在官網發現 TextureResource.generate(from:withName:options:) 也要被棄用了,直接來換個方法似乎更好。
加上原本覺得使用 SimpleMaterial 可以反射場景的光線很不錯,另一個選擇的材質 UnlitMaterial 則不會對場景光線有反應。重新查看 UnlitMaterial 的文件,赫然發現 UnlitMaterial 的 blending 屬性有透明的選擇!
因此,今天改用 UnlitMaterial 材質,並使用 TextureResource 非同步的初始化方法 init(named:in:)來拯救魔杖。
在建立平面 mesh 之後,先初始化一個實體:
var placeholder = UnlitMaterial()
placeholder.blending = .transparent(opacity: 0.0)
let entity = ModelEntity(mesh: mesh, materials: [placeholder])
使用透明材質的 UnlitMaterial 作為材料,先在載入魔杖前初始化一個看不見的實體。
接著非同步載入魔杖:
Task {
    do {
        let texture = try await TextureResource(named: "Wand")

        var material = UnlitMaterial()
        material.color = .init(tint: .white, texture: .init(texture))
        material.blending = .transparent(opacity: 1.0)

        await MainActor.run {
            entity.model?.materials = [material]
        }
    } catch {
        print("Failed to load texture: \(error)")
    }
}
用 Task 非同步載入圖片資源 "Wand",建立新材質並套用到平面上。
注意 material 的顏色不能直接填 .clear,魔杖會消失。blending = .transparent(opacity: 1.0) 讓 PNG 的 alpha 通道生效,只會顯示魔杖,其餘透明。這裡的 opacity 也不能是 0,魔杖照樣消失。
最後在 MainActor 上更新材質,確保 UI 執行緒安全。
之後建立相機錨點的部分一樣。不過今天移除了 entity.components.set(BillboardComponent())這一行,因為把 entity 掛在 AnchorEntity(.camera) 底下,並放在 [0,0,-0.3],等於永遠在相機正前方;相機一轉,anchor 跟著轉,平面也就自然會面向相機。也就不用再設定 billboard 了。
整理目前的 RealityView:
import SwiftUI
import RealityKit
import ARKit

@available(iOS 18.0, *)
struct RealityCameraView: View {
    var body: some View {
        RealityView { content in
            content.camera = .spatialTracking

            let mesh = MeshResource.generatePlane(width: 0.04, height: 0.25)

            var placeholder = UnlitMaterial()
            placeholder.blending = .transparent(opacity: 0.0)
            let entity = ModelEntity(mesh: mesh, materials: [placeholder])

            Task {
                do {
                    let texture = try await TextureResource(named: "Wand")

                    var material = UnlitMaterial()
                    material.color = .init(tint: .white, texture: .init(texture))
                    material.blending = .transparent(opacity: 1.0)

                    await MainActor.run {
                        entity.model?.materials = [material]
                    }
                } catch {
                    print("Failed to load texture: \(error)")
                }
            }

            let anchor = AnchorEntity(.camera)
            entity.position = [0, 0, -0.3]
            anchor.addChild(entity)
            content.add(anchor)
        }
        .ignoresSafeArea()
    }
}
實機畫面: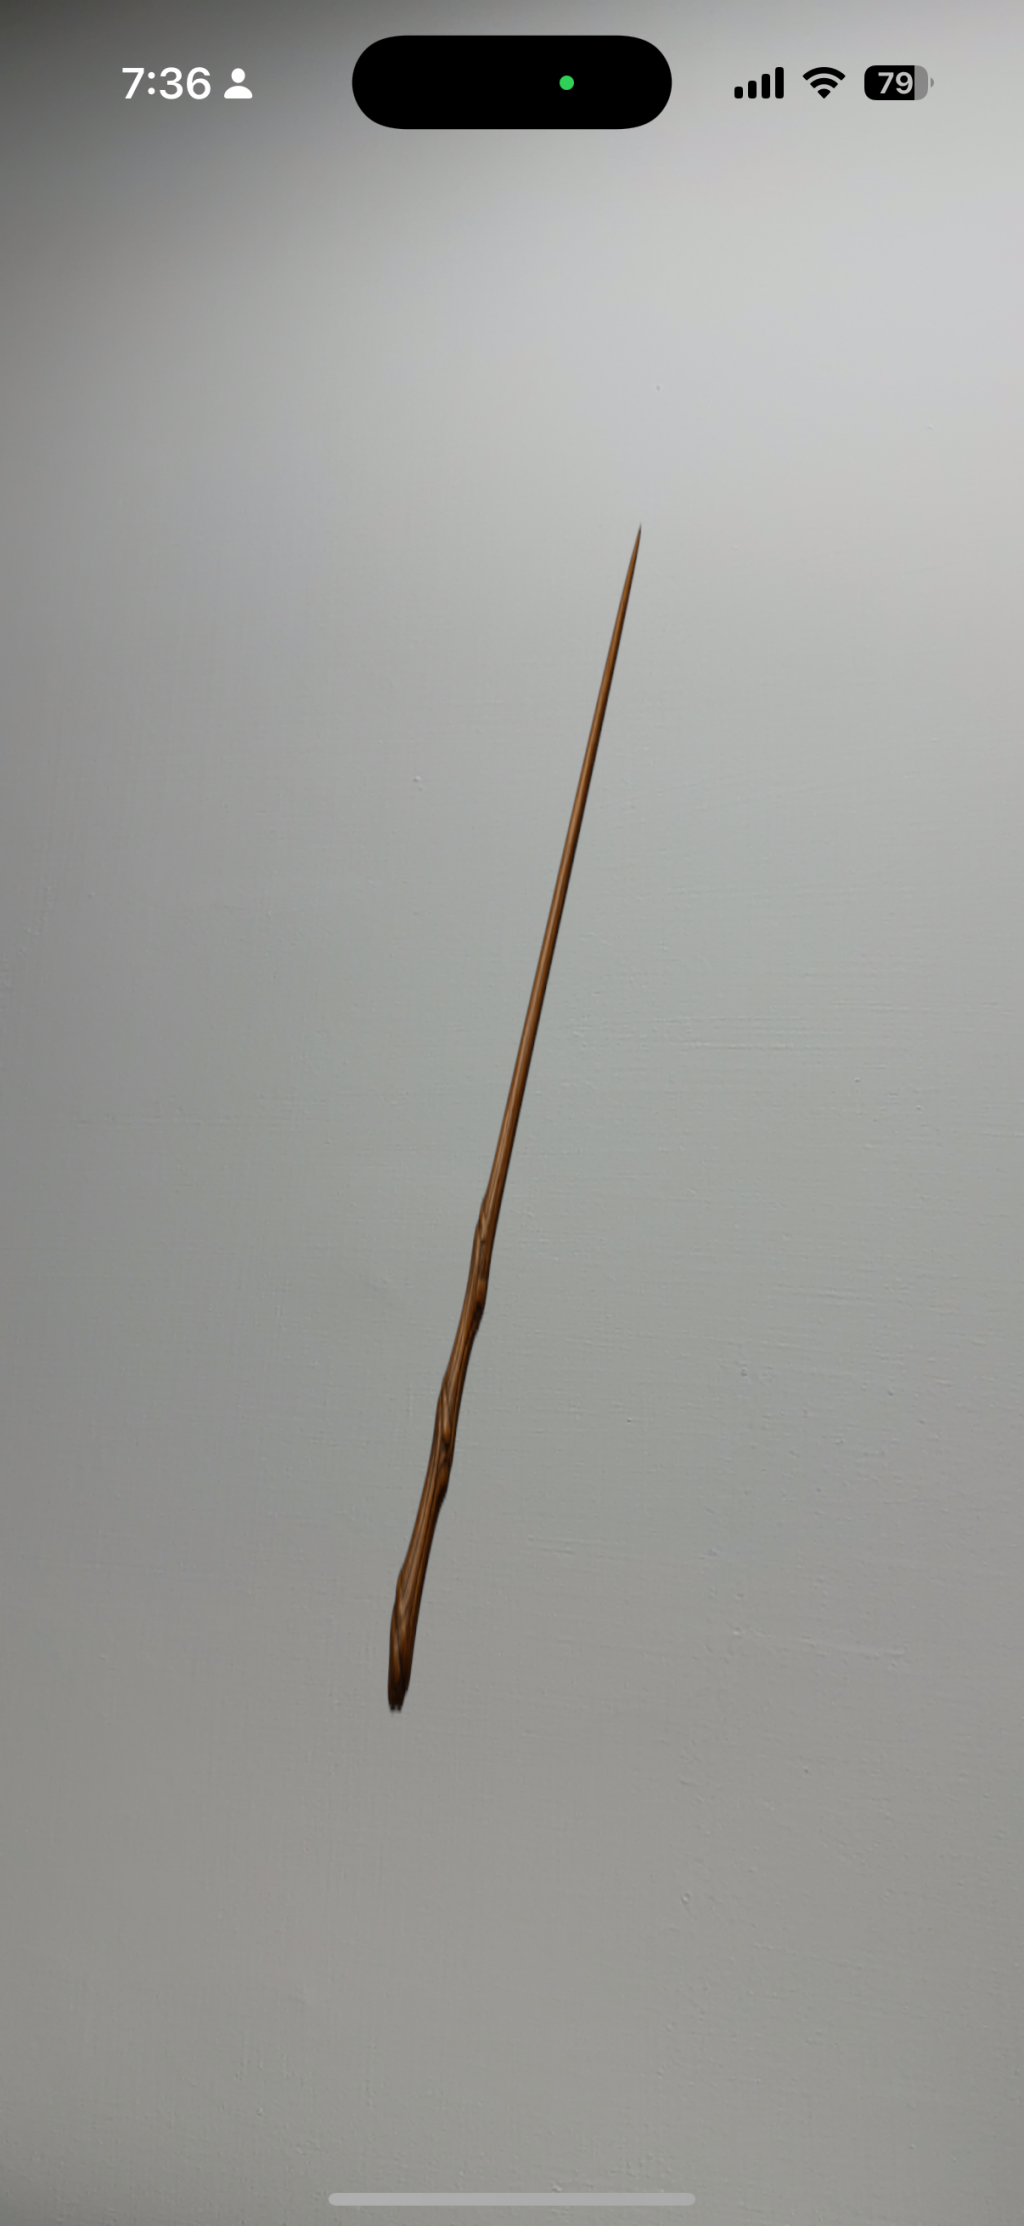
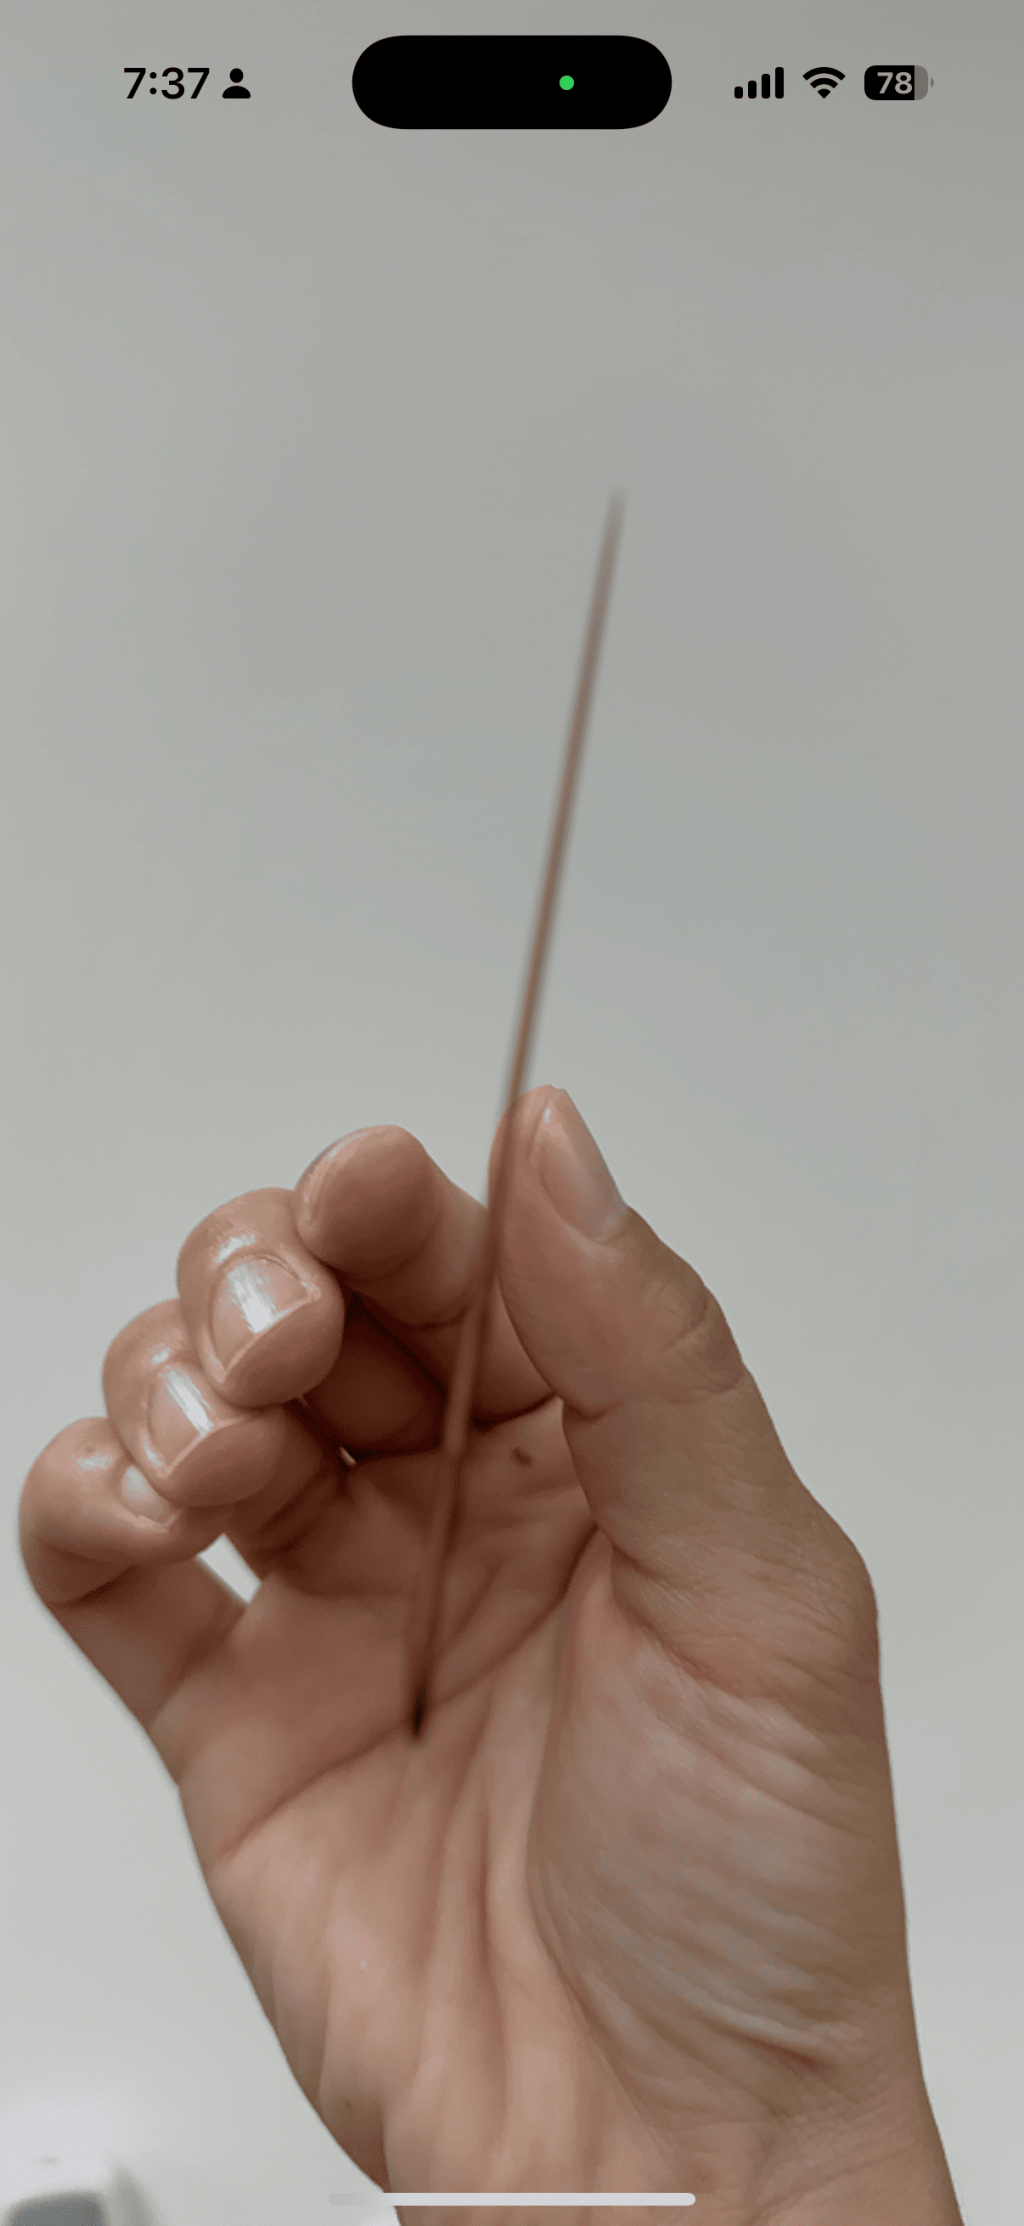
可以觀察到, AR 鏡頭一次只能聚焦在一個物體上。如果對焦在魔杖上,手就會失焦,反之亦然。
總之,完成今天的任務:解放魔杖囉!

