marimo是資料科學領域的新星,可以視為新一代的notebook。其開發速度相當快,每隔一陣子就會有令人驚艷的新功能。
今天我們除了學習marimo的基礎知識外,還會使用marimo提供的widget建立如下的互動式表格(dark mode下錄制):
這是一個Django於部署前需要確認的表格,使用者可以點擊各確認事項的widget來標記檢查是否完成,並透過進度條得知整體進度。
本日大綱如下:
建議使用uv安裝:
uv add marimo
然後在命令列中執行:
marimo edit notebook.py
會在瀏覽器中開啟notebook.py(如果該路徑下沒有notebook.py的話,就會先建立後再開啟)。
此外,marimo有sandbox模式(使用--sandbox旗標),會在檔案一開頭記錄所使用的Python版本及依賴套件的版本,方便uv或WASM環境下使用。當需要在不同OS上執行notebook或是需要與其它團隊交換檔案時,特別好用。其格式會像是:
# /// script
# requires-python = ">=3.13"
# dependencies = [
#     "great-tables==0.18.0",
#     "polars==1.33.1",
# ]
# ///
marimo在其GitHub repo是這麼描述這個專案:
A reactive Python notebook that's reproducible, git-friendly, and deployable as scripts or apps.
我們將從上述提到的四個面向來認識marimo:
marimo notebook所有事物,都會因為變化而自動隨之變化。
舉例來說,現在有cell1、cell2及cell3運行如下:
# cell1
a = 1
# cell2
b = 2
# cell3
a + b # 3
此時,如果將cell1中的「"a"」改為2並執行:
# cell1
a = 2
則cell3會自動變成:
# cell3
a + b # 4
這與Jupyter notebook有很大的不同,在Jupyter notebook中我們必須重新執行cell3,才會依照當下的狀態進行該cell的計算。
其原理為marimo對notebook建立了directed acyclic graph (DAG),所以可以得知cell3的結果會受到cell1中變數的影響,進而自動重新計算cell3。
值得一提的是,為了建構唯一且準確的DAG,marimo notebook不允許在不同cell中重複定義變數,例如:
# cell4
❌
a = 3
# This cell redefines variables from other cells.
但是如果是在同一個cell中重複定義則是允許的(因為仍然能解析出唯一的DAG),例如:
# cell5
✔️
c = 1
c = 2
最後,如果變數使用_(底線)開頭,則marimo notebook會視為各cell的局部變數,也就是該變數將無法在其它cell使用,例如:
# cell6
_a = 1
# cell7
❌
_a
# name '_a' is not defined
DAG確保marimo notebook是即時反映當下狀態,沒有隱藏狀態。
在marimo notebook中,由於是使用DAG判斷各cell的執行順序,所以各cell在marimo notebook中的順序並不重要。舉例來說,如果marimo notebook中的cell是如下的順序,在重啟kernel後仍可正常執行:
# cell1
a + b # 3
# cell2
a = 1
# cell3
b = 2
這點也與Jupyter notebook有很大的不同。在Jupyter notebook中,除了各cell的位置會影響初始計算外,使用者更常會於中途進行某些cell的操作,這將導致重啟kernel之後,難以重現預期的結果。
DAG確保marimo notebook的結果是唯一且可預期。
由於Jupyter notebook是以JSON格式來儲存,這使得微小變動在git diff中,好像改變很多。
相比之下,marimo notebook只是一般的.py檔案,並不儲存計算結果,所以程式碼的微小變動僅會造成微小的git diff。
marimo notebook的儲存格式就是單純的
.py檔案。
marimo底層使用starlette,部署起來就像一般的ASGI,更可以和FastAPI搭配使用(畢竟FastAPI底層也是starlette嘛!)。
此外,marimo notebook提供了豐富的UI元素,讓使用者方便操作,而開發者可以透過各widget的.value屬性取得其值。這麼一來,使得marimo notebook能夠很容易地轉變為APP,並使用marimo run notebook.py部署。
最後,marimo notebook支援WASM,可透過官方提供的molab部署為WASM APP。
marimo notebook提供多種部署選項。
此範例之marimo notebook檔案可下載回本機運行,或是直接上傳至molab,即刻部署為一個使用WASM的APP。
而我覺得更方便的作法,則是使用molab讀取GitHub上的marimo notebook檔案(留意網址須使用https://raw.githubusercontent.com/開頭,不是一般瀏覽時用的https://github.com/)部署為WASM app。
Setup cell是一個特別的cell,marimo notebook會確保其是第一個執行的cell,特別適合用在引入模組時使用:
import marimo as mo
import polars as pl
from great_tables import GT, html, md
df dataframedf dataframe共有三列:
tasks = [
    "Set DEBUG = False",
    "Configure ALLOWED_HOSTS",
    "Set up a secret key",
    "Collect static files",
    "Apply database migrations",
    "Set up gunicorn or uWSGI",
    "Configure reverse proxy (e.g., Nginx)",
    "Secure the database",
    "Set up HTTPS (SSL)",
    "Configure logging & monitoring",
]

notes = [
    "Never deploy with DEBUG = True ⚠️",
    "Include your domain(s) or IP address 🌐",
    "Use a strong, secure key from an environment variable 🔐",
    "Run `python manage.py collectstatic` 📦",
    "Run `python manage.py migrate` 🗃️",
    "Use as a WSGI server in production 🔄",
    "Serve static/media files and forward to WSGI server 🧭",
    "Use strong credentials, disable remote root login 🛡️",
    "Use Let's Encrypt or your own certificate 🔒",
    "Track errors and app performance 📊",
]

n_row = len(tasks)
status = ["☐"] * n_row
data = {"Status": status, "Task": tasks, "Notes": notes}
df = pl.DataFrame(data)
df
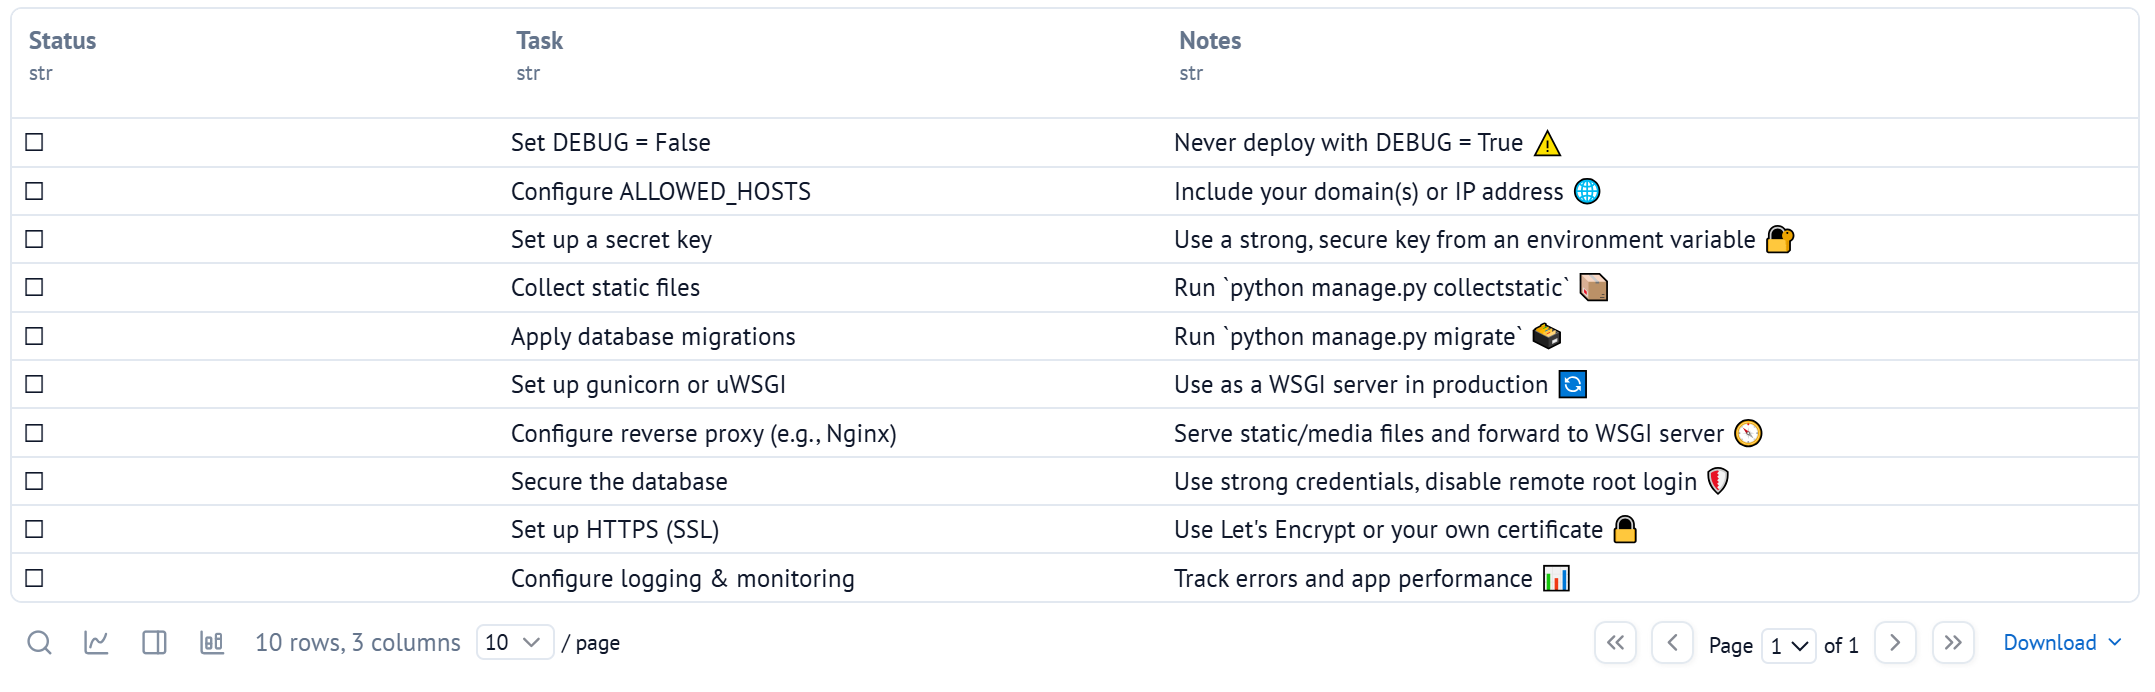
如果仔細觀察,可以發現df在marmimo notebook介面中,有不少可以點擊的UI工具,方便快速進行資料探勘。
建立一個包含十個mo.ui.switch的mo.ui.array。
status_widget = mo.ui.switch()
status_widgets = mo.ui.array([status_widget] * n_row)
create_bar()函數create_bar()的靈感來自於Great Tables提供的範例,將作為進度條使用。
def create_bar(
    x: float,
    max_width: int,
    height: int,
    background_color1: str,
    background_color2: str,
) -> str:
    width = round(max_width * x, 2)
    px_width = f"{width}px"
    return f"""\
    <div style="width: {max_width}px; background-color: {background_color1};">\
        <div style="height:{height}px;width:{px_width};background-color:{background_color2};"></div>\
    </div>\
    """
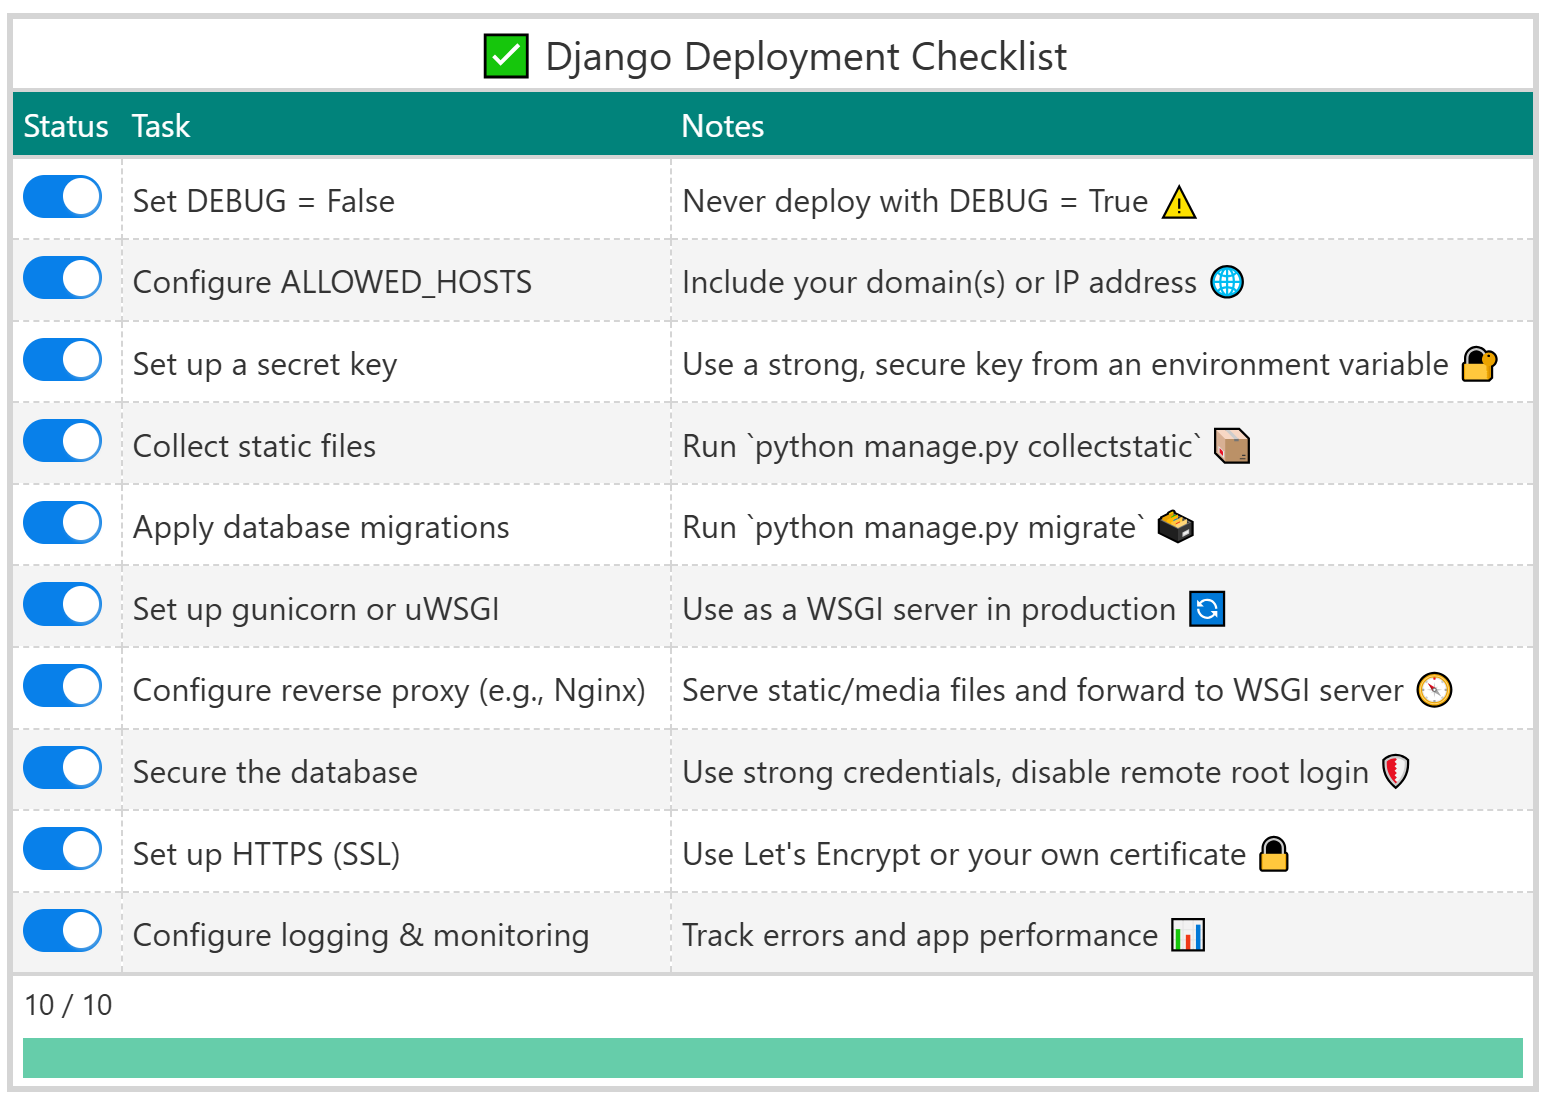
使用Great Tables建立此互動式表格(light mode下截圖)。
done_count = sum(s.value for s in status_widgets)

gt = (
    GT(
        df.with_columns(
            pl.Series(
                [status._repr_html_() for status in status_widgets]
            ).alias("Status")
        )
    )
    .tab_source_note(f"{done_count} / {n_row}")
    .tab_source_note(
        html(
            create_bar(
                done_count / n_row,
                max_width=750,
                height=20,
                background_color1="lightgray",
                background_color2="#66CDAA",
            )
        )
    )
    .tab_header("✅ Django Deployment Checklist")
    .opt_stylize(color="cyan", style=4)
)
gt
簡單說明如下:
_repr_html_()來替換原先為「"☐"」的「"Status"」列,這是表格由靜態成為互動的關鍵,詳細原因請參考marimo教學文件。今天我們學習了marimo最基礎的用法,如果您有興趣想更深入了解,可以參考這段YouTube影片,Vincent列舉了十多個marimo的特色及小技巧,相當值得一看!
最後,如果對於Great Tables在marimo中的應用有興趣的朋友,可以看看參考資料中所列的部落格文章,今天的範例內容來自參考資料2。