在前一天我們已經學會了如何使用 Core Location 來取得用戶位置,而今天我們要進一步將位置資訊反映在地圖上。我們可以使用 MapKit 此一蘋果提供的地圖框架,此框架提供了顯⽰、導覽地圖,在地圖上加上標記,覆蓋物等功能。
今天簡單三個目標:
我們可以延續昨天使用 Core Location 的專案,使用我們已經建立好的 LoactionManager 來取得位置,並且將位置顯示在地圖上。
首先引入 MapKit:
import MapKit
在 MapKit 當中,我們找到這個初始化方法:
@MainActor @preconcurrency
public init<C>(
    position: Binding<MapCameraPosition>,
    bounds: MapCameraBounds? = nil,
    interactionModes: MapInteractionModes = .all,
    scope: Namespace.ID? = nil,
    @MapContentBuilder content: () -> C
) where Content == MapContentView<Never, C>, C : MapContent
說明一下幾個參數:
Binding<MapCameraPosition>,作用是透過雙向綁定,允許程式碼與地圖之間都能改變相機位置,常用值有:
.automatic - 自動決定相機位置.userLocation(fallback: .automatic) - 跟隨使用者位置.region(MKCoordinateRegion(...)) - 指定特定區域與縮放程度.camera(MapCamera(...)) - 3D 相機控制(高度、俯仰角等)nil(無限制)。通常用於防止使用者將地圖拖拽到不相關區域。.all(允許所有互動)。MapCameraPosition 類別的 @State 變數以作為雙向綁定的初始化參數:@State private var position: MapCameraPosition = .automatic
而因為我們不特別限制使用者互動,interactionModes 設為 .all 即可。
Map(position: $position, interactionModes: .all) {
    if let coord = locationManager.lastSeenLocation?.coordinate {
        Marker("目前位置", coordinate: coord)
    }
}
這邊我們使用 locationManager 最後取得的使用者位置 lastSeenLocation 的經緯度 coordinate,作為參數傳入 Marker 這個地圖大頭針,
取得使用者位置後,標示在地圖上。
當使用者的位置持續變動時,我們有時需要地圖畫面持續跟隨,為了達到這個效果,我們要使用 onChange 這個 modifier。
/// - Parameters:
///   - value: The value to check against when determining whether
///     to run the closure.
///   - initial: Whether the action should be run when this view initially
///     appears.
///   - action: A closure to run when the value changes.
///   - oldValue: The old value that failed the comparison check (or the
///     initial value when requested).
///   - newValue: The new value that failed the comparison check.
///
/// - Returns: A view that fires an action when the specified value changes.
nonisolated public func onChange<V>(
    of value: V,
    initial: Bool = false,
    _ action: @escaping (_ oldValue: V, _ newValue: V) -> Void
) -> some View where V : Equatable
透過監聽 value 的變化,你可以決定要做什麼相對應的處理。
.onChange(of: locationManager.lastSeenLocation) { oldLocation, newLocation in
    // 舊值與新值都存在時,比較距離
    if let old = oldLocation, let new = newLocation {
        if metersBetween(old, new) > 15 {
            let c = new.coordinate
            position = .region(
                MKCoordinateRegion(
                    center: c,
                    span: MKCoordinateSpan(latitudeDelta: 0.01, longitudeDelta: 0.01)
                )
            )
        }
    } else if let new = newLocation { // 第一次定位:old 為 nil,只用 new
        let c = new.coordinate
        position = .region(
            MKCoordinateRegion(
                center: c,
                span: MKCoordinateSpan(latitudeDelta: 0.01, longitudeDelta: 0.01)
            )
        )
    }
}
我們監聽 locationManager.lastSeenLocation,每當 LocationManager 收到新的 GPS 座標時,這個屬性就會更新,onChange 會自動捕捉到這個變化,並執行內部的處理邏輯。
而因為 GPS 定位存在誤差,可能每秒都有 1-5 公尺的飄移,即便是站在原地不動的情境,座標可能會一直更新,此時若更新畫面,地圖將會不斷「抖動」,使用體驗便不是很好。因此,為了提供流暢的使用體驗,我們可以透過 onChange 的 closure 裡的兩個參數 oldValue 與 newValue 來判斷,只有當新位置與舊位置相距超過 15 公尺時,才移動地圖相機。而 App 剛啟動或第一次獲得定位權限時的處理,因為 oldLocation 是 nil,就直接將地圖相機移動到使用者目前位置。
position = .region(
    MKCoordinateRegion(
        center: c,                    // 新的座標中心
        span: MKCoordinateSpan(       // 縮放程度
            latitudeDelta: 0.01,      // 緯度範圍(約 1.1 公里)
            longitudeDelta: 0.01      // 經度範圍(約 1.1 公里)
        )
    )
)
這裡我們使用 .region(...),將地圖的縮放程度控制不要太大或太小(0.01 度 ≈ 1.1 公里範圍)。
功能完成~
完整程式碼如下:
import SwiftUI
import CoreLocation
import MapKit
struct ContentView: View {
@StateObject var locationManager = LocationManager()
@State private var position: MapCameraPosition = .automatic
var body: some View {
VStack(spacing: 20) {
switch locationManager.authorizationStatus {
case .notDetermined:
ProgressView()
Text("正在請求定位權限...")
case .restricted, .denied:
Image(systemName: "location.slash.fill")
.font(.largeTitle)
.foregroundColor(.red)
Text("您的位置權限已被關閉。")
Text("請至「設定」App 中開啟權限。")
case .authorizedWhenInUse, .authorizedAlways:
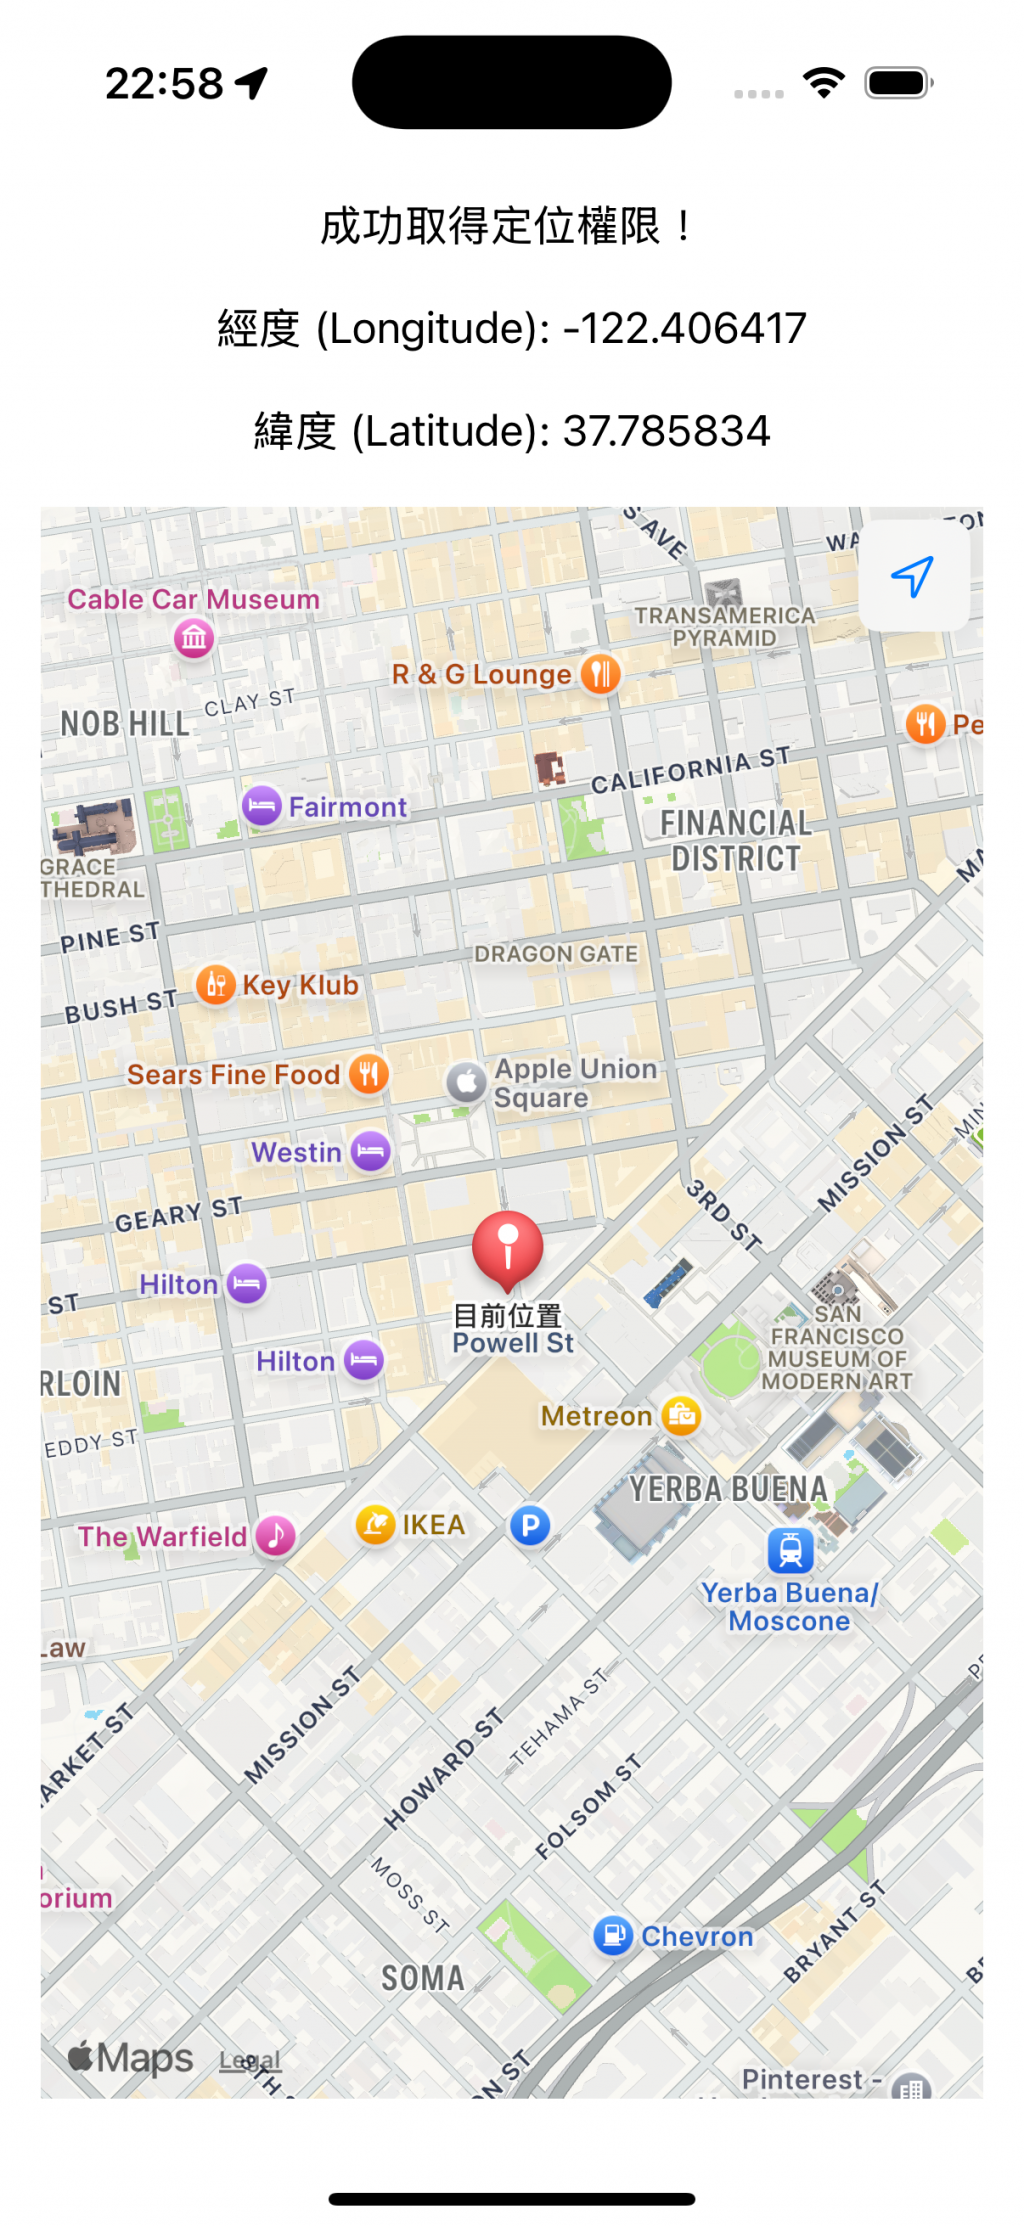
Text("成功取得定位權限!")
if let coordinate = locationManager.lastSeenLocation?.coordinate {
Text("經度 (Longitude): \(coordinate.longitude)")
Text("緯度 (Latitude): \(coordinate.latitude)")
} else {
ProgressView()
Text("正在取得您的位置...")
}
Map(position: $position, interactionModes: .all) {
if let coord = locationManager.lastSeenLocation?.coordinate {
Marker("目前位置", coordinate: coord)
}
}
.mapControls({
MapUserLocationButton()
})
.onChange(of: locationManager.lastSeenLocation) { oldLocation, newLocation in
// 舊值與新值都存在時,比較距離
if let old = oldLocation, let new = newLocation {
if metersBetween(old, new) > 15 {
let c = new.coordinate
position = .region(
MKCoordinateRegion(
center: c,
span: MKCoordinateSpan(latitudeDelta: 0.01, longitudeDelta: 0.01)
)
)
}
} else if let new = newLocation { // 第一次定位:old 為 nil,只用 new
let c = new.coordinate
position = .region(
MKCoordinateRegion(
center: c,
span: MKCoordinateSpan(latitudeDelta: 0.01, longitudeDelta: 0.01)
)
)
}
}
@unknown default:
Text("發生未知的錯誤")
}
}
.multilineTextAlignment(.center)
.padding()
}
func metersBetween(_ a: CLLocation, _ b: CLLocation) -> CLLocationDistance {
a.distance(from: b)
}
}
#Preview {
ContentView()
}
今天我們學會了如何將 Core Location 取得的使用者位置,結合 MapKit 在地圖上即時顯示,並用 Marker 標記目前位置。
明天我們將介紹 Geofencing(地理圍欄)這個功能,這也是我們 App 會用到的技術。透過 Geofencing,可以讓 App 偵測使用者是否進入或離開特定區域,實現自動提醒、紀錄或觸發特定行為,非常適合用來做公路里程標的定位與通知。