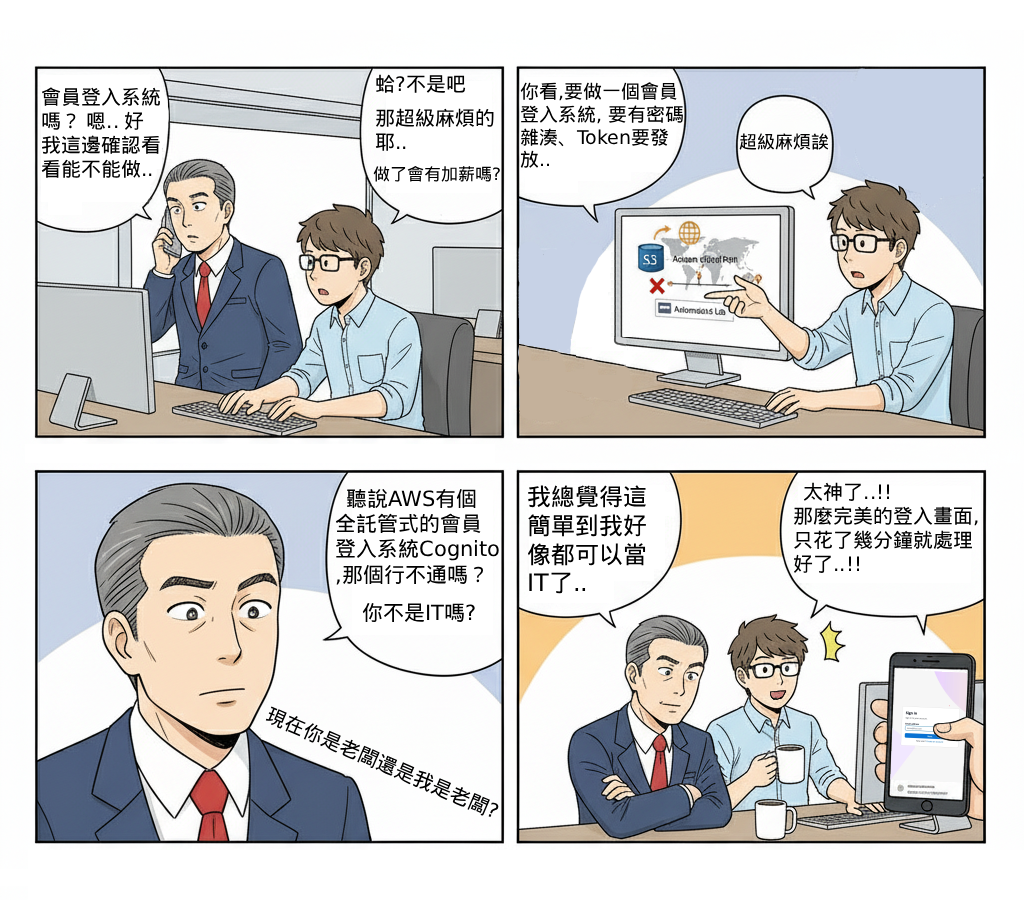
在 Serverless 架構中,會員註冊與身份驗證是最核心的功能之一。若要自行開發一套完整的帳號系統(註冊、登入、密碼重設、MFA、多平台整合),不僅需要大量程式碼,也會面臨安全性與合規性的挑戰。
使用 Amazon Cognito User Pool,可以快速建立一個全託管的會員系統,內建密碼雜湊、MFA、多因子驗證、社群登入(Google、Facebook、Apple)、以及 JWT Token 驗證。這大幅降低了開發與維運成本,並避免常見的安全漏洞。
其必要性與痛點:
(1) 傳統自建會員系統需自行處理密碼加密、存放、驗證邏輯,容易出現安全漏洞。
(2) 若需支援社群登入、MFA,多數情況要寫大量額外程式碼,難以維護。
(3) 會員註冊與登入流程若沒有標準化,後續要與 API Gateway、前端、其他 AWS 服務串接會困難重重。
在整體 Serverless 架構中,Cognito 作為 Day 9 的核心服務,提供「全託管身分驗證」,讓 API Gateway 與前端可以無痛整合,專注在業務邏輯開發,而非重複造輪子。
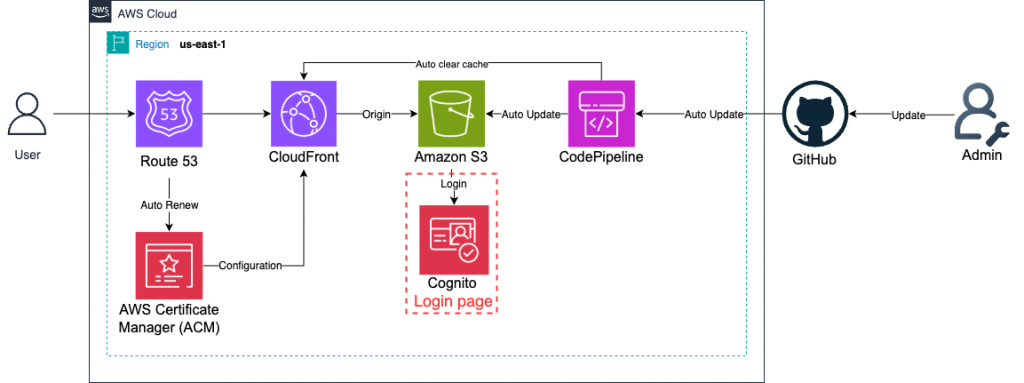
(1) Cognito User Pool 會自動處理 密碼雜湊、Token 發放、驗證邏輯,不需自行實作。
(2) Cognito Token(ID Token, Access Token, Refresh Token)可直接被 API Gateway Authorizer 驗證,免寫額外驗證程式。
(3) 若需要在註冊後做額外處理,可透過 PostConfirmation Lambda Trigger,例如建立 DynamoDB 預設資料或寄送歡迎信。
(4) Cognito 內建 MFA 與安全策略(密碼強度、帳號鎖定),建議在 Lab 中啟用並測試。
(5) 若需整合社群登入(Google、Facebook、Apple ID),可在 Cognito Federation 設定中加入 Identity Provider,減少 OAuth 實作難度。
無
進入「Cognito」服務頁面。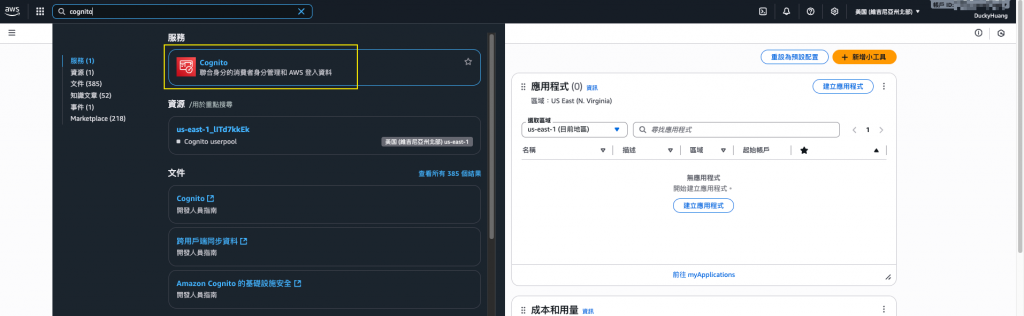
創建一個「使用者集區」。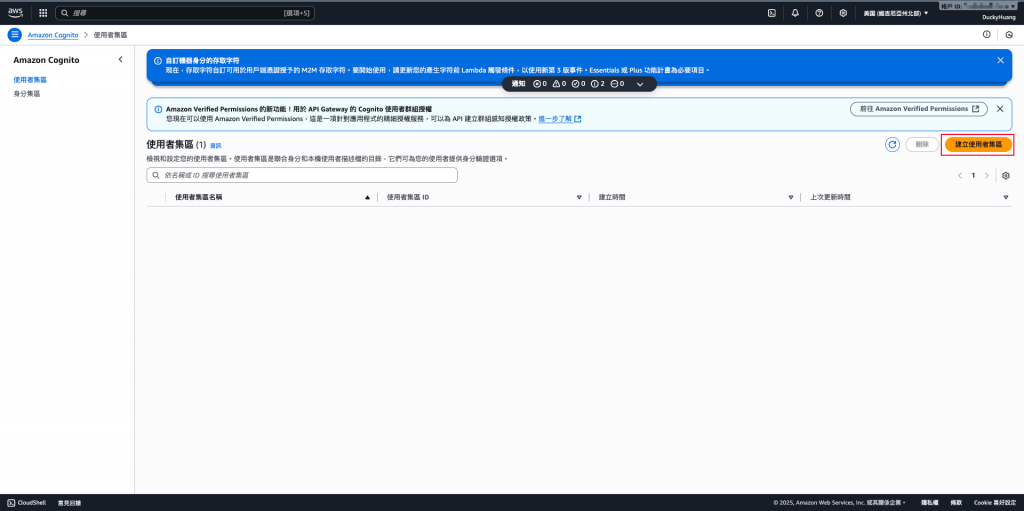
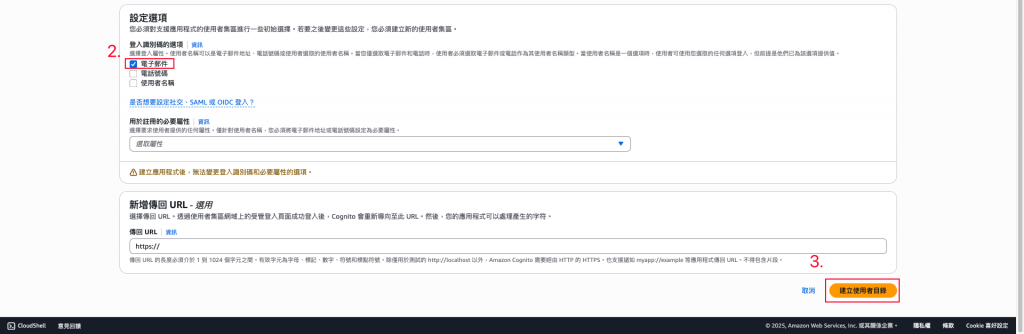
命名,並選擇用戶的登入方式。(推薦使用E-mail為登入方式)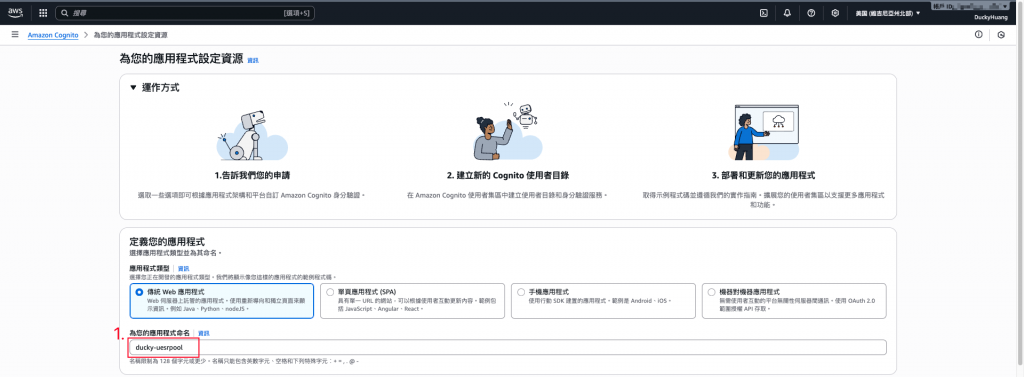
進入剛剛創建的「使用者集區」內。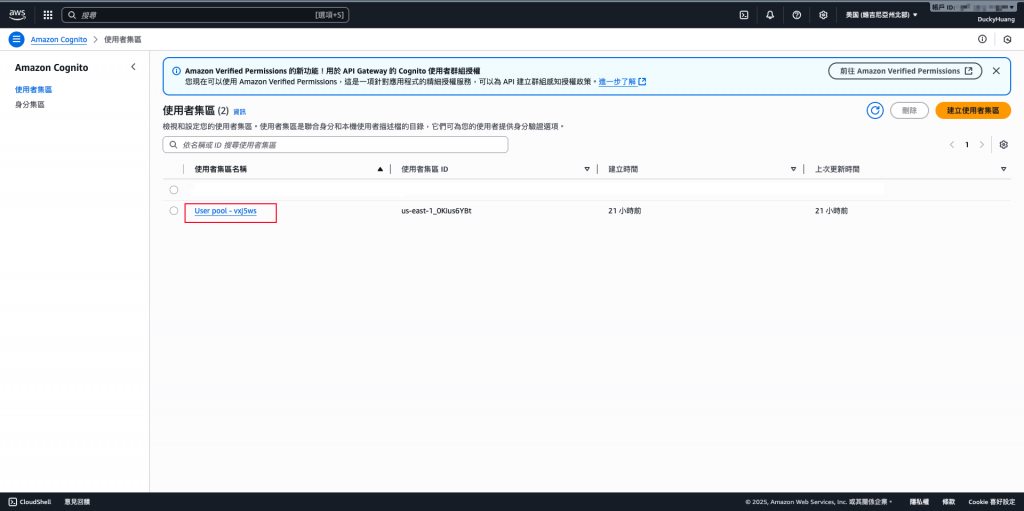
進到「應用程式用戶端」。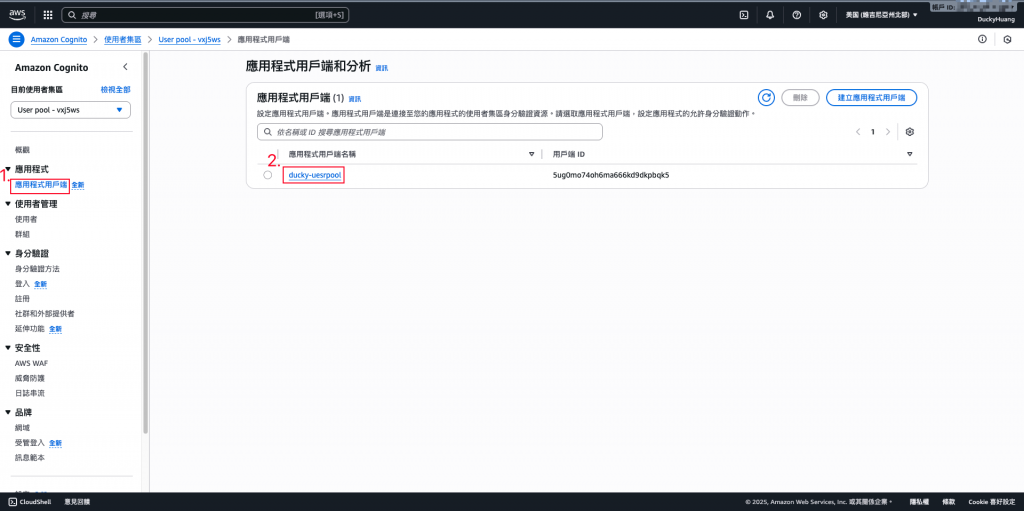
編輯「登入頁面」。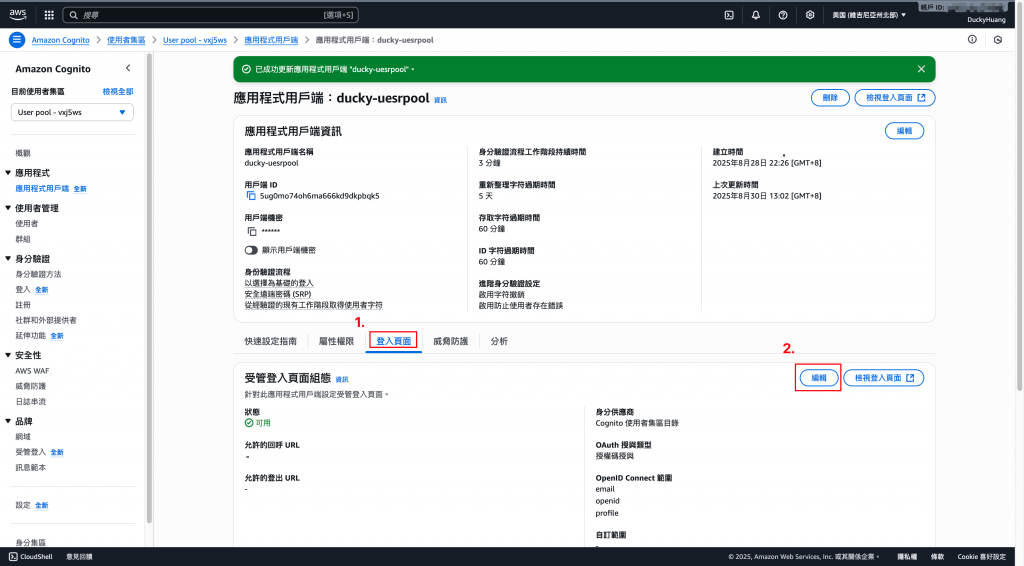
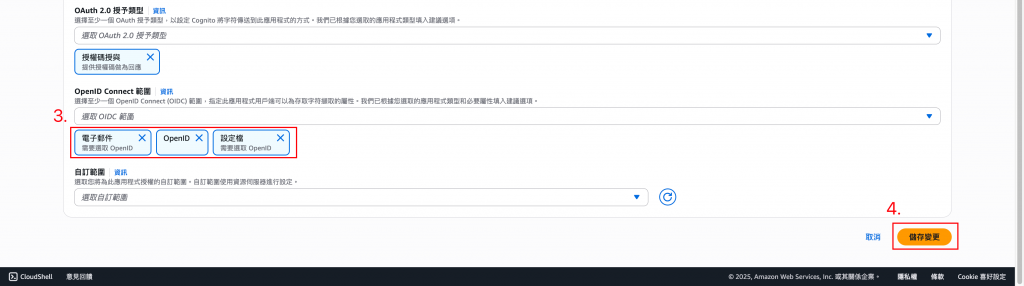
設定「回呼URL(登入後連結)」、「登出URL(登出後連結)」及登入時會帶有哪些資料。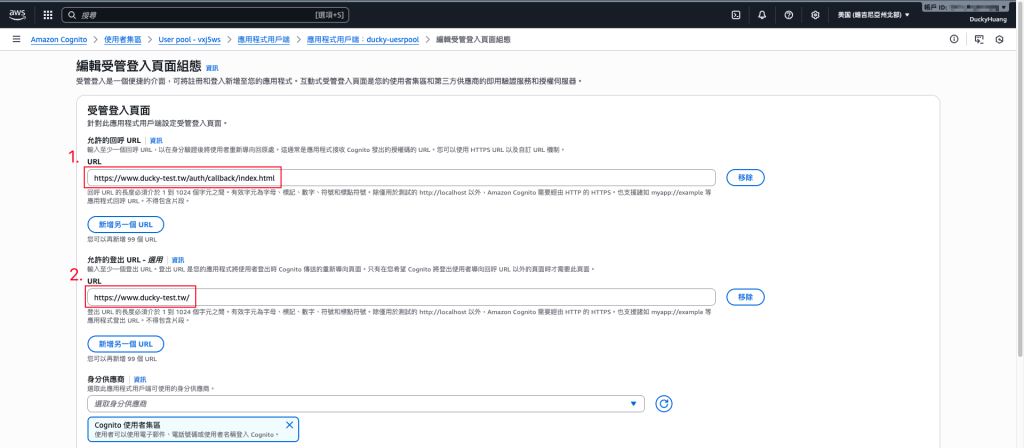
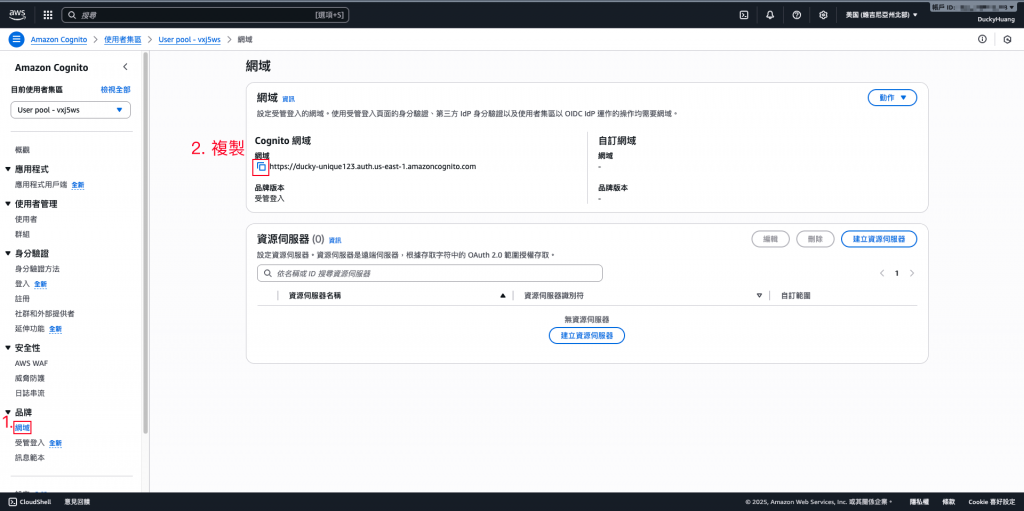
先刪除原本的cognito網域。(創建時會自動幫你代入Cognito名稱的網域)
刪除掉網域前綴。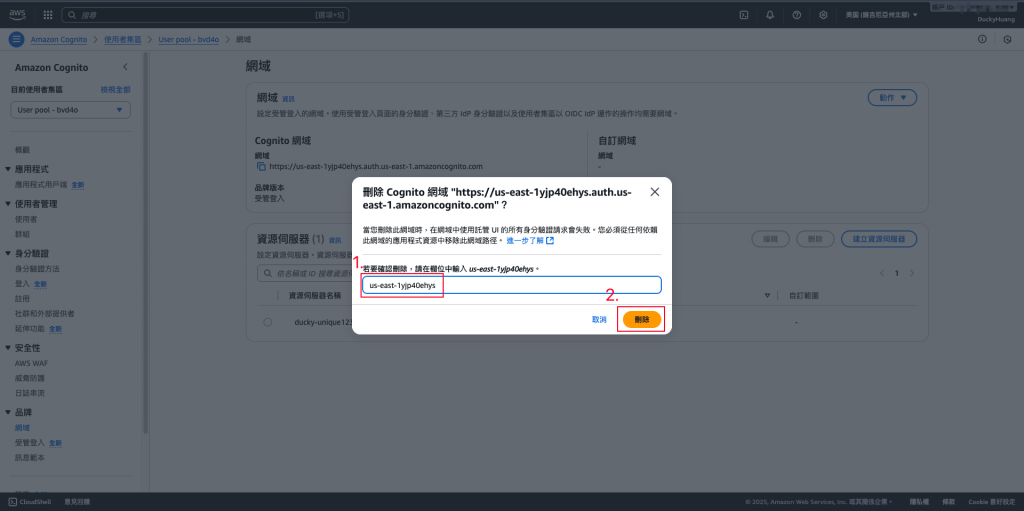
點選「建立Cognito網域」。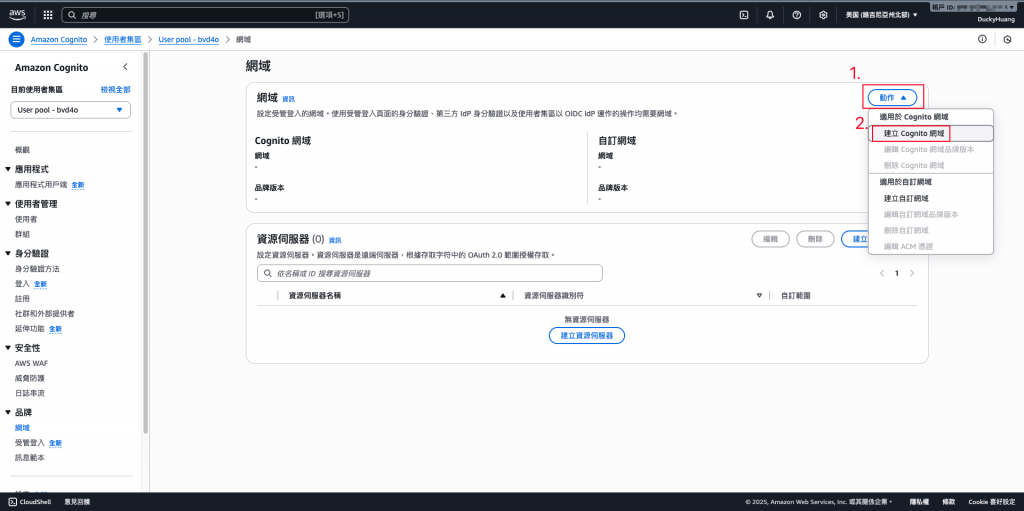
輸入自己喜歡的網域前綴。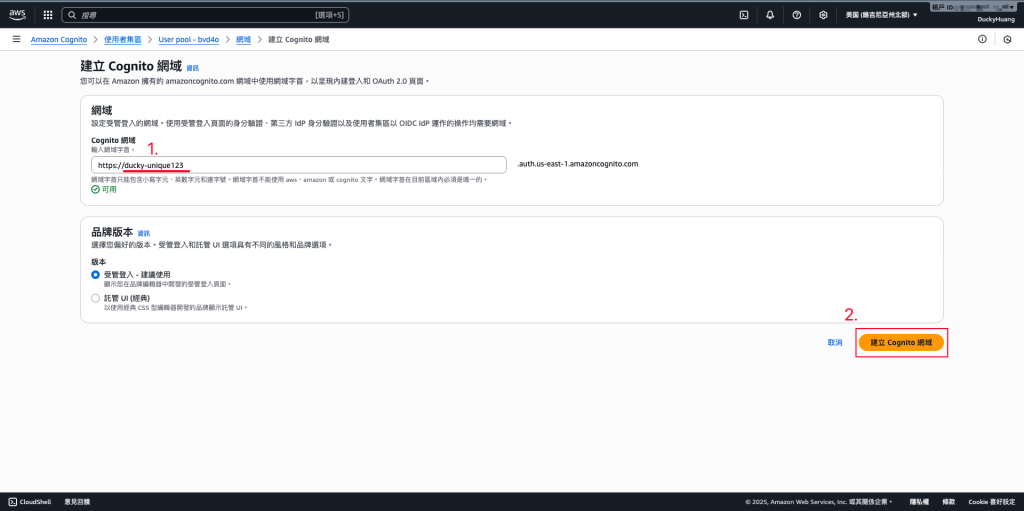
完成後,cognito會幫你建立一個網域: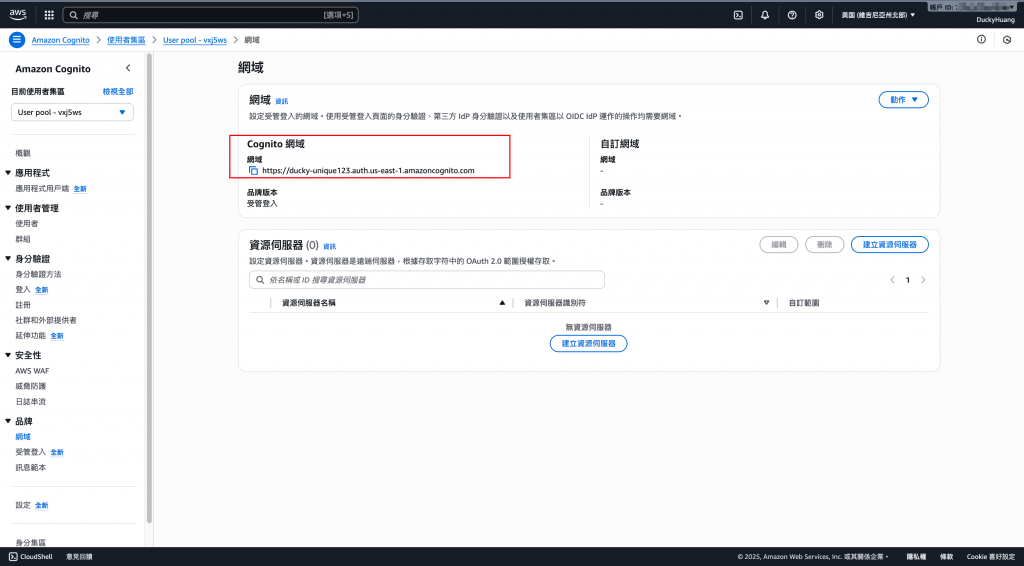
進入「Cloudfrnot」服務頁面。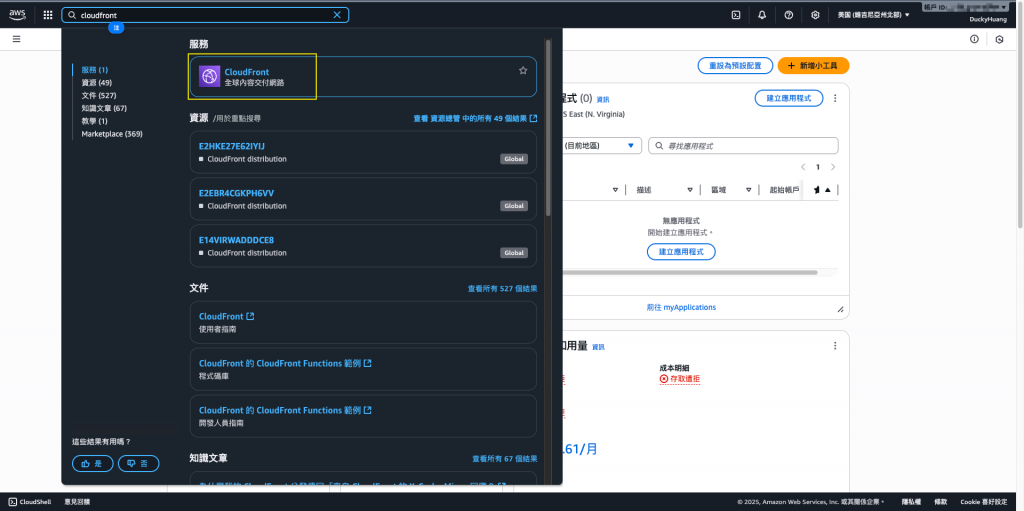
點選「來源」頁面,建立新的「來源」網頁。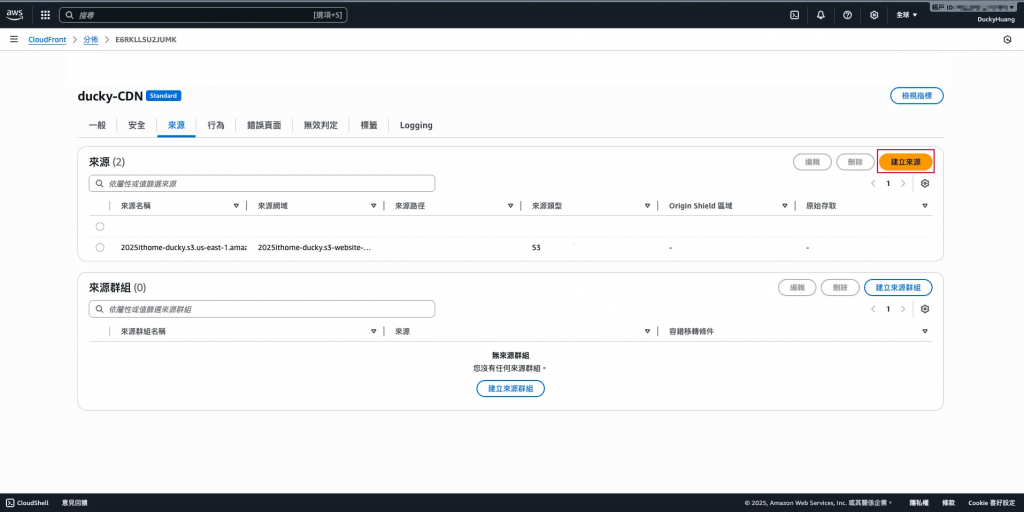
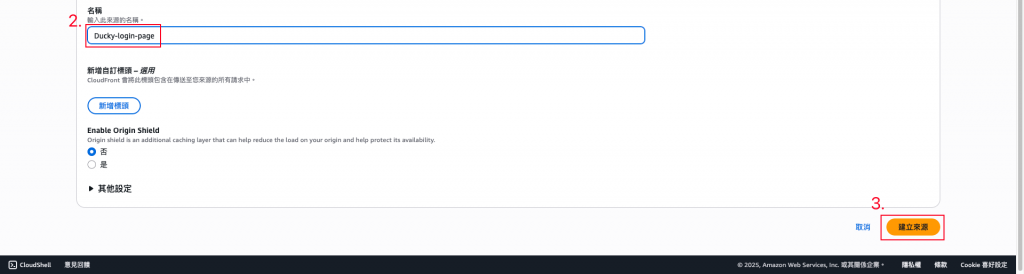
選擇剛剛創建的第三個源站(用Cognito做的Login page)。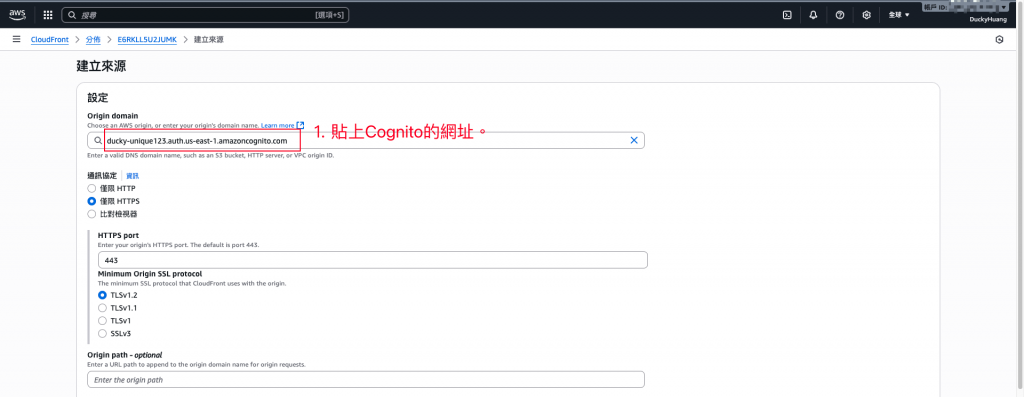
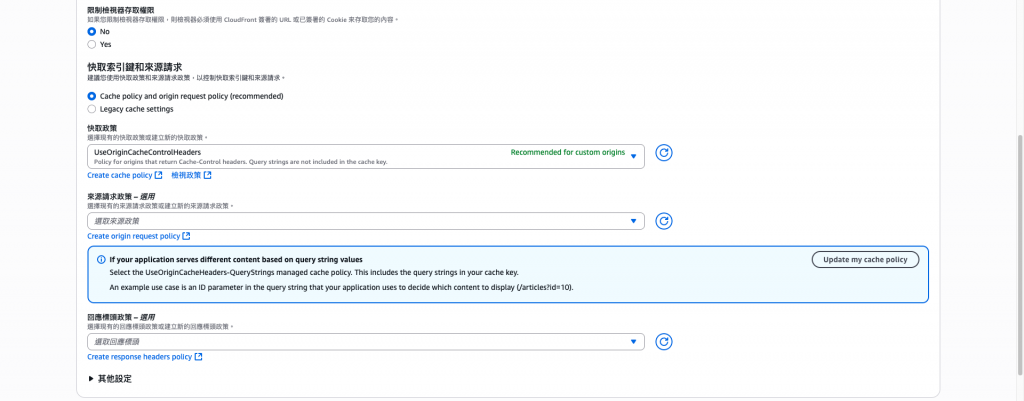
再創建一個新的「行為」。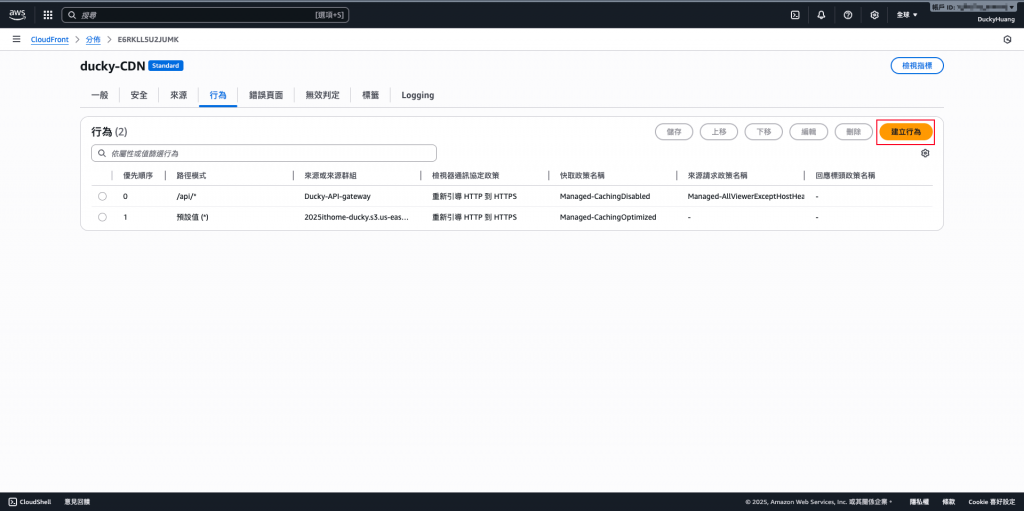
選擇「訪問特定路徑」會出現指定的源站頁面(Login頁面)。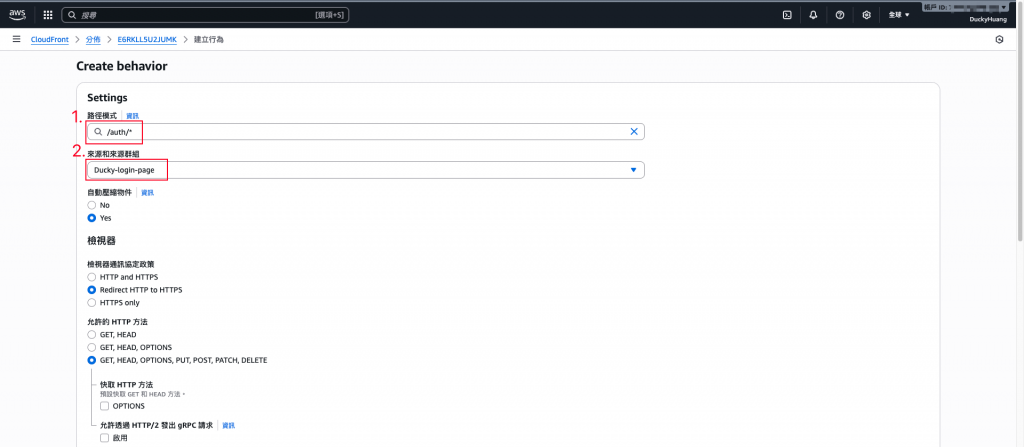
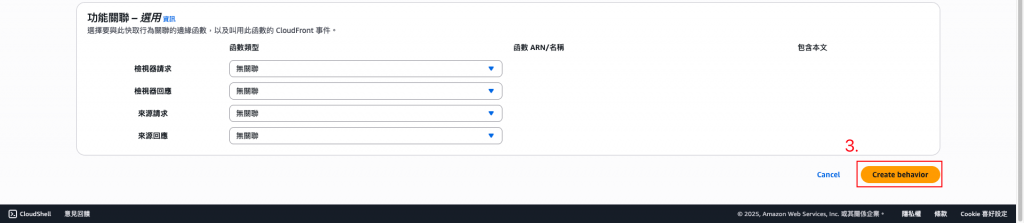
創建完成畫面。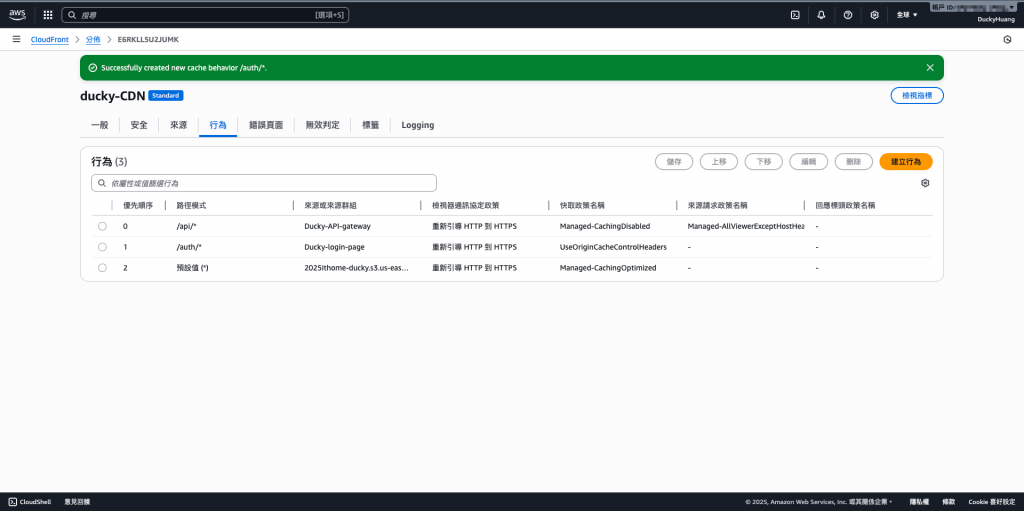
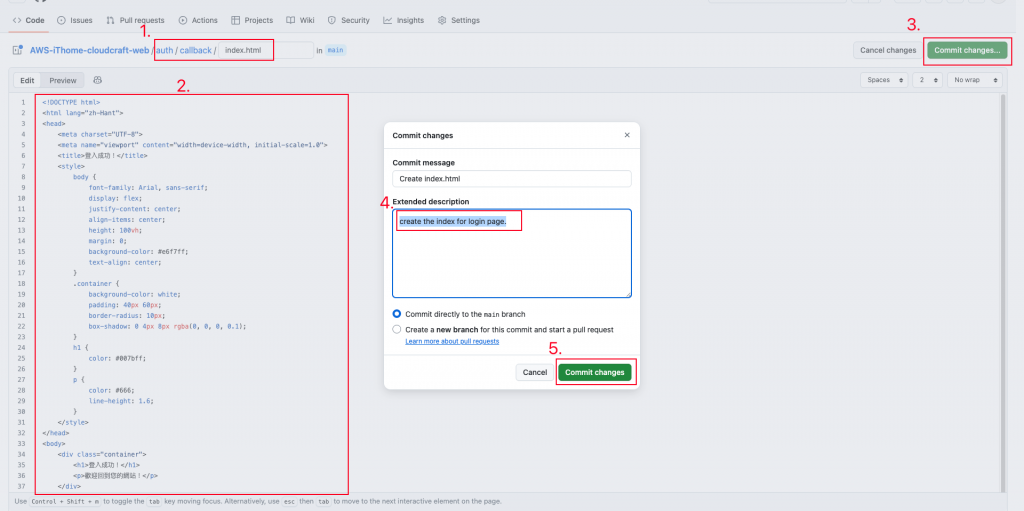
去GitHub上修改index.html的內容。
<!DOCTYPE html>
<html lang="en">
<head>
<meta charset="UTF-8">
<meta name="viewport" content="width=device-width, initial-scale=1.0">
<title>My Website Home Page</title>
<style>
body {
font-family: Arial, sans-serif;
display: flex;
flex-direction: column;
justify-content: center;
align-items: center;
height: 100vh;
margin: 0;
background-color: #f0f0f0;
text-align: center;
}
.container {
background-color: white;
padding: 40px 60px;
border-radius: 10px;
box-shadow: 0 4px 8px rgba(0, 0, 0, 0.1);
}
h1 {
color: #333;
}
p {
color: #666;
line-height: 1.6;
}
.login-button {
padding: 10px 20px;
font-size: 16px;
color: white;
background-color: #007bff;
border: none;
border-radius: 5px;
cursor: pointer;
text-decoration: none; /* 移除超連結底線 */
margin-top: 20px;
display: inline-block;
}
.login-button:hover {
background-color: #0056b3;
}
</style>
</head>
<body>
<div class="container">
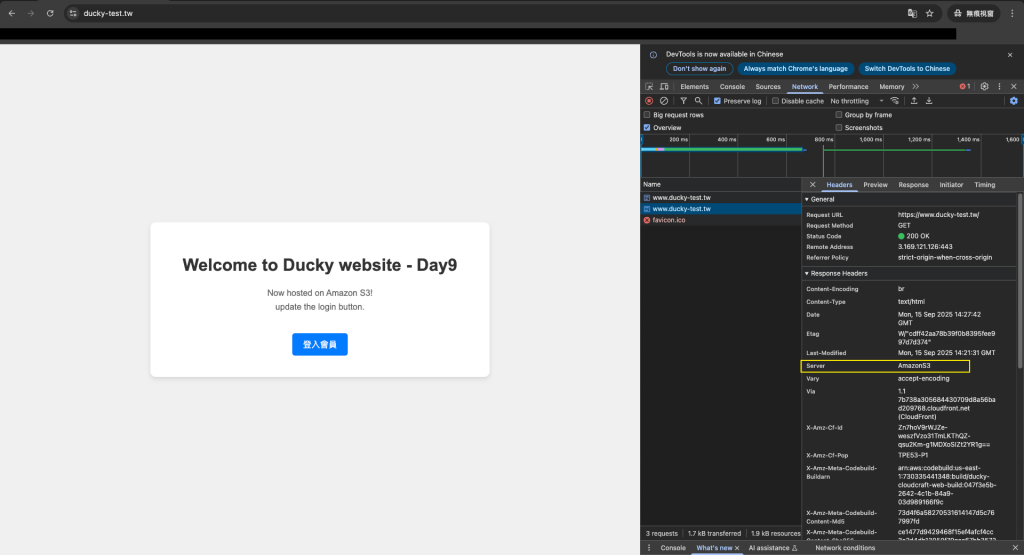
<h1>Welcome to Ducky website - Day9</h1>
<p>Now hosted on Amazon S3!<br>update the login button.</p>
<a href="<AWS_Cognito_login_URL>/login?client_id=5ug0mo74oh6ma666kd9dkpbqk5&response_type=code&scope=email+openid+profile&redirect_uri=<AWS_Cognito_callback_URL>" class="login-button">
登入會員
</a>
</div>
</body>
</html>
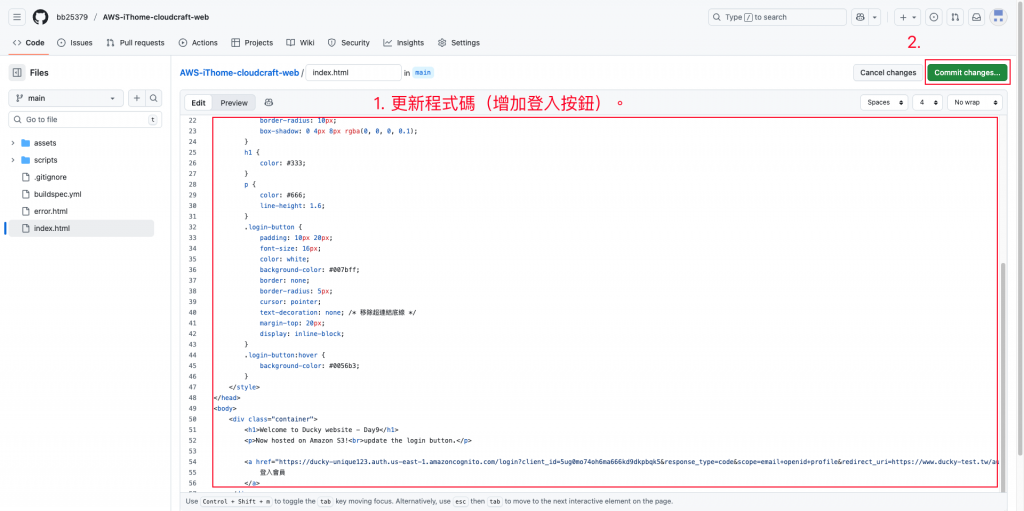
打上備註(選用),推送版本。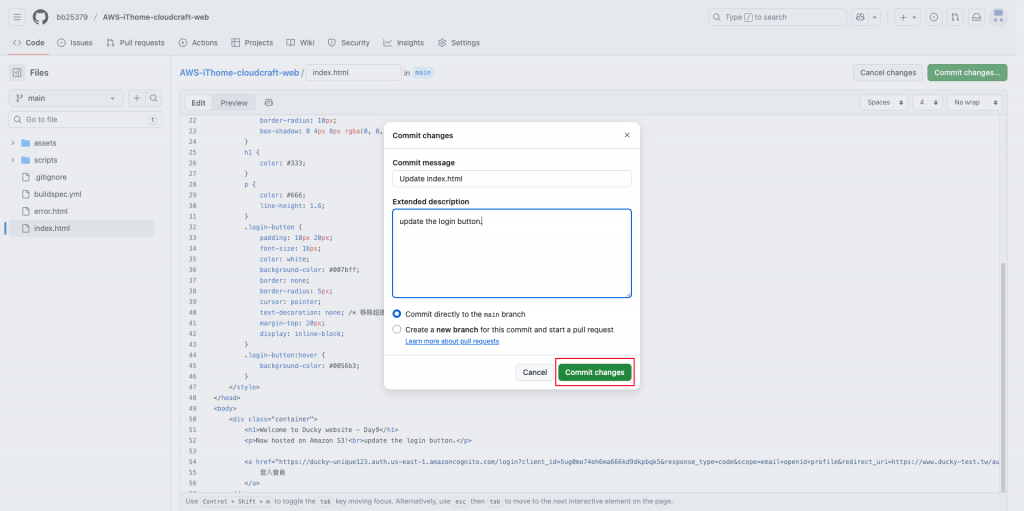
點選剛剛建立的Cognito使用者集區。
進入剛剛建立的「應用程式用戶端」內。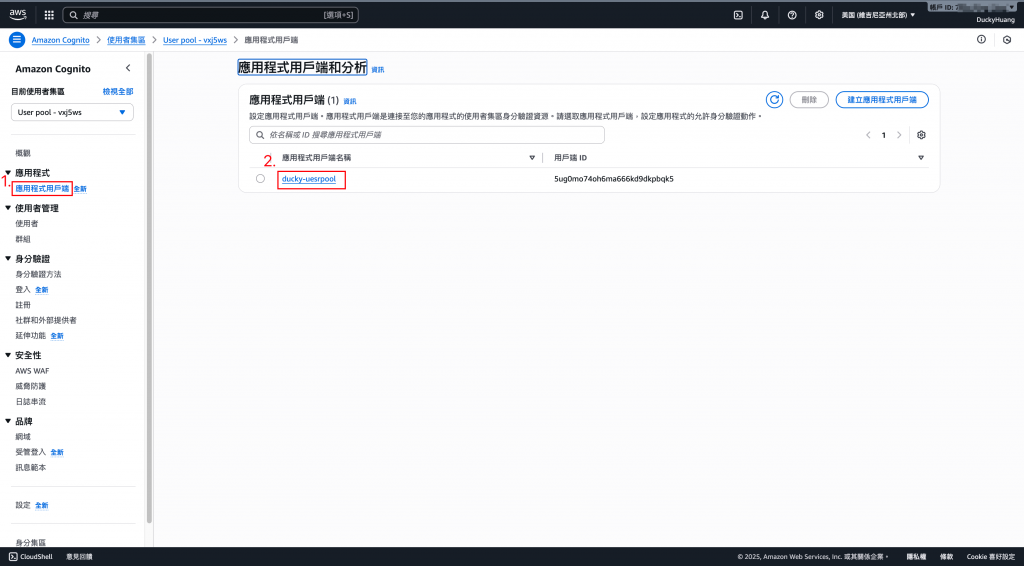
進入登入頁面。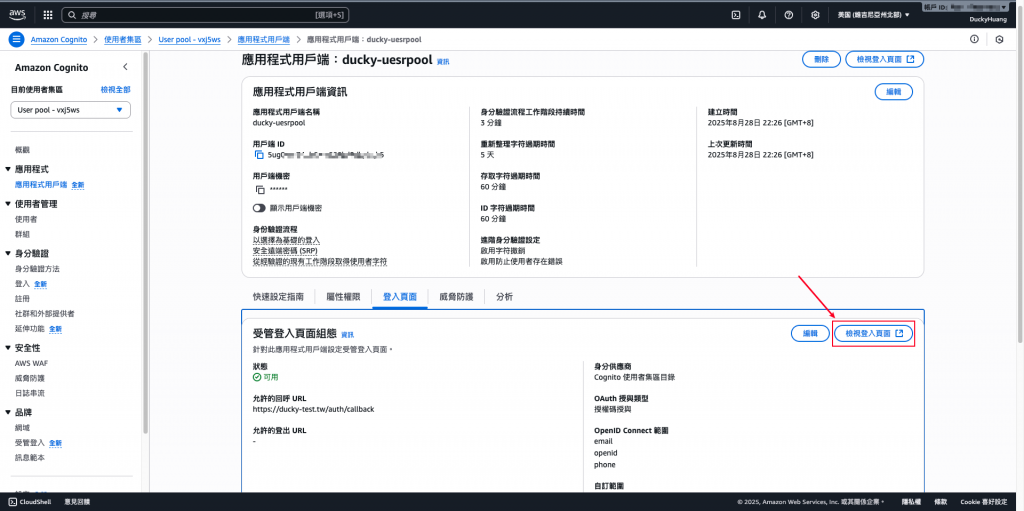
成功看見登入頁面。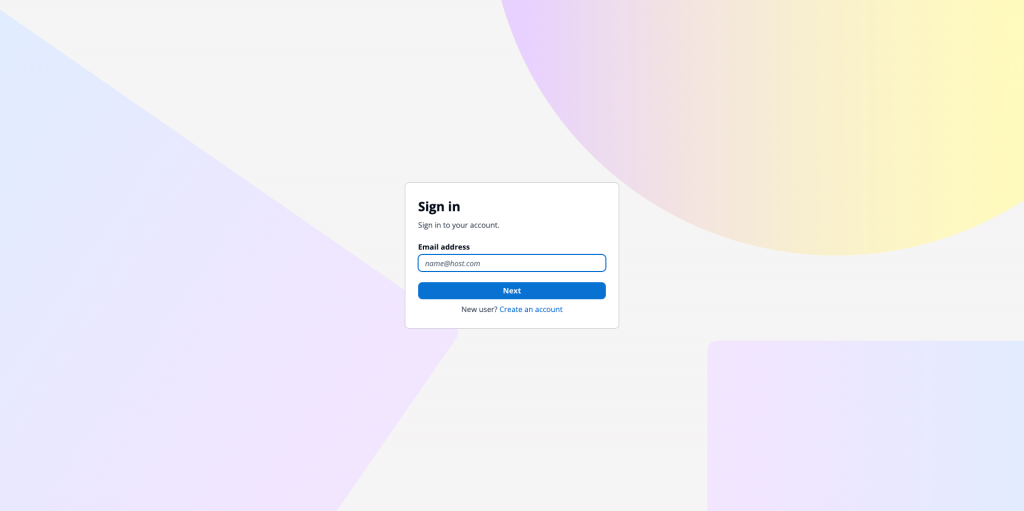
用URL格式的方式來測試 Hosted UI,依照下面的範本,把URL貼上瀏覽器做測試,照講會得到一樣的頁面。
Hosted UI的URL格式
<AWS_Cognito_login_URL>/login
?client_id=你的AppClientId
&response_type=code
&scope=email+openid+profile
&redirect_uri=<AWS_Cognito_callback_URL>
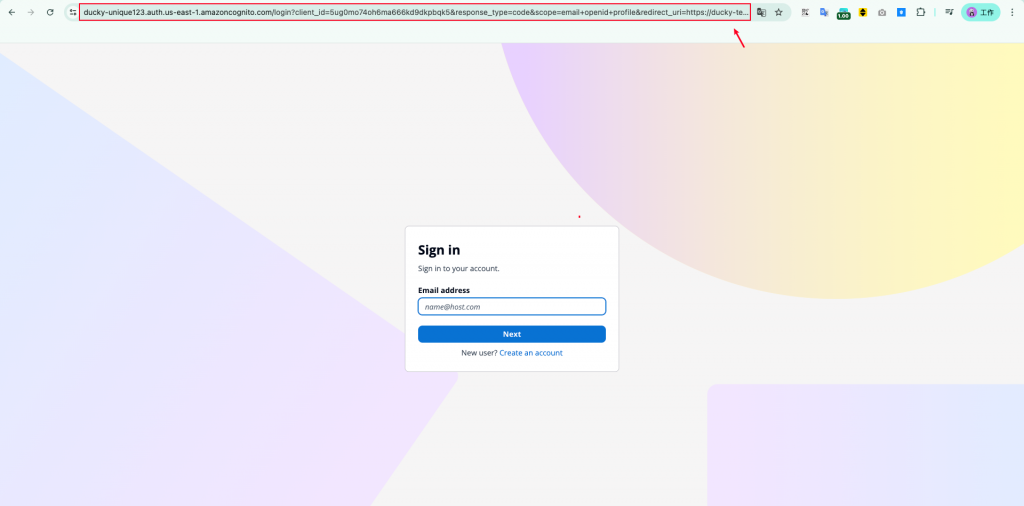
第一行的網址: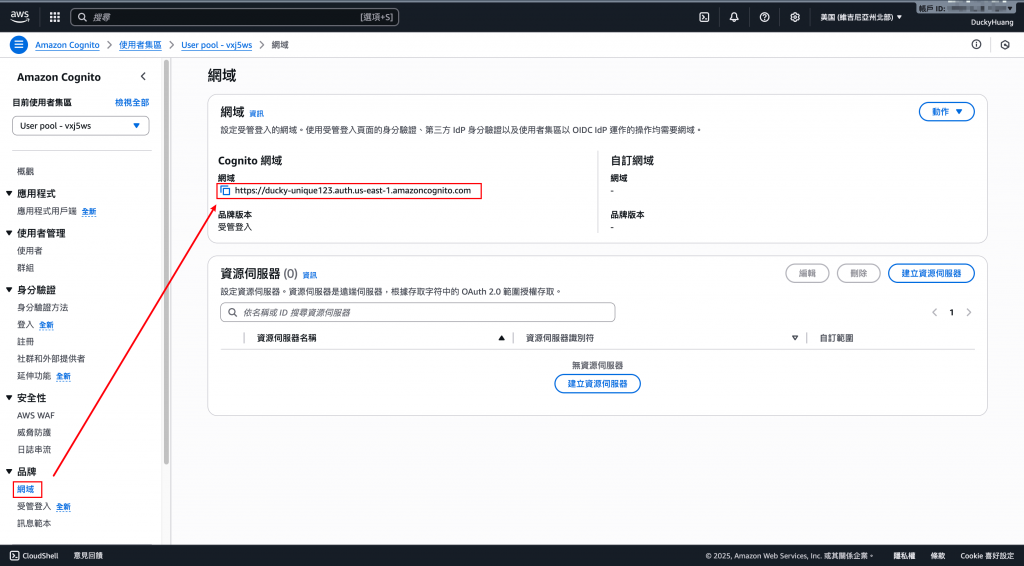
Client_id: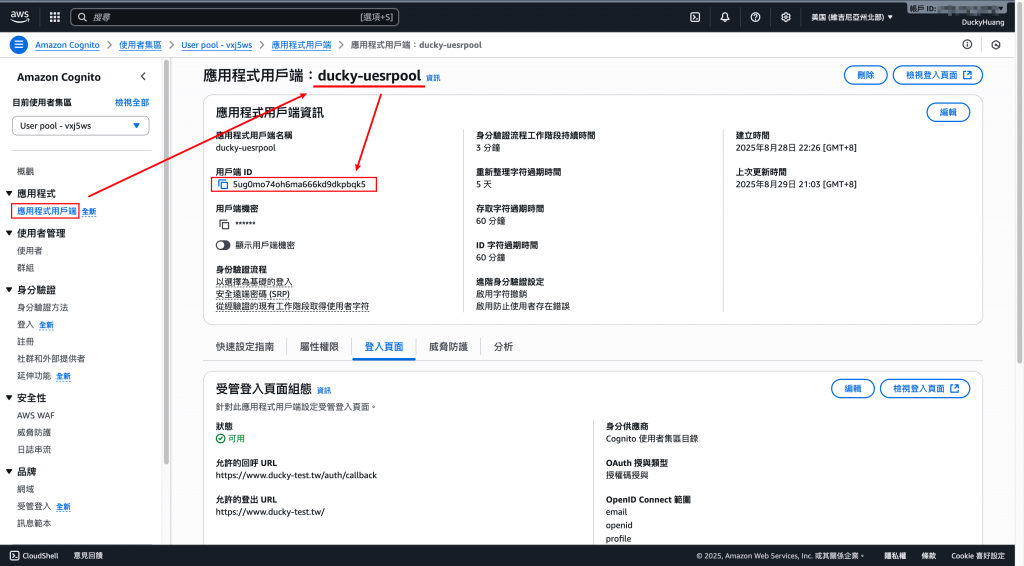
redirect_uri: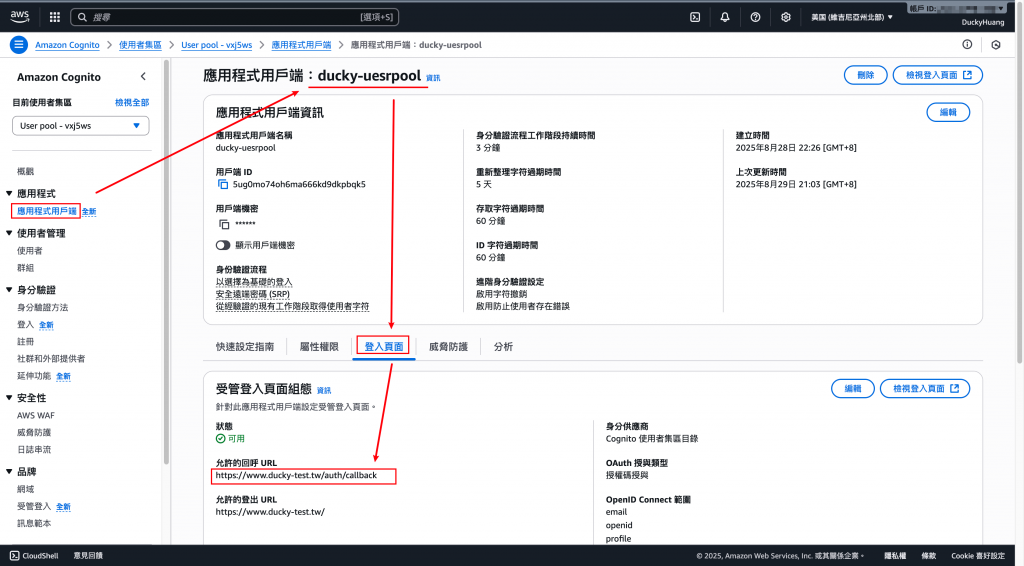
本次範例
https://ducky-unique123.auth.us-east-1.amazoncognito.com/login
?client_id=5ug0mo74oh6ma666kd9dkpbqk5
&response_type=code
&scope=email+openid+profile
&redirect_uri=https://www.ducky-test.tw/auth/callback/index.html
註冊前先確認Cognito上沒有使用者資料。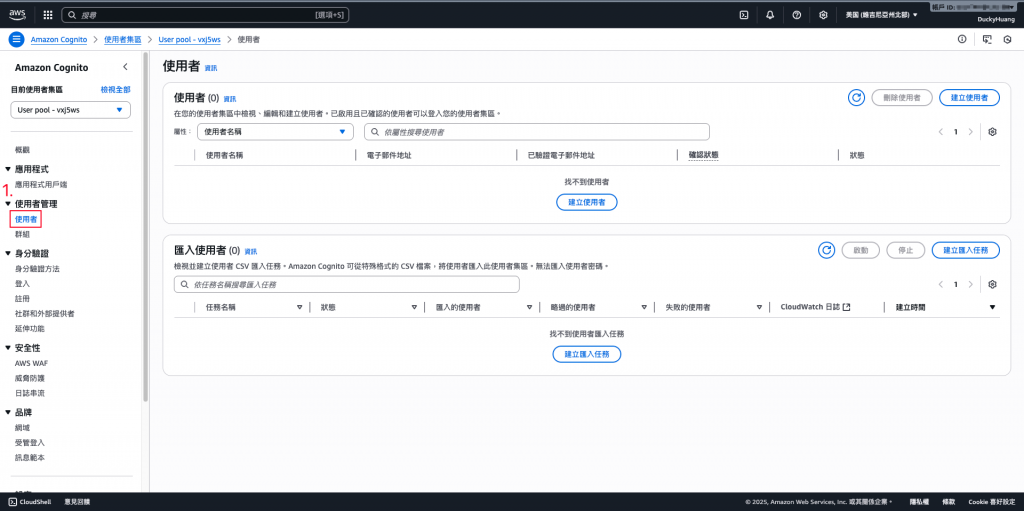
創建帳戶。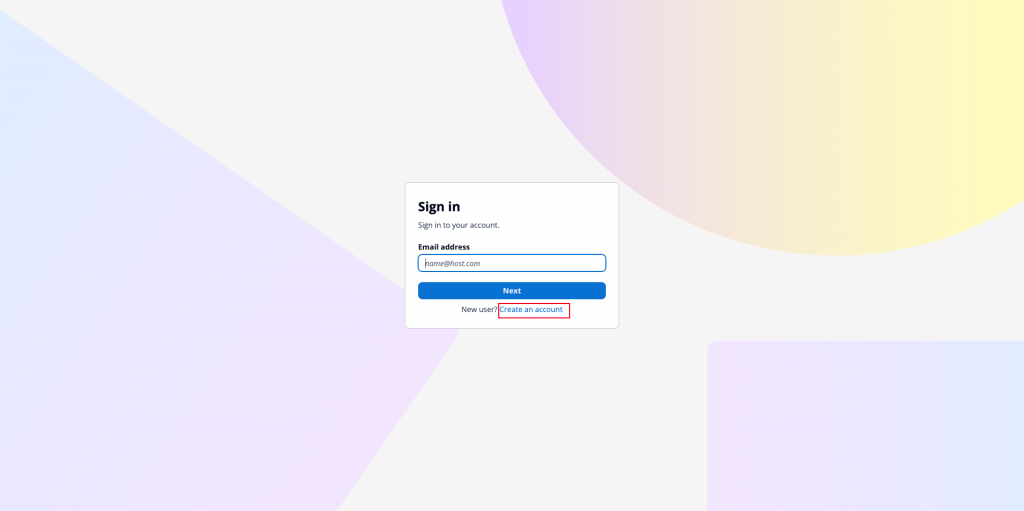
輸入E-mail及密碼做註冊。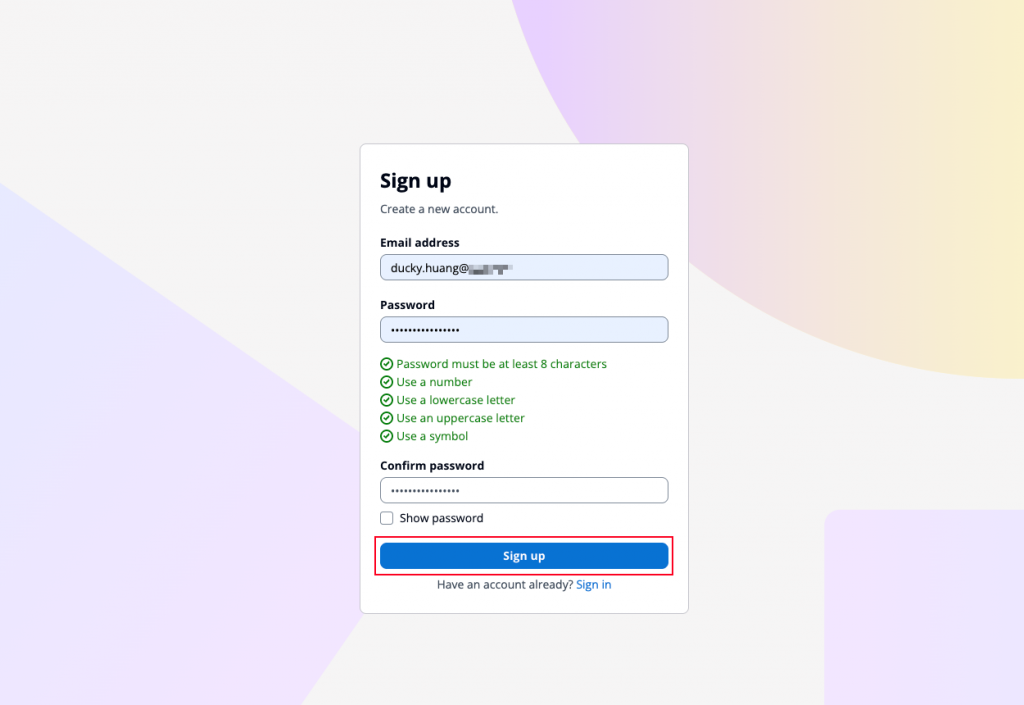
輸入驗證碼。

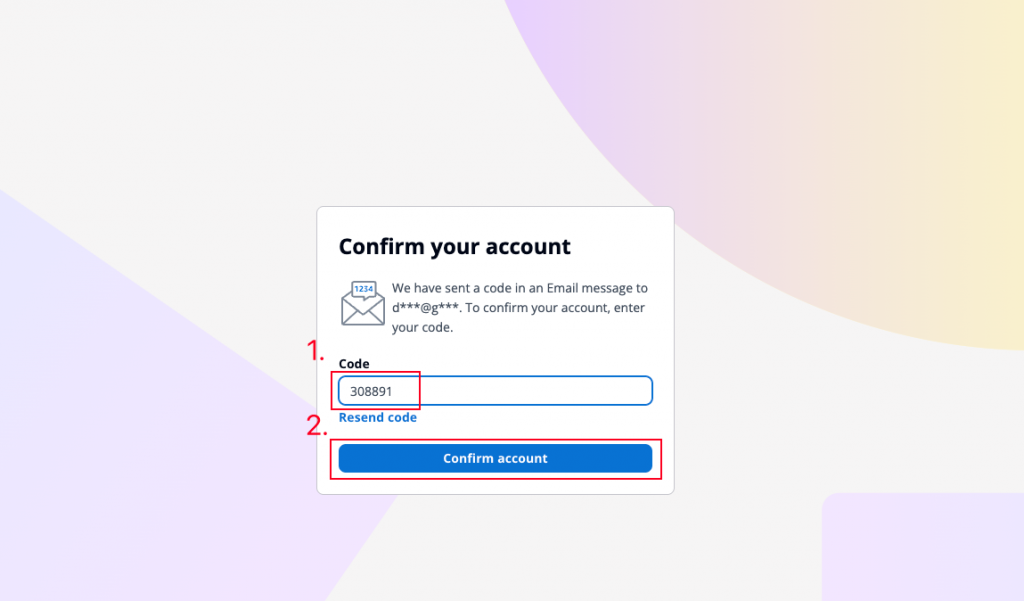
完成註冊。(查看Cognito後台,會發現有一個新的user)
點選登入。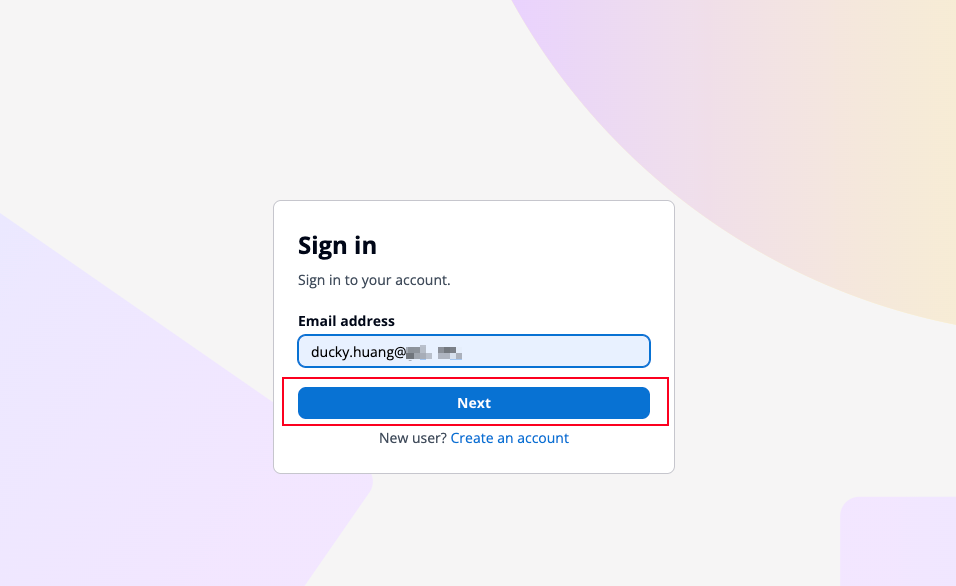
登入後頁面。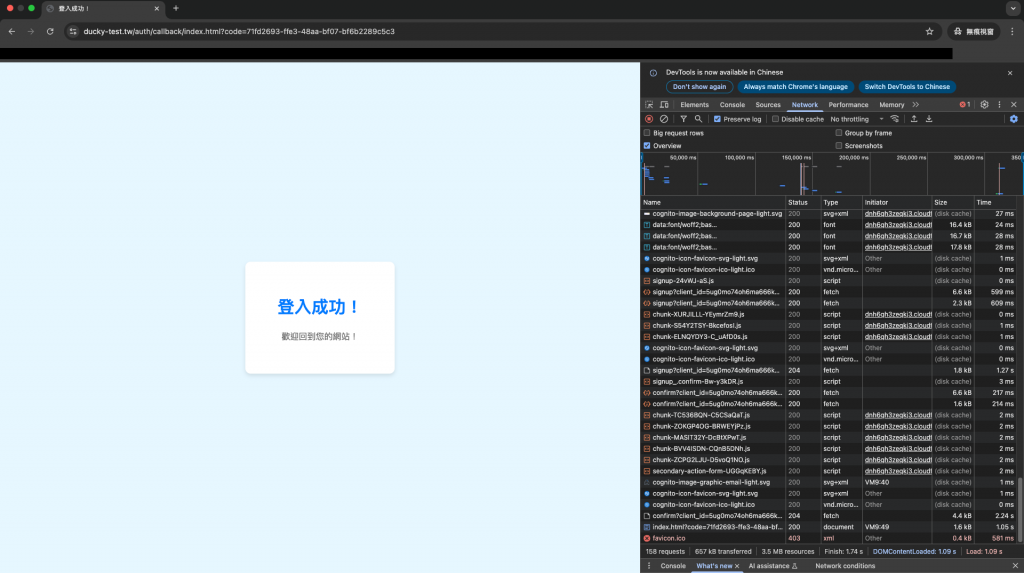
今天我們完成了 Cognito 全託管式會員註冊與驗證系統 的建置。它解決了自建會員系統的安全與維運痛點,並且可以與 API Gateway、Lambda、DynamoDB 無縫整合,實現完整的 Serverless 身分驗證解決方案。
未來在 Day 10(會員通知信件) 與 Day 11(MFA 安全強化) 中,會進一步擴充註冊體驗,讓系統更安全、更貼近實務需求。
參考資料:
[1] AWS - 使用 Amazon Cognito 字首網域進行受管登入:
https://docs.aws.amazon.com/zh_tw/cognito/latest/developerguide/cognito-user-pools-assign-domain-prefix.html
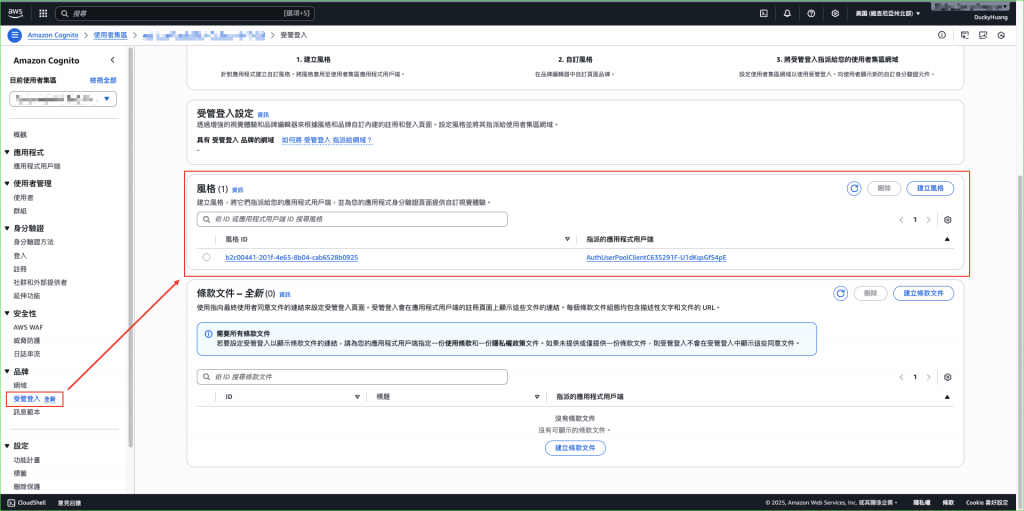
請問登入的畫面有辦法客製嗎🤔
Dylan有辦法唷,從Cognito的左側「品牌」中的「受管頁面」可以編輯登入畫面的「風格」