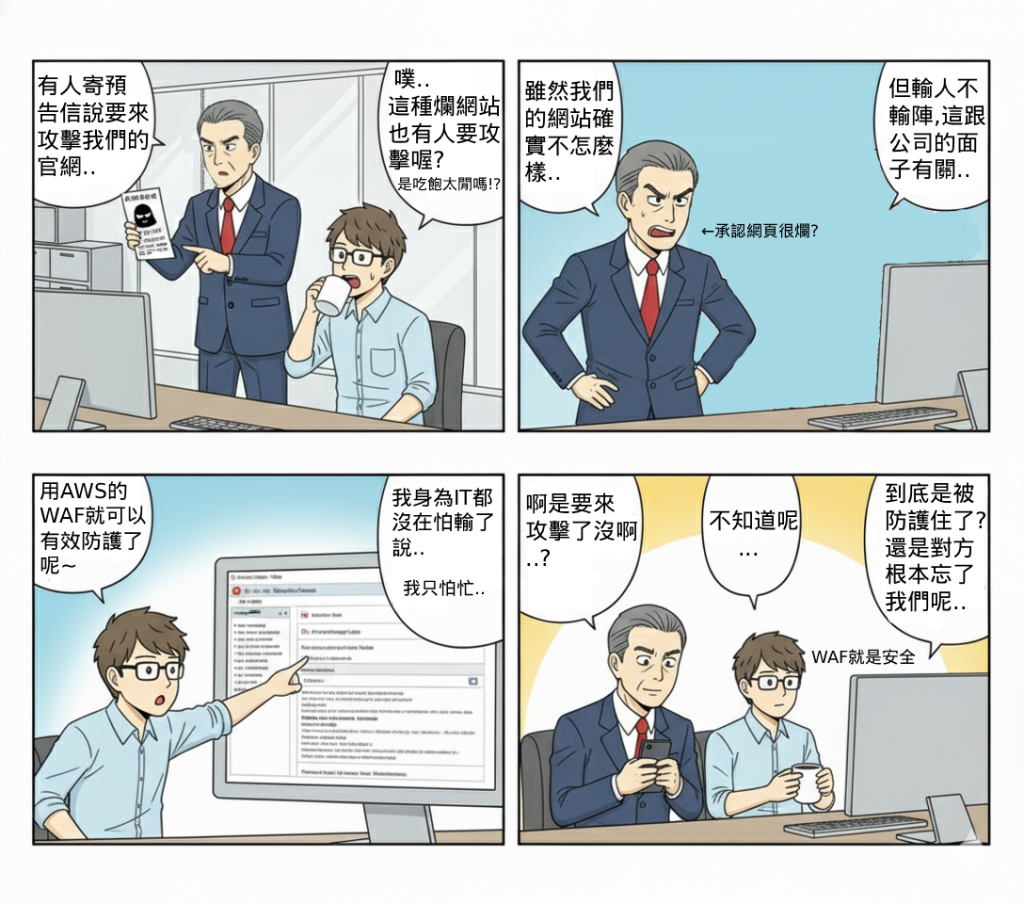
隨著系統對外開放 API 或網站入口,惡意流量與自動化攻擊(如 SQL Injection、XSS、Bot Flooding)變得常見。若沒有流量層級的防護,惡意請求可能在抵達後端前造成壓力、或直接觸發漏洞。本次 Lab 的目標是利用 AWS WAF 搭配 CloudFront 實現全球分佈的 Web Application Firewall,主動攔截異常流量與特定區域的 IP 存取,確保網站與 API 的前端安全性。
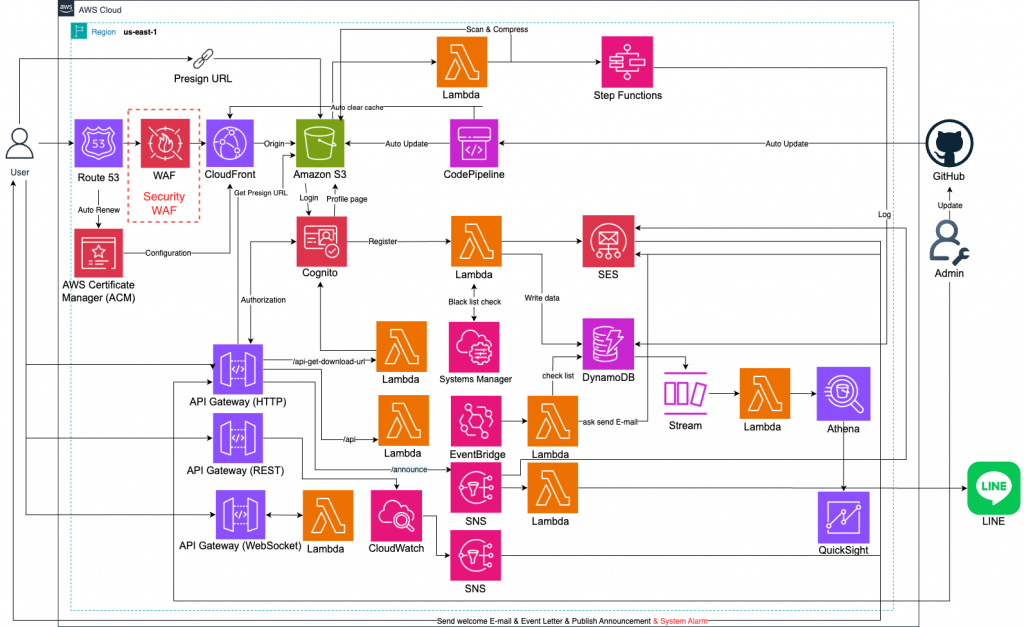
本 Lab 屬於整體 Serverless 架構的「安全防護層(Security Layer)」,位於所有使用者請求進入後端(S3、API Gateway、Lambda)之前。前幾日的實作已經涵蓋資料分析與檔案處理,本日聚焦於「進入點安全性」。
WAF + CloudFront 可視為安全閘道,透過全域邊緣節點在「離攻擊源最近的地方」過濾流量,減少對應用層的壓力,並確保只有合規的 HTTP 請求能進入系統。
(1) AWS WAF:建立 Web ACL,利用 AWS Managed Rules 自動偵測並阻擋 SQLi、XSS、Bot 等常見攻擊。
(2) Amazon CloudFront:作為全域 CDN 與 WAF 的前端整合點,讓防護規則能在全球邊緣節點執行。
(3) Amazon S3:作為靜態網站或 API 儲存後端,WAF 放行的請求會進入此層。
(4) IAM:提供 WAF 與 CloudFront 操作所需的最低權限角色,確保設定過程安全。
進入「WAF & Shield」頁面。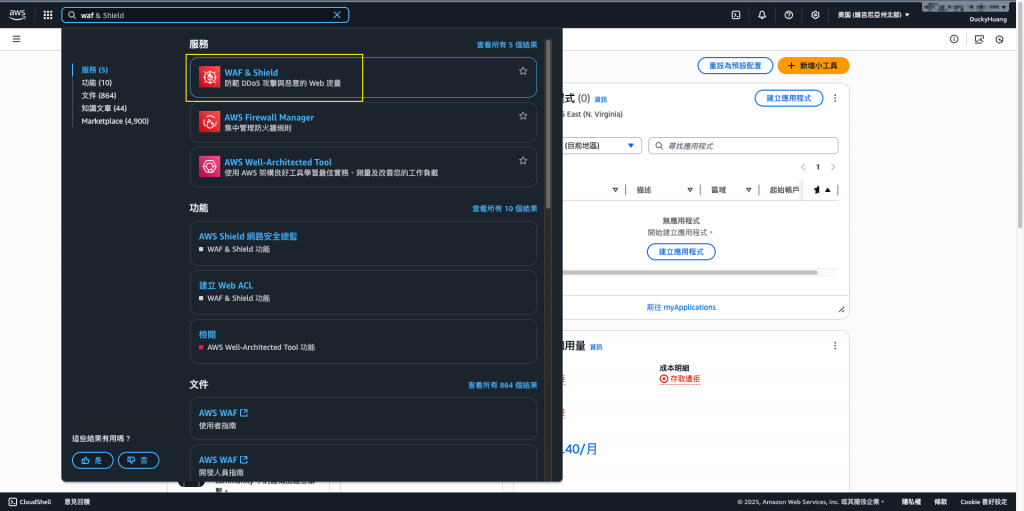
創建一個新的web ACL。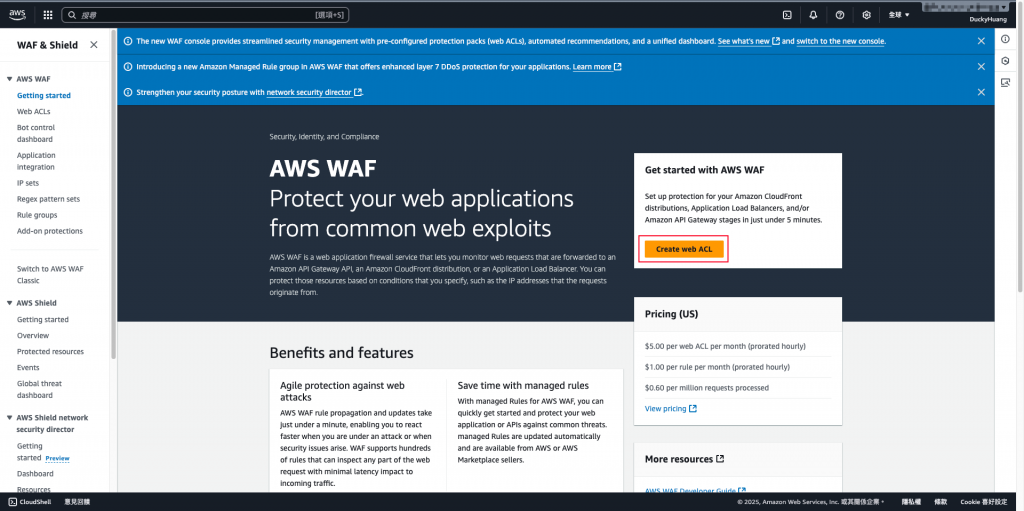
創建Global WAF,並設定名稱。
💡WAF Web ACL 在建立時,區域的選擇決定了它可以關聯哪些 AWS 服務。
Global (全域) 區域建立 Web ACL。這是因為 CloudFront 是一個全球性服務,而 WAF 規則必須部署到全球的邊緣節點上。us-east-1 或 ap-northeast-2) 建立 Web ACL。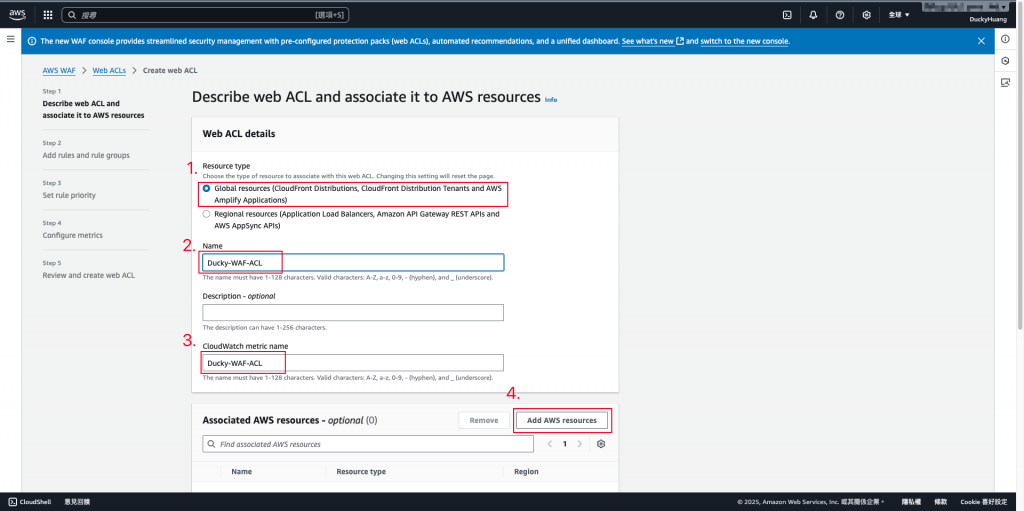
選擇來源為「CloudFront」。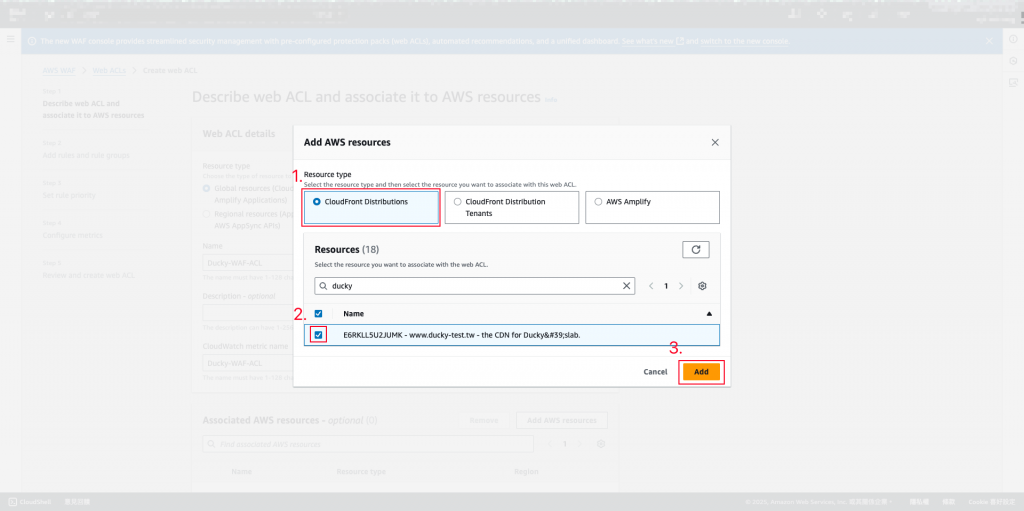
下一步。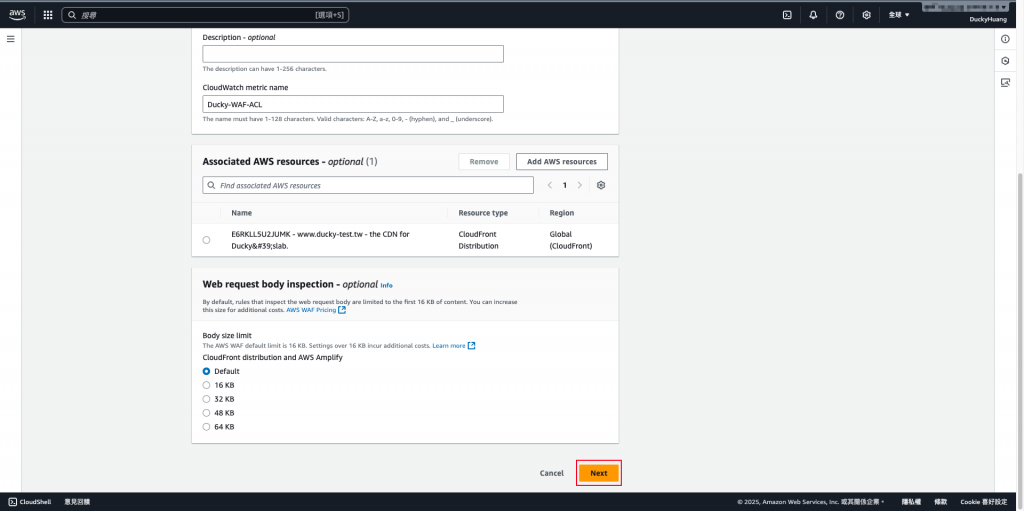
新增AWS內建規則。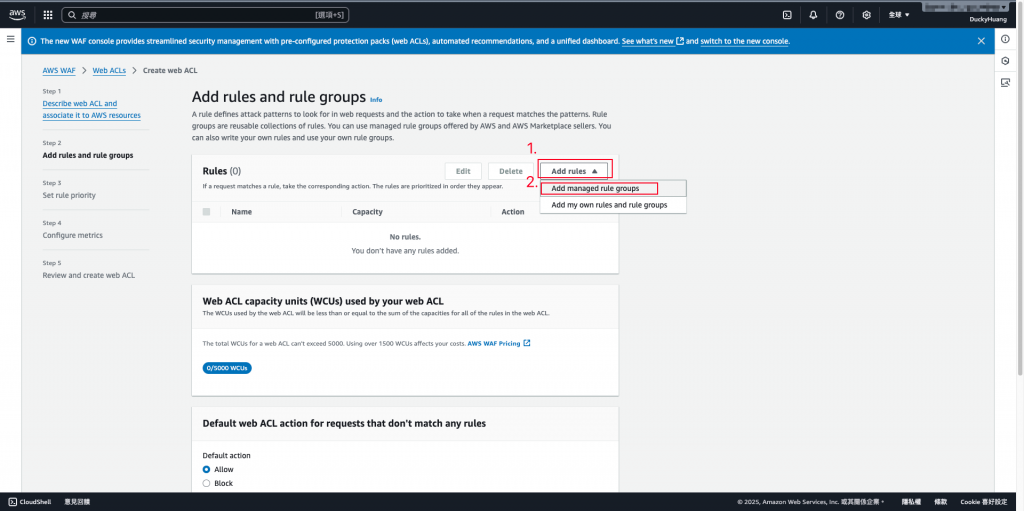
啟用「SQL database」規則。(防止SQL注入)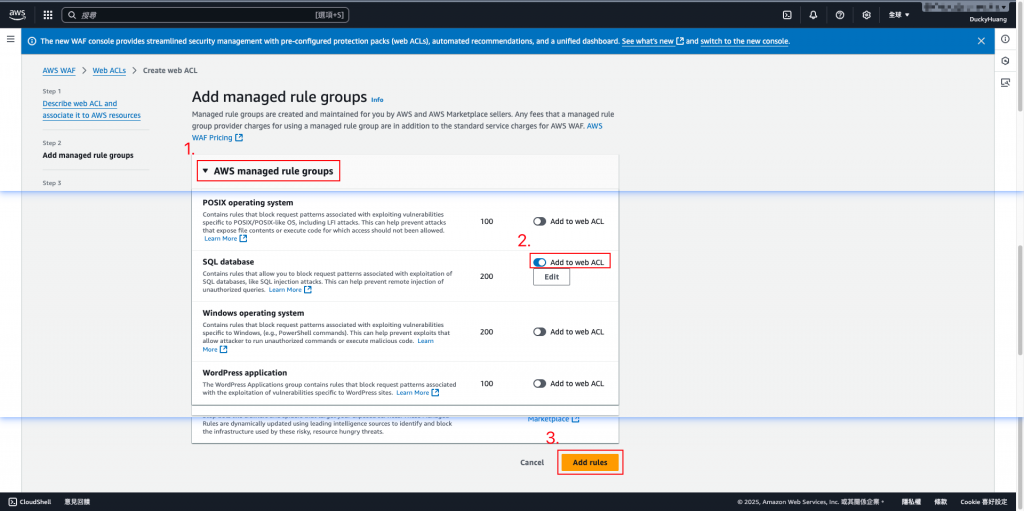
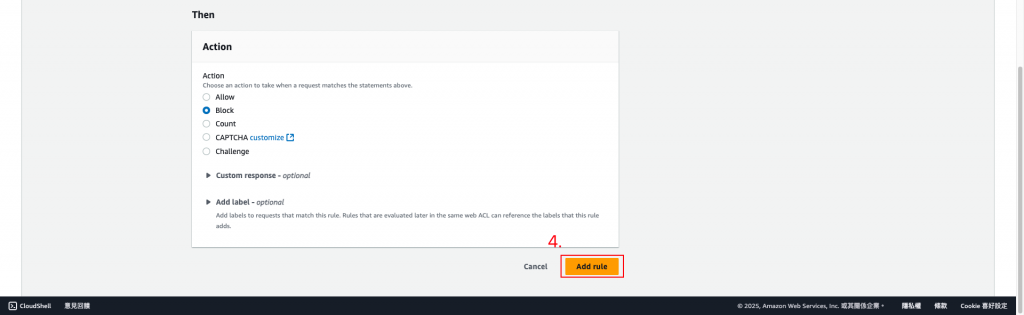
新增自訂義規則。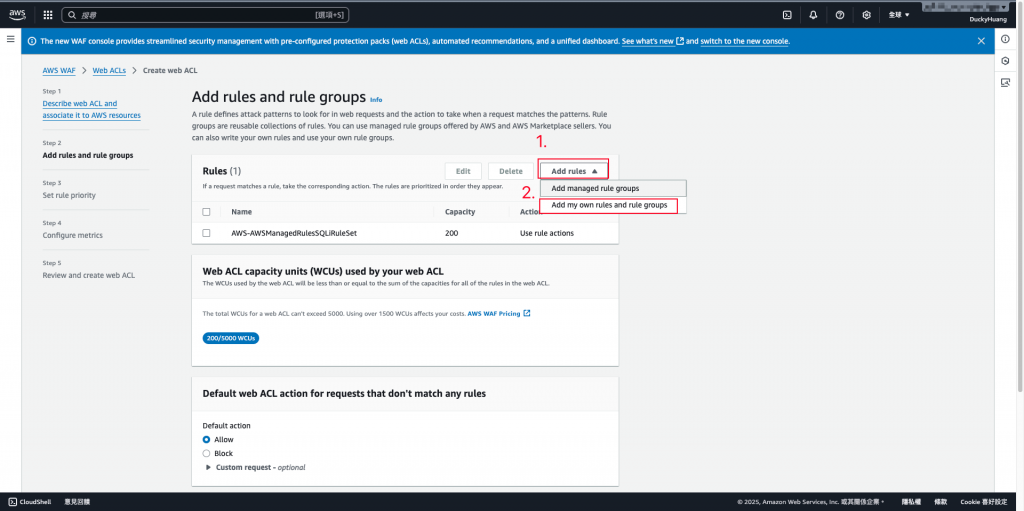
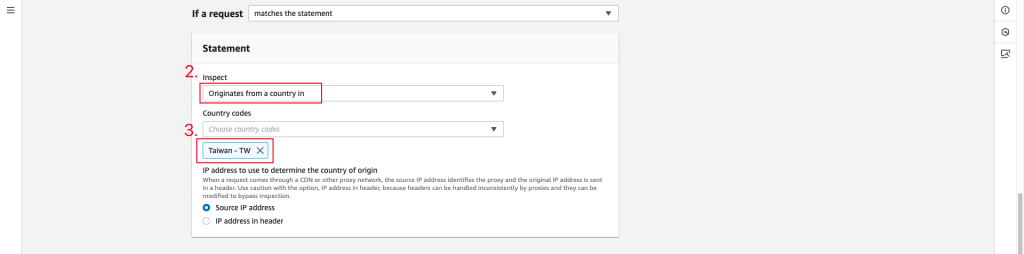
防止特定國家訪問。(這邊設定「限制台灣用戶IP訪問」)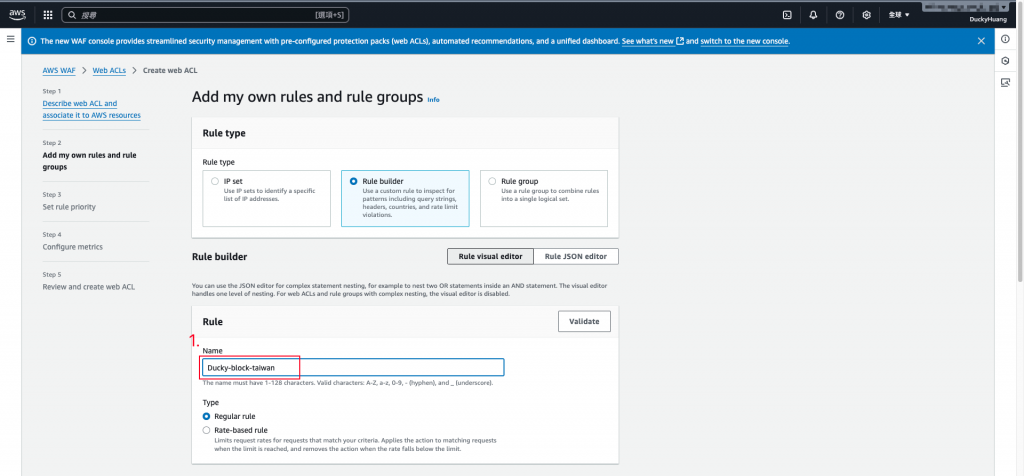
下一步。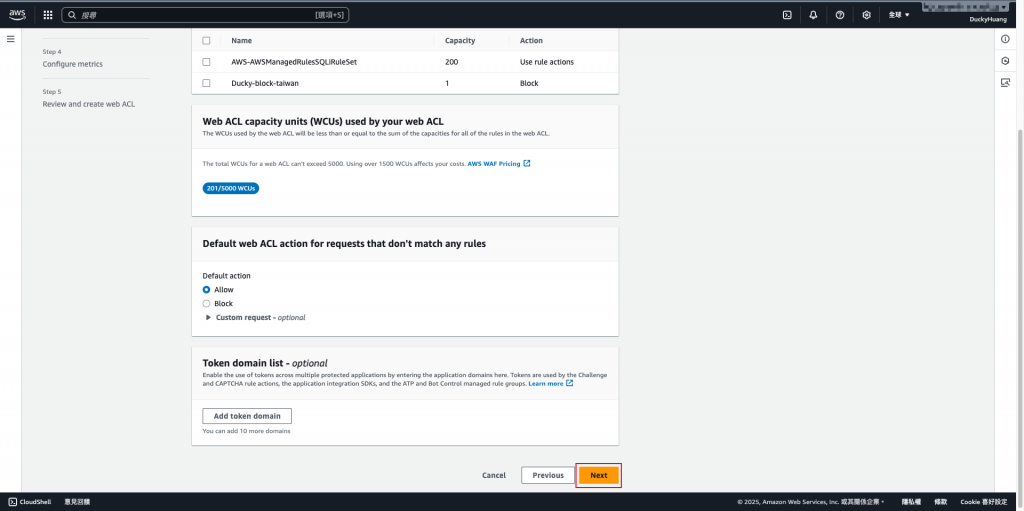
調整規則優先級。(本次不做調整)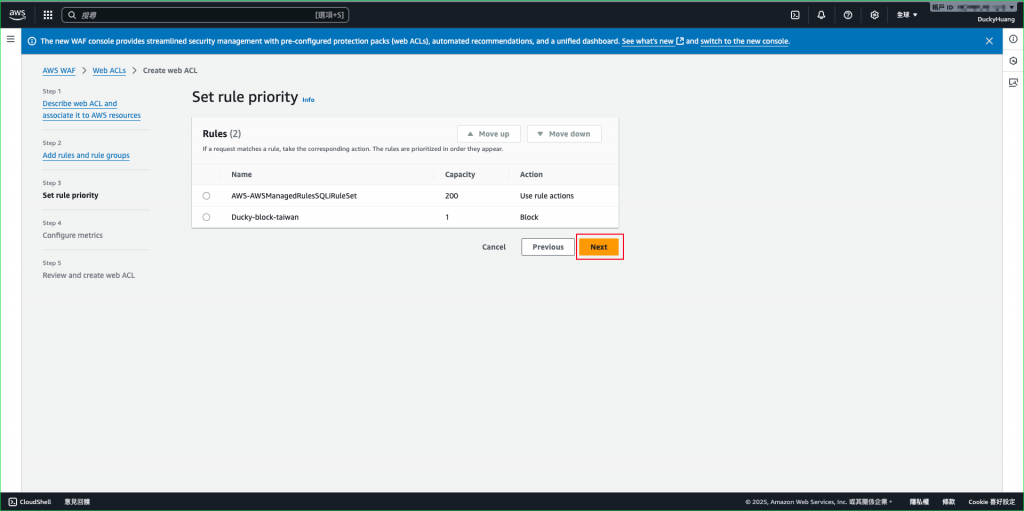
設定CloudWatch Metric (CloudWatch 指標) 的名稱。
確認創建。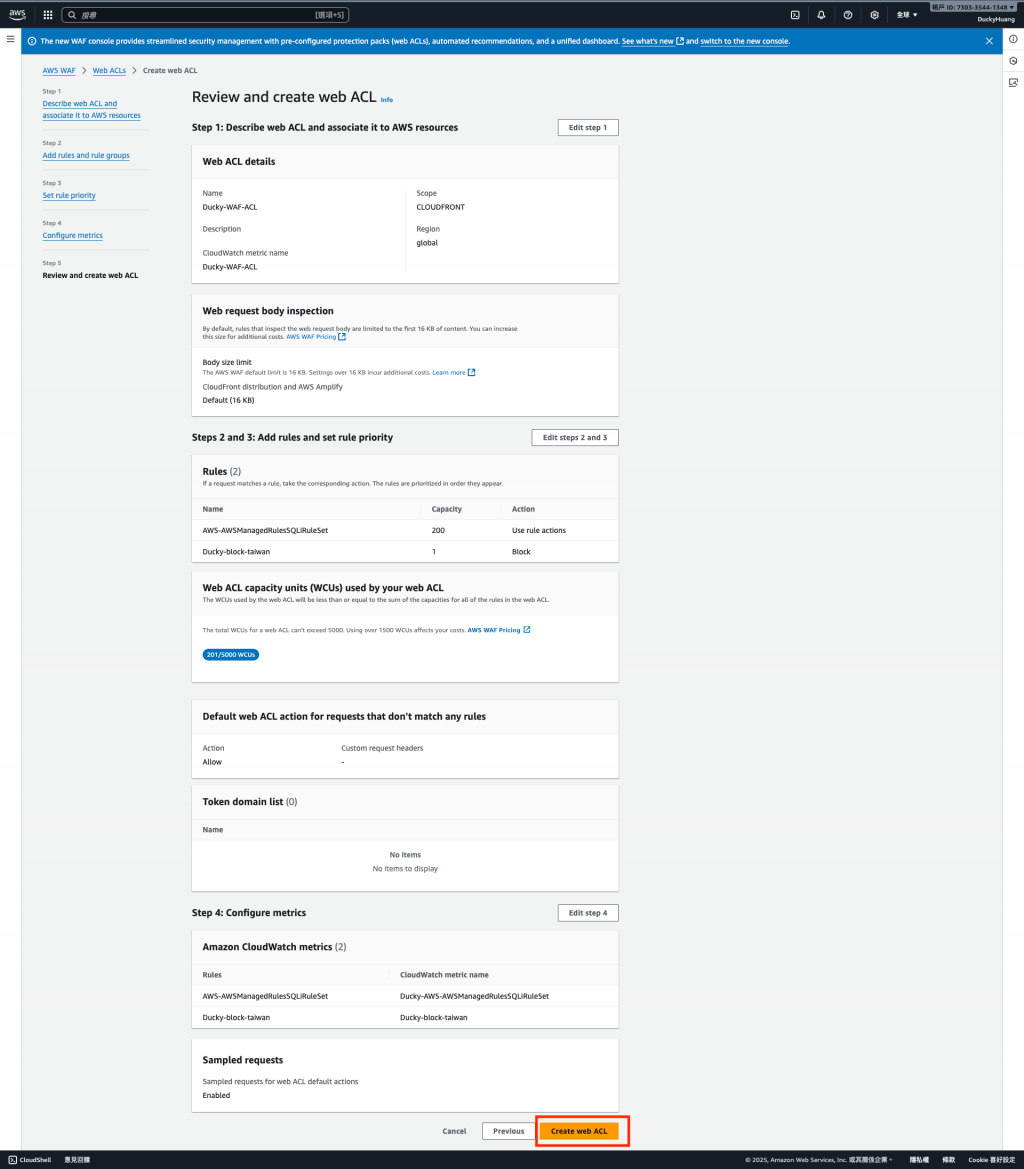
至「CloudFront」頁面。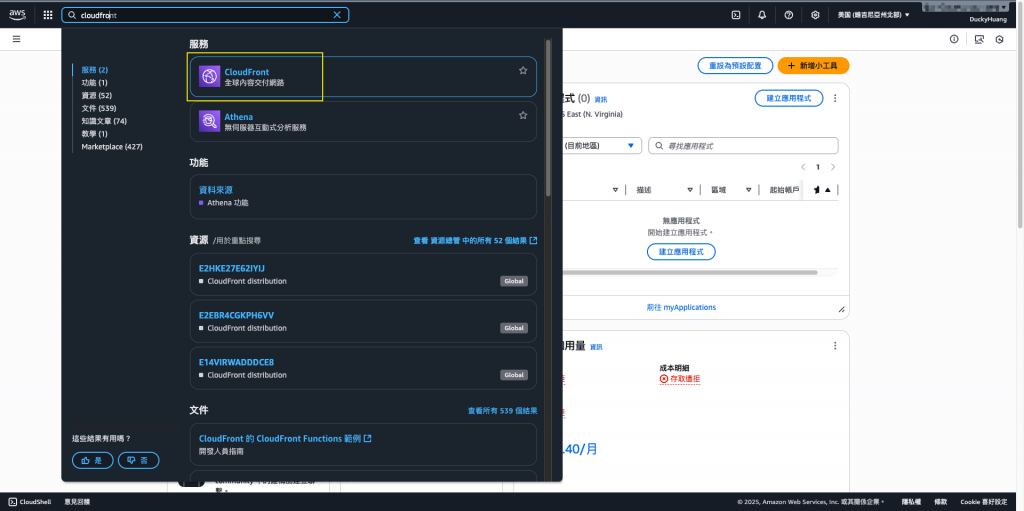
進入CloudFront資源內。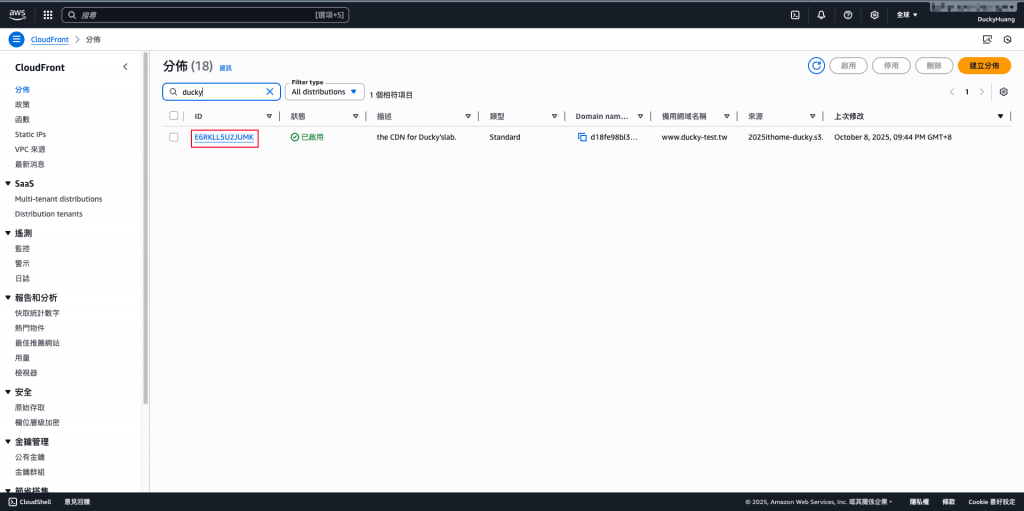
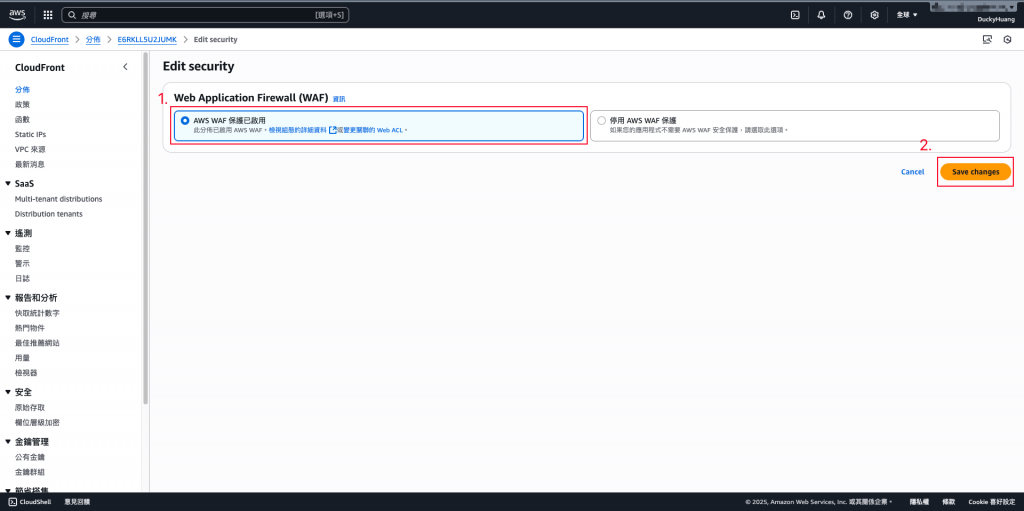
點選「安全」頁面,確認WAF已生效。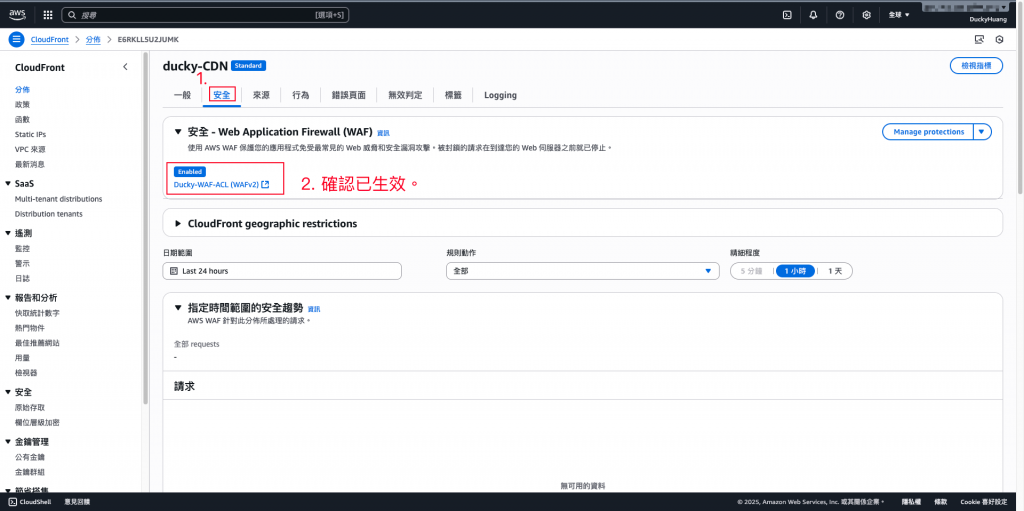
【補充】沒開啟的話,請點這邊啟用。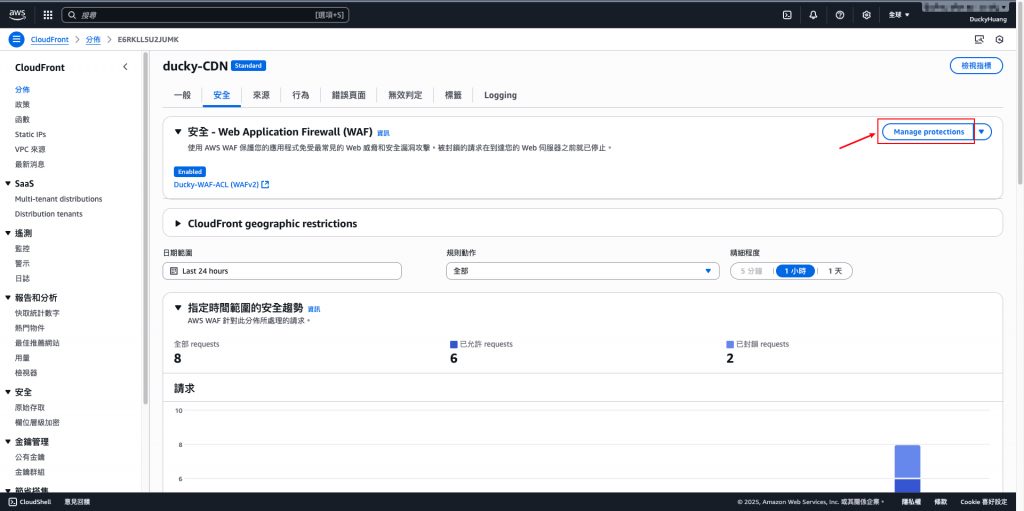
說明:使用 VPN 切換至被封鎖區域(台灣 IP),重新訪問網站,應顯示封鎖頁面或 Access Denied。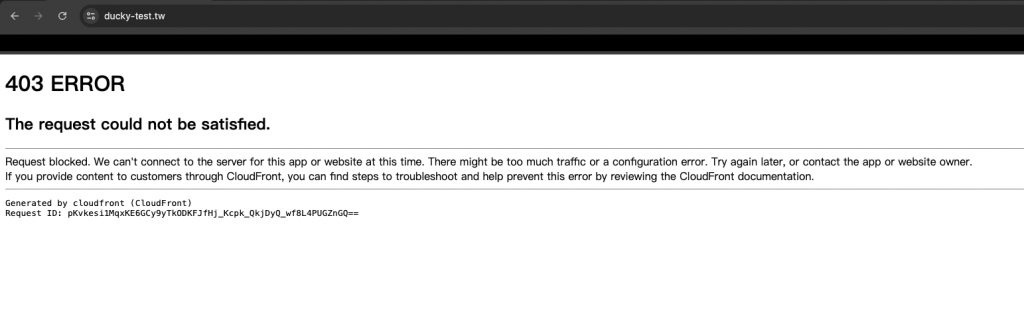
說明:使用非封鎖區域 IP 正常訪問 CloudFront URL,網站應能正確顯示。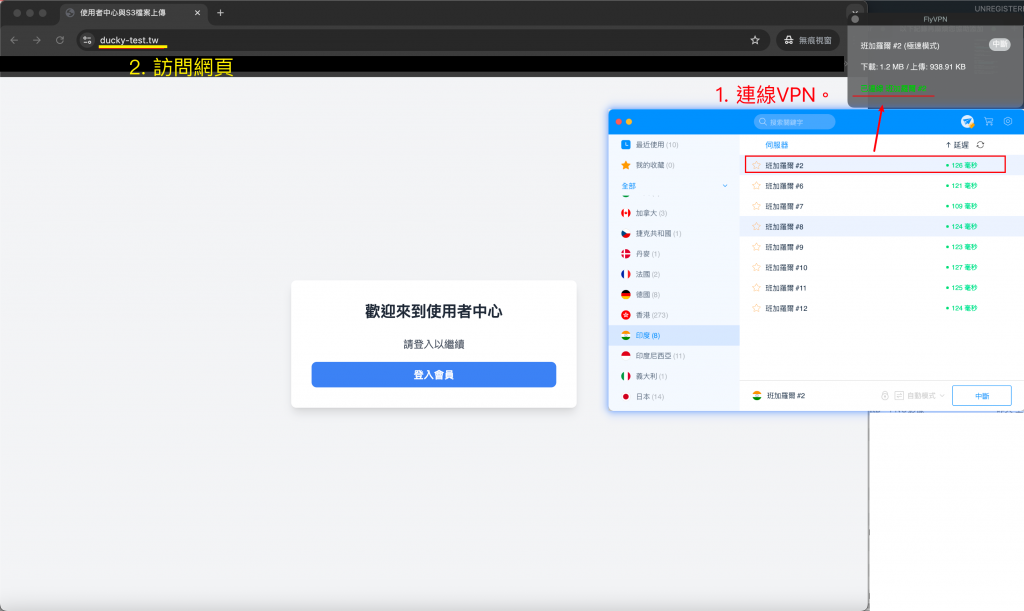
說明:使用 curl 模擬 SQL Injection 請求,確認是否被阻擋。(記得使用非封鎖區域)
curl -X POST "https://<your-cloudfront-domain>" -d "id=1' OR '1'='1"
結果應回傳:403 Forbidden。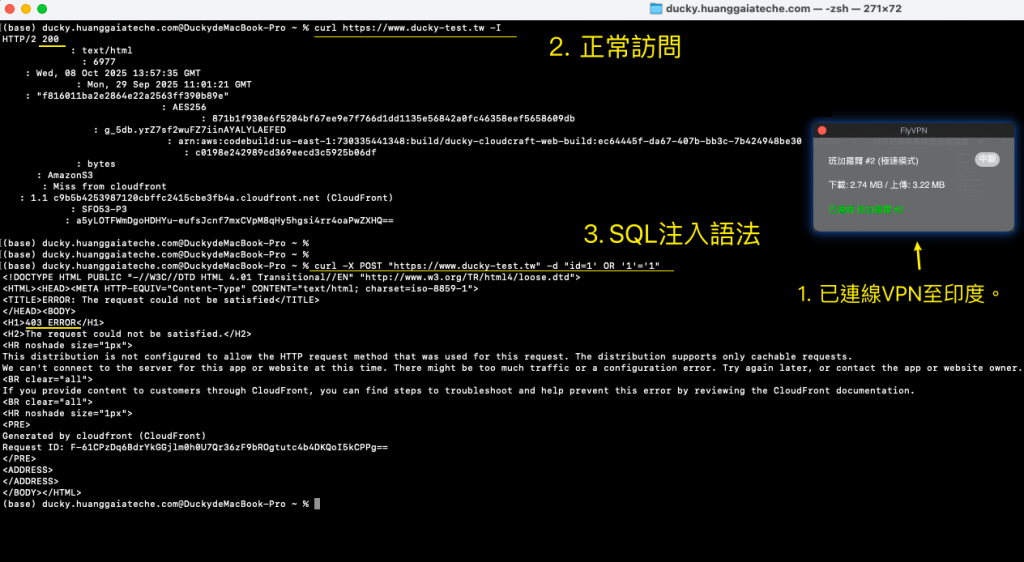
本次 Lab 建立了一層全球級的安全防護架構,透過 CloudFront + WAF,在流量進入應用層前就能進行過濾與阻擋。此設計有效降低後端負載,避免惡意請求造成服務中斷或資料外洩。
最終成果是一個結合 高可用性、安全性與成本效益 的 Web 防護方案,為整體 Serverless 架構打下安全基礎。

