昨天我們介紹了自動化的核心元素,裡面的案例有提到:
在 n8n 的 Workflow 裡,如果要使用 Google Drive Node,打開 Node 第一個格子就是要設定「Credential」
點開「Create new credential」會跳出一個視窗,這個視窗中會需要你填寫 Client ID、Client Secret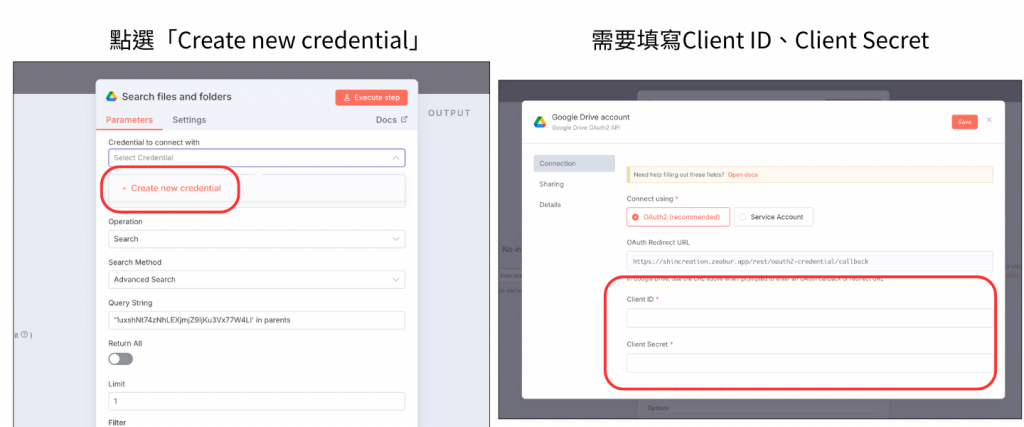
所以今天這篇文章,我會用一張圖來拆解整個流程,告訴你:
要取得 Client ID / Secret,實際上需要在 Google Cloud 先設定哪些東西?
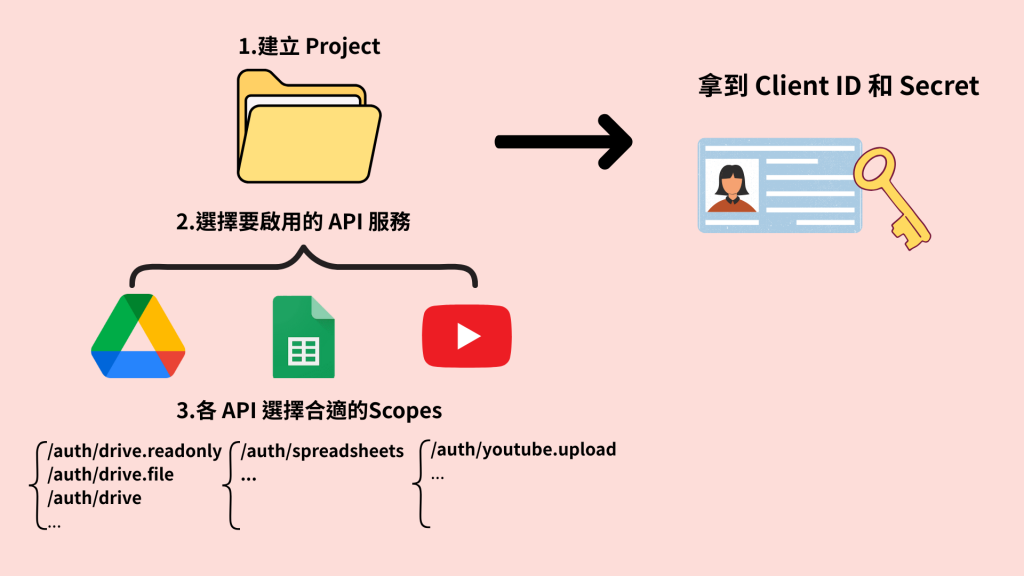
簡單來說就是三個步驟:
首先到 Google Cloud Console 登入自己的 Google 帳號。第一次使用會需要填一些基本設定,按照指引填寫即可。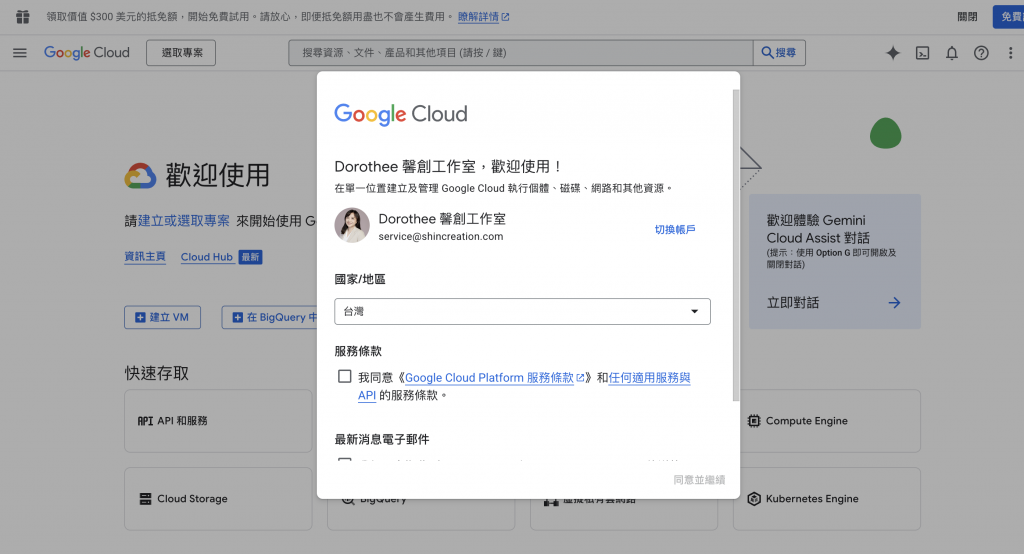
點選「選取專案」,會出現一個視窗,按「新增專案」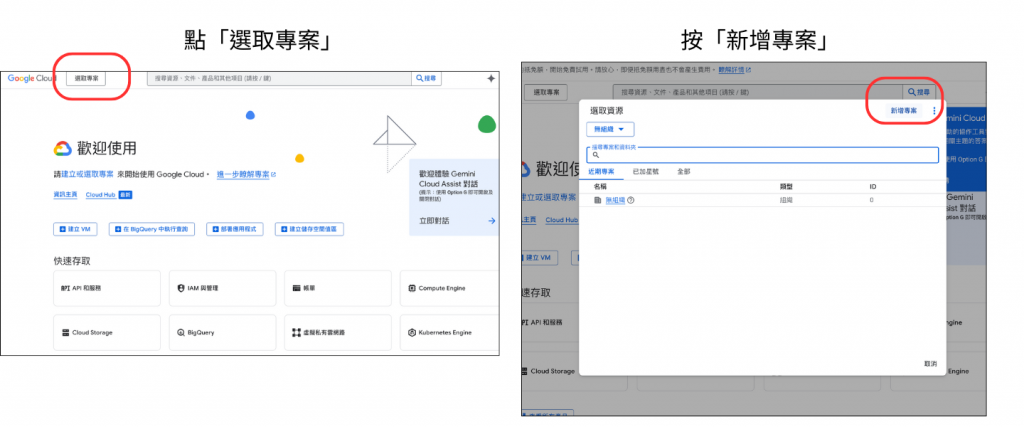
填寫專案名稱的空格,可以取一個比較好辨識的名稱,在這邊我用的是「n8n Project」
填好後按「建立」
主頁左上方顯示剛剛建立的專案名稱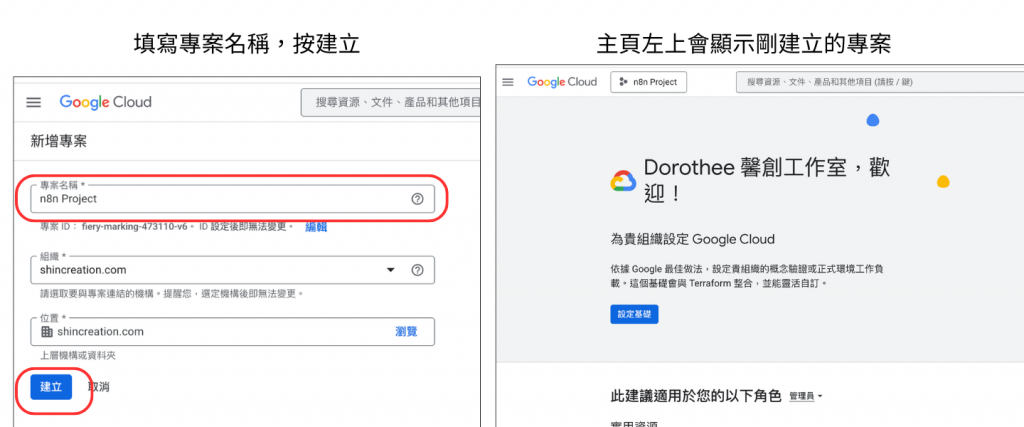
接著點開左上方的導覽選單☰,會看到很多選項
滑鼠先移到「API與服務」,點選其中的次選單「OAuth同意畫面」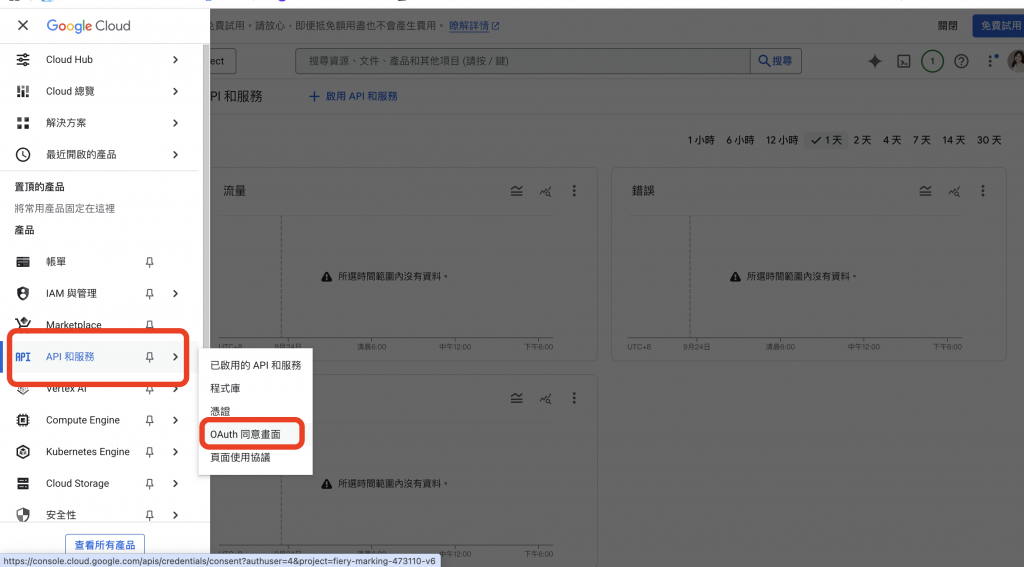
點選「開始」進入應用程式的設定
填寫應用程式名稱、使用者支援電子郵件
填好後按「下一步」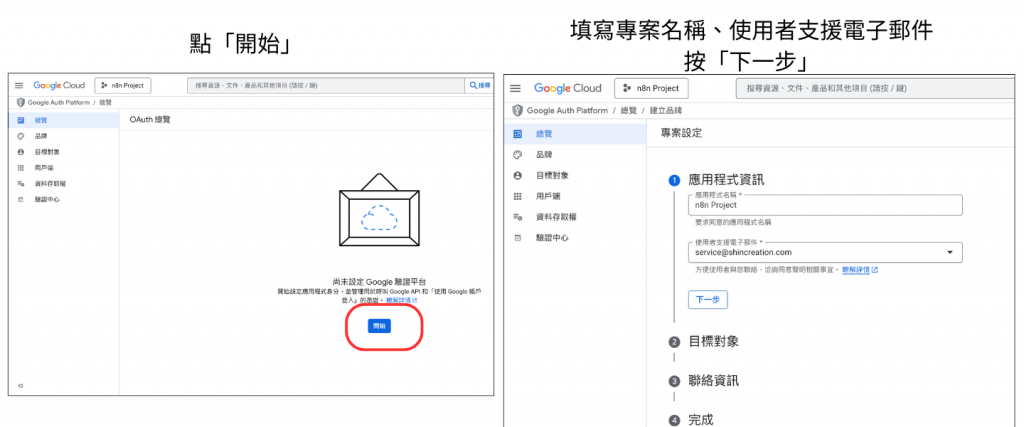
目標對象選「外部」,按「下一步」
填寫聯絡資訊的電子郵件,按「下一步」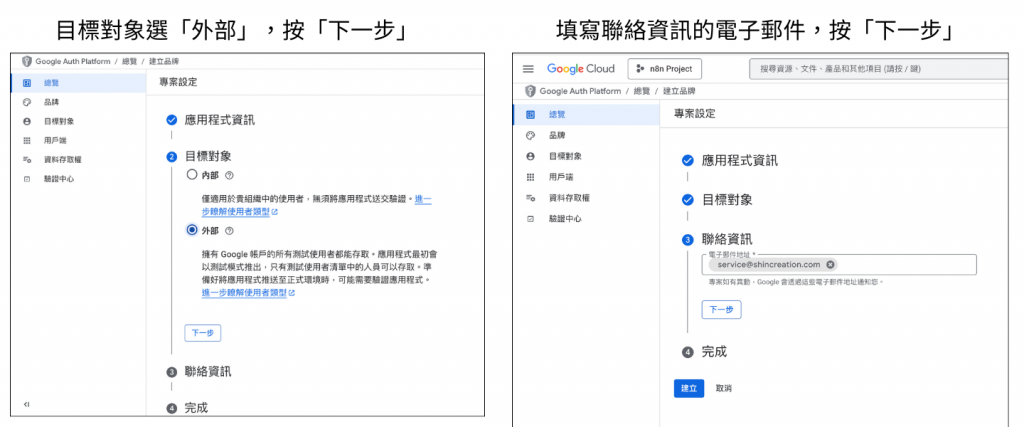
最後,打勾同意《Google API 服務:使用者資料政策 》之後,按「繼續」、「建立」的按鈕。
左側會看到還有很多項目,從品牌以下點進去,開始逐項設定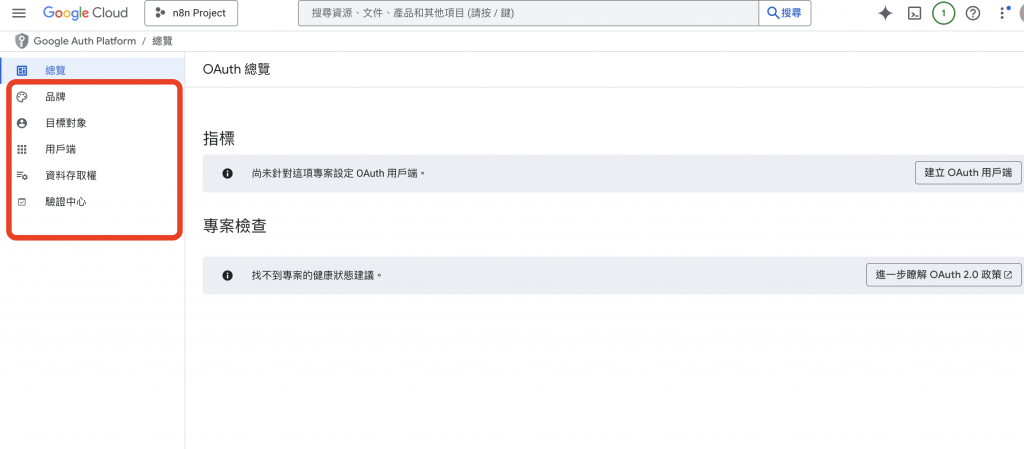
在 品牌資訊 的設定裡,Google 會要求填寫 授權網域(Authorized domain)。
這裡的網域必須是實際會使用這個憑證的服務網域。
因為這組 Google Credential 是要給 n8n 使用的,所以授權網域就要填寫 n8n 的部署網址。
像我的環境是架在 Zeabur 上,因此這裡填入:shincreation.zeabur.app
開發人員聯絡資訊可填寫自己的 Email
完成後就按「儲存」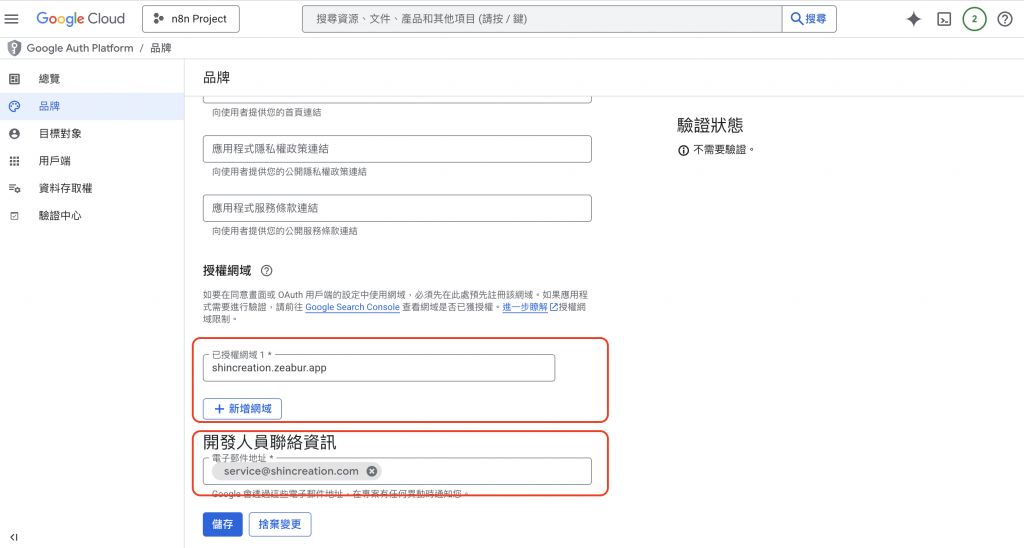
接下來,我們就要選擇要啟用的 API 服務。
昨天的案例有用到 Google Drive 跟 Google Sheets 的 Node,那就要啟用 Google Drive 跟 Google Sheets 的 API 服務。
點開左上方的導覽選單☰,滑鼠移到「API與服務」,點選其中的次選單「已啟用的 API 與服務」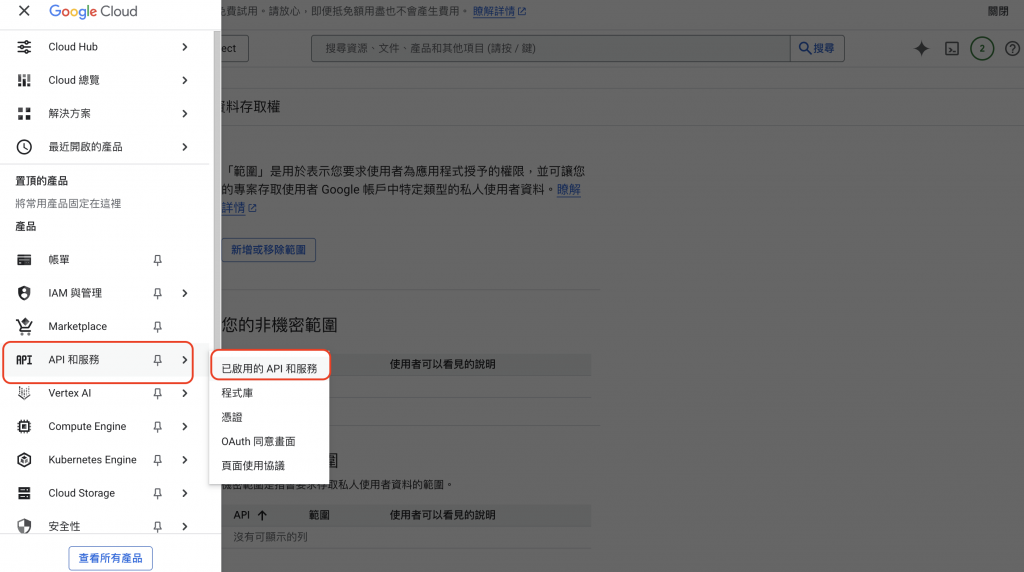
點「啟用 API 和服務」,輸入關鍵字搜尋,如:Google Drive、Google Sheets
一次啟用一個 API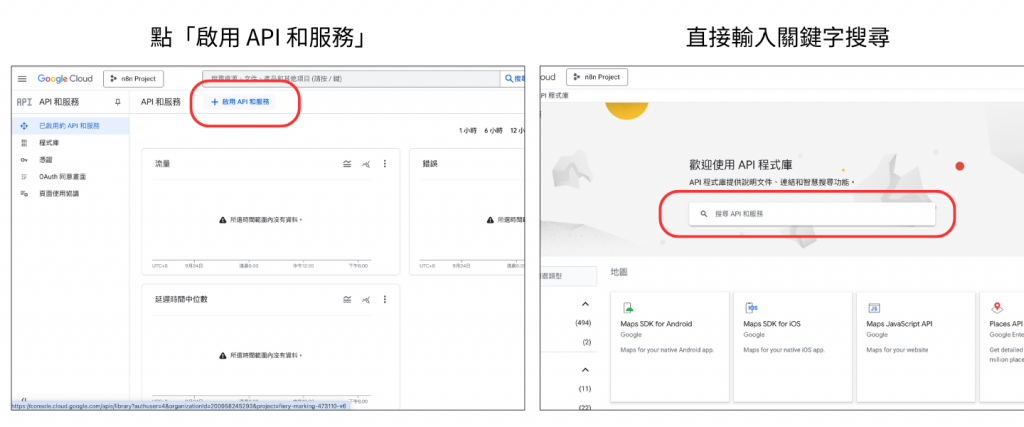
像上圖出現很多 Google Drive 相關的 API 服務,不知道要選哪一個的話,可以根據你想要達成的目的,去問 ChatGPT,讓它告訴你該選哪一個。
點想要的 API 服務,按「啟用」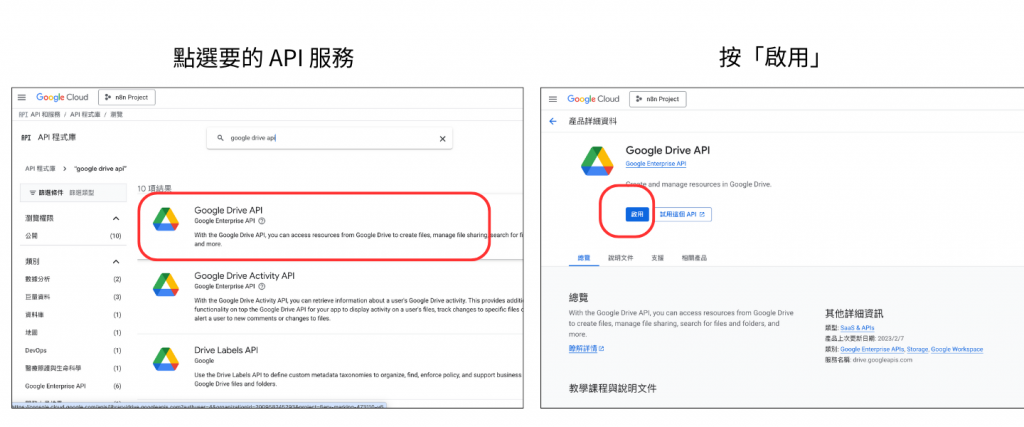
API 啟用後,還要進一步決定應用程式到底能做什麼事,這就是 Scopes
點開左上方的導覽選單☰,滑鼠移到「API與服務」,點選其中的次選單「OAuth同意畫面」
點選左側的「資料存取權」,會看到「新增或移除範圍」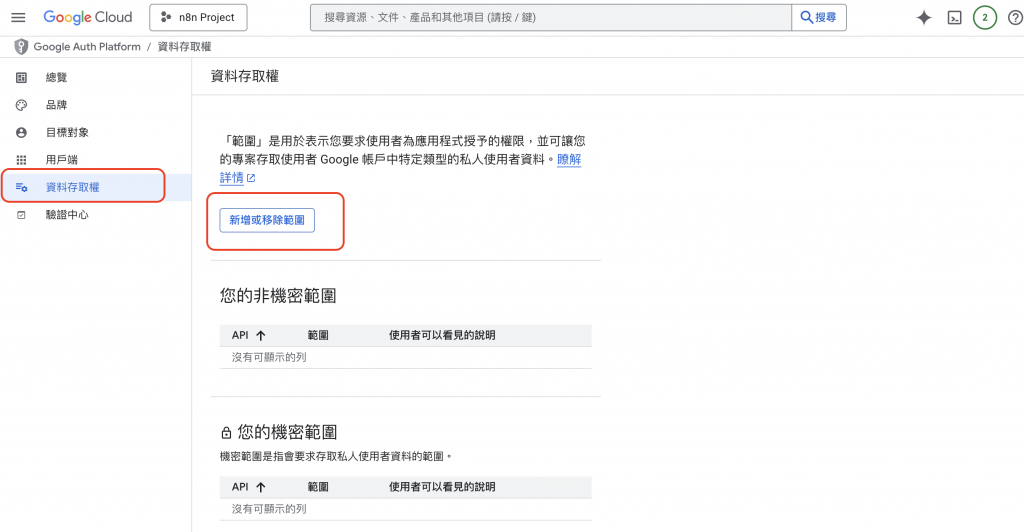
點選後看到右側出現很多選項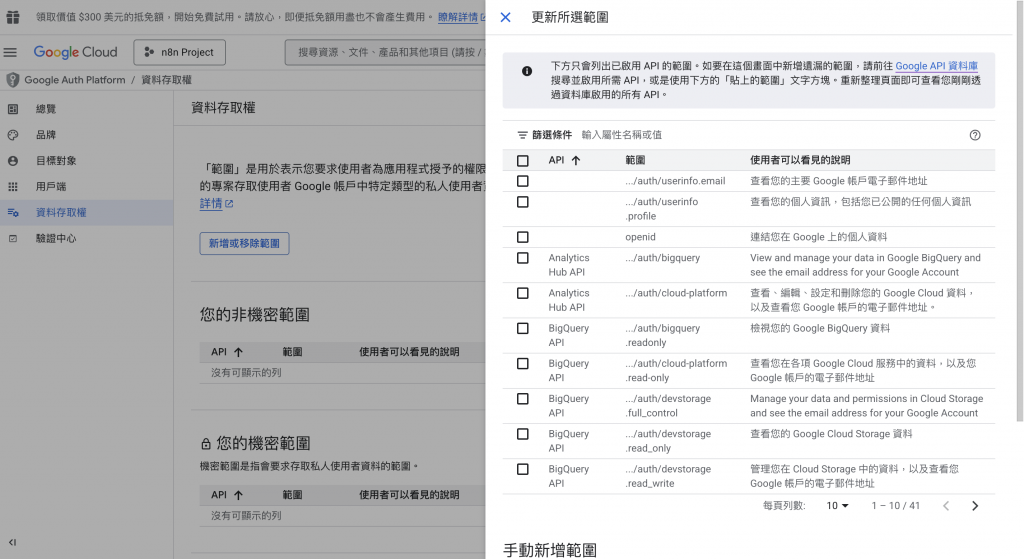
每個 Scope 範圍旁邊都有說明可以做到什麼事情
我自己是不會全部都勾選,我會先根據我想要達成的目標,去問 ChatGPT 該勾選哪些 Scope 範圍
就會逐個輸入搜尋再勾選。
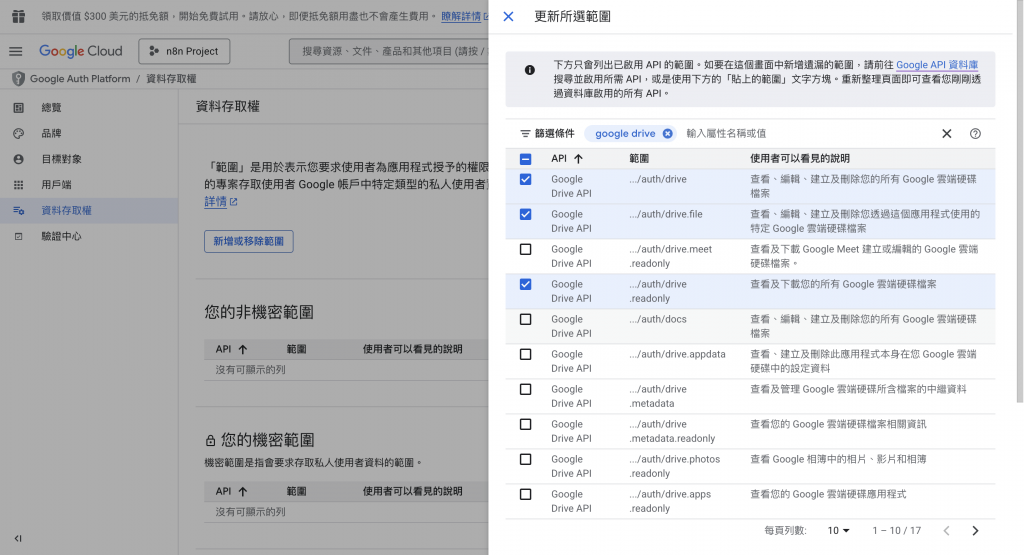
最後記得按「更新」,回到「資料存取權」的畫面,下方要按「Save」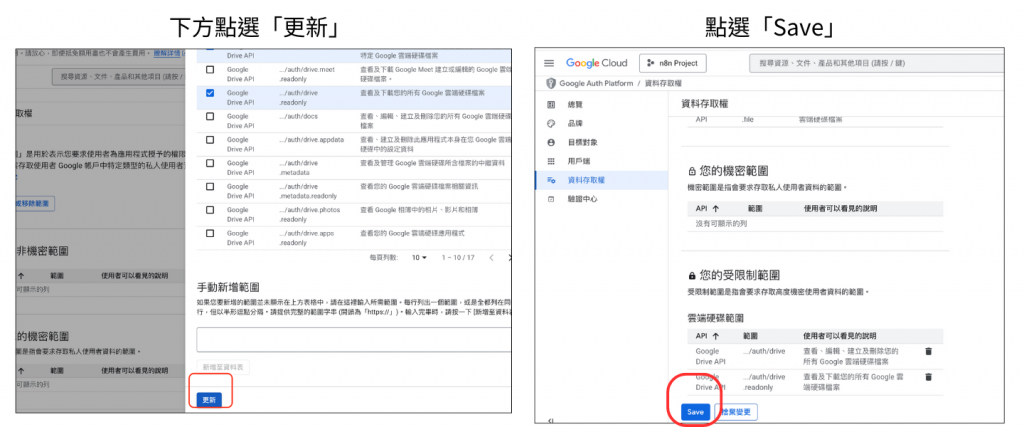
來到最後一個步驟,左側點選「用戶端」,「建立用戶端」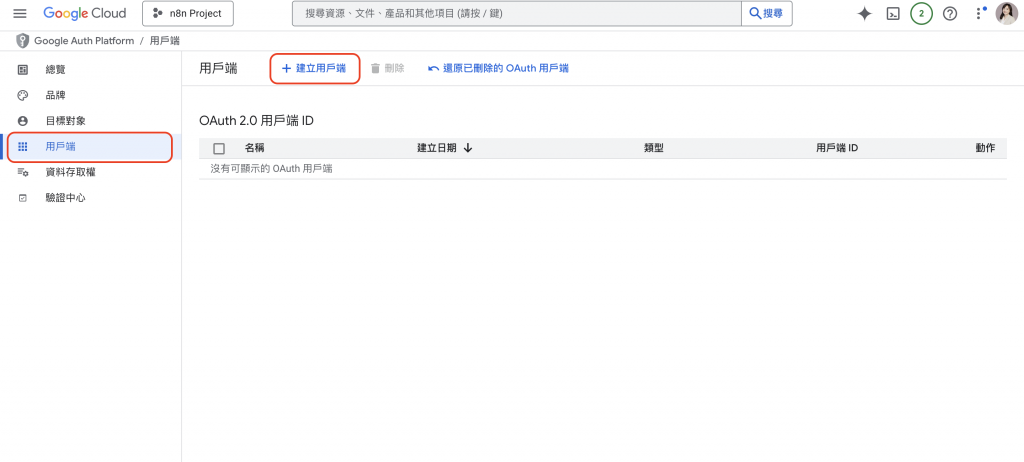
應用程式類型選「網頁應用程式」,填寫名稱的空格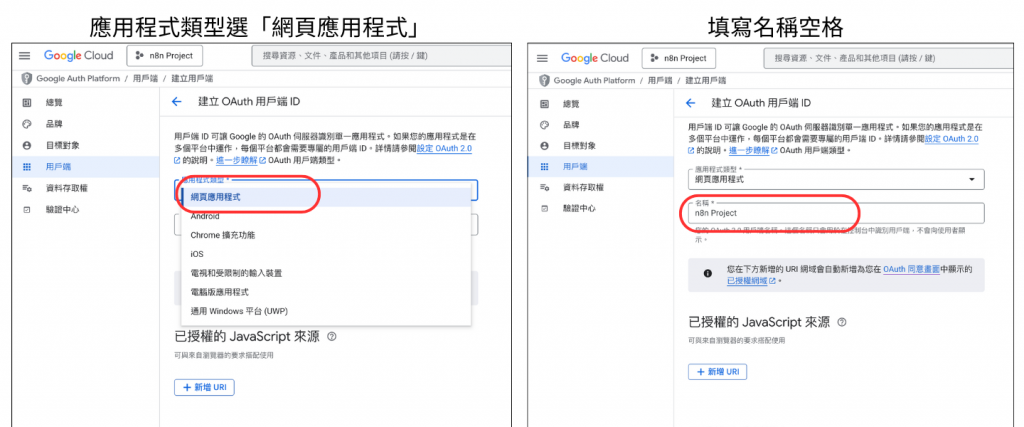
下方有一個「已授權的重新導向 URI」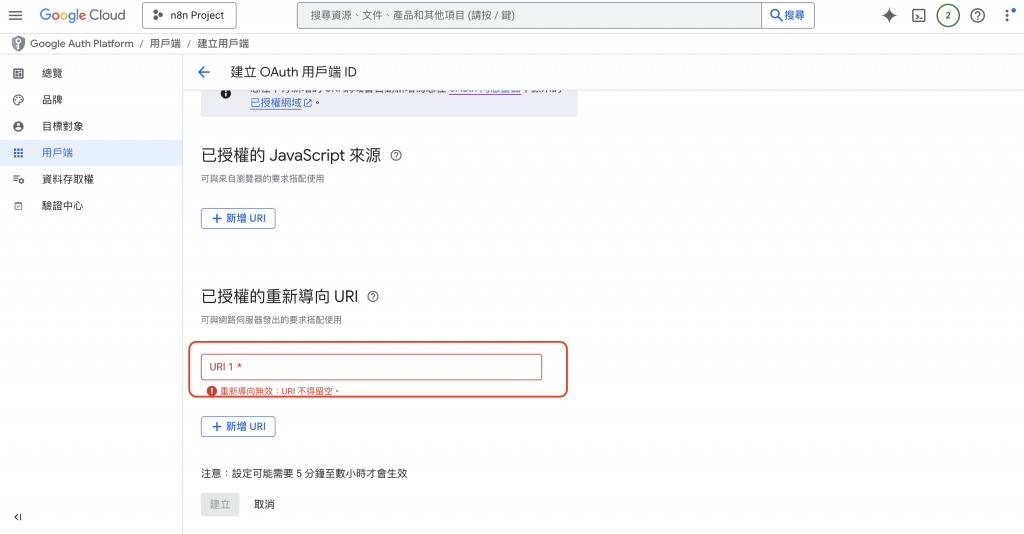
這個要回到 n8n 要填寫 Google Drive Credential 的視窗
複製 OAuth Redirect URL 貼到「已授權的重新導向 URI」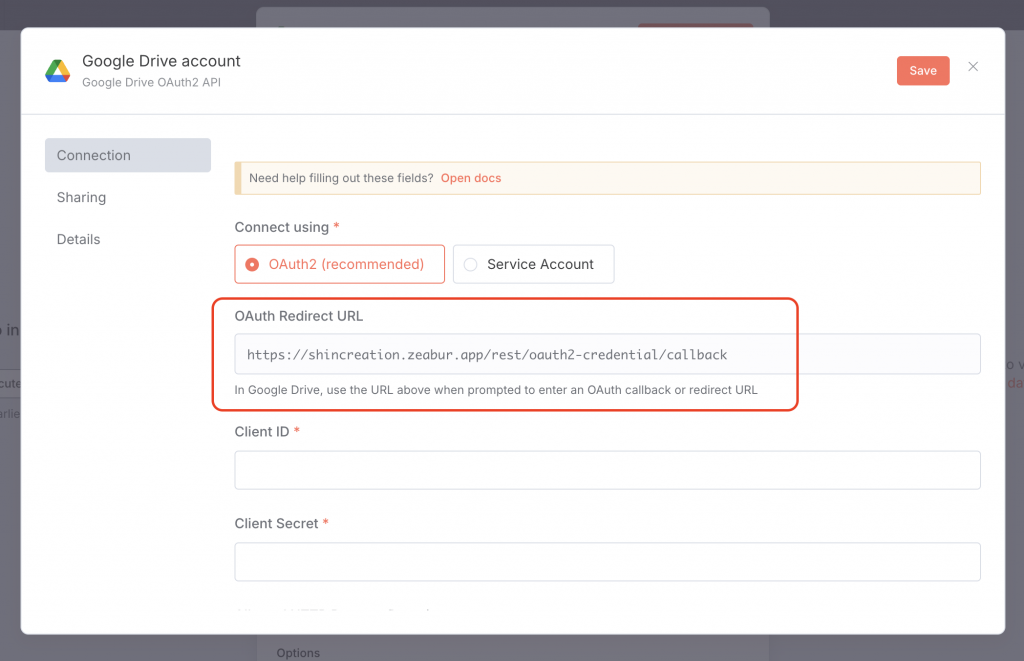
完成後按「建立」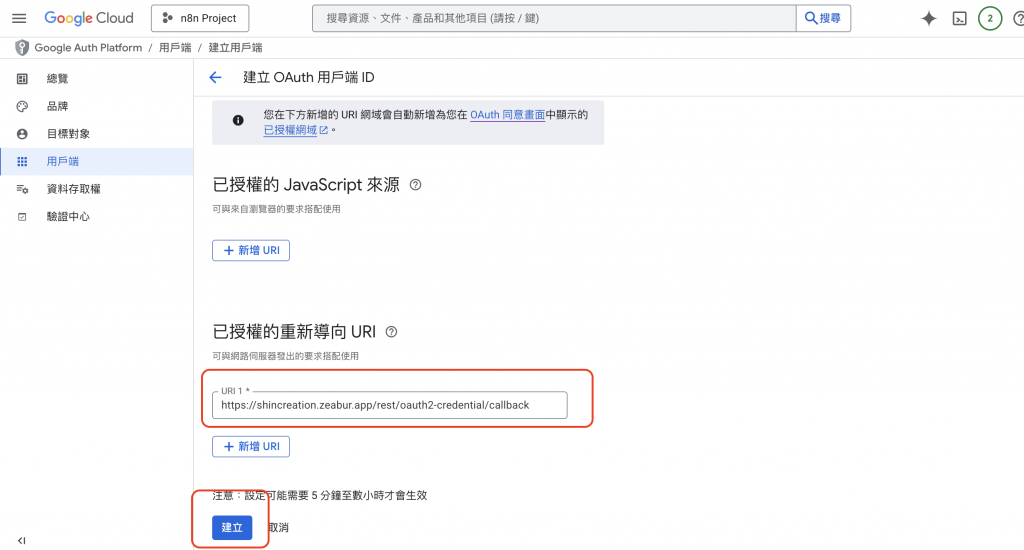
會出現用戶端 ID 跟用戶端密碼,先複製存下來。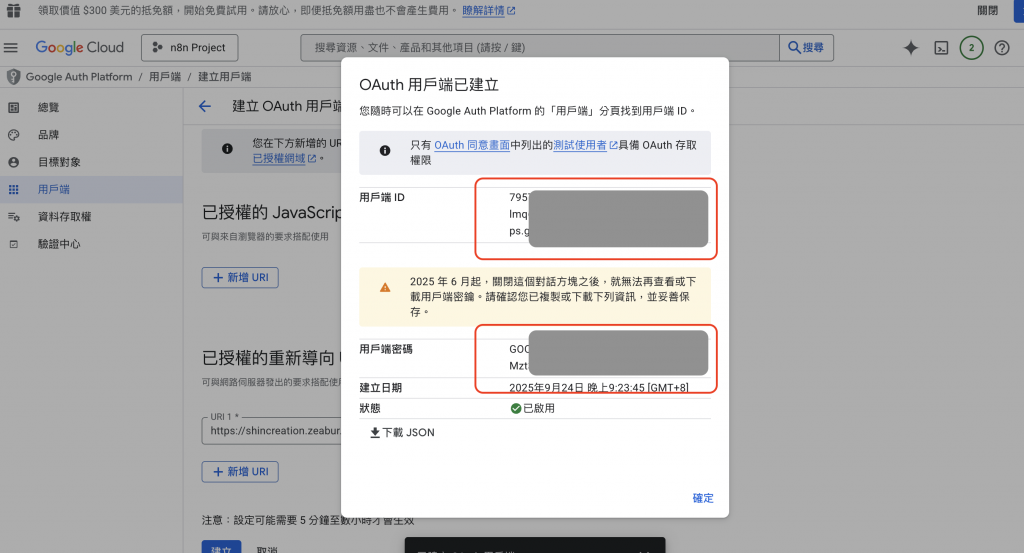
最後回到「目標對象」,點選「發布應用程式」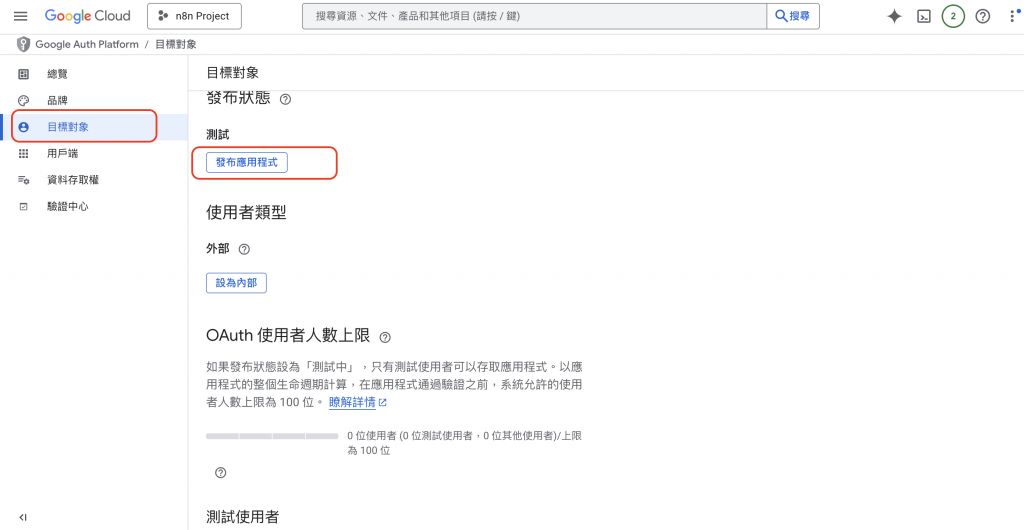
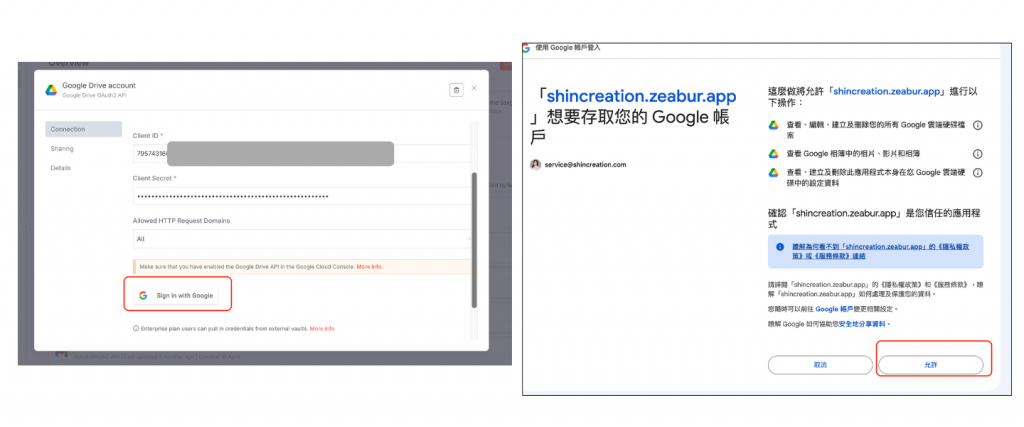
n8n Google Drive Credential 的 Client ID 跟 Client Secret 貼上剛剛在 Google 介面取得的用戶端 ID 跟用戶端密碼,點下方「Sign in with Google」
會出現你授權給 n8n 的項目,按「允許」就完成了!
如果這一組 Client ID & Secret 在 Google 那邊也有選擇 Google Sheets API 服務跟勾選相對應的 Scopes的話,在 n8n Google Sheets Credential 也可以填寫同一組 ID & Secret 去設定。
今天帶大家拆解了 Google 憑證的設定流程:先建立 Project → 啟用 API → 選擇 Scope → 取得 Client ID 和 Secret,最後再把這些資訊填回 n8n。
雖然步驟看起來很多,但只要掌握這個架構,之後要新增其他 Google API(不管是 Drive、Sheets 還是 YouTube)就會更輕鬆。
明天我們會更進一步,實際教大家 n8n 的流程安排與節點設定,把今天準備好的憑證真正用在自動化流程裡。

