嗨大家,我是 Debuguy。
Day 14 聊完 LiteLLM 的概念後,今天終於要動手整合了。但在開始之前,我遇到一個讓我有點頭痛的問題...
原本以為 liteLLM 是實作了 OpenAI 的 API
因此我應該可以用 OpenAI plugin 指向 LiteLLM。理論上應該是這樣:
import { openAI } from '@genkit-ai/openai';

const ai = genkit({
  plugins: [
    openAI({
      apiKey: process.env['LITELLM_API_KEY'],
      baseURL: process.env['LITELLM_API_URL'],
    }),
  ],
});
看起來很完美對吧?但實際跑起來會爆炸。
因為 GenKit 的 OpenAI plugin 做了一些假設:
gpt-4、gpt-3.5-turbo 這種當我直接用 OpenAI plugin 連 LiteLLM 時:
// ❌ 這樣會炸
const model = ai.model('openai/gemini-2.5-flash-lite');
GenKit 會一臉困惑:
「gemini-2.5-flash-lite?這什麼鬼?這是 OpenAI 的模型嗎?」
而且更麻煩的是,Gemini 的一些特殊功能參數或能力 OpenAI plugin 根本不知道怎麼處理。
既然現成的不行,那就自己來吧!好在 GenKit 提供了 openAICompatible 這個好東西。
GenKit 知道很多 LLM 提供商都在「cosplay OpenAI API」,所以提供了一個通用的 adapter:
import openAICompatible from '@genkit-ai/compat-oai';
這個 adapter 的設計很聰明:
import { googleAI } from '@genkit-ai/google-genai';
import { modelActionMetadata, z } from 'genkit';
import openAICompatible, {
  defineCompatOpenAIModel,
  compatOaiModelRef,
  ChatCompletionCommonConfigSchema
} from '@genkit-ai/compat-oai';
import { OpenAI } from 'openai';
import type { GenkitPluginV2 } from 'genkit/plugin';

// 1. 定義 config schema(繼承自 OpenAI 的標準 schema)
const LiteLlmConfigSchema = ChatCompletionCommonConfigSchema.extend({
    store: z.boolean().optional(),
});

// 2. 定義模型 reference(繼承 Gemini 的能力)
const geminiModelRef = (name: string, namespace: string) =>
  compatOaiModelRef({
    ...googleAI.model(name),  // 複製 Gemini 的所有能力!
    namespace: namespace,
    configSchema: LiteLlmConfigSchema,
  });

// 3. 主要的 plugin function
export const liteLlm = (params?: {
  apiKey?: string,
  url?: string
}): GenkitPluginV2 => {
  const namespace = 'litellm';

  return openAICompatible({
    name: namespace,
    apiKey: params?.apiKey ?? process.env['LITELLM_API_KEY'],
    baseURL: params?.url ?? process.env['LITELLM_API_URL'],

    // 4. 模型解析器:告訴 GenKit 怎麼找到模型
    resolver: (client: any, actionType: string, actionName: string) =>
      (actionType === 'model')
        ? defineCompatOpenAIModel({
            name: actionName,
            client: client,
            modelRef: geminiModelRef(actionName, namespace),
          })
        : undefined,

    // 5. 列出所有可用模型(從 LiteLLM API 取得)
    listActions: async (client: OpenAI) =>
      await client.models.list()
        .then(res => res.data.map(m =>
          modelActionMetadata(geminiModelRef(m.id, namespace))
        )),
  });
};
1. 繼承 Gemini 的能力
...googleAI.model(name)
這一行是關鍵!我們告訴 GenKit:
「雖然我是透過 OpenAI API 格式呼叫,但這個模型其實有 Gemini 的所有能力(thinking、reasoning、tools...)」
2. 動態模型列表
listActions: async (client: OpenAI) =>
  await client.models.list()
Plugin 會直接問 LiteLLM:「你那邊有哪些模型?」
這樣我在 LiteLLM UI 新增模型後,GenKit 會自動看到,完全不用改 code!
3. Namespace 隔離
const namespace = 'litellm';
所有模型都會被放在 litellm/ namespace 下,不會跟其他 plugin 打架。
有了這個 plugin,GenKit 的程式碼就變得超乾淨:
// GenKit/src/index.ts
import { liteLlm } from './plugin/litellm.js';

const ai = genkit({
  plugins: [
    liteLlm(),  // 就這樣!
  ],
});

// 使用時
const model = ai.model('litellm/gemini-2.0-flash-exp');
Day 13:
import { googleAI } from '@genkit-ai/google-genai';

const ai = genkit({
  plugins: [
    googleAI({
      apiKey: process.env['GEMINI_API_KEY']!  // 直接連 Gemini
    }),
  ],
});
Day 16:
import { liteLlm } from './plugin/litellm.js';

const ai = genkit({
  plugins: [
    liteLlm()  // 透過 LiteLLM 代理
  ],
});
表面上只是改了 plugin,但背後的架構完全不同了!
當然也要把 LiteLLM service 加進來:
services:
  # 新增 LiteLLM service
  litellm:
    image: ghcr.io/berriai/litellm:main-stable
    ports:
      - "4000:4000"
    environment:
      - DATABASE_URL=postgresql://postgres:postgres@postgres:5432/postgres
      - STORE_MODEL_IN_DB=True
      - LITELLM_MASTER_KEY=${LITELLM_MASTER_KEY}
      - LITELLM_SALT_KEY=${LITELLM_SALT_KEY}
    depends_on:
      - postgres
    healthcheck:
      test: ["CMD-SHELL", "wget --no-verbose --tries=1 http://localhost:4000/health/liveliness || exit 1"]
      interval: 30s
      timeout: 10s
      retries: 3

  # GenKit 現在依賴 LiteLLM
  genkit-service:
    environment:
      - LITELLM_API_KEY=${LITELLM_API_KEY}
      - LITELLM_API_URL=http://litellm:4000
    depends_on:
      - litellm
      - playwright-mcp
template.env 也要加料:
# LiteLLM 相關
LITELLM_MASTER_KEY=${LITELLM_MASTER_KEY}    # 管理用的 key
LITELLM_SALT_KEY=${LITELLM_SALT_KEY}        # 加密用的 salt
LITELLM_API_KEY=${LITELLM_API_KEY}          # 給 GenKit 用的 virtual key
LITELLM_API_URL=${LITELLM_API_URL}          # 給 GenKit 用的 LiteLLM 服務位址
整合完後,你可以打開 http://localhost:4000 看到 LiteLLM 的管理介面:
新增模型:
j-team
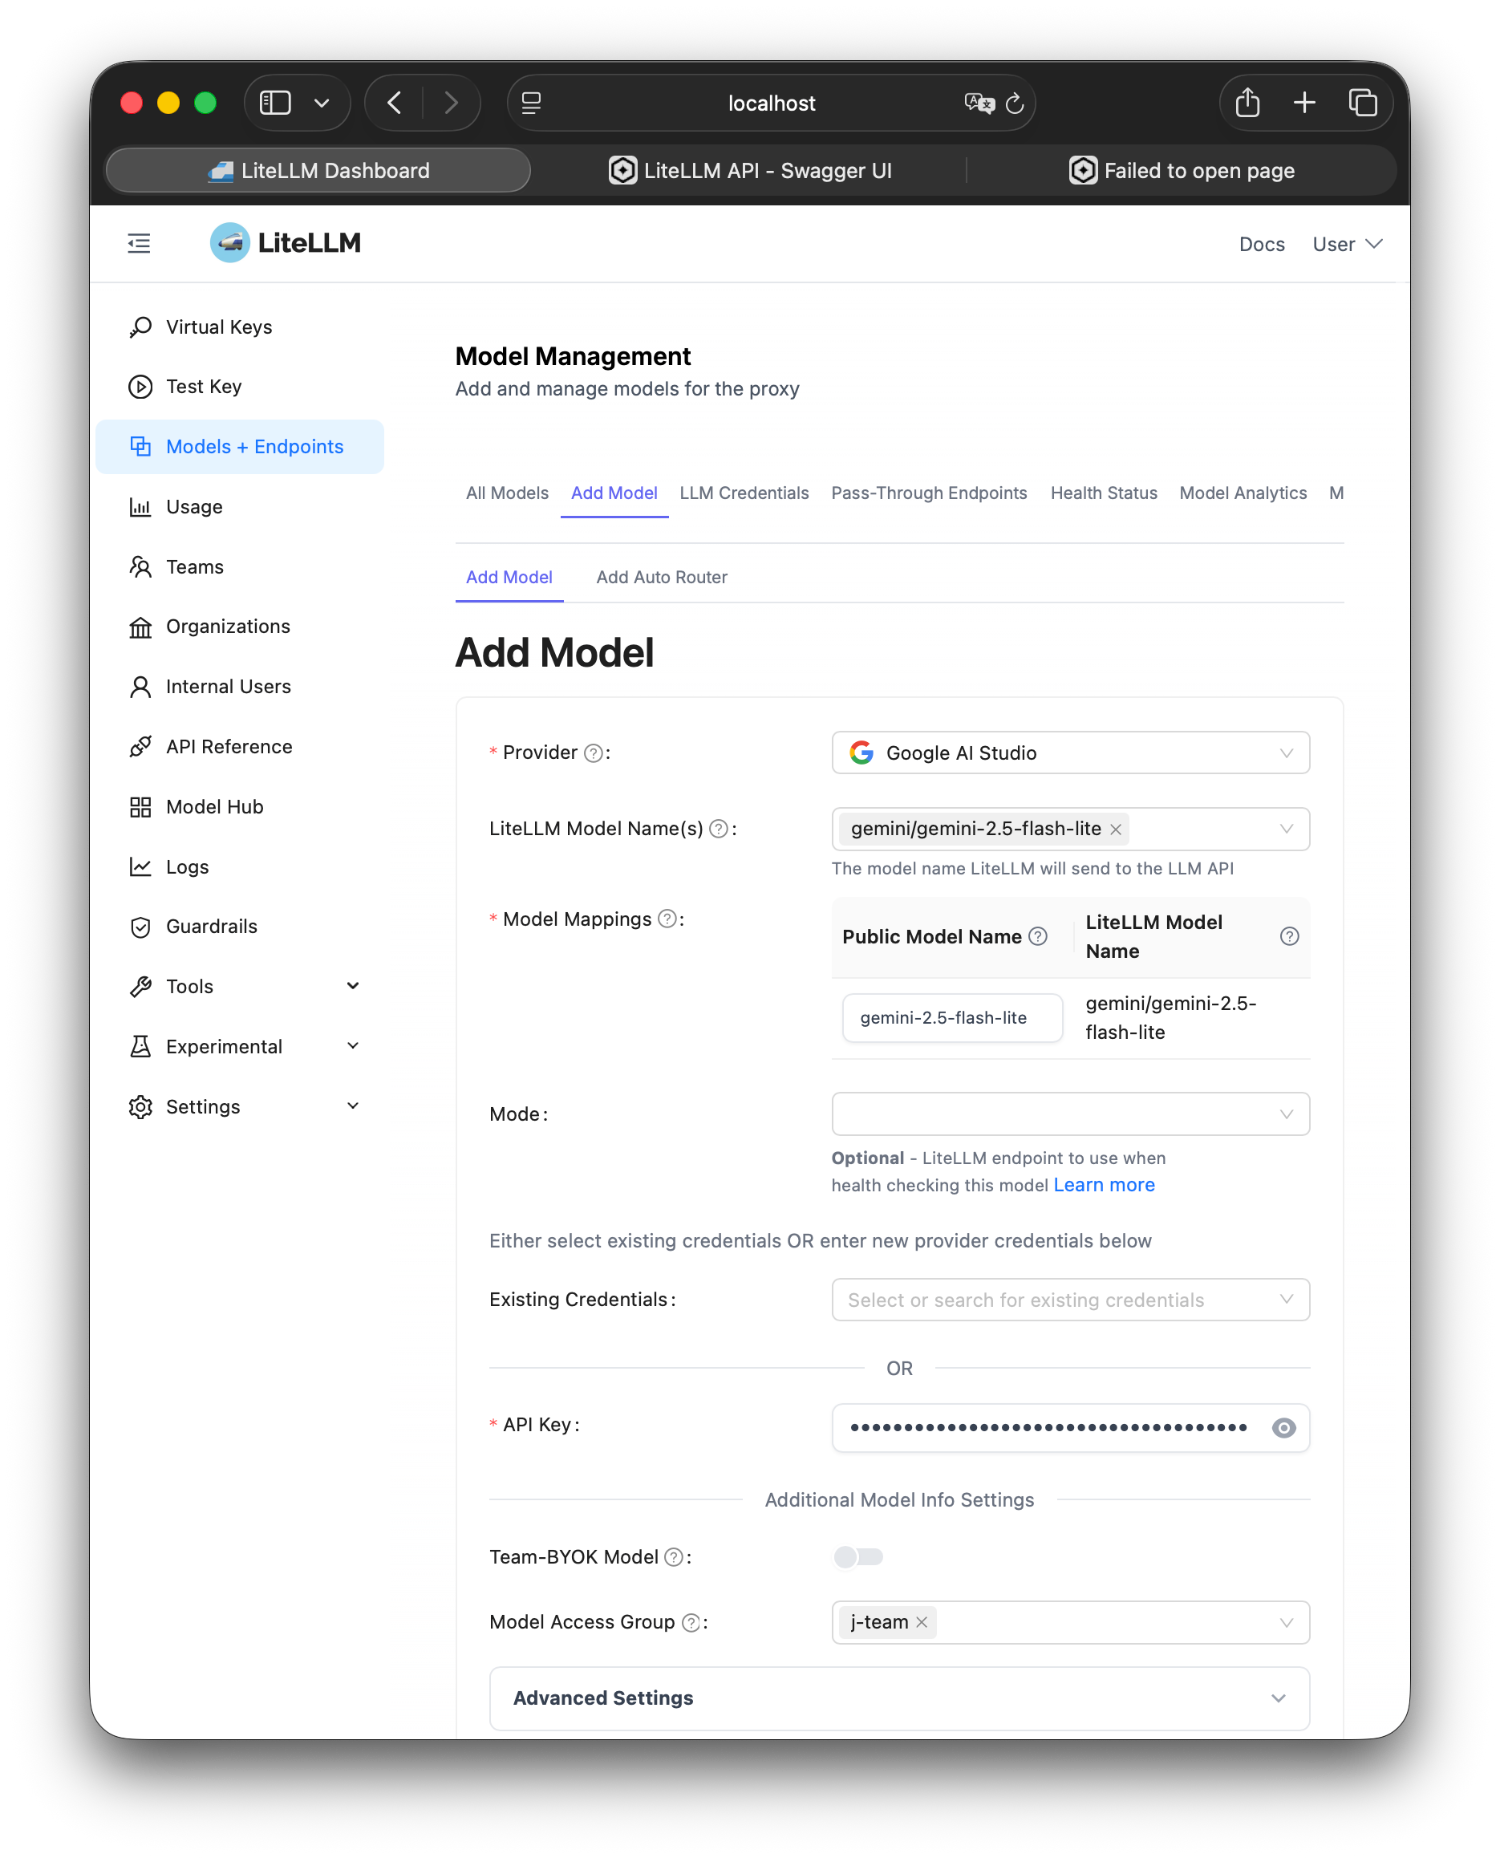
**建立 Team 和 **
j-team <- 不是指定某個模型而是用 group 的方式帶入方便之後新增模型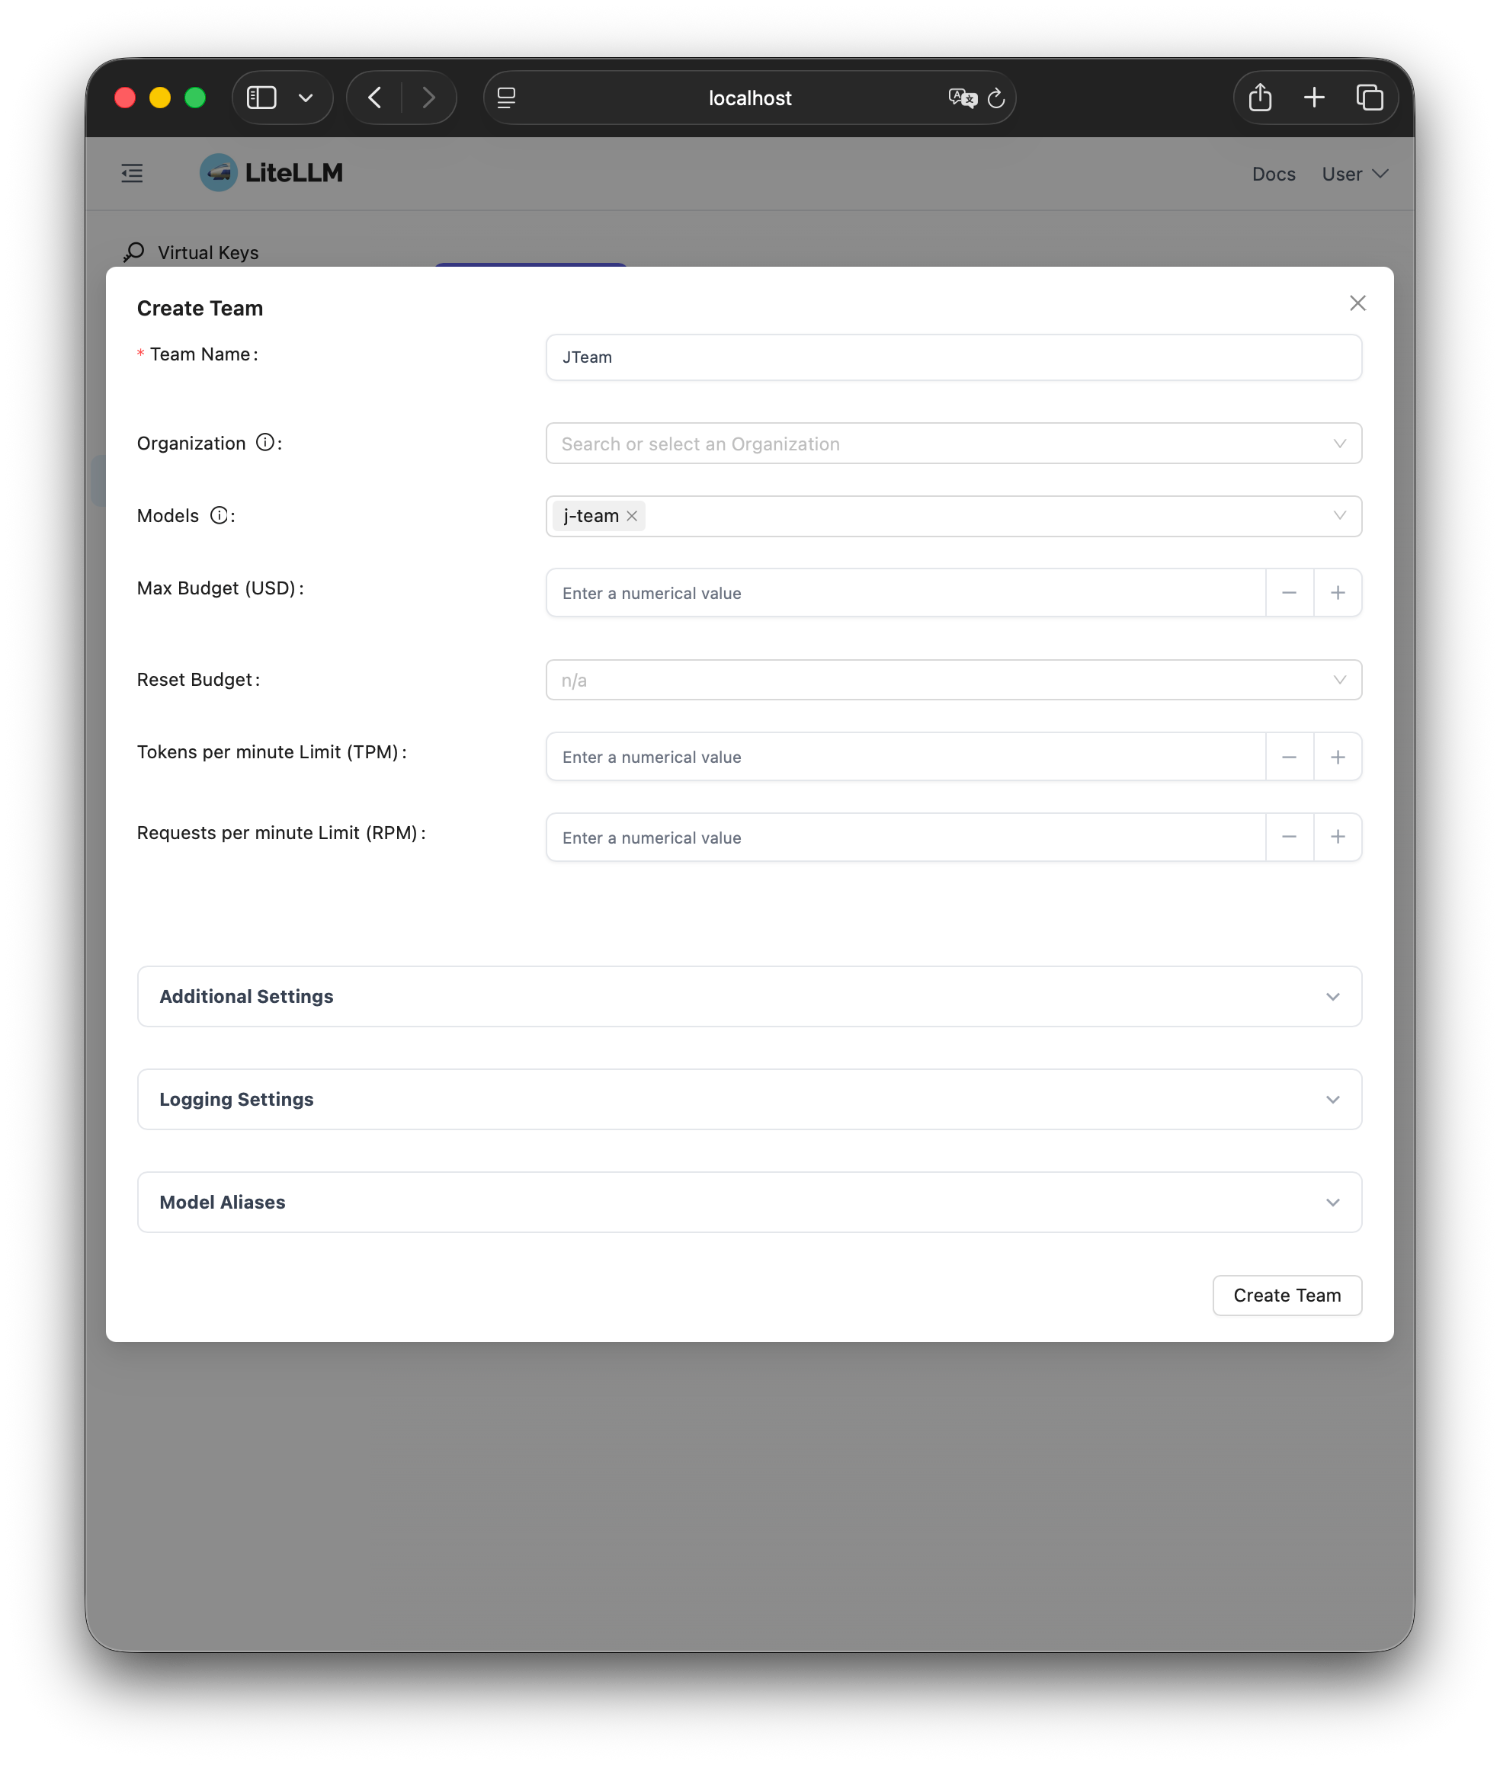
產生 Virtual Key
All Team Models <- 這樣之後這個 key 能用的 model 就隨著 team 的設定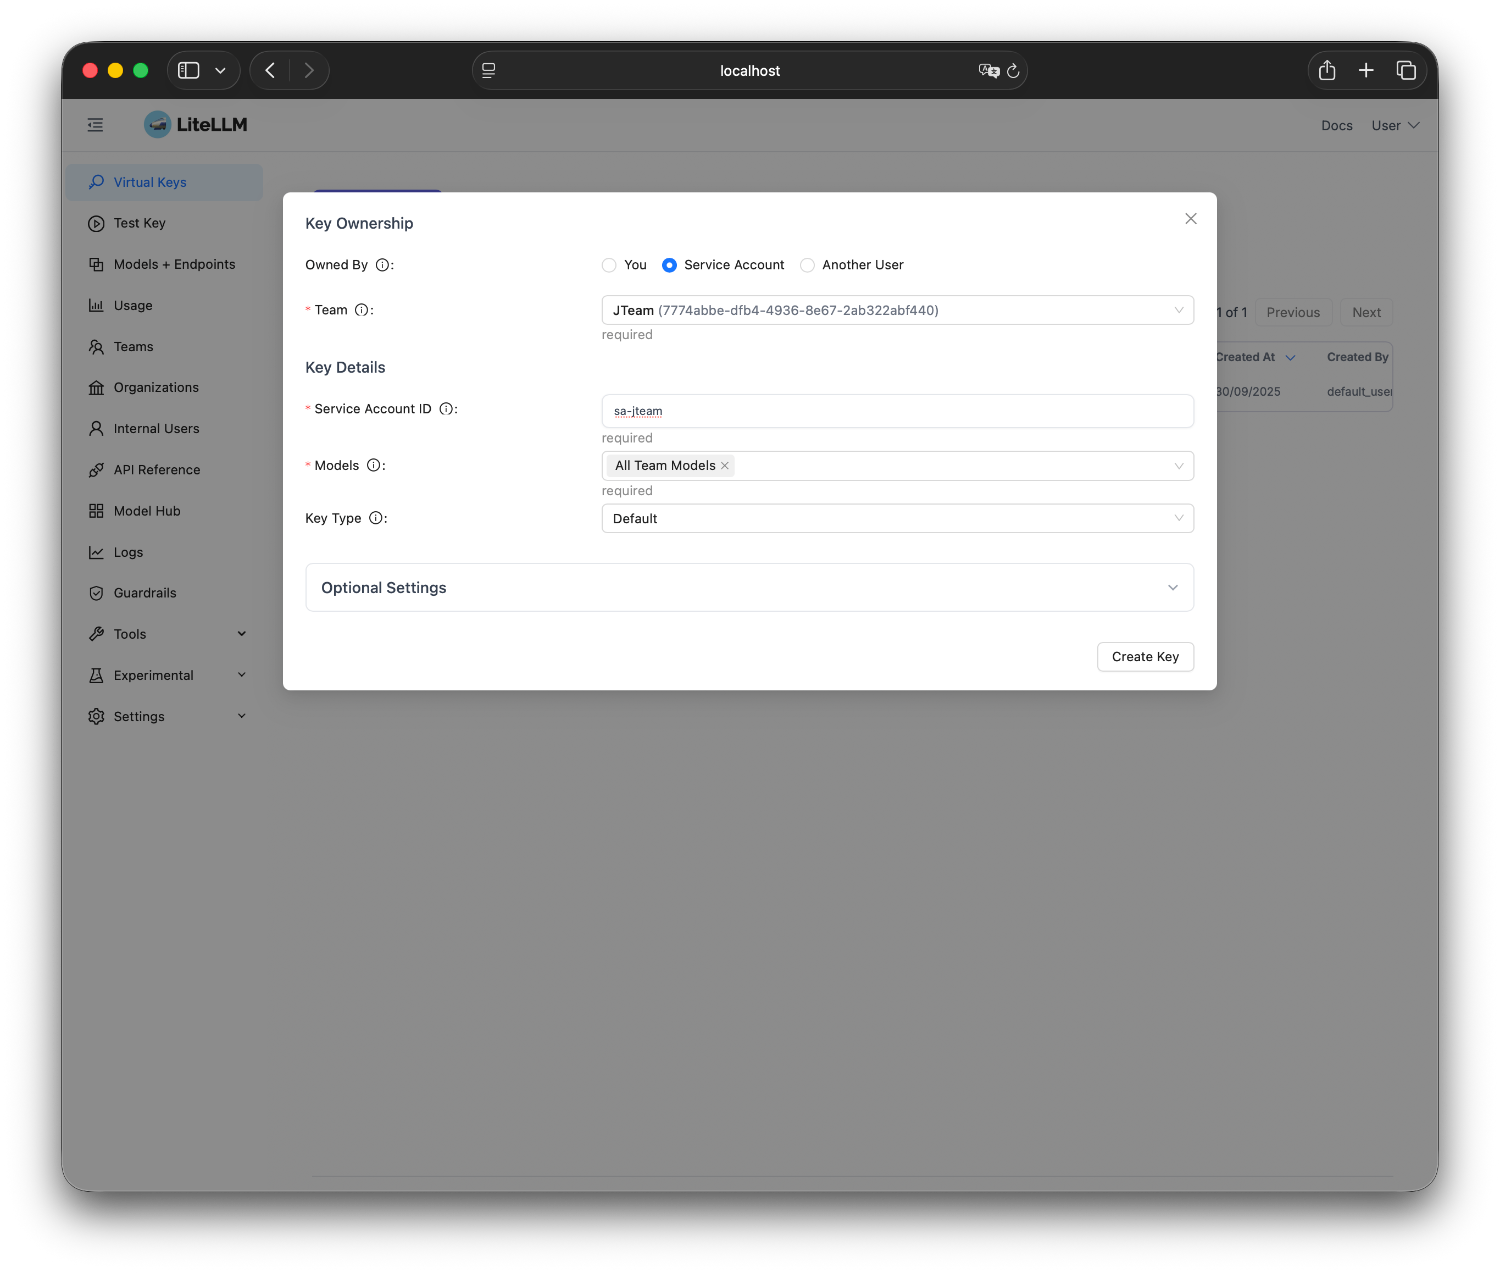
Day 13: GenKit 直接拿真實 GEMINI_API_KEY
Day 16: GenKit 拿的是 LITELLM_API_KEY(virtual key)
洩漏了也可以立刻撤銷,不影響其他人。
在 LiteLLM UI 設定:
想換模型?去 LiteLLM UI 點兩下:
ai.model('litellm/claude-4-sonnet')
完全不用動 plugin code!
Day 16 做的事情:
核心改動:
GenKit/src/plugin/litellm.ts)openAICompatible 作為基底達成效果:
寫 plugin 的經驗:
「一開始覺得要自己寫 plugin 很麻煩,但其實 GenKit 的
openAICompatible已經幫我們處理掉 90% 的工作了。」
關鍵是理解 GenKit 的 model reference 系統,然後告訴它:
剩下的 HTTP 請求、回應解析、streaming,GenKit 都會自動處理。
明天我們要來聊另一個 DevOps Day 2 的關鍵議題:Observability。
今天接好了 LiteLLM 明天要來接 Langfuse 了
完整的原始碼在這裡,plugin 的完整實作都在裡面!
AI 的發展變化很快,目前這個想法以及專案也還在實驗中。但也許透過這個過程大家可以有一些經驗和想法互相交流,歡迎大家追蹤這個系列。
也歡迎追蹤我的 Threads @debuguy.dev


 iThome鐵人賽