早安~昨天已經完成前端範本的改造與後端 API 服務,今天要把兩者進行整合,直接進入主題吧!
EditGroupAppStore.ts 作為與後端溝通的橋樑。CategoryAppsList:用來儲存從後端取回的資料。fetchCategoryAppsList:向後端 API 服務發送請求。updateSelectedApps:在全選特定功能群組時,更新 store 中的 CategoryAppsList 數值。import { defineStore } from 'pinia';
// project imports
import { fetchWrapper , type ActionRsp} from '@/utils/helpers/fetch-wrapper';
const baseUrl = `${import.meta.env.VITE_API_URL}`;
export interface CategoryApps {
categoryID: string;
categoryName: string;
categoryApps: SysApp[];
}
interface SysApp {
appID: number;
appName: string;
isSelected: boolean;
}
const CategoryAppsList: CategoryApps[] = [];
export const useEditGroupAppStore = defineStore({
id: 'EditGroupAppStore',
state: () => ({
CategoryAppsList: [] as CategoryApps[],
ActionRsp : {} as ActionRsp,
}),
actions: {
async fetchCategoryAppsList(groupId: number) {
try {
let apiUri : string = baseUrl;
apiUri = `${baseUrl}/CategoryApps?groupId=${groupId}`;
const respData: CategoryApps[] = await fetchWrapper.get(apiUri) as CategoryApps[];
this.CategoryAppsList = respData;
} catch (error) {
console.error('Failed to fetch CategoryApps:', error);
}
},
async saveGroupApps(Rgid: number, AppIds: number[]) {
try {
let apiUri : string = baseUrl;
apiUri = `${baseUrl}`;
console.log("saveGroupApps(apiUri)", apiUri);
const respData: ActionRsp = await fetchWrapper.post(apiUri, {groupId, AppIds}) as ActionRsp;
this.ActionRsp = respData;
} catch (error) {
console.error('Failed to fetch CategoryApps:', error);
}
},
async updateSelectedApps( categoryID :string , isSelected : boolean) {
// 修改 store 中的物件 CategoryAppsList 將下方的categoryApps的 isSelected 都改為 true
this.CategoryAppsList.forEach((categoryApps) => {
if (categoryApps.categoryID === categoryID) {
categoryApps.categoryApps.forEach((app) => {
app.isSelected = isSelected;
});
}
});
}
},
});
回到需求面:管理者可以建立多個功能群組,並針對不同群組設定功能開放。這意味著 每次開啟編輯視窗時,都需要同步一次後端的資料。如圖24-1: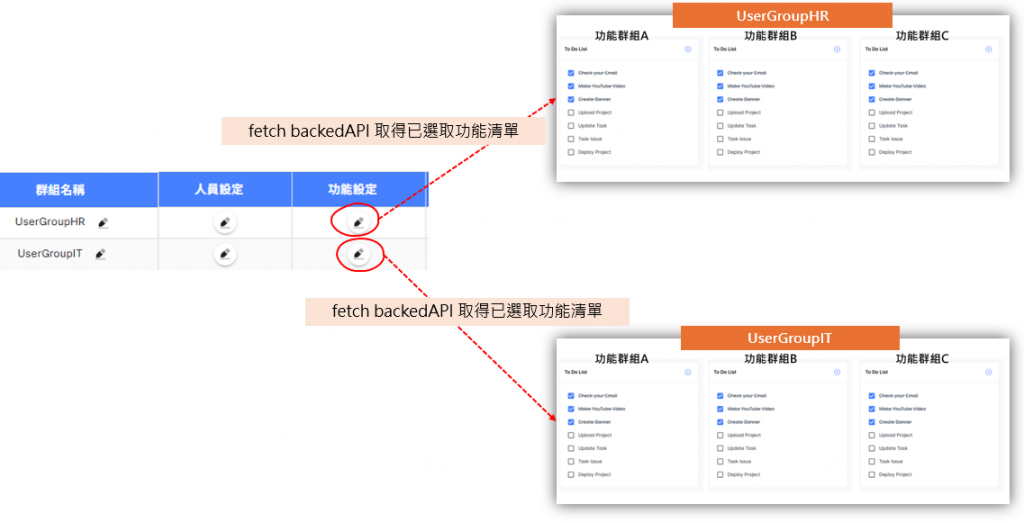
圖24-1:每當點選不同使用者群組時,前端會透過群組的 Id 向後端 API 請求,取得該群組已選取的功能清單。
watch,監測監聽 defineProps 傳遞的參數值變化觸發與後端的同步邏輯,各參數定義如下:群組ID 或是群組資料物件。fetchCategoryAppsList 方法,以 props.selectedItem.groupId 作為參數,向後端 API 請求該群組已選取的功能清單。<script setup lang="ts">
//DialogEditGroupApp.vue
import { ref, watch, onMounted } from 'vue';
import { type CategoryApps , useEditGroupAppStore} from '@/stores/EditGroupAppStore'; // 呼叫 backendApi store.ts
import UiParentCard from '@/views/pages/Admin/GroupAppCard.vue';
const props = defineProps({
DiaGroupApp: Object,
selectedItem: Object,
});
const editGroupAppStore = useEditGroupAppStore();
const categoryAppsList = ref<CategoryApps[]>([]);
const emit = defineEmits(['close']); // 父層是事件為關閉視窗
const title = ref('');
watch(() => props.DiaGroupApp?.dialog,
async (newValue) => {
showEditGroupAppDia.value = newValue;
title.value = props.selectedItem?.title || '';
if (props.selectedItem && showEditGroupAppDia.value == true) {
await editGroupAppStore.fetchCategoryAppsList(props.selectedItem.groupId);
categoryAppsList.value = editGroupAppStore.CategoryAppsList;
}
}
);
</script>
<template>
<v-dialog v-model="showEditGroupAppDia" persistent scrollable max-width="1200px">
<v-card >
<v-card-item>
<h3 class="text-h5 mb-3">群組【{{title}}】轄下功能設定</h3>
</v-card-item>
<v-divider></v-divider>
<v-card-text>
<v-row>
<v-col v-for="category in categoryAppsList" :key="category.categoryID" class="mb-4" cols="3">
<v-card></v-card>
<UiParentCard :title="category.categoryName" :categoryID="category.categoryID">
<div class="pb-0" v-for="(app, i) in category.categoryApps" :key="i" :value="app.appID" >
<v-checkbox-btn color="success" hide-details v-model="app.isSelected" aria-label="checkbox">
<template v-slot:label>
<div class="ms-2 text-darkText">
{{ app.appName }}
</div>
</template>
</v-checkbox-btn>
</div>
</UiParentCard>
</v-col>
</v-row>
</v-card-text>
<v-card-actions>
<!-- to-do eslint error -->
<v-btn color="primary" variant="flat" rounded="md" @click="">Save</v-btn>
<v-btn variant="flat" rounded="md" @click="$emit('close')">Cancel</v-btn>
</v-card-actions>
</v-card>
</v-dialog>
</template>
圖24-2:點選 HR 使用者群組收到後端的回應內容。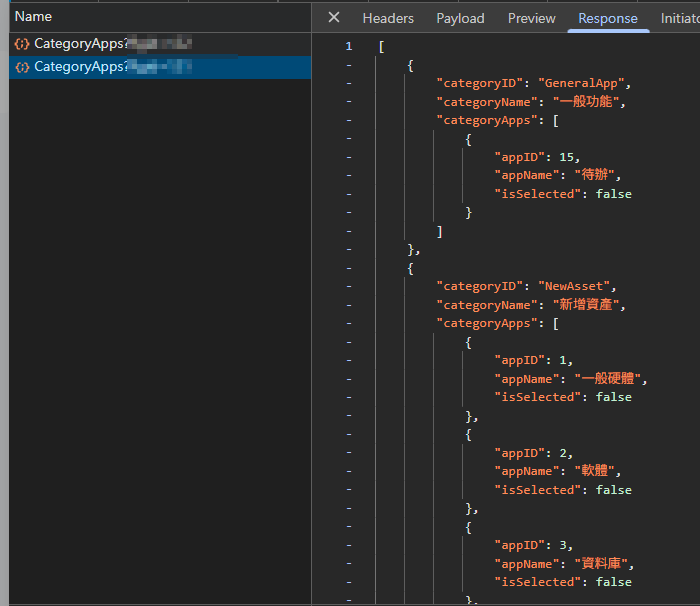
圖24-3:點選 HR 使用者群組,未授權任功能。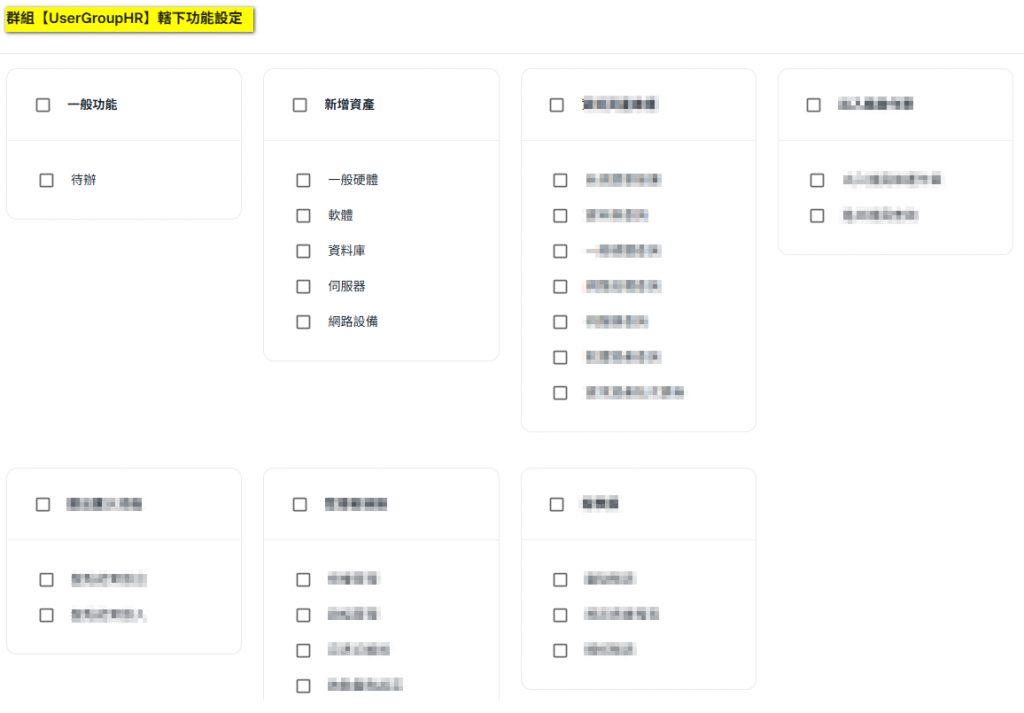
圖24-4:透過資料庫建立幾筆模擬資料並點選 IT 使用者群組確認後端回應。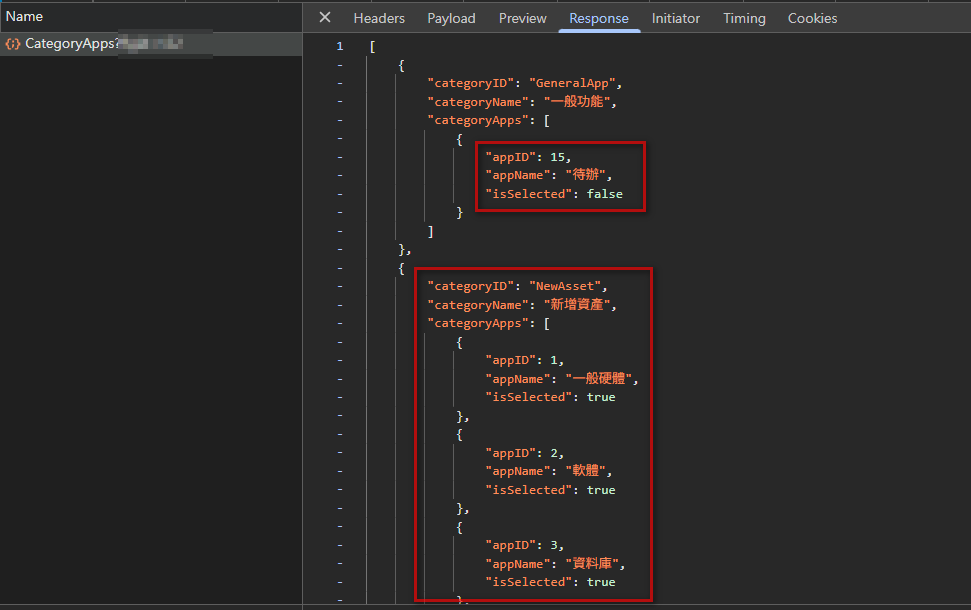
圖24-5:點選 IT 使用者群組,依據回應資料,顯示勾選的功能清單。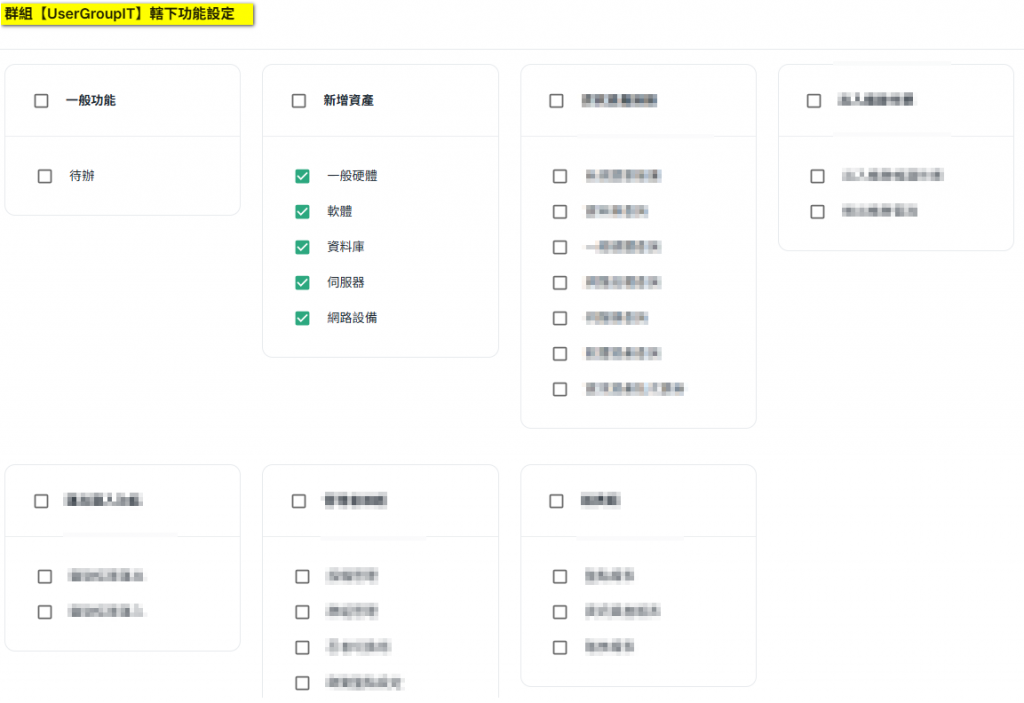
經過今天的整合,前後端已能順利串接,並依群組動態載入功能清單,成功做到已授權功能自動勾選。這也代表接下來的群組管理流程,已具備完整的基礎。
