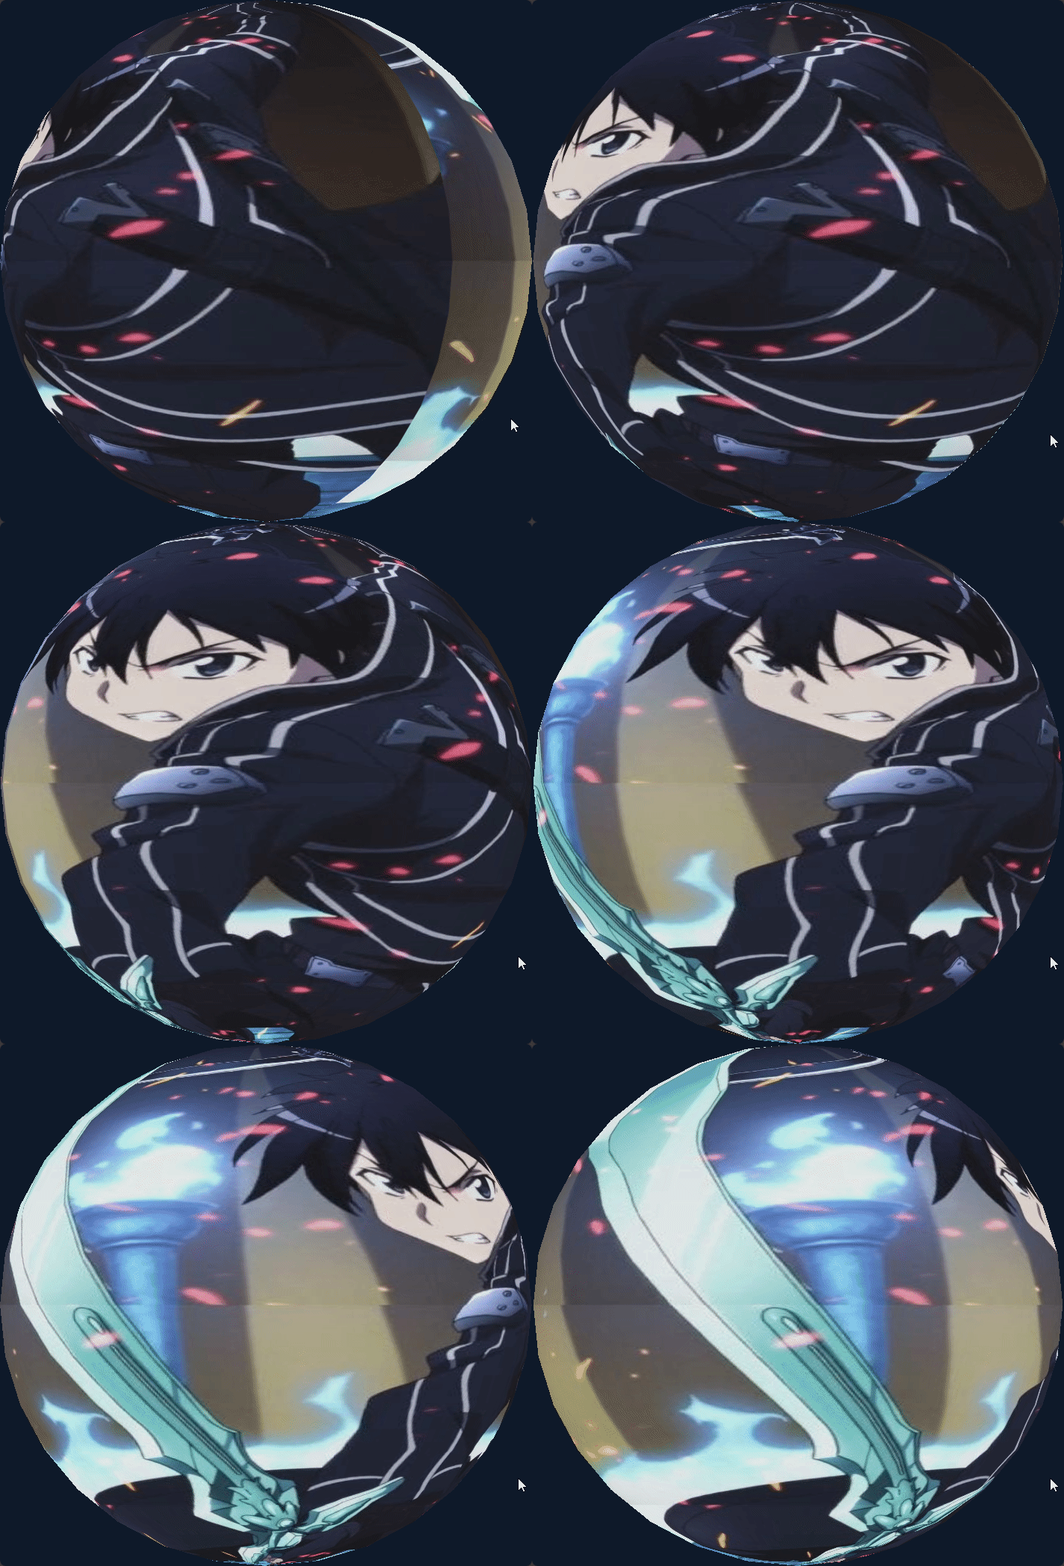
這一篇把你的 WebGPU 畫面從「只有顏色」升級到「有光、有材質貼圖」。
我們會做三件事:
- 建立 Uniform(相機/光/材質參數),
- 建立 材質貼圖 + 取樣器(sampler),
- 在 WGSL 實作 Lambert + Blinn-Phong 基本打光,並把貼圖當作表面顏色(albedo)。
先假設你已經有上一章的「初始化 & 清畫面」和「載入模型」骨架(頂點含 位置/法線/UV,索引可選)。
沒有模型也行,你可以先用一個方塊/平面測試。
材質(albedo):表面的「底色」。通常來自一張貼圖(texture),或一個顏色係數(baseColorFactor)。
光照(這篇用經典 Blinn-Phong)
max(dot(N, L), 0),表面面向光線越正,越亮。H = normalize(L + V),高光強度約 pow(max(dot(N, H), 0), shininess)。相機/矩陣:把物件位置轉到螢幕上(MVP),把法線轉到正確空間(normal matrix)。
MVP、normalMat、lightDir、cameraPos、baseColorFactor、shininess。檔名
shader.wgsl。
你需要在 VS 輸出世界空間法線與 UV,FS 取樣貼圖並計算光照。
// ---------- Uniforms(全部 16 bytes 對齊,避免對齊地雷) ----------
struct Uniforms {
  mvp             : mat4x4<f32>,
  normalMat       : mat4x4<f32>,
  lightDir        : vec4<f32>, // xyz 有效
  cameraPos       : vec4<f32>,
  baseColorFactor : vec4<f32>, // 乘在貼圖上的顏色
  matParams       : vec4<f32> // x = shininess,其餘保留
};
@group(0) @binding(0) var<uniform> U : Uniforms;

// 材質貼圖與取樣器
@group(0) @binding(1) var colorTex : texture_2d<f32>;
@group(0) @binding(2) var colorSmp : sampler;

// VS 輸出結構
struct VSOut {
  @builtin(position) pos : vec4<f32>,
  @location(0) normalWS  : vec3<f32>,
  @location(1) uv        : vec2<f32>,
  @location(2) posWS     : vec3<f32>
};

@vertex
fn vs_main(@location(0) inPos: vec3<f32>,
           @location(1) inNor: vec3<f32>,
           @location(2) inUV : vec2<f32>) -> VSOut {
  var o: VSOut;
  o.pos = U.mvp * vec4<f32>(inPos, 1.0);

  // 法線轉到世界空間(w=0 不受平移)
  o.normalWS = normalize((U.normalMat * vec4<f32>(inNor, 0.0)).xyz);

  o.uv    = inUV;
  o.posWS = (U.normalMat * vec4<f32>(inPos, 1.0)).xyz; // 簡便:若 normalMat=模型矩陣,posWS 也能近似
  return o;
}

@fragment
fn fs_main(@location(0) N_in : vec3<f32>,
           @location(1) uv    : vec2<f32>,
           @location(2) posWS : vec3<f32>) -> @location(0) vec4<f32> {
  // 取樣 albedo(先不處理 gamma,初學版本夠用)
  let albedoTex = textureSample(colorTex, colorSmp, uv).rgb;
  let albedo = albedoTex * U.baseColorFactor.rgb;

  // 向量:法線/光/視線/半角
  let N = normalize(N_in);
  let L = normalize(U.lightDir.xyz);
  let V = normalize(U.cameraPos.xyz - posWS);
  let H = normalize(L + V);

  // 光照
  let ambient  = 0.08;
  let diffuse  = max(dot(N, L), 0.0);
  let shininess = max(U.matParams.x, 1.0);
  let specular = pow(max(dot(N, H), 0.0), shininess);

  // 混合(係數可自行微調)
  let kd = 1.0;      // 漫反射權重
  let ks = 0.25;     // 高光權重
  let color = albedo * (ambient + kd * diffuse) + vec3<f32>(ks * specular);

  return vec4<f32>(color, 1.0);
}
之後想更真實,你可以:
- 對貼圖做 sRGB→Linear(
pow(albedoTex, 2.2))再計算;最後輸出再pow(color, 1.0/2.2)。- 加上 法線貼圖、金屬粗糙度 等(屬於 PBR 範圍)。
下面程式碼可以直接接在你現有的
main.ts/main.js裡(初始化過 device/context/format、已有 vbuf/ibuf)。
頂點格式:arrayStride = 32 bytes,offset 分別是0/12/24對應 3/3/2 個 float。
// 0) 已有:device、context、format、canvas、頂點/索引緩衝 vbuf/ibuf、深度貼圖 depthView
//    若還沒有,請參考你前幾篇的初始化與載入模型教學。

// 1) 建 Uniform Buffer(大小 = mvp 64 + normal 64 + 4*vec4 64 = 192 bytes)
const UBO_SIZE = 64 + 64 + 16 * 4; // 192
const ubo = device.createBuffer({
  size: UBO_SIZE,
  usage: GPUBufferUsage.UNIFORM | GPUBufferUsage.COPY_DST
});

// 2) 載入貼圖並建立 Texture + Sampler
async function loadTexture(url: string) {
  const bmp = await createImageBitmap(await (await fetch(url)).blob());
  const tex = device.createTexture({
    size: [bmp.width, bmp.height],
    format: 'rgba8unorm',
    usage: GPUTextureUsage.TEXTURE_BINDING | GPUTextureUsage.COPY_DST
  });
  device.queue.copyExternalImageToTexture(
    { source: bmp },
    { texture: tex },
    { width: bmp.width, height: bmp.height }
  );
  const sampler = device.createSampler({
    magFilter: 'linear',
    minFilter: 'linear',
    mipmapFilter: 'linear',
    addressModeU: 'repeat',
    addressModeV: 'repeat'
  });
  return { tex, sampler };
}
const { tex: colorTex, sampler: colorSmp } = await loadTexture('assets/albedo.png');

// 3) BindGroupLayout / PipelineLayout / BindGroup
const bindGroupLayout = device.createBindGroupLayout({
  entries: [
    { binding: 0, visibility: GPUShaderStage.VERTEX | GPUShaderStage.FRAGMENT, buffer: { type: 'uniform' }},
    { binding: 1, visibility: GPUShaderStage.FRAGMENT, texture: { sampleType: 'float' }},
    { binding: 2, visibility: GPUShaderStage.FRAGMENT, sampler: { type: 'filtering' }},
  ]
});
const pipelineLayout = device.createPipelineLayout({ bindGroupLayouts: [bindGroupLayout] });
const bindGroup = device.createBindGroup({
  layout: bindGroupLayout,
  entries: [
    { binding: 0, resource: { buffer: ubo }},
    { binding: 1, resource: colorTex.createView() },
    { binding: 2, resource: colorSmp },
  ]
});

// 4) 讀入 WGSL + 建管線(記得頂點格式對齊你的資料)
const shaderModule = device.createShaderModule({ code: await (await fetch('shader.wgsl')).text() });

const vertexLayout: GPUVertexBufferLayout = {
  arrayStride: 8 * 4, // 32 bytes
  attributes: [
    { shaderLocation: 0, offset: 0,      format: 'float32x3' }, // position
    { shaderLocation: 1, offset: 3 * 4,  format: 'float32x3' }, // normal
    { shaderLocation: 2, offset: 6 * 4,  format: 'float32x2' }, // uv
  ]
};

const pipeline = device.createRenderPipeline({
  layout: pipelineLayout,
  vertex: { module: shaderModule, entryPoint: 'vs_main', buffers: [vertexLayout] },
  primitive: { topology: 'triangle-list', cullMode: 'back', frontFace: 'ccw' },
  fragment: { module: shaderModule, entryPoint: 'fs_main', targets: [{ format }] },
});

// 5) 每幀更新 Uniform(相機 + 模型 + 光 + 材質)
function updateUBO(timeSec: number) {
  // —— 這裡用你慣用的數學庫;示意就地計算 —— //
  const eye = new Float32Array([0, 0.7, 2.2]);
  const center = new Float32Array([0, 0.2, 0]);
  const up = new Float32Array([0, 1, 0]);

  // 請用你現有的矩陣工具產生 proj/view/model(或沿用前幾篇的小工具)
  const proj = perspective(60 * Math.PI / 180, canvas.width / canvas.height, 0.1, 100);
  proj[5] *= -1; // WebGPU NDC 的 Y 翻轉
  const view  = lookAt(eye, center, up);
  const model = rotateY(timeSec * 0.6);

  const mvp = mul(proj, mul(view, model));
  const normalMat = model; // 入門:僅旋轉/等比縮放時可直接用 model;一般應使用「逆轉置」

  const lightDir = new Float32Array([-0.4, -1.0, -0.35, 0]);
  const cameraPos = new Float32Array([eye[0], eye[1], eye[2], 1]);
  const baseColorFactor = new Float32Array([1.0, 1.0, 1.0, 1.0]);
  const matParams = new Float32Array([64.0, 0, 0, 0]); // shininess = 64

  // 依照 WGSL 的排列寫入(位移都以 16 bytes 對齊)
  device.queue.writeBuffer(ubo,   0, mvp.buffer ?? mvp);          // 0..63
  device.queue.writeBuffer(ubo,  64, normalMat.buffer ?? normalMat); // 64..127
  device.queue.writeBuffer(ubo, 128, lightDir);                   // 128..143
  device.queue.writeBuffer(ubo, 144, cameraPos);                  // 144..159
  device.queue.writeBuffer(ubo, 160, baseColorFactor);            // 160..175
  device.queue.writeBuffer(ubo, 176, matParams);                  // 176..191
}

// 6) 繪製流程(和你之前的一樣,換成 setBindGroup + drawIndexed)
function frame(ts: number) {
  const t = ts * 0.001;
  updateUBO(t);

  const encoder = device.createCommandEncoder();
  const colorView = context.getCurrentTexture().createView();

  const pass = encoder.beginRenderPass({
    colorAttachments: [{ view: colorView, clearValue: { r:0.06, g:0.10, b:0.16, a:1 }, loadOp:'clear', storeOp:'store' }],

  });

  pass.setPipeline(pipeline);
  pass.setBindGroup(0, bindGroup);
  pass.setVertexBuffer(0, vbuf);
  if (ibuf) { pass.setIndexBuffer(ibuf, 'uint32'); pass.drawIndexed(indexCount); }
  else      { pass.draw(vertexCount); }
  pass.end();

  device.queue.submit([encoder.finish()]);
  requestAnimationFrame(frame);
}
requestAnimationFrame(frame);

// —— 你自己的矩陣函式(perspective/lookAt/rotateY/mul)請沿用前文或任何工具 —— //
小提醒
- BindGroup 的順序與 WGSL 的
@binding()必須完全一致。- 頂點格式:務必檢查
arrayStride/offset/format跟你的資料一致(本例 32 bytes)。
成果:
JS 程式碼:https://pastecode.io/s/2gmcwo7x
基本光照與材質 = 「貼圖(albedo) ×(環境 + 漫反射 + 高光)」
把 Uniform(相機/光/材質)說清楚、把 Texture+Sampler 綁上去、在 WGSL 做簡單的光照公式,你的模型就從「純色」變成「有質感」的 3D 物件了。
接下來加法線貼圖與 PBR,你就能走向更真實、更穩定的材質表現!
