昨天我們完成了 Google 第三方登入功能後端 API 的開立,今天我們要到 Config 中為該 API 設定權限,並處理 CORS 的問,最後回到前端確認整個流程沒有問題。
與註冊和帳號密碼登入功能一樣,以 Google 進行登入時尚未驗證,因此加入規則,開放未經驗證的請求訪問這個API:
public class SecurityConfig {
		...
    @Bean
    public SecurityFilterChain securityFilterChain(HttpSecurity http) throws Exception {
        http
							...
							.authorizeHttpRequests(
	              // .anyRequest().authenticated() 前新增這一行
	              .requestMatchers("/users/auth/google").permitAll()
	              .anyRequest().authenticated()
				      )

        return http.build();
    }
}
CORS定義
CORS(Cross-Origin Resource Sharing,跨來源資源共享),是一種瀏覽器的安全機制,用於限制在網頁的跨域請求,跨域的定義則源自同源政策 (Same-origin policy)。所謂同源,指的是
是指兩個 URL 具備相同協定、埠號以及主機位置,以我們專案中的前端來說,其協定、埠號與主機位置為:
http
localhost
4200
後端伺服器資訊則為:
http
localhost
8081
端口不同,顯然不符合同源的定義,因此從前端發送至後端的請求即為一跨域請求。這也是我們今天要針對 CORS 進行配置的主要原因,當 CORS 未妥善設定時,瀏覽器的同源政策會阻止這個跨域的請求,來保護使用者的資訊安全,防止惡意腳本訪問它不應該訪問的資源。
談到 CORS 時,我們會將請求分成簡單請求與預檢請求,兩者定義如下:
簡單請求:
Accept, Accept-Language, Content-Language 或 Content-Type 搭配指定值。(詳細定義可參考 MDN 對簡單請求的說明)
預檢請求:非為簡單請求者皆為預檢請求。
兩者的差別主要在於,若為預檢請求,瀏覽器會使用 OPTIONS 方法在原本的請求前,先向請求端發送一次 HTTP 請求,來確認實際請求是否安全可發送。
為何需要預檢請求呢?這是因為,同源政策說是限制請求,但背後其實已經發送請求,只是在確認跨域且未設定 CORS 的情況下限制了的回傳,因此若送出一些 DELETE 或 PUT 的方法,還是有可能造資源被竄改的狀況發生。
設定 CORS
同源問題主要是透過從後端設定 CORS 的配置來解決的,SpringBoot 中,幾種方式可以配置 CORS:
@CrossOrigin:加在 Contoller 或某個特定端點的方法上,比較類似局部設定,最簡單但是當專案規格擴大會變得難以維護。WebMvcConfig:建立一個設定類別,實作 WebMvcConfigurer 介面,並覆寫 addCorsMappings 方法。在Spring MVC 層級處理,比較適合沒有採用 Spring Security 的情況下使用。CorsFilter**:建立一個 CorsConfigurationSource 的 Bean,並將其整合到 Spring Security 的 SecurityFilterChain 中。適合採用 Spring Security 的專案使用。因此,我們選擇方法3來配置我們的跨域請求規則。首先,到 SecurityConfig 中新增 corsConfigurationSource ,並註冊到 Spring 容器中:
public class SecurityConfig {

	@Bean
	public CorsConfigurationSource corsConfigurationSource() {
	    CorsConfiguration configuration = new CorsConfiguration();

	    configuration.setAllowedOrigins(Arrays.asList("http://localhost:4200"));

	    configuration.setAllowedMethods(Arrays.asList("GET", "POST", "PUT", "DELETE", "OPTIONS"));

	    configuration.setAllowedHeaders(Arrays.asList("Authorization", "Content-Type", "X-Requested-With"));

	    configuration.setAllowCredentials(true);

	    configuration.setMaxAge(3600L);

	    UrlBasedCorsConfigurationSource source = new UrlBasedCorsConfigurationSource();
	    // 對所有路徑套用此 CORS 設定
	    source.registerCorsConfiguration("/**", configuration);
	    return source;
	}
}
內容設定了允許跨域請求的來源、Http方法、Header與是否允許攜帶憑證。其中,比較特別的是 setMaxAge,這個方法是針對預檢請求的快取設定,在此我們設定 3600 秒,代表 1 小時內相同的請求不需要再進行預檢,減少網路來回,提升效率。
同一份檔案中的 securityFilterChain 設定中加入 corsFilter:
@Bean
public SecurityFilterChain securityFilterChain(HttpSecurity http) throws Exception {
    http
        //加入這行於鏈式呼叫最上方
        .cors(cors -> cors.configurationSource(corsConfigurationSource()))
    return http.build();
}
至此,我們就完成了 CORS 的設定。
後端設定好後,我們可以回到前端畫面測試資料是否正確傳遞,再進一步在前端處理回傳後的資料。
跟前幾天一樣,我們執行第三方登入的流程,最後打開 F12 看看我們打印出的回傳結果,應該會像這個樣子:
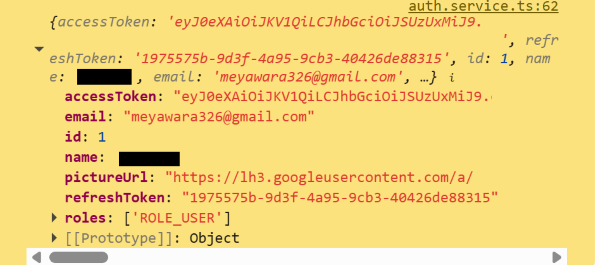
確認包含所需的使用者資訊、AaccessToken 與 RefreshToken,讓我們進一步處理接收的資料。
為了在元件間傳遞使用者資訊,我們新增一個 BehaviorSubject 來推播使用者資訊:
 // 使用 BehaviorSubject 來管理和廣播當前使用者狀態
private currentUserSubject = new BehaviorSubject<UserProfile | null>(null);
public currentUser$ = this.currentUserSubject.asObservable();
這邊我根據後端回傳的資訊定義了UserProfile interface。
在 原本的 handleAuthCallback新增以下內容:
(1) 接收到後端使用者資訊後,將資料推播至 BehaviorSubject(首頁會拉取使用者資訊渲染頁面)。
(2) 為保持登入狀態,簡單將資訊存入 local storage ,新增 loadInitialUser 方法讓主頁每次都可以從 local storage 撈取使用者資料顯示於頁面:
  //authService

  handleAuthCallback(code: string): void {
	...
    this.http.post<UserProfile>(backendApi, { code }).subscribe({
      next: (user) => {
        // 將後端回傳使用者資訊推進 BehaviorSubject 並存到 localStorage
        this.currentUserSubject.next(user);
        localStorage.setItem('currentUser', JSON.stringify(user));
      }
      ...
  }
在建構子中呼叫 loadInitialUser,好讓每次元件被創建時都會去載入使用者資訊:
  private loadInitialUser(): void {
    const userJson = localStorage.getItem('currentUser');
    if (userJson) {
      this.currentUserSubject.next(JSON.parse(userJson));
    }
  }
簡單加入登出功能,當登出時,要確實清除 local storage 的資料,並推送空的使用者資訊到 currentUserSubject 中(重新渲染主頁畫面):
logout(): void {
  localStorage.removeItem('currentUser');
  this.currentUserSubject.next(null);
  this.router.navigate(['/auth/login']);
}
home.html
改寫主頁的 html,讓我們可以從畫面更清楚的看到變化。當使用者存在,畫面上會顯示使用者名稱+使用者登入;若否則顯示狀態為登出中的頁面:
<h1> Home Page </h1>
<div *ngIf="authService.currentUser$ | async as user; else loggedOutTemplate">

  <div class="home-container">
    <div class="profile-card">
      <p>用戶 {{ user.email }} 已登入!</p>
      <button (click)="signOut()">登出</button>
    </div>
  </div>

</div>

<ng-template #loggedOutTemplate>

  <div class="home-container">
    <div class="profile-card not-logged-in">
      <p>您尚未登入</p>
      <button (click)="goToLogin()">前往登入頁面</button>
    </div>
  </div>

</ng-template>
home.ts
新增 logout 方法,呼叫 authService 登出功能:
logout(): void {
 this.authService.logout();
}
將使用者資料進行儲存後,可以很明顯的看出第三方登入功能順利完成。以下進行簡單的測試與說明:
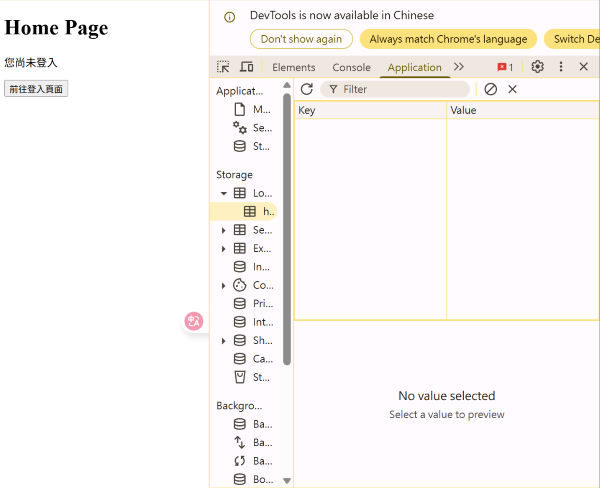
登入頁面:此步驟與前幾天無異,此時 local storage 為空,點擊前往登入頁面。
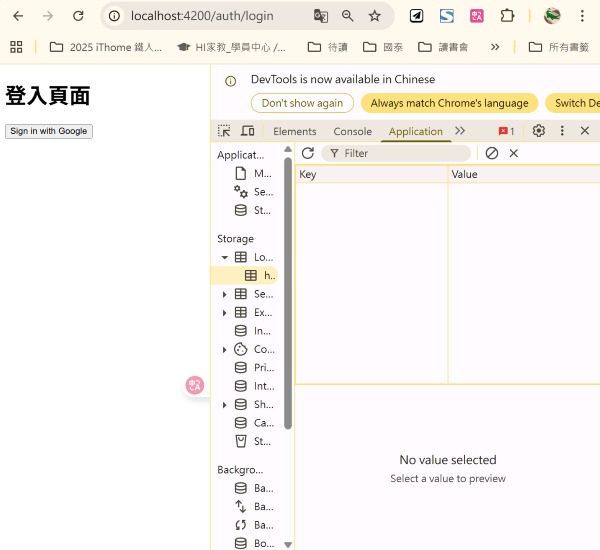
登入頁面:點擊透過 Google 登入,驗證流程也與前幾天相同。
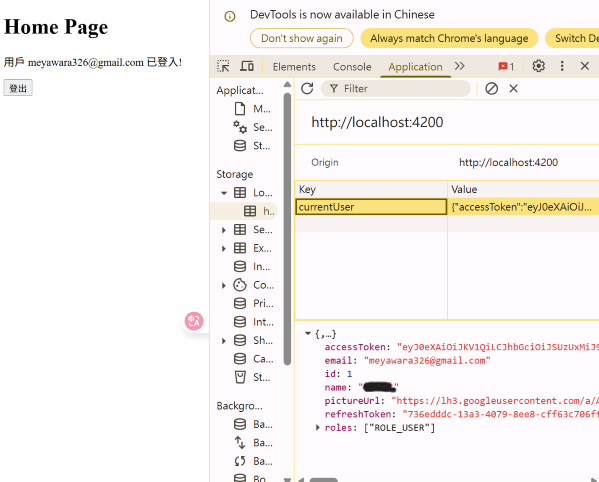
登入頁面:登入後會發現 local storage 存入了使用者的資料,並且首頁顯示了當前使用者的 email,且重新整理頁面後仍然存在。
登出:點擊剛剛首頁的登出,可以發現 local storage 資料正確地被清空了,且當前用戶資訊也被清除後重新渲染頁面。
今天,我們完成了透過 Google 進行第三方登入的功能,也學習了前端接收使用者資料後儲存資料的方法。之後幾天,想試著以 spring 提供的框架實作第三方登入,有時間的話,也會一併紀錄透過 Line 登入功能的開發過程。


 iThome鐵人賽