

不得不說,我的 Windows 桌面與 Downloads 資料夾,是我電腦最髒亂的地方:
在 Downloads 資料夾裡面多的是甚麼 Screenshot_2026.png、install.exe、任何的 .pdf 檔案、壓縮檔,久久才會進行手動清理一次。
因此,今天會用 Node-RED 搭配 agy cli,定時掃描 Downloads,依檔案內容建立分類目錄,再由流程移動檔案。
本文同步發布於 GitHub: 2026-18th-it-ironman
一般我們在進行分類的時候,通常透過寫死副檔名的規則 (如,.png、jpg 丟圖片區、.exe 丟到軟體區。)
但現實生活中的檔案更複雜:
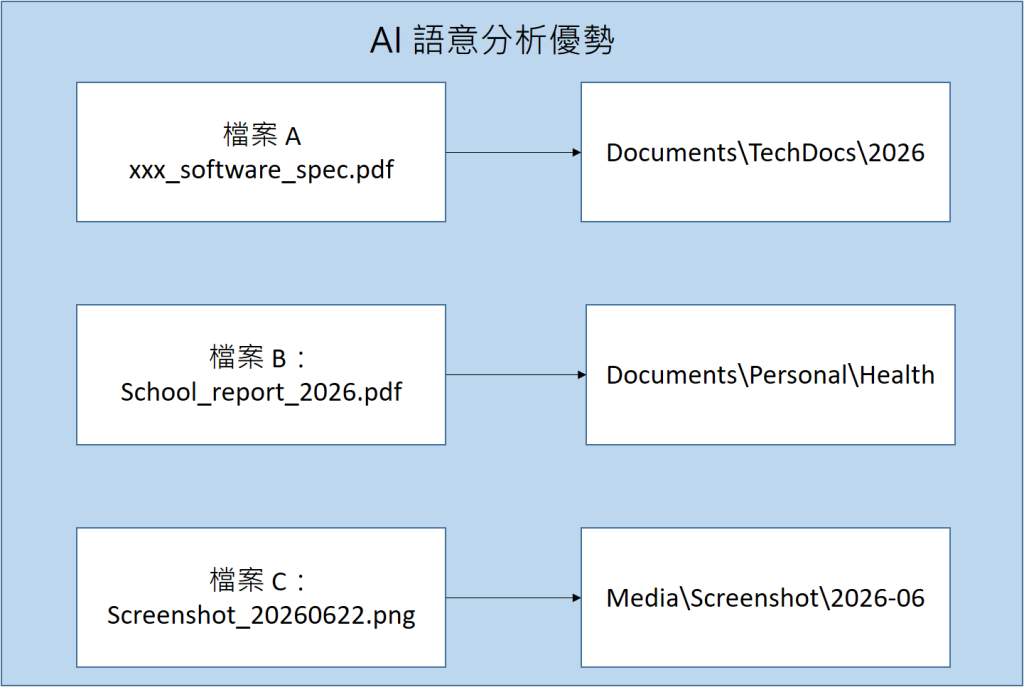
Screenshot_2026-06-22.png 應該丟到 Media/Screenshots/2026-06/。xxx_software_spec_v2.pdf 應該丟到 Documents/TechDocs/2026/。docker-desktop-installer.exe 應該丟到 Installers/。但在真實工作與生活中,這種寫死規則的腳本很快就會遇到三大死穴: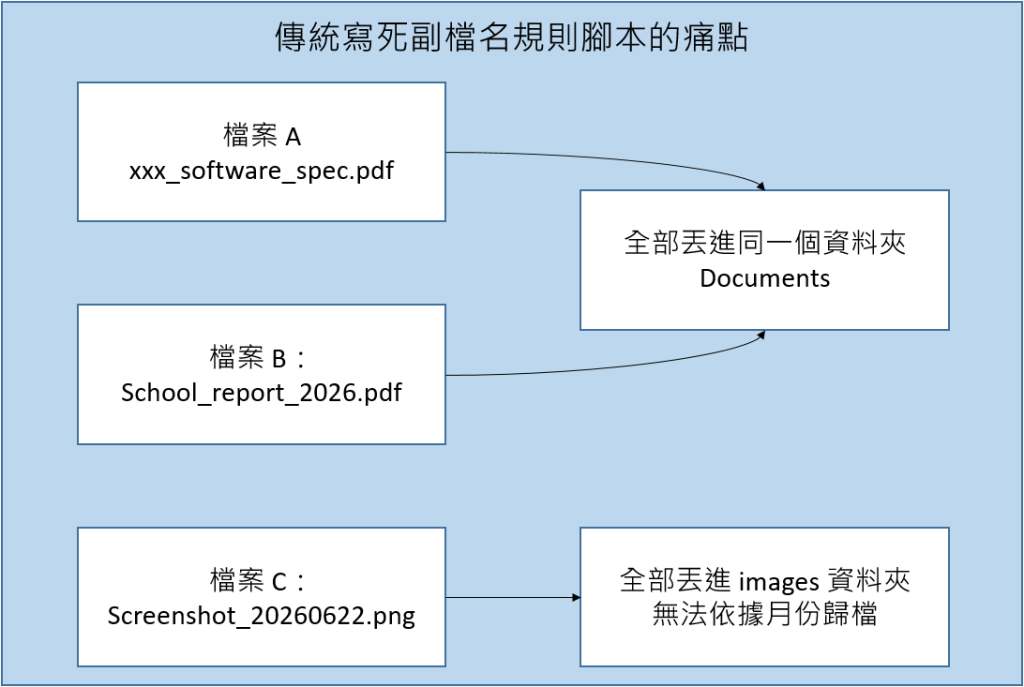
.pdf 檔案,「軟體規格書」應該歸檔到 Documents/TechDocs,而「健康檢查報告」應該歸檔到 Documents/Personal/Health。副檔名完全看不出兩者的本質差異。IMG_20260622_142011.png。AI 在這裡負責根據檔名與內容提出分類路徑及命名建議。
這一次就透過 AI 幫助我們根據檔案的意圖,自動進行分類。
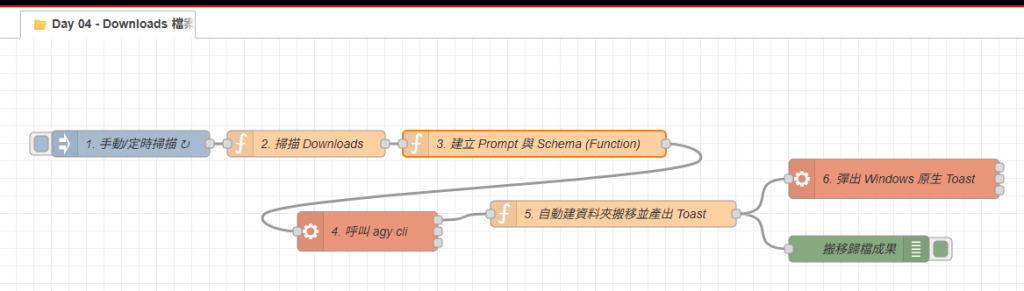
整套下載區自動整理管線由 6 個節點模組與階段 組成:

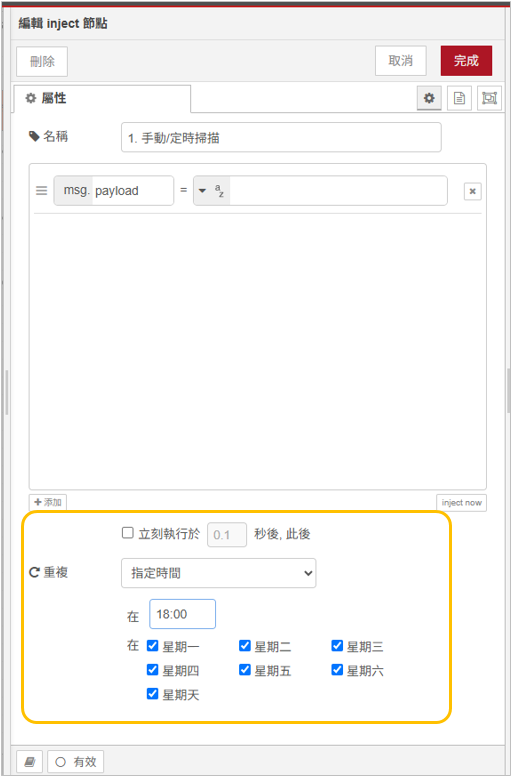
拉出一個 inject 節點:
我比較偏好不使用第三方套件,能夠用內建的模組就直接使用;因此,直接使用 Node.js 內建的 os、fs、path 模組。
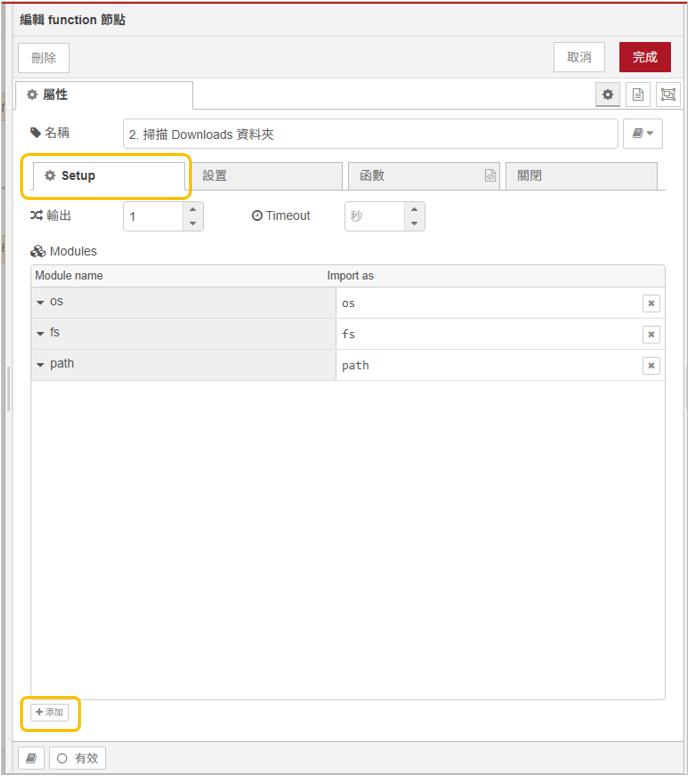
💡 Setup 設定提醒:
請點開 Function 節點,切換到 「設定(Setup)」➔「模組(Modules)」 頁籤,新增os、fs、path三個模組(變數名稱分別對應os、fs、path)。
這邊有一個重點是我們每一次只處理 20 檔案進行分類,避免我們的 Prompt 過長
// Function 節點:純 JS 快速掃描 Downloads 目錄 (Setup 注入 os, fs, path)
const homedir = os.homedir();
const downloadsDir = path.join(homedir, 'Downloads');
const candidateFiles = [];

try {
    const items = fs.readdirSync(downloadsDir);
    for (const name of items) {
        // 過濾暫存檔、隱藏檔與正在下載中的檔案
        if (name.startsWith('.') || name.endsWith('.tmp') || name.endsWith('.crdownload')) continue;

        const fullPath = path.join(downloadsDir, name);
        try {
            const stat = fs.statSync(fullPath);
            // 防禦 2:只處理實體檔案,自動略過子資料夾 (避免 EISDIR 錯誤)
            if (stat.isFile()) {
                candidateFiles.push({
                    original_name: name,
                    size_kb: Math.round(stat.size / 1024),
                    ext: path.extname(name).toLowerCase()
                });
            }
        } catch(e) {}

        // 批次處理限額 (每次最多處理 20 個檔案,避免 Prompt 過長)
        if (candidateFiles.length >= 20) break;
    }
} catch(err) {
    node.warn('掃描 Downloads 失敗: ' + err.toString());
}

// 如果下載區乾乾淨淨,安靜結束流程
if (candidateFiles.length === 0) {
    node.warn('Downloads 目前無新檔案需整理');
    return null;
}

msg.candidateFiles = candidateFiles;
return msg;
--json-schema 契約(Function 節點)將掃描到的檔案清單包裝成 Prompt,並傳入嚴格的 JSON Schema,要求 AI 僅需輸出 original_name、category(子目錄名稱)與 new_name(標準化檔名):
const files = msg.candidateFiles;

const prompt = `你是一個專業的檔案分類專家。請為以下檔案分析用途與語意,給出建議的「子資料夾名稱」(如 TechDocs, Screenshots, Installers, Archives, Manuals) 與「標準化新檔名」: ${JSON.stringify(files)}`;

const schema = {
      type: 'object',
      properties: {
        results: {
          type: 'array',
          items: {
            type: 'object',
            properties: {
              original_name: { type: 'string', description: '原始檔名' },
              category: {
                type: 'string',
                // 強制限制 AI 只能從以下固定 6 個資料夾中選擇!
                enum: ['Documents', 'Media', 'Installers', 'Archives', 'Code', 'Others'],
                description: '分類目標資料夾'
              },
              new_name: { type: 'string', description: '整理後的新檔名 (保留原副檔名)' }
            },
            required: ['original_name', 'category', 'new_name']
          }
        }
      },
      required: ['results']
    };

msg.payload = `agy -p ${JSON.stringify(prompt)} --dangerously-skip-permissions --json-schema ${JSON.stringify(JSON.stringify(schema))} --output-format json`;
return msg;
agy cli 執行推理(Exec 節點)拉出一個 exec 節點:
msg.payload 動態傳入)。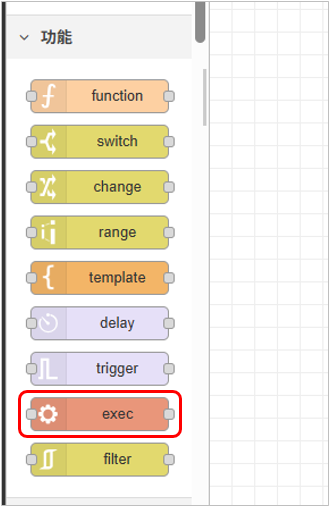
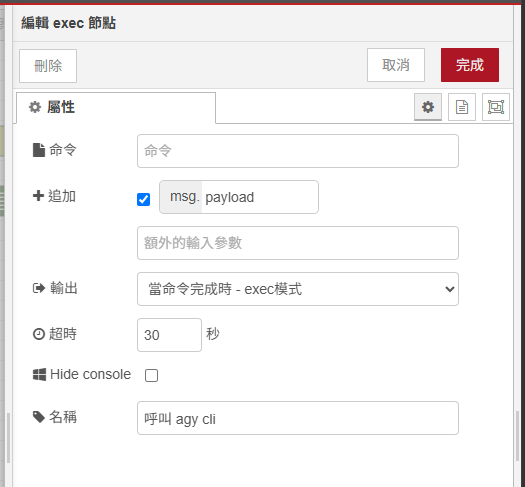
當 agy cli 回傳標準 JSON 後,進行實體檔案搬移:
// Function 節點:自動建目錄並安全搬移 (Setup 注入 os, fs, path)
const homedir = os.homedir();
const downloadsDir = path.join(homedir, 'Downloads');

let parsed;
try {
    parsed = typeof msg.payload === 'string' ? JSON.parse(msg.payload) : msg.payload;
} catch (e) {
    node.error('JSON 解析失敗: ' + msg.payload);
    return null;
}

// 雙軌解包 (支援 structured_output 與 response 字串)
let data = parsed.structured_output;
if (!data && parsed.response) {
    try {
        data = typeof parsed.response === 'string' ? JSON.parse(parsed.response) : parsed.response;
    } catch (e) {
        const match = parsed.response.match(/\{[\s\S]*\}/);
        if (match) data = JSON.parse(match[0]);
    }
}

const results = (data && data.results) || parsed.results || [];
const movedList = [];

for (const item of results) {
    const srcPath = path.join(downloadsDir, item.original_name);

    // 程式碼強制規範:根目錄寫死在 Downloads,AI 僅輸出子目錄名稱 (category)
    const folderName = (item.category || item.target_folder || 'Others').replace(/^[\\\/]+/, '').trim();
    const destDir = path.join(downloadsDir, folderName);
    const destPath = path.join(destDir, item.new_name || item.original_name);

    // 防禦 1:確認來源檔案依然存在 (防止已被使用者手動刪除)
    if (fs.existsSync(srcPath) && fs.statSync(srcPath).isFile()) {
        // 防禦 2:遞迴建立目標子資料夾 (如 Downloads/TechDocs)
        fs.mkdirSync(destDir, { recursive: true });

        // 防禦 3:安全更名與搬移
        fs.renameSync(srcPath, destPath);
        movedList.push({ from: item.original_name, to: item.new_name, dir: folderName });
    }
}

// 建立 Windows 原生 Toast 通知腳本
msg.movedCount = movedList.length;
msg.payload = `powershell -NoProfile -Command "[Windows.UI.Notifications.ToastNotificationManager, Windows.UI.Notifications, ContentType = WindowsRuntime] > $null; $template = [Windows.UI.Notifications.ToastNotificationManager]::GetTemplateContent([Windows.UI.Notifications.ToastTemplateType]::ToastText02); $textNodes = $template.GetElementsByTagName('text'); $textNodes.Item(0).AppendChild($template.CreateTextNode('📂 下載區 AI 整理完畢')) > $null; $textNodes.Item(1).AppendChild($template.CreateTextNode('已成功分類歸檔 ${movedList.length} 個檔案至 Downloads 子資料夾!')) > $null; [Windows.UI.Notifications.ToastNotificationManager]::CreateToastNotifier('Node-RED AI 管家').Show([Windows.UI.Notifications.ToastNotification]::new($template));"`;

msg.movedFiles = movedList;
return msg;
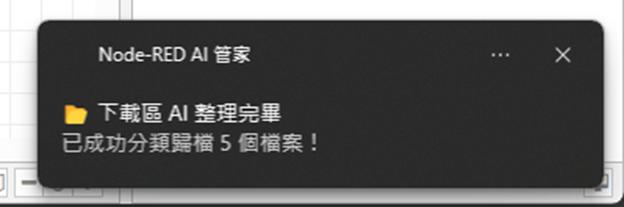
最後接上一顆 exec 節點執行上一步產生的 PowerShell Toast 腳本,檔案整理完成時 Windows 桌面右下角就會彈出漂亮的通知卡片!
本案例 flow
今天完成了第一個以 AI 協助判斷檔案分類的 Windows 自動化流程。


 iThome鐵人賽
 看影片追技術