

在 Windows 終端機下指令、安裝套件或編譯專案時,最讓人頭痛的就是突然噴出一長串紅字報錯:
npm ERR! code ENOENT、git error: failed to push some refs、ExecutionPolicy restricted……
每次都要手動複製整段錯誤訊息到瀏覽器或聊天工具,會讓排查流程中斷。這篇會在 Node-RED 建立一個報錯分析 API,輸入rescue後,由本機 AI 回傳原因說明與可供檢查的修復命令。
本文同步發布於 GitHub: 2026-18th-it-ironman

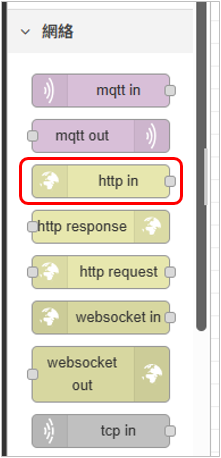
http in 節點)在 Node-RED 畫面上拉出一個 http in 節點:
POST
/api/ai/rescue
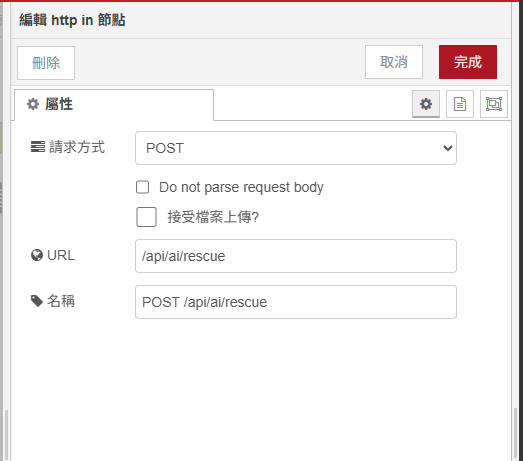
後方接上建立 Prompt 的 Function 節點。
在 Function 節點中,定義嚴謹的修復契約,強制模型輸出包含 plain_reason(原因)與 fix_commands(可執行的修復指令陣列):
// Function 節點:建立報錯排查 Prompt
const errorLog = (typeof msg.payload === 'object' ? msg.payload.error : msg.payload) || "未知終端錯誤";

const prompt = `你是一個資深的 Windows 與全端除錯專家。使用者在終端機遇到以下報錯,請用一句白話文解釋原因,並給出 1~3 行最精準、可直接複製執行的修復指令:
${errorLog}`;

const schema = {
  type: "object",
  properties: {
    plain_reason: { type: "string", description: "用一句大白話說明報錯原因" },
    fix_commands: {
      type: "array",
      items: { type: "string" },
      description: "可直接複製執行的修復指令清單"
    },
    risk_level: { type: "string", enum: ["LOW", "MEDIUM", "HIGH"] }
  },
  required: ["plain_reason", "fix_commands", "risk_level"]
};

// 建立無人值守命令行
msg.payload = `agy -p ${JSON.stringify(prompt)} --dangerously-skip-permissions --json-schema ${JSON.stringify(JSON.stringify(schema))} --output-format json`;
return msg;
agy cli(Exec 節點)拉出一個 exec 節點:
msg.payload 傳入)。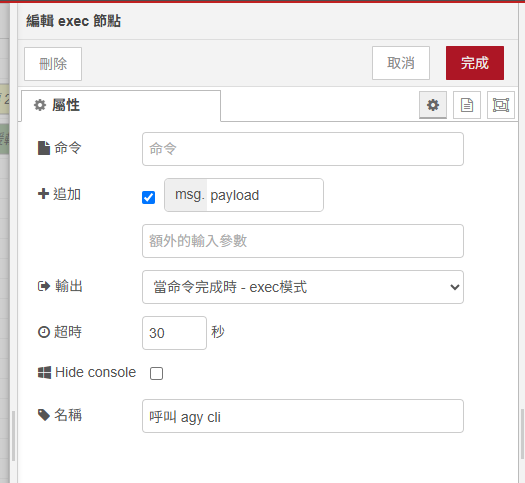
http response 節點)在 Function 節點中進行雙軌解包,確保資料正確提取後回傳給終端機:
// Function 節點:解析修復建議 (雙軌解包)
let parsed;
try {
    parsed = typeof msg.payload === 'string' ? JSON.parse(msg.payload) : msg.payload;
} catch(e) {
    node.error('JSON 解析失敗: ' + msg.payload);
    msg.payload = { plain_reason: 'AI 回傳格式解析失敗', fix_commands: [], risk_level: 'LOW' };
    return msg;
}

// 雙軌解包:取出 structured_output 或 response 內部的修復資料
let data = parsed.structured_output;
if (!data && parsed.response) {
    try {
        data = typeof parsed.response === 'string' ? JSON.parse(parsed.response) : parsed.response;
    } catch (e) {
        const match = parsed.response.match(/\{[\s\S]*\}/);
        if (match) data = JSON.parse(match[0]);
    }
}

msg.payload = data || parsed;
return msg;
後方接上一個 http response 節點,設定狀態碼為 200,並在標頭設定 Content-Type: application/json; charset=utf-8。
$PROFILE 配置 rescue 一鍵救援函數$PROFILE?它在哪裡?$PROFILE 是 PowerShell 每次啟動時會自動載入的個人設定檔(相當於 Linux 的 ~/.bashrc 或 ~/.zshrc)。
$PROFILE?在 PowerShell 中執行以下命令,即可直接用「記事本」打開設定檔:
# 1. 如果設定檔還沒建立過,先自動建立檔案
if (!(Test-Path -Path $PROFILE)) {
    New-Item -ItemType File -Path $PROFILE -Force
}

# 2. 用記事本開啟 (或輸入 code $PROFILE 用 VS Code 開啟)
notepad $PROFILE
檔案實際存放路徑:
通常位於%USERPROFILE%\Documents\PowerShell\Microsoft.PowerShell_profile.ps1。
rescue 函數貼入 $PROFILE 最下方:# 在 PowerShell 中一鍵呼叫本機 AI 救援 (自動讀取上一條報錯)
function rescue {
# 智慧抓取,優先自動抓取上一條報錯 ($Error[0]),若無則抓剪貼簿
$err = ""
if ($Error.Count -gt 0 -and $Error[0]) {
$err = $Error[0] | Out-String
}
if ([string]::IsNullOrWhiteSpace($err)) {
$err = Get-Clipboard
}
if ([string]::IsNullOrWhiteSpace($err)) {
Write-Host "⚠️ 目前沒有捕獲到終端報錯或剪貼簿文字!" -ForegroundColor Yellow
return
}
$body = @{ error = $err.Trim() } | ConvertTo-Json
try {
$res = Invoke-RestMethod -Uri "http://127.0.0.1:1880/api/ai/rescue" -Method Post -Body $body -ContentType "application/json; charset=utf-8"
# 雙重相容:若回傳為外層 Envelope 物件,自動解包取 structured_output
if ($res.structured_output) {
$res = $res.structured_output
}
Write-Host "`n🔍 故障原因: " -ForegroundColor Yellow -NoNewline
Write-Host $res.plain_reason
Write-Host "💡 建議修復指令:" -ForegroundColor Green
$res.fix_commands | ForEach-Object { Write-Host " > $_" -ForegroundColor Cyan }
Write-Host ""
} catch {
Write-Host "❌ 無法連線至 Node-RED 救援端點: $($_.Exception.Message)" -ForegroundColor Red
}
}
存檔並關閉記事本後,在終端機輸入以下指令立即載入生效:
. $PROFILE
在 PowerShell 中隨便輸入一個錯誤指令(例如 adsdf),接著直接輸入 rescue 並按 Enter:
PS G:> adsdf
adsdf: The term 'adsdf' is not recognized as a name of a cmdlet, function, script file, or executable program.
Check the spelling of the name, or if a path was included, verify that the path is correct and try again.

PS G:> rescue

🔍 故障原因: 系統中找不到名為 'adsdf' 的指令或執行檔,可能是拼字錯誤或未安裝該指令套件。
💡 建議修復指令:
  > Get-Command adsdf
  > winget search adsdf
本案例 flow

今天將本機 AI 接到終端機工作流,讓報錯內容可以透過 rescue 送進分析流程。


 iThome鐵人賽
 看影片追技術