iT邦幫忙

2026 iThome 鐵人賽

DAY 7
1

我們在VirtualBox裡配好了記憶體、CPU,也掛載了虛擬硬碟。今天終於到了最讓人緊張興奮的時刻:正式開機安裝 Ubuntu!
第一次在實體電腦裝系統大家都會怕,因為隨便按個格式化硬碟,Windows 的資料可能就全沒了。但在虛擬機裡完全不用怕,因為這顆 100 GB 的硬碟是虛擬的,就算手殘按錯,最慘也就是刪除 VM 重來一次。(p.s.我之前重裝了五、六次…)

首次開機:進入安裝步驟
在 VirtualBox 主畫面選中昨天建好的檔案,點擊上方的綠色箭頭「啟動」。
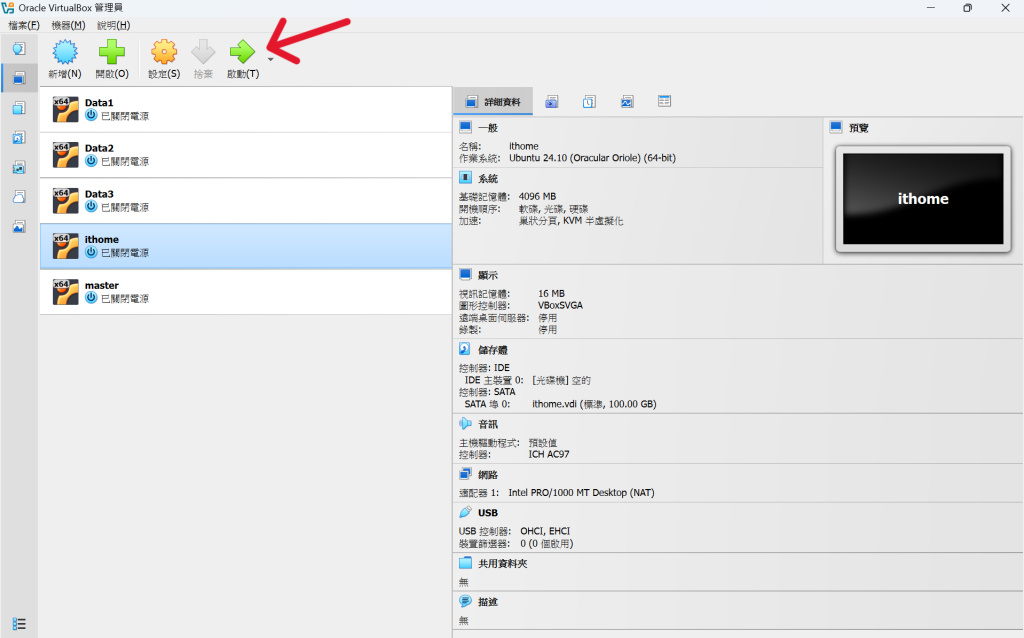
https://ithelp.ithome.com.tw/upload/images/20260906/20183886EivRtWytjg.png
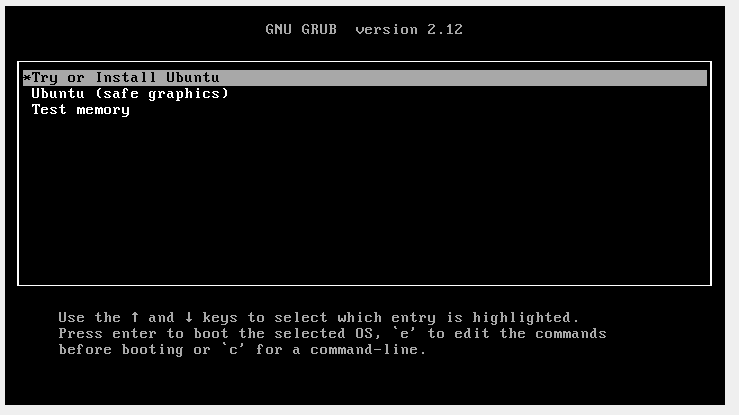
螢幕會彈出一個黑色視窗,並出現開機選單:

  • 預設會停在第一項:Try or Install Ubuntu
  • 直接按鍵盤Enter進入。
    https://ithelp.ithome.com.tw/upload/images/20260906/20183886Iv3JbkMccz.png

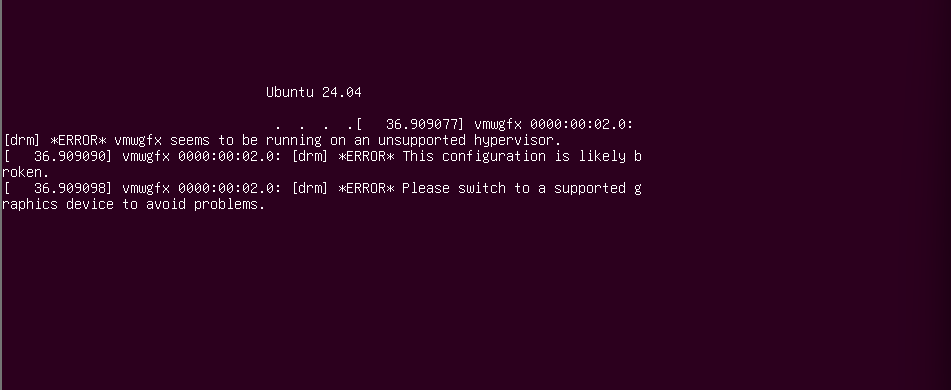
如果出現以下的畫面:
https://ithelp.ithome.com.tw/upload/images/20260906/20183886wXpzQnpl3P.png
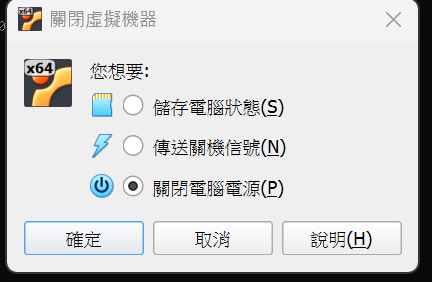
先按右上角的x,把虛擬機關掉
https://ithelp.ithome.com.tw/upload/images/20260906/201838867unBipb0dR.png
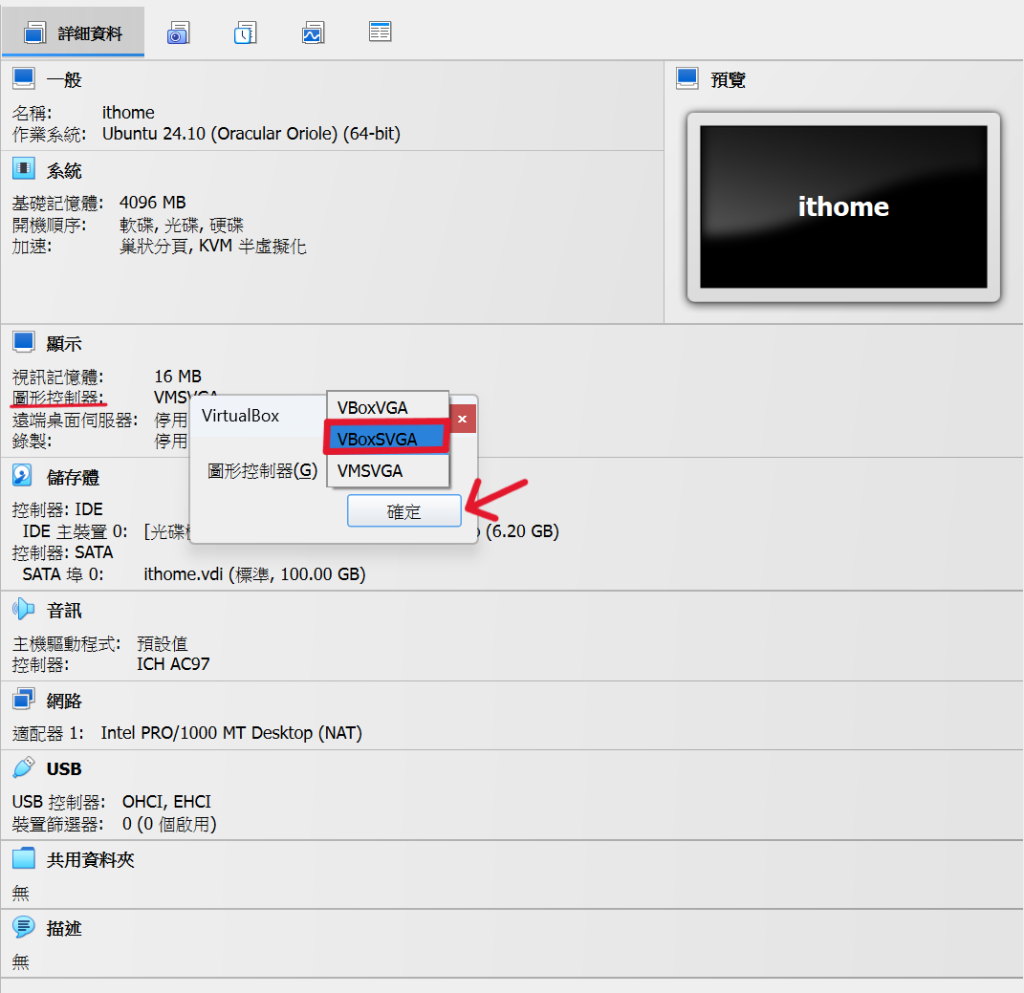
回到詳細資料畫面
點擊顯示-圖形控制器,更改成VBoxSVGA,並重新啟動虛擬機
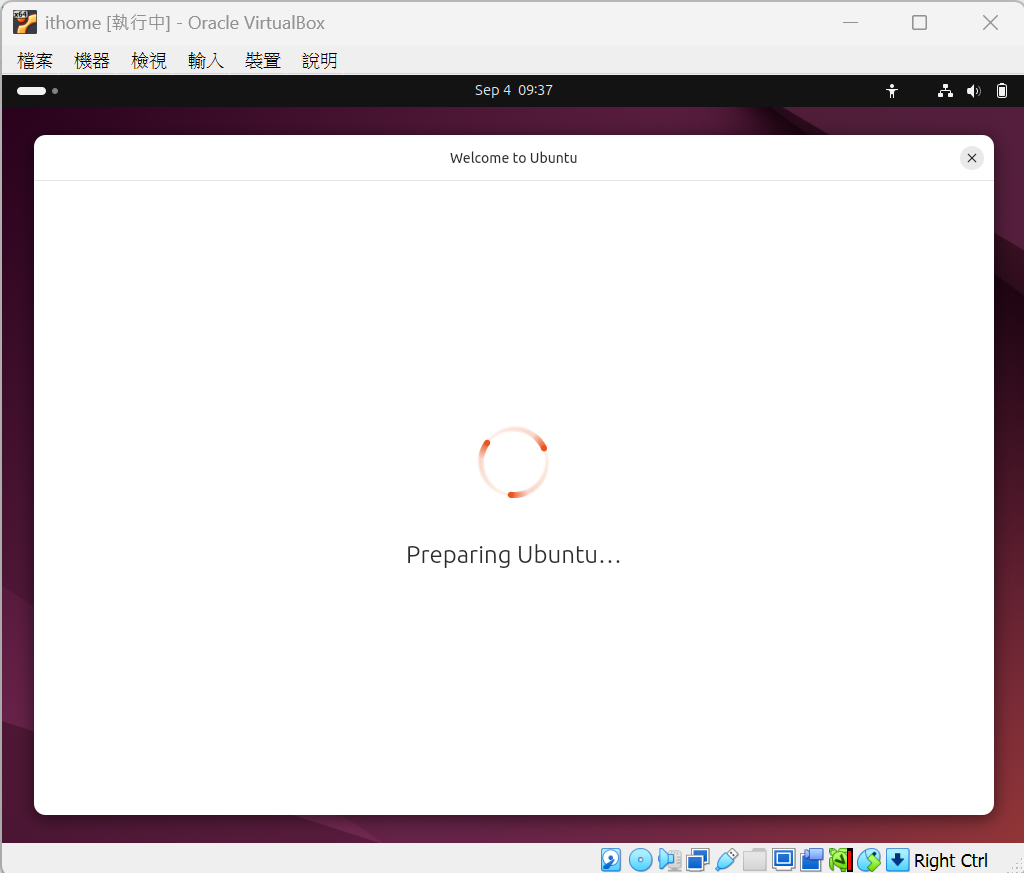
https://ithelp.ithome.com.tw/upload/images/20260906/20183886D4ZaJHmzZ3.png

  • 接下來畫面會出現 Ubuntu 的 Logo,載入安裝程式,要稍等 1~2 分鐘
    https://ithelp.ithome.com.tw/upload/images/20260906/20183886QrSRgYVAri.png

步驟 1:語言與鍵盤配置

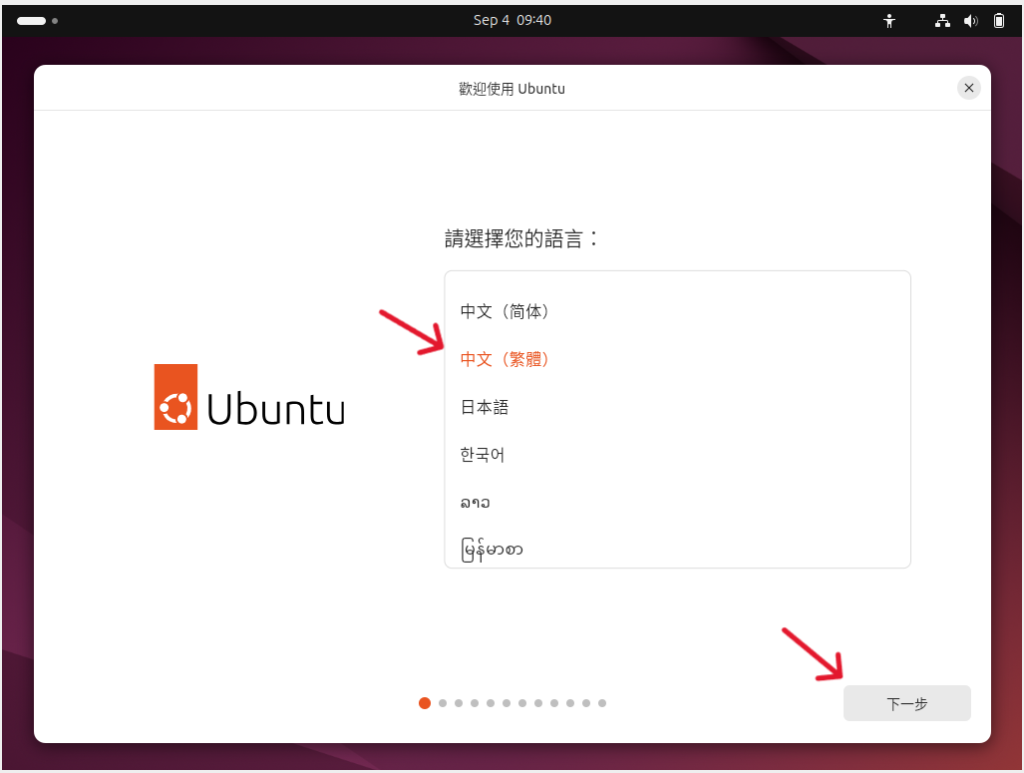
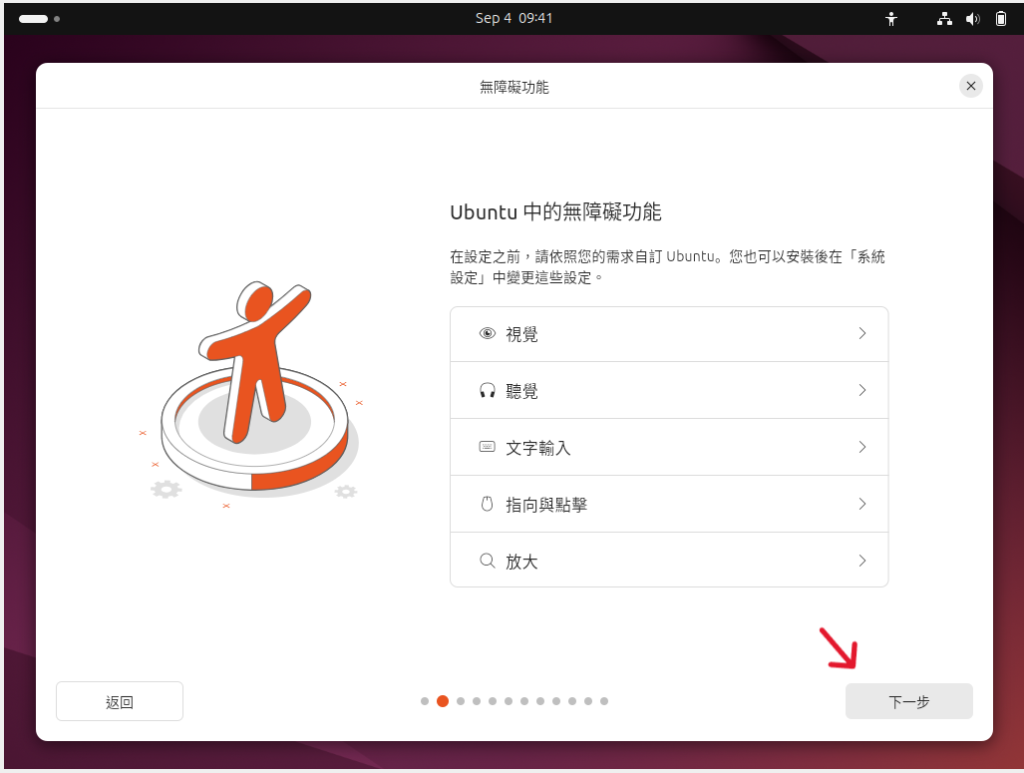
  • 進到圖形化安裝畫面後,按照以下順序設定:
    (1) 歡迎畫面:語言選單可以選「中文 (繁體)」或「English」,中文要滑到最下面
    https://ithelp.ithome.com.tw/upload/images/20260906/20183886WbJAeKf5fX.png
    https://ithelp.ithome.com.tw/upload/images/20260906/20183886TiU3FegVh3.png
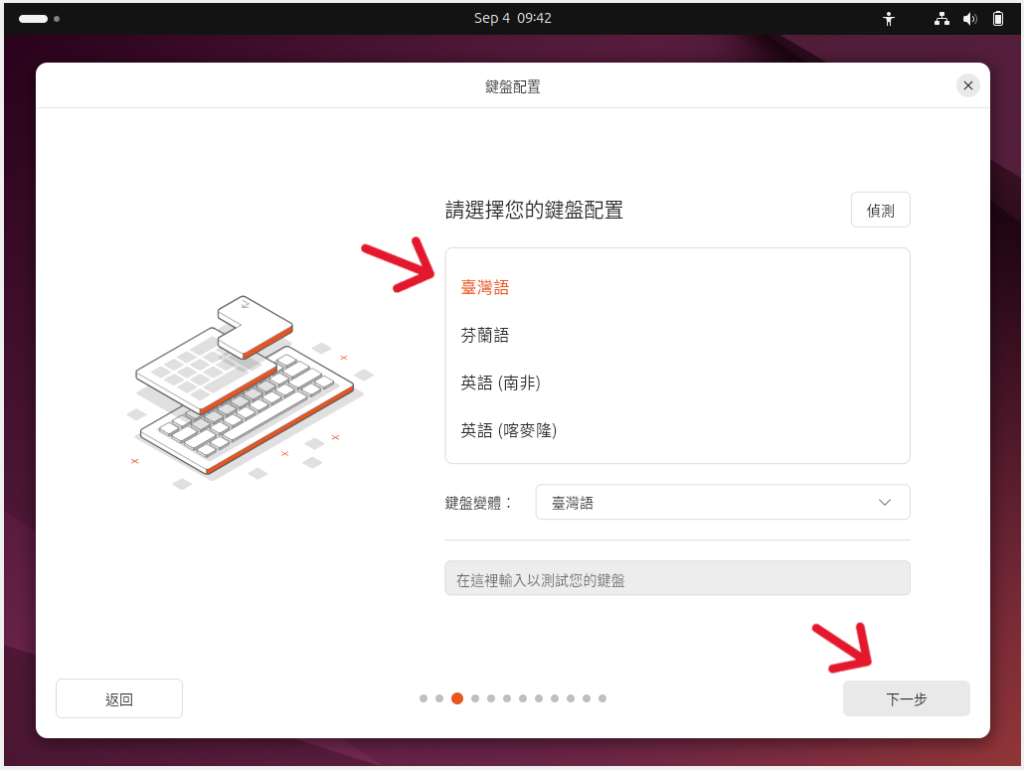
    (2) 鍵盤配置:選擇臺灣語,點擊下一步
    https://ithelp.ithome.com.tw/upload/images/20260906/20183886CpgcYPdxxs.png

步驟 2:螢幕大小比例與安裝

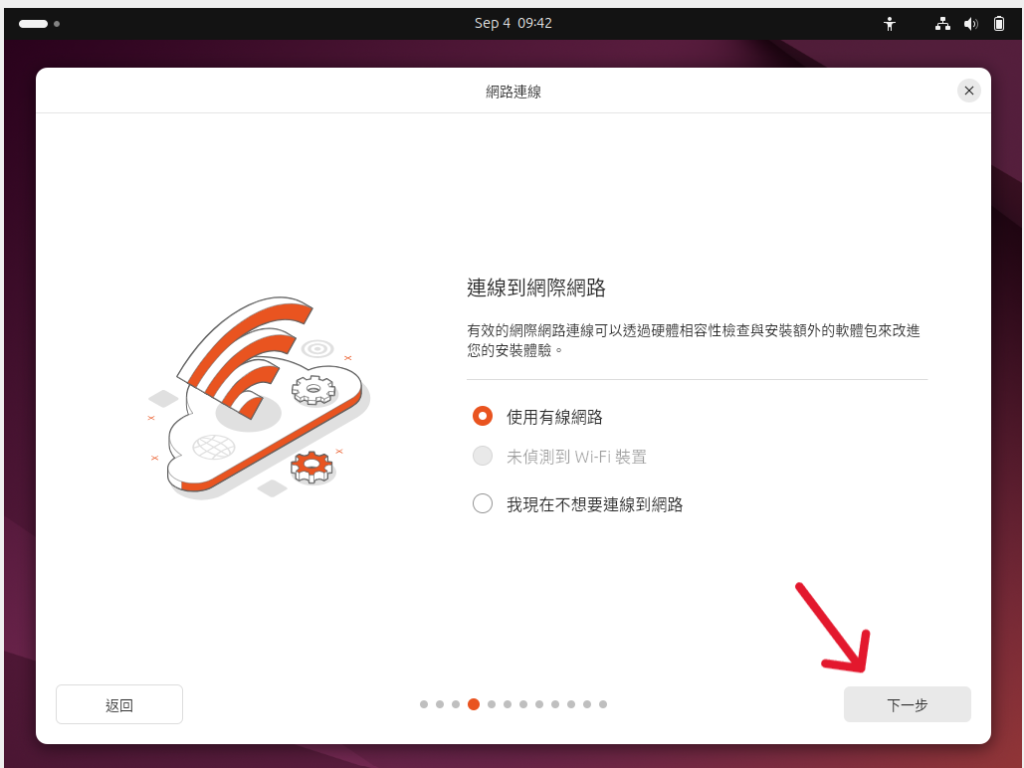
  • 保持預設的網路連線即可
    https://ithelp.ithome.com.tw/upload/images/20260906/20183886STy7L8XDAf.png
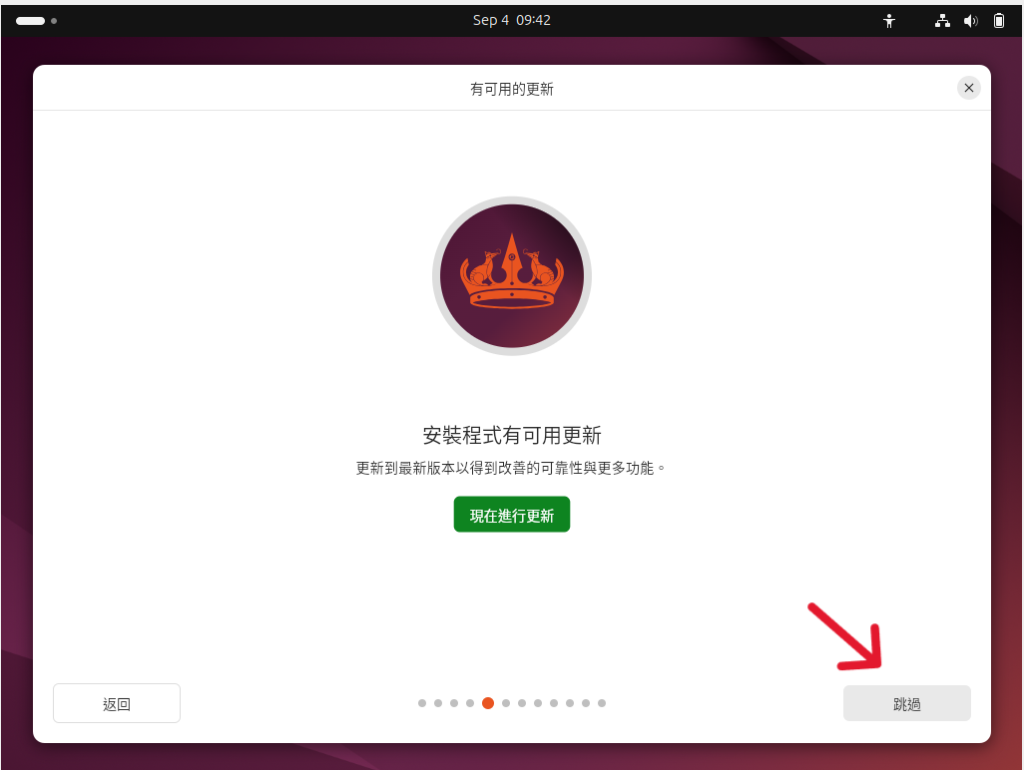
  • 略過更新畫面
    https://ithelp.ithome.com.tw/upload/images/20260906/20183886FSh7CFZulW.png
  • 選擇下方的「試用Ubuntu
    https://ithelp.ithome.com.tw/upload/images/20260906/20183886ONeTEQfAUF.png

1.更改螢幕大小比例

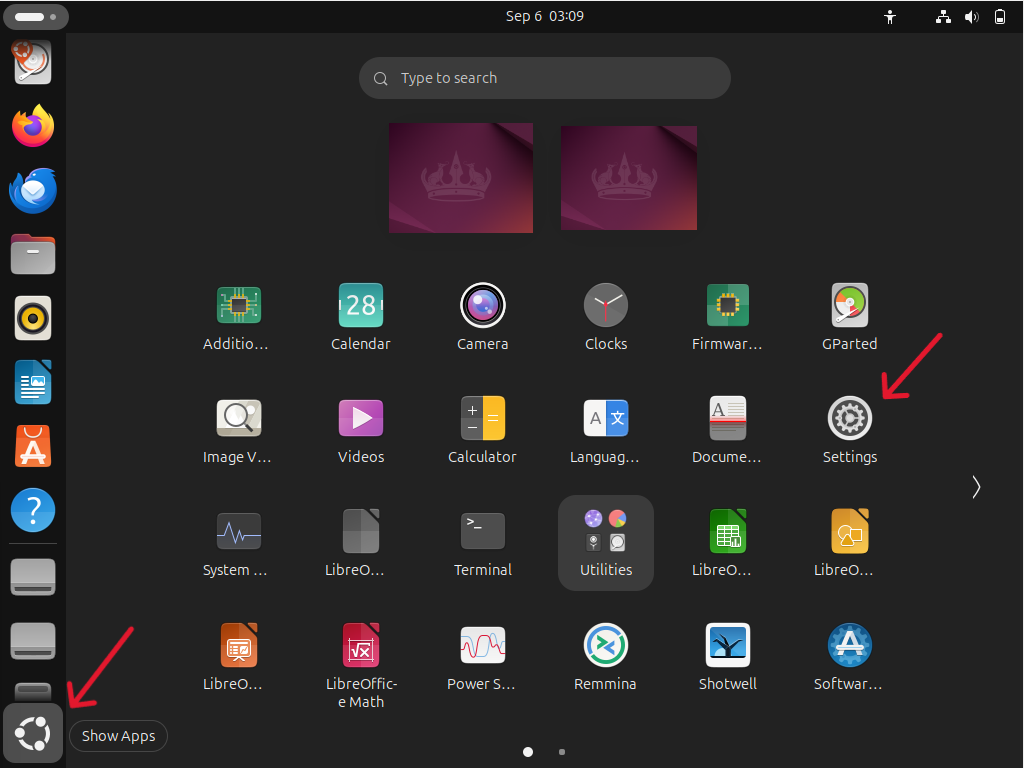
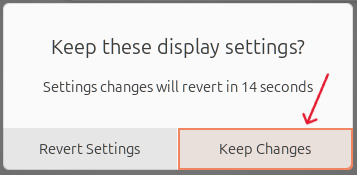
  • 來到主畫面,點擊左下角的「Show Apps」,找到「Settings」並點擊
    https://ithelp.ithome.com.tw/upload/images/20260906/20183886g20x8XUWEX.png
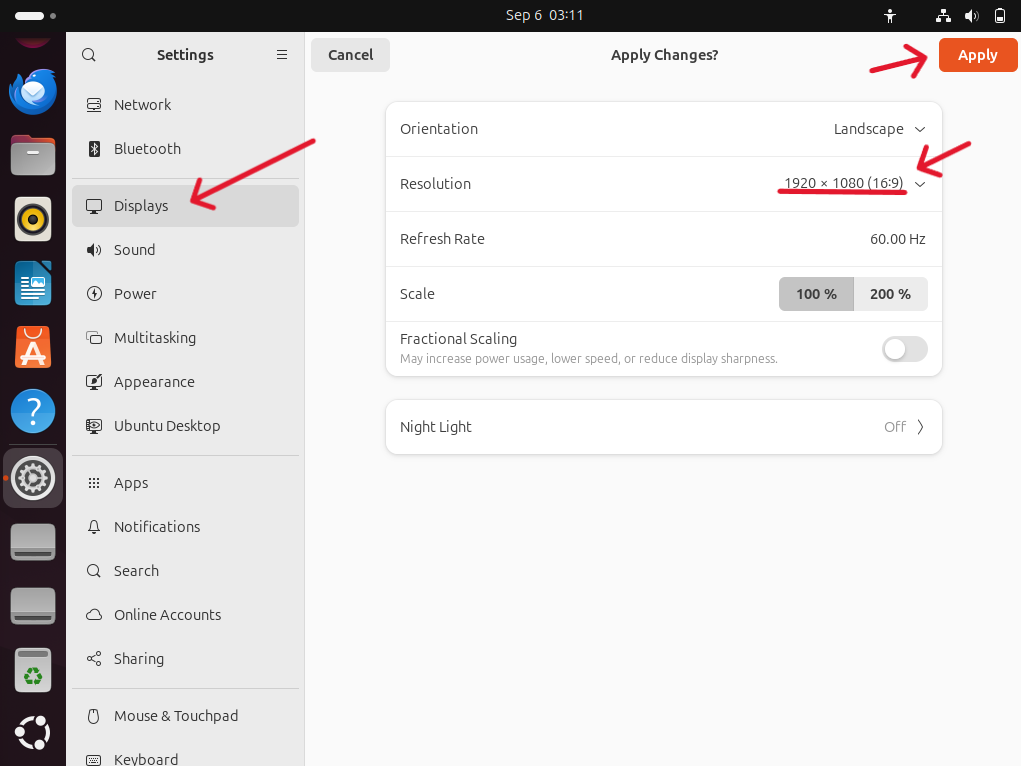
  • 點擊「Displays」後,就可以更改螢幕大小比例
    https://ithelp.ithome.com.tw/upload/images/20260906/20183886ehEbBmTdah.png
    https://ithelp.ithome.com.tw/upload/images/20260906/20183886ZkSsUAVazU.png

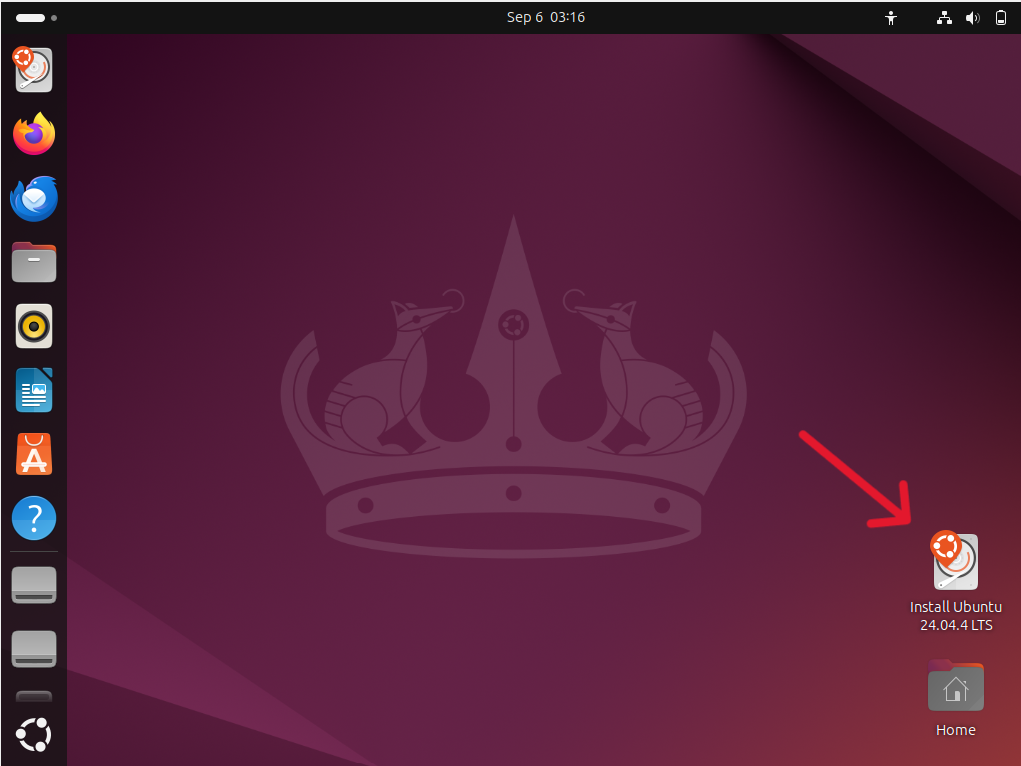
2.安裝Ubuntu

  • 回到主畫面後,點擊右下角的「Install Ubuntu
    https://ithelp.ithome.com.tw/upload/images/20260906/20183886nK1Yn6yiCL.png
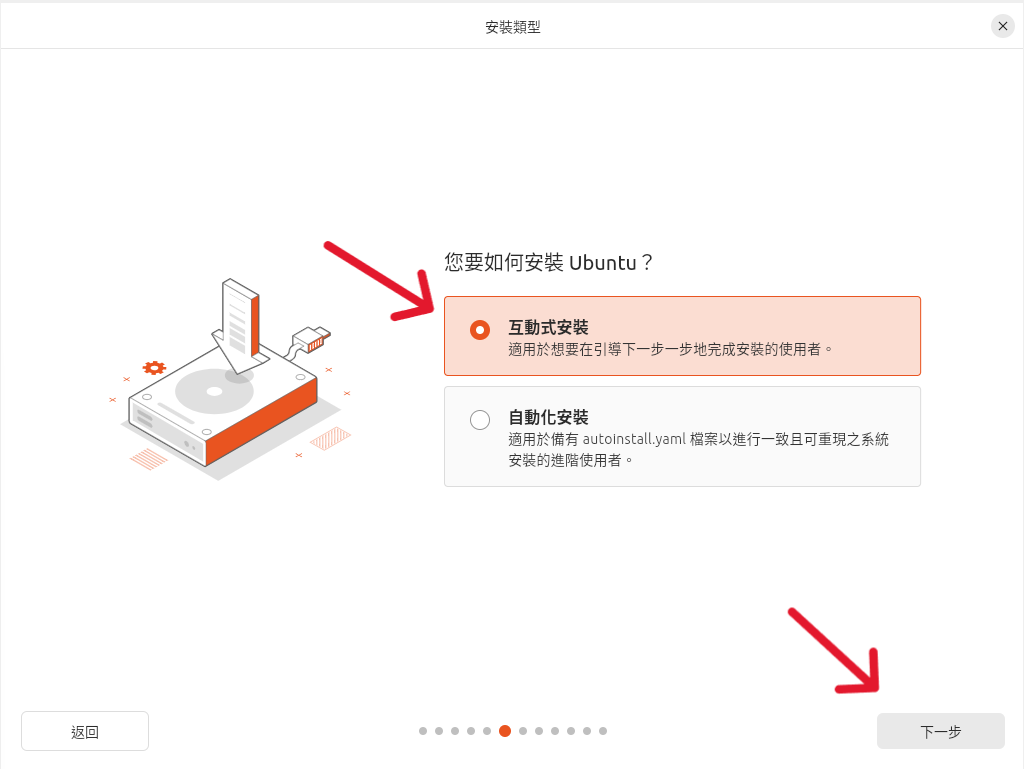
  • 選擇上面的「互動安裝
    https://ithelp.ithome.com.tw/upload/images/20260906/20183886Fly8C8ZEOx.png
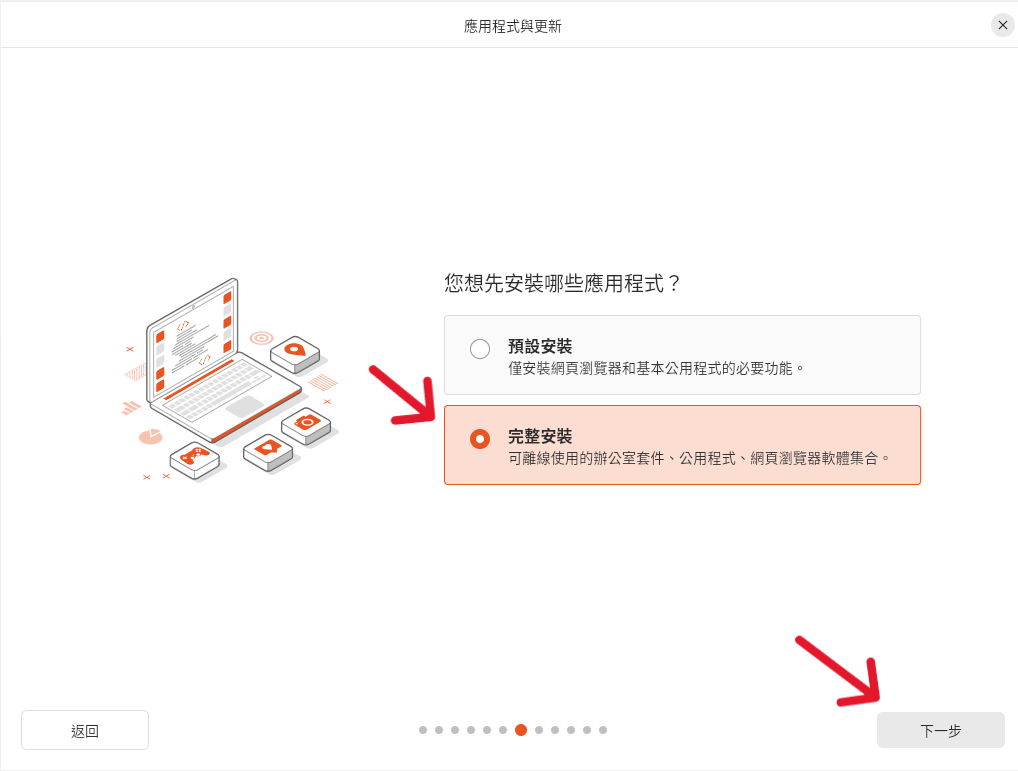
  • 選擇下面的「完整安裝
    https://ithelp.ithome.com.tw/upload/images/20260906/20183886UoxpuMjNxx.png
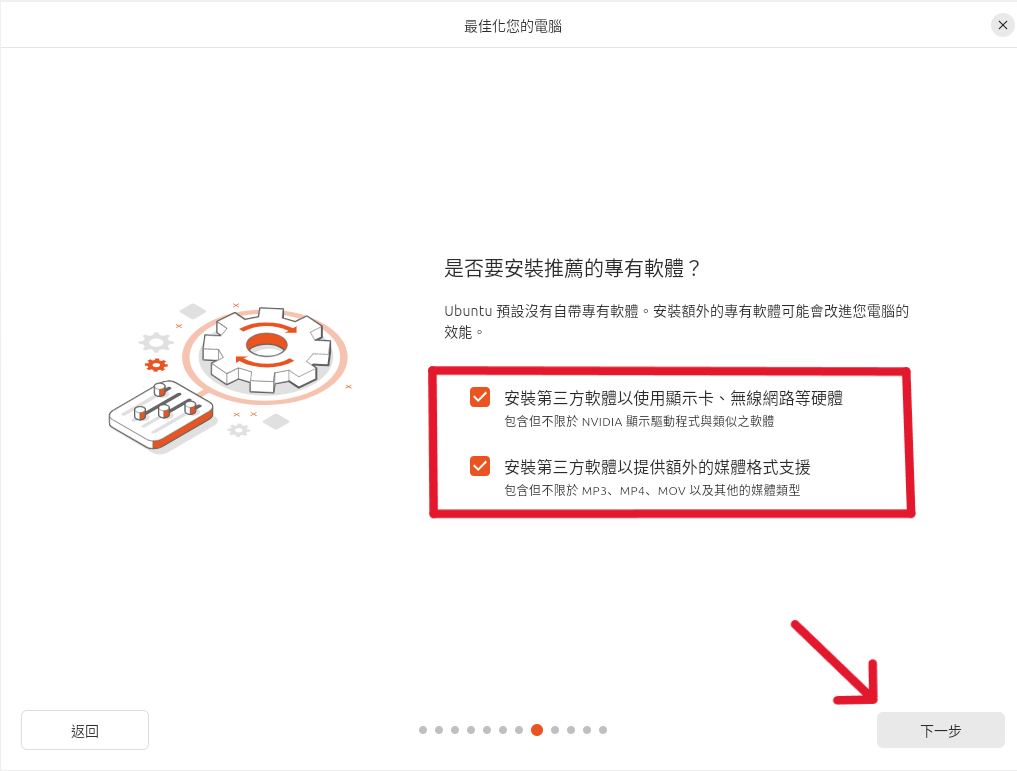
  • 兩個選項都打勾,這樣顯卡支援會比較好
    https://ithelp.ithome.com.tw/upload/images/20260906/20183886I04djYtipB.png
  • 磁碟分割選擇「清除磁碟並安裝Ubuntu
    https://ithelp.ithome.com.tw/upload/images/20260906/201838865tkC9IGbbg.png

3.設定使用者帳號

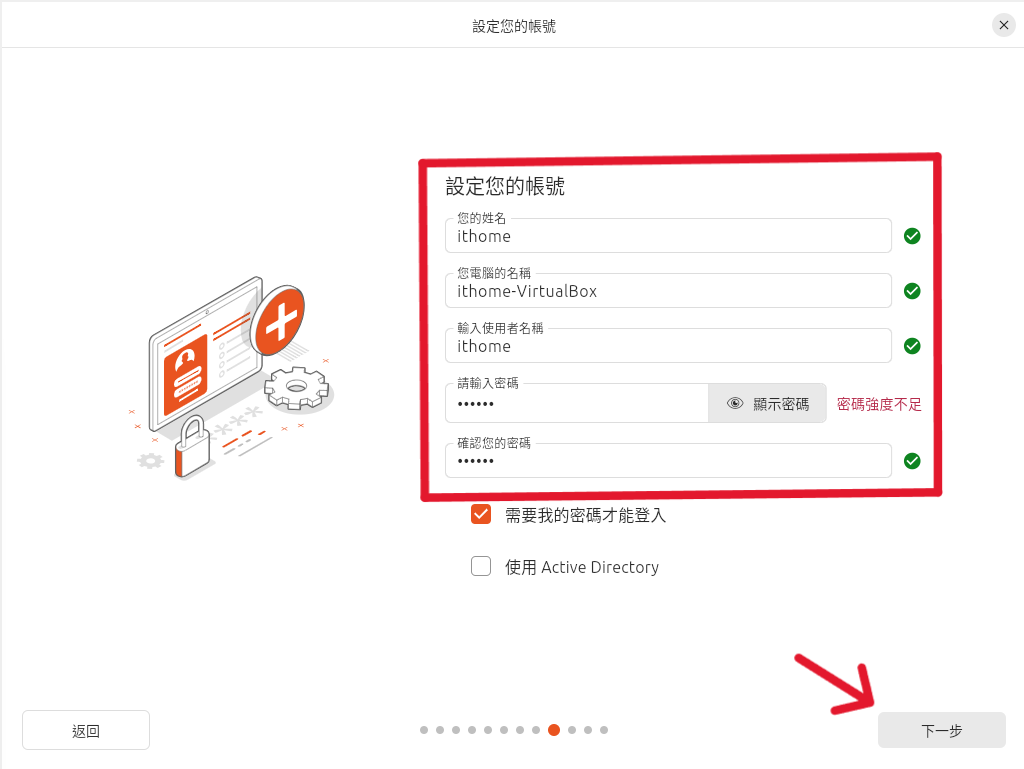
  • 設定使用者姓名(登入帳號名稱,建議全小寫英文)、密碼(未來下 sudo 管理員指令時必須輸入的密碼,設好記一點即可)
    https://ithelp.ithome.com.tw/upload/images/20260906/20183886Re0rFJLBie.png
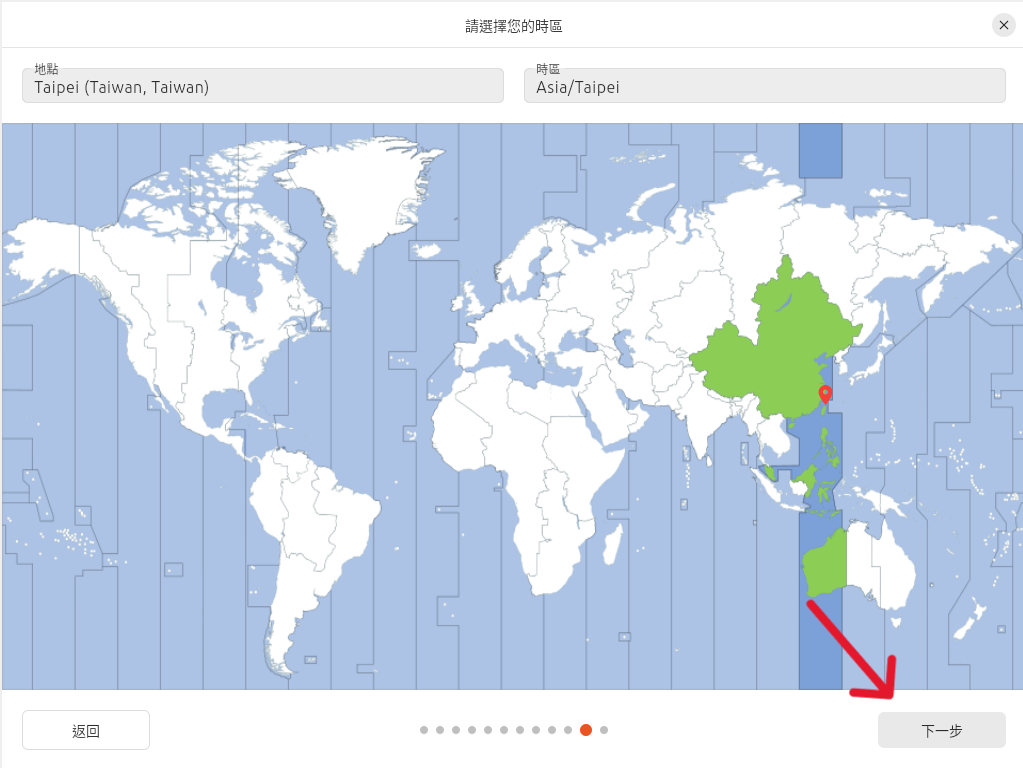
  • 設定時區:如果預設是台北,按下一步即可
    https://ithelp.ithome.com.tw/upload/images/20260906/20183886Yh0htZslAc.png

https://ithelp.ithome.com.tw/upload/images/20260906/20183886gLHltd9p6W.png

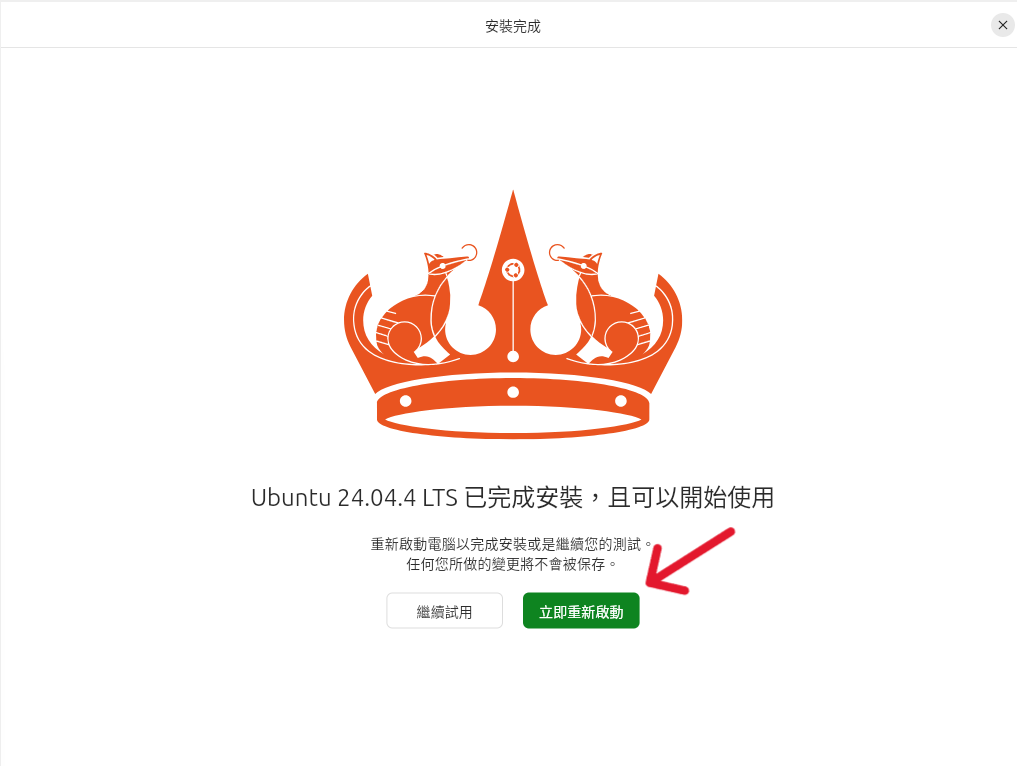
4.完成安裝並重新啟動
點擊繼續後,系統就開始自動複製檔案並安裝了。這個過程大約需要 5 到15分鐘(取決於你的電腦效能與網路速度)。
安裝完成後,點擊重新啟動
https://ithelp.ithome.com.tw/upload/images/20260906/20183886HAaJnFm5EP.png

重開機過程中,黑底白字常會卡在這一行:
Please remove the installation medium, then press ENTER:
這時直接按一下鍵盤的Enter鍵,虛擬機就會順利重開進入到 Ubuntu 桌面!

|明日目標:我們將安裝虛擬機必備外掛——Guest Additions,打通主機與虛擬機的雙向互動!|


上一篇
Day 06|組裝第一台虛擬電腦:VirtualBox 建立 VM 與資源分配
下一篇
Day 08|雙向剪貼簿、拖放檔案與認識 Guest Additions
系列文
大學生的VirtualBox虛擬機與Ubuntu實戰30天11
圖片
  熱門推薦
圖片
{{ item.channelVendor }} | {{ item.webinarstarted }} |
{{ formatDate(item.duration) }}
直播中

尚未有邦友留言

立即登入留言