
昨天準備了硬體,今天就接著繼續緩慢的開發前進吧。
買回板子或是模組之後,建議先不要急著連接其他裝置。有一定的機率買到有瑕疵的設備,根據先前在祥昌購物的經驗,可以憑發票送檢,幾天後就會更換一塊。
因為 ESP32 有諸多版本,而手邊這塊 ESP32-S3-CAM GOOUUU 的各個 腳位,從 Arduino 網站上面查看其定義。 ( 連結:https://forum.arduino.cc/t/chinese-esp32-s3-cam/1318290 )
所以,剛剛提到的「測試板子」的做法,就是拿一條線,連接電腦和板子的 TTL (圖中右下的那個 USB Type-C)。
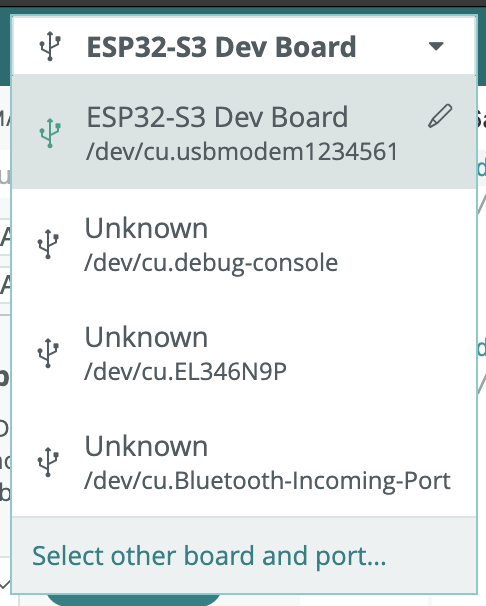
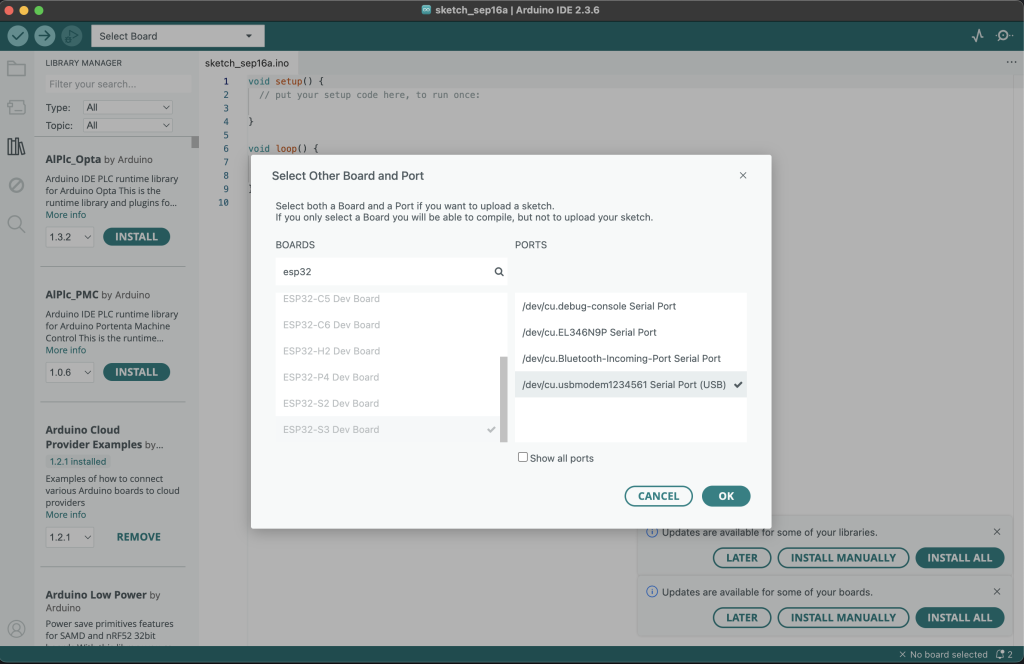
void setup() {
  Serial.begin(115200);
  Serial.println("Hello ESP32-S3");
}

void loop() {
  delay(1000);
}
ESP32-S3-CAM GOOUUU
SR602
現在準備要初始化 ESP32-S3-CAM GOOUUU,連接紅外線感測器 SR602,偵測有人活動連續三秒,就拍下一張照片,存到 SD 卡。
交叉使用古早方法...這好像什麼交叉詰問,YES or NO
ChatGPT 回覆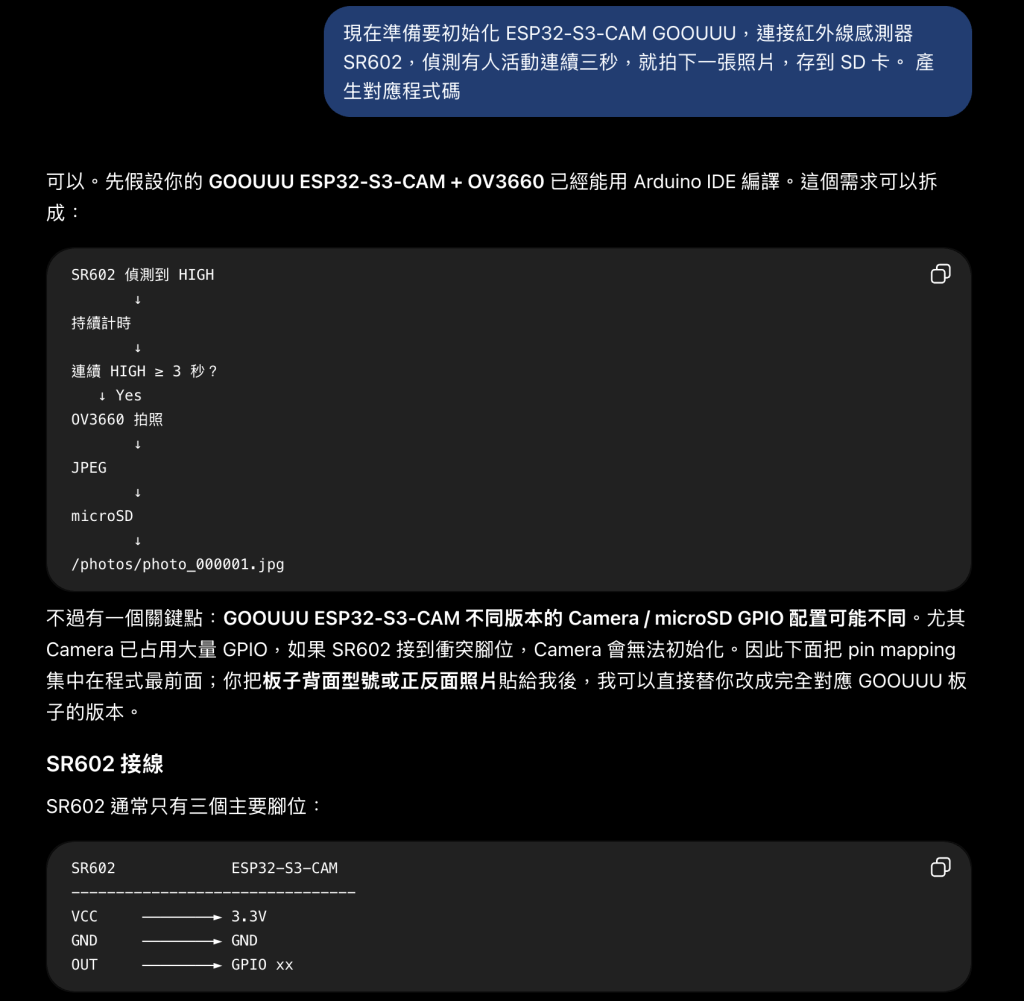
直接產出原始碼
#include "esp_camera.h"
#include "FS.h"
#include "SD_MMC.h"

// ======================================================
// GOOUUU ESP32-S3-CAM V1.5
// OV3660 + SR602 PIR + microSD
// ======================================================

// ---------- SR602 ----------
#define PIR_PIN 2

// 必須連續偵測 3 秒
const unsigned long MOTION_TRIGGER_MS = 3000;

// ---------- Camera ----------
#define PWDN_GPIO_NUM     -1
#define RESET_GPIO_NUM    -1

#define XCLK_GPIO_NUM     15
#define SIOD_GPIO_NUM      4
#define SIOC_GPIO_NUM      5

#define Y9_GPIO_NUM       16
#define Y8_GPIO_NUM       17
#define Y7_GPIO_NUM       18
#define Y6_GPIO_NUM       12
#define Y5_GPIO_NUM       10
#define Y4_GPIO_NUM        8
#define Y3_GPIO_NUM        9
#define Y2_GPIO_NUM       11

#define VSYNC_GPIO_NUM     6
#define HREF_GPIO_NUM      7
#define PCLK_GPIO_NUM     13

// ---------- microSD ----------
#define SD_CLK  39
#define SD_CMD  40
#define SD_D0   38


unsigned long motionStart = 0;

bool timingMotion = false;
bool photoTaken = false;

uint32_t photoNumber = 0;


// ======================================================
// Camera Initialization
// ======================================================

bool initCamera() {

  camera_config_t config = {};

  config.ledc_channel = LEDC_CHANNEL_0;
  config.ledc_timer   = LEDC_TIMER_0;

  config.pin_d0 = Y2_GPIO_NUM;
  config.pin_d1 = Y3_GPIO_NUM;
  config.pin_d2 = Y4_GPIO_NUM;
  config.pin_d3 = Y5_GPIO_NUM;
  config.pin_d4 = Y6_GPIO_NUM;
  config.pin_d5 = Y7_GPIO_NUM;
  config.pin_d6 = Y8_GPIO_NUM;
  config.pin_d7 = Y9_GPIO_NUM;

  config.pin_xclk  = XCLK_GPIO_NUM;
  config.pin_pclk  = PCLK_GPIO_NUM;
  config.pin_vsync = VSYNC_GPIO_NUM;
  config.pin_href  = HREF_GPIO_NUM;

  config.pin_sccb_sda = SIOD_GPIO_NUM;
  config.pin_sccb_scl = SIOC_GPIO_NUM;

  config.pin_pwdn  = PWDN_GPIO_NUM;
  config.pin_reset = RESET_GPIO_NUM;

  config.xclk_freq_hz = 20000000;

  // 直接讓 Camera 輸出 JPEG
  config.pixel_format = PIXFORMAT_JPEG;

  // 第一階段先 VGA,確認整套流程穩定
  config.frame_size = FRAMESIZE_VGA;

  config.jpeg_quality = 10;

  if (psramFound()) {

    Serial.println("PSRAM detected");

    config.fb_location = CAMERA_FB_IN_PSRAM;
    config.fb_count = 2;

    config.grab_mode = CAMERA_GRAB_LATEST;

  } else {

    Serial.println("WARNING: PSRAM not detected");

    config.fb_location = CAMERA_FB_IN_DRAM;
    config.fb_count = 1;
  }


  esp_err_t err = esp_camera_init(&config);

  if (err != ESP_OK) {

    Serial.printf(
      "Camera init failed: 0x%x\n",
      err
    );

    return false;
  }


  sensor_t *sensor = esp_camera_sensor_get();

  if (sensor != nullptr) {

    Serial.printf(
      "Camera sensor PID: 0x%04X\n",
      sensor->id.PID
    );
  }


  Serial.println("Camera OK");

  return true;
}


// ======================================================
// SD Initialization
// ======================================================

bool initSD() {

  // GOOUUU V1.5 SD pins
  SD_MMC.setPins(
    SD_CLK,
    SD_CMD,
    SD_D0
  );


  // true = 1-bit SDMMC mode
  if (!SD_MMC.begin(
        "/sdcard",
        true
      )) {

    Serial.println(
      "SD initialization failed"
    );

    return false;
  }


  if (SD_MMC.cardType() == CARD_NONE) {

    Serial.println(
      "No SD card detected"
    );

    return false;
  }


  uint64_t sizeMB =
    SD_MMC.cardSize() / (1024 * 1024);


  Serial.printf(
    "SD Card: %llu MB\n",
    sizeMB
  );


  if (!SD_MMC.exists("/photos")) {

    SD_MMC.mkdir("/photos");
  }


  Serial.println("SD OK");

  return true;
}


// ======================================================
// Find next photo number
// 避免 ESP32 重開機後從 000001 開始覆寫
// ======================================================

void findNextPhotoNumber() {

  File dir = SD_MMC.open("/photos");

  if (!dir) {
    return;
  }


  uint32_t maxNumber = 0;


  while (true) {

    File file = dir.openNextFile();

    if (!file) {
      break;
    }


    String name = file.name();


    int start =
      name.lastIndexOf("photo_");


    if (start >= 0) {

      String number =
        name.substring(
          start + 6,
          start + 12
        );


      uint32_t n =
        number.toInt();


      if (n > maxNumber) {
        maxNumber = n;
      }
    }


    file.close();
  }


  dir.close();

  photoNumber = maxNumber;


  Serial.printf(
    "Last photo: %06lu\n",
    (unsigned long)photoNumber
  );
}


// ======================================================
// Capture
// ======================================================

bool takePhoto() {

  Serial.println();
  Serial.println("------------------------");
  Serial.println("Taking photo...");


  camera_fb_t *fb =
    esp_camera_fb_get();


  if (!fb) {

    Serial.println(
      "Capture failed"
    );

    return false;
  }


  photoNumber++;


  char path[40];

  snprintf(
    path,
    sizeof(path),
    "/photos/photo_%06lu.jpg",
    (unsigned long)photoNumber
  );


  Serial.printf(
    "Resolution: %d x %d\n",
    fb->width,
    fb->height
  );


  Serial.printf(
    "JPEG: %u bytes\n",
    fb->len
  );


  File file =
    SD_MMC.open(
      path,
      FILE_WRITE
    );


  if (!file) {

    Serial.println(
      "Cannot create photo"
    );

    esp_camera_fb_return(fb);

    return false;
  }


  size_t written =
    file.write(
      fb->buf,
      fb->len
    );


  file.close();

  esp_camera_fb_return(fb);


  if (written == 0) {

    Serial.println(
      "SD write failed"
    );

    return false;
  }


  Serial.printf(
    "Saved: %s\n",
    path
  );

  Serial.printf(
    "Written: %u bytes\n",
    written
  );

  Serial.println("------------------------");

  return true;
}


// ======================================================
// Setup
// ======================================================

void setup() {

  Serial.begin(115200);

  delay(2000);


  Serial.println();
  Serial.println("==============================");
  Serial.println(" Smart Fridge Camera");
  Serial.println(" GOOUUU ESP32-S3-CAM V1.5");
  Serial.println(" OV3660 + SR602");
  Serial.println("==============================");


  pinMode(
    PIR_PIN,
    INPUT
  );


  Serial.println();
  Serial.println("[1] Camera");

  if (!initCamera()) {

    Serial.println(
      "FATAL: Camera failed"
    );

    while (true) {
      delay(1000);
    }
  }


  Serial.println();
  Serial.println("[2] SD Card");

  if (!initSD()) {

    Serial.println(
      "FATAL: SD failed"
    );

    while (true) {
      delay(1000);
    }
  }


  findNextPhotoNumber();


  Serial.println();
  Serial.println("==============================");
  Serial.println("SYSTEM READY");
  Serial.println("Waiting for motion...");
  Serial.println("==============================");
}


// ======================================================
// Loop
// ======================================================

void loop() {

  bool motion =
    digitalRead(PIR_PIN);


  // ==============================================
  // SR602 HIGH
  // ==============================================

  if (motion == HIGH) {

    // 第一次 HIGH
    if (!timingMotion) {

      timingMotion = true;

      motionStart = millis();

      Serial.println(
        "Motion detected..."
      );
    }


    // HIGH 必須連續 3 秒
    if (
      !photoTaken &&
      millis() - motionStart >= MOTION_TRIGGER_MS
    ) {

      Serial.println(
        "Motion sustained for 3 seconds"
      );


      if (takePhoto()) {

        photoTaken = true;

      } else {

        Serial.println(
          "Photo failed"
        );
      }
    }

  }

  // ==============================================
  // SR602 LOW
  // ==============================================

  else {

    // HIGH 不足三秒
    if (
      timingMotion &&
      !photoTaken
    ) {

      Serial.println(
        "Motion ended before 3 seconds"
      );
    }


    // 已經拍照,等人離開才重新 Arm
    if (
      timingMotion &&
      photoTaken
    ) {

      Serial.println(
        "Motion ended - system rearmed"
      );
    }


    timingMotion = false;
    photoTaken = false;

    motionStart = 0;
  }


  delay(20);
}



 iThome鐵人賽
 看影片追技術
