

Part 3|第 7/30 篇
今日要做的事: 開好 Firebase 專案+Google 登入,讓「Verifier 已 ACCEPT 的餐點」能掛到固定 uid。
今天要解決的目的: Part 2 契約通過後才持久化;每一筆從第一天就知道是誰的。
Day 5 收工那天我跟自己說:契約定了,再繼續在 AI Studio 裡玩辨識只會原地打轉。
可是一想到「資料要活過隔天」,第一個問題居然不是 Firestore——是:這是誰的?
AI Studio 很會看懂一張照片,卻不負責記住你昨天留下的東西。上雲端不是為了酷,是為了不要每天重貼同一份 Context。
| 項目 | 內容 |
|---|---|
| 產出 | Firebase 專案 dishflow、Google Auth、persistVerifiedMeal() 寫入閘門 |
| 工具 | Firebase Console、Authentication、Firestore(測試模式)、本機 Vite demo |
| 不使用 | Gemini Runtime、Storage、正式敏感資料、同時開兩種登入 |
| 完成條件 | 未登入不能寫;非 ACCEPT 不能寫;路徑含目前 uid |
本機程式:material/code/day6(金鑰只進 .env,已用 .gitignore 擋)。
Day 5 把進庫條件講清楚了:結構救完、語意 ACCEPT,才准寫。
可是那整個流程還活在 Playground——關掉分頁,時間序列就沒了。像做完一桌菜,沒人記得是誰點的。
真正持久化前要同時過兩道門:
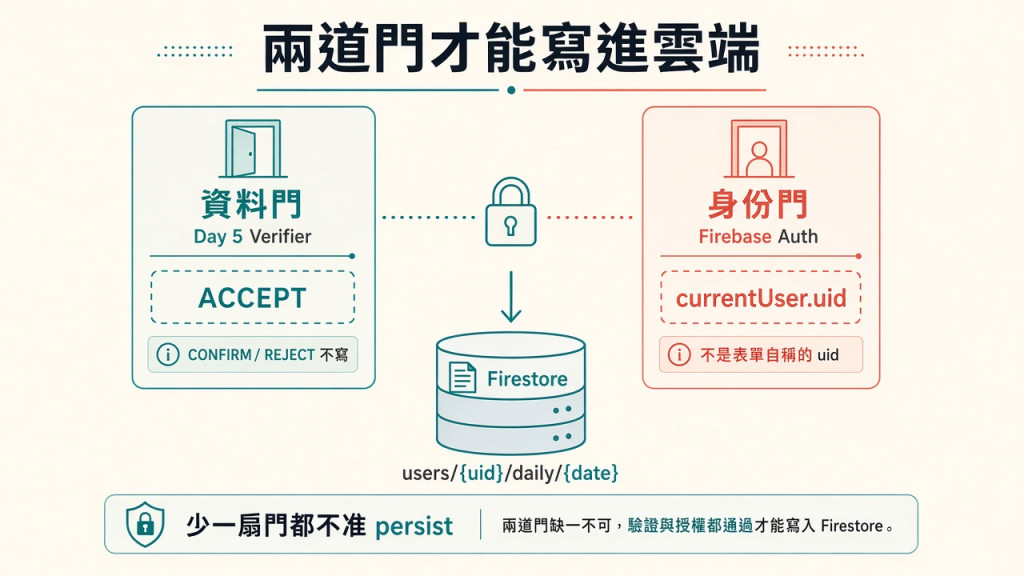
少了資料門,會保存「長得很合法的猜測」;
少了身份門,後面無法證明 pantry 與 meals 屬於同一個人。
今天只處理登入與 uid。跨帳號隔離是明天 Day 7 的 Rules——先別搶跑。
責任順序固定:
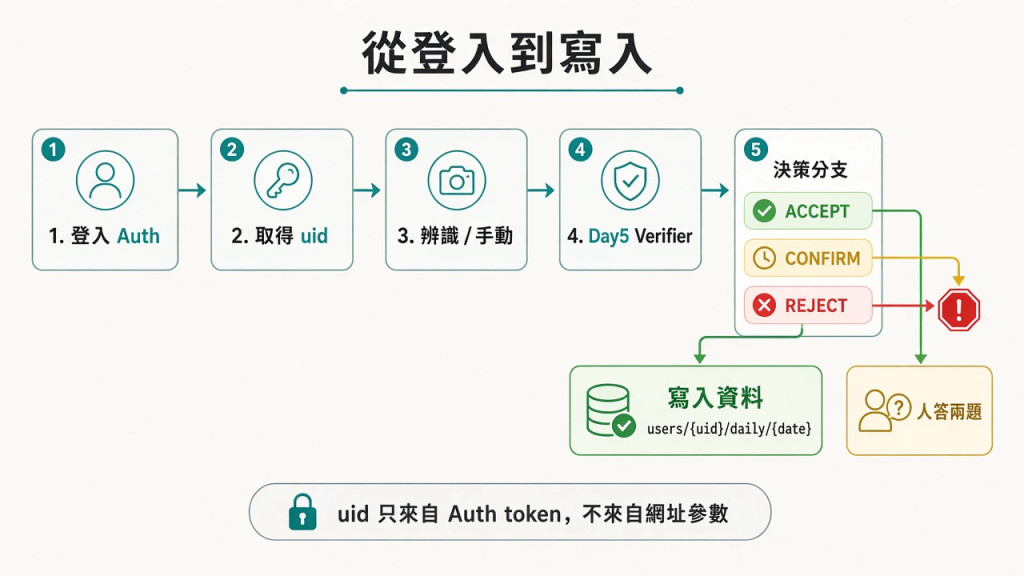
我給自己寫的三條鐵律:
資料一律掛在使用者子樹:
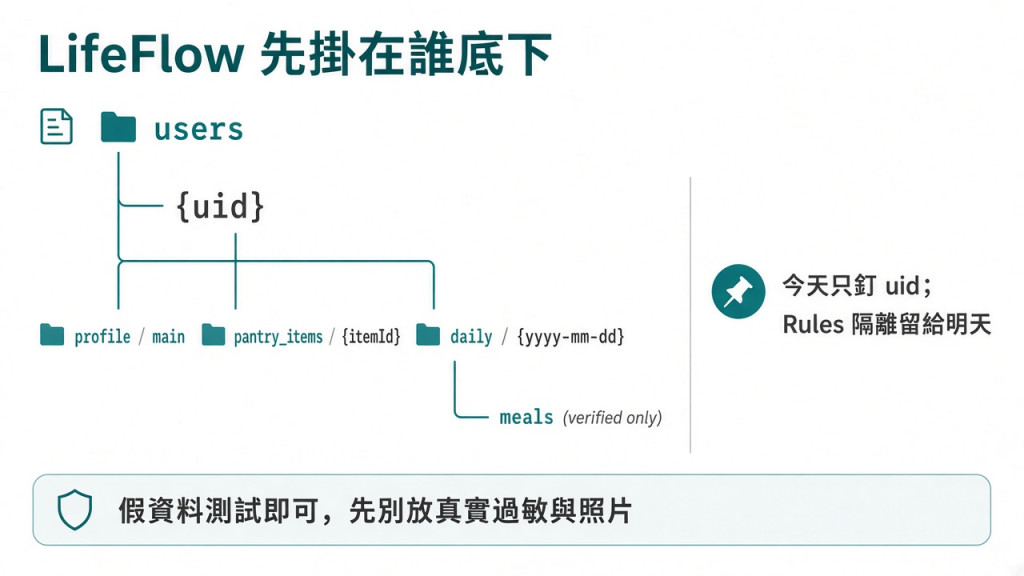
Rules 還沒證明隔離之前,只寫假資料(fixture_meal_01)。真實過敏、真實照片——先別塞。
建立流程裡 Console 會問兩件事:
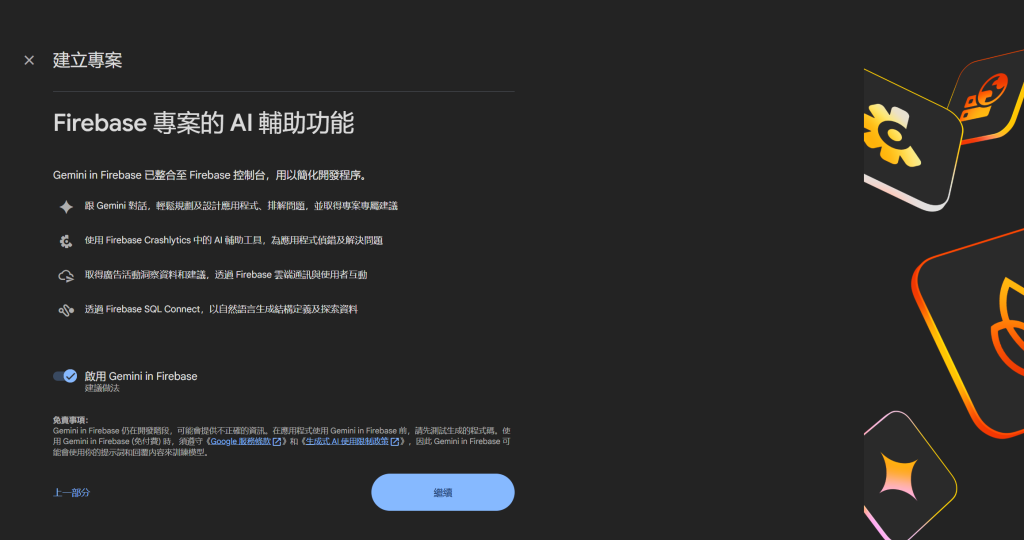
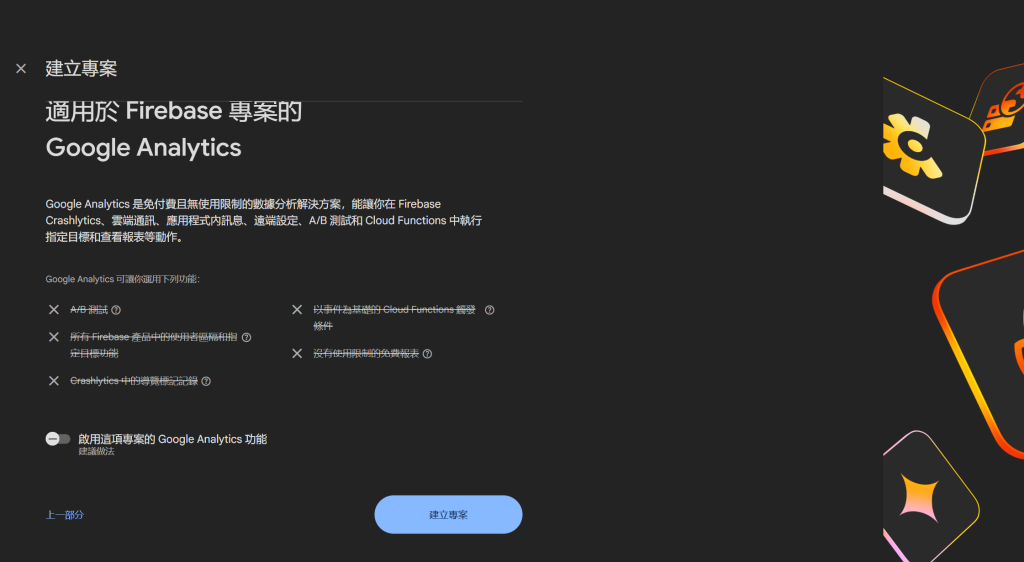
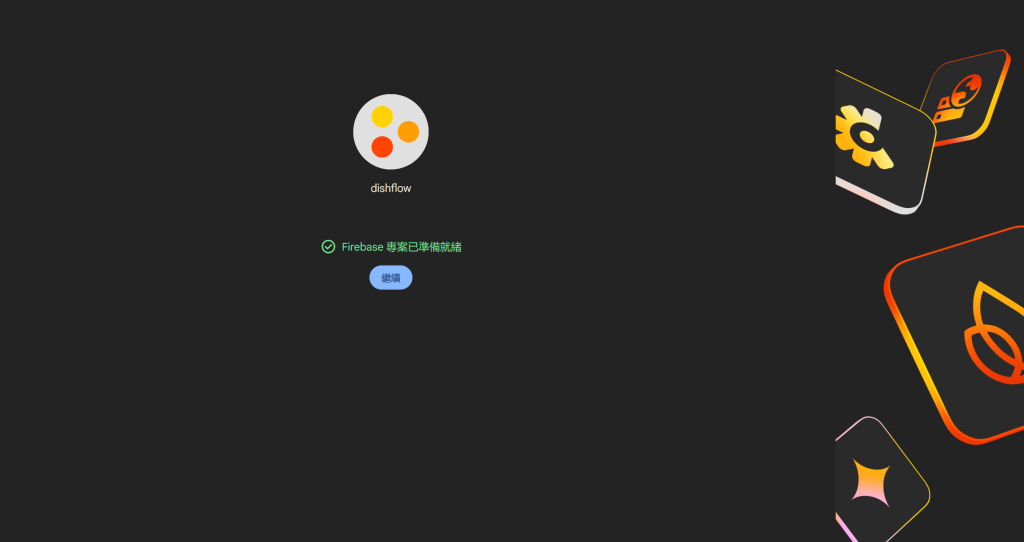
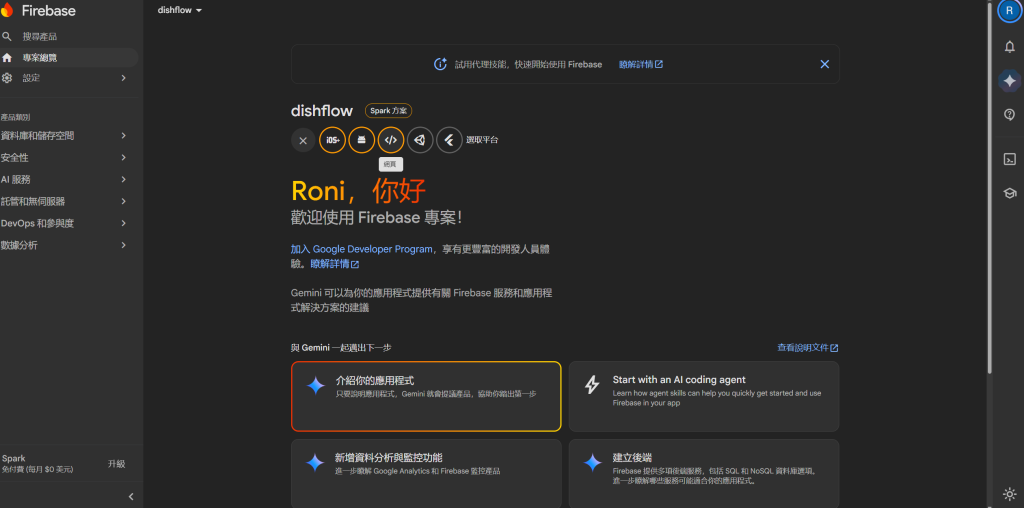
進總覽選 Web,暱稱 dishflow-web(Hosting 先不勾):
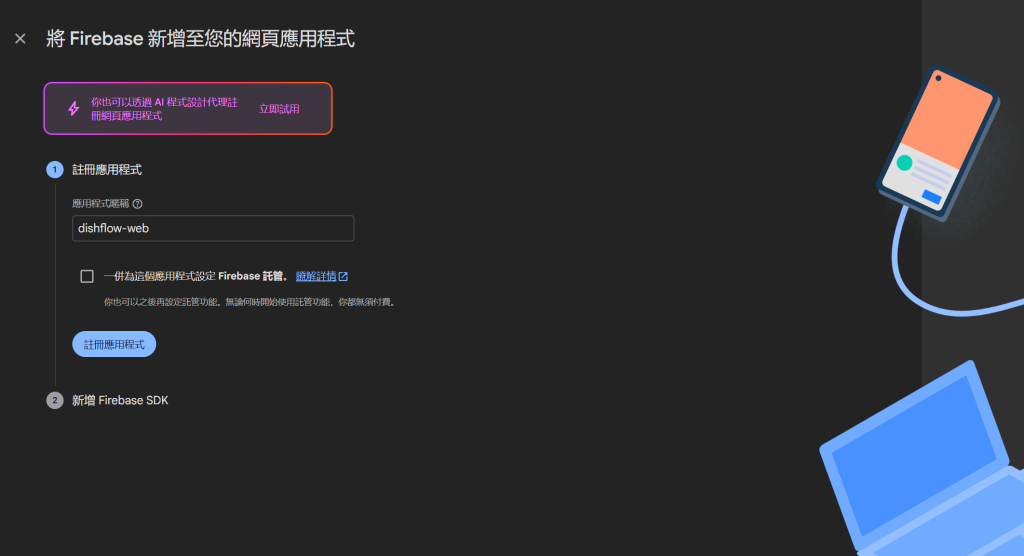
接著會跳出完整 firebaseConfig。那頁我不截進文章——沒必要在鐵人賽全文廣播一輪 key。做法是丟進本機 .env,用 Vite 的 VITE_FIREBASE_* 注入(見第 3.5 節)。
Authentication → 登入方式 → Google → 選支援 email → 啟用:
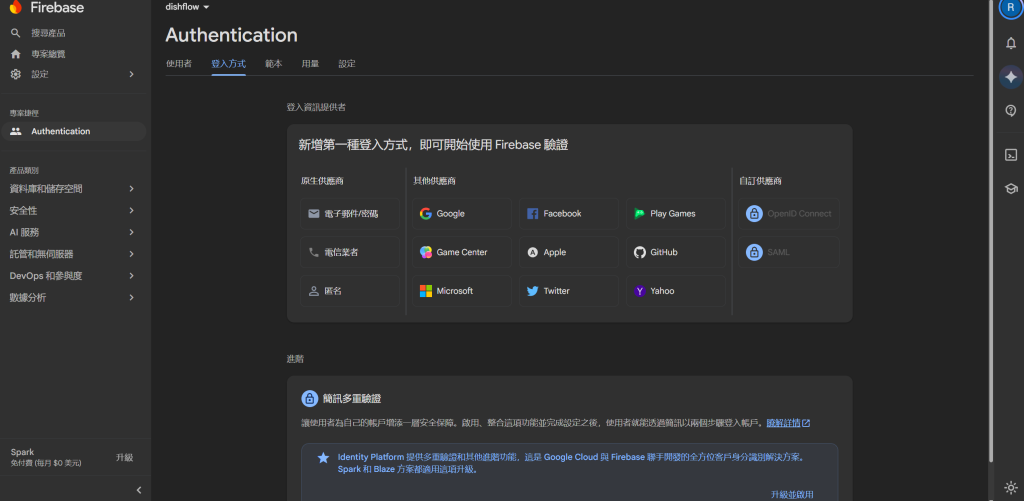
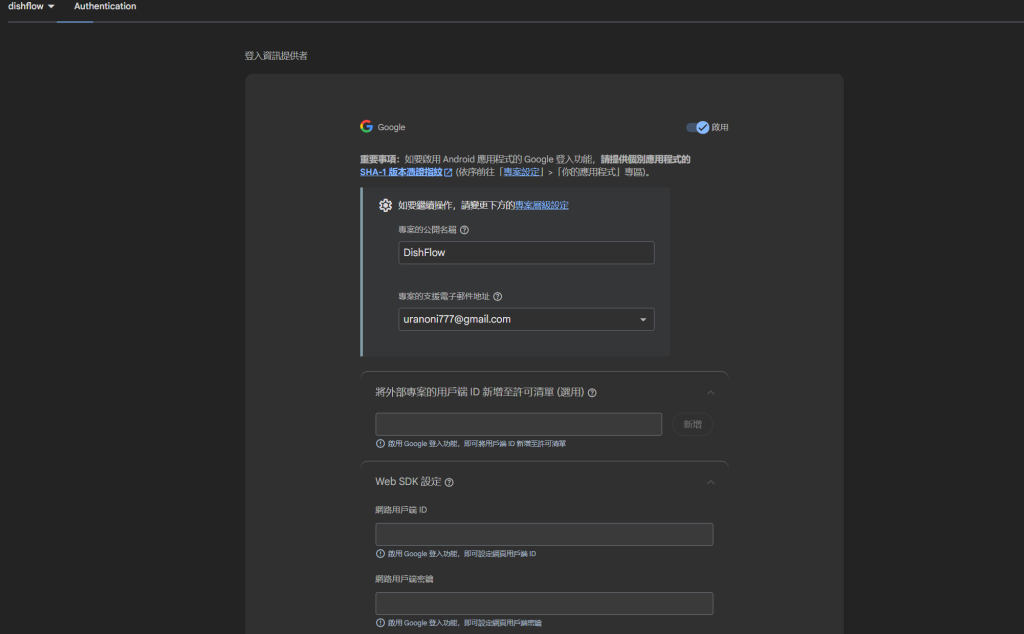
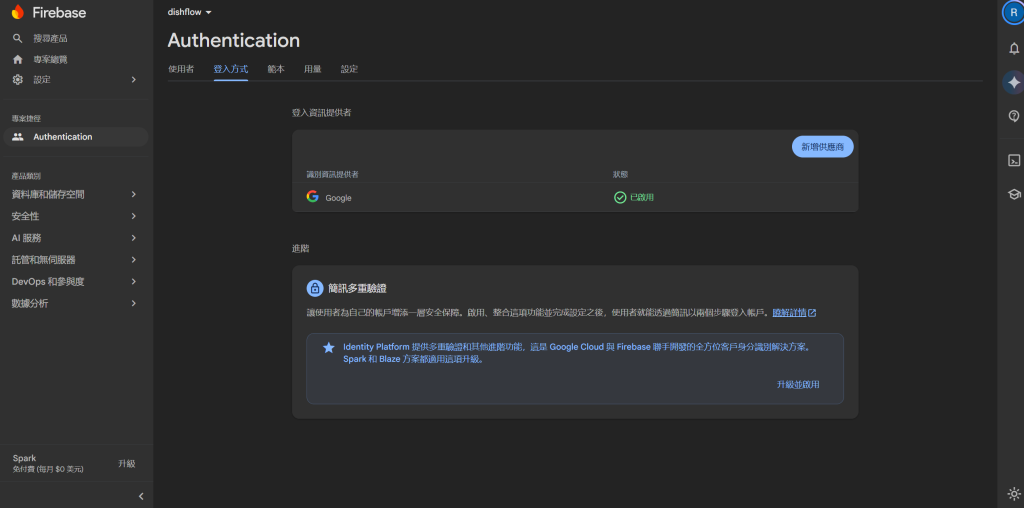
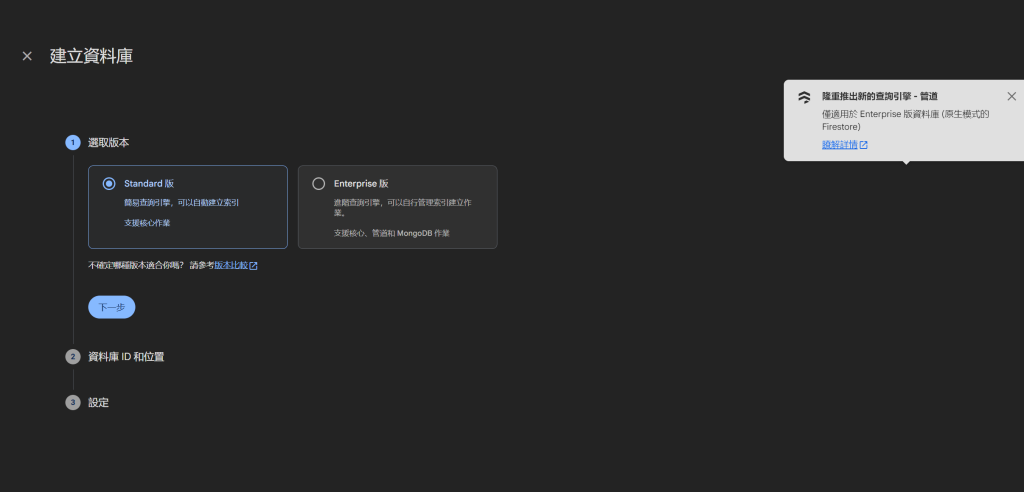
版本選 Standard。地區選單當下有點難搞,好像沒辦法選擇,不然我應該會選最近的亞洲區。不過選得到能用的就先建,畢竟 Rules 比地區重要。
設定選 測試模式:警告寫得很清楚,30 天內誰拿到路徑都能讀寫。所以今天只放假 label。
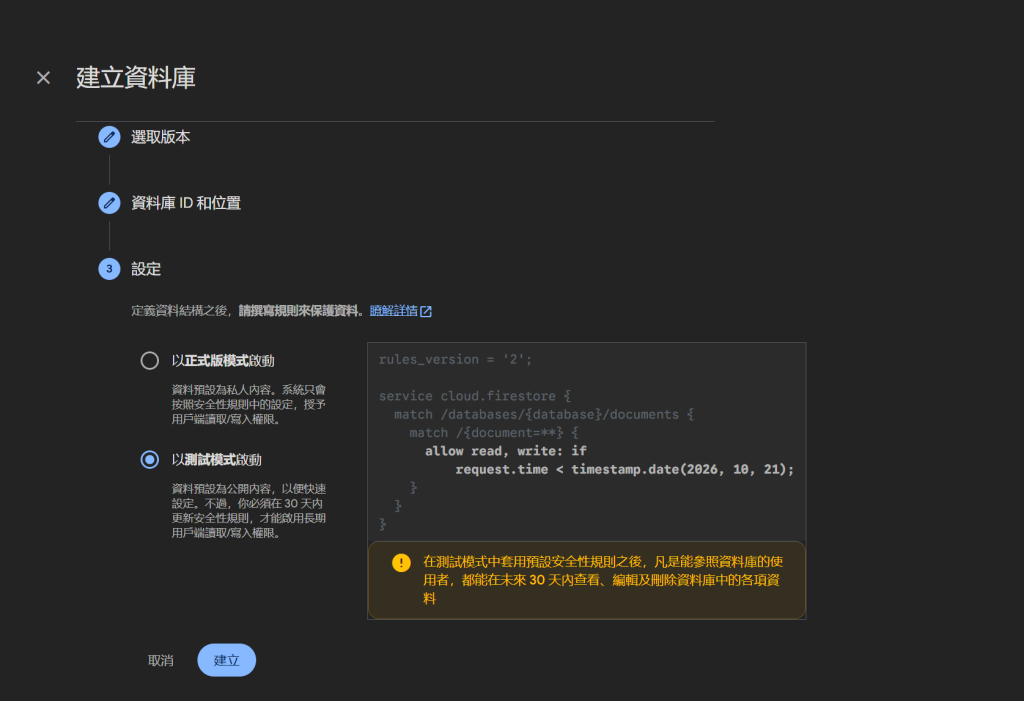
前端只認 auth.currentUser.uid,不接受表單或網址自稱:
async function persistVerifiedMeal(result, date) {
  const user = auth.currentUser;
  if (!user) throw new Error("AUTH_REQUIRED");
  if (result.decision !== "ACCEPT") throw new Error("MEAL_NOT_VERIFIED");

  return writeMeal({
    path: `users/${user.uid}/daily/${date}`,
    meal: result.verified_meal,
    verifier_decision: result.decision,
    model_raw_ref: result.model_raw_ref
  });
}
就這兩行判斷:沒登入 → 丟;不是 ACCEPT → 丟。完整版在 src/persistVerifiedMeal.js(還會再檢查 path 裡的 uid 必須等於目前登入者)。
本機跑起來後:Google 登入(帳戶列已遮)→ 截短 uid → CONFIRM/REJECT 被擋 → ACCEPT 假資料才寫得進去:
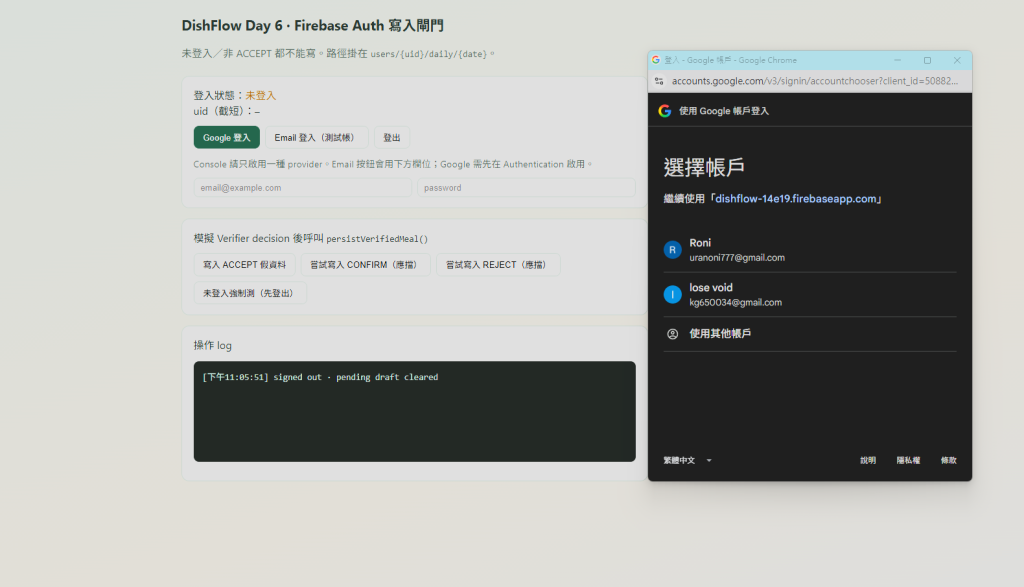
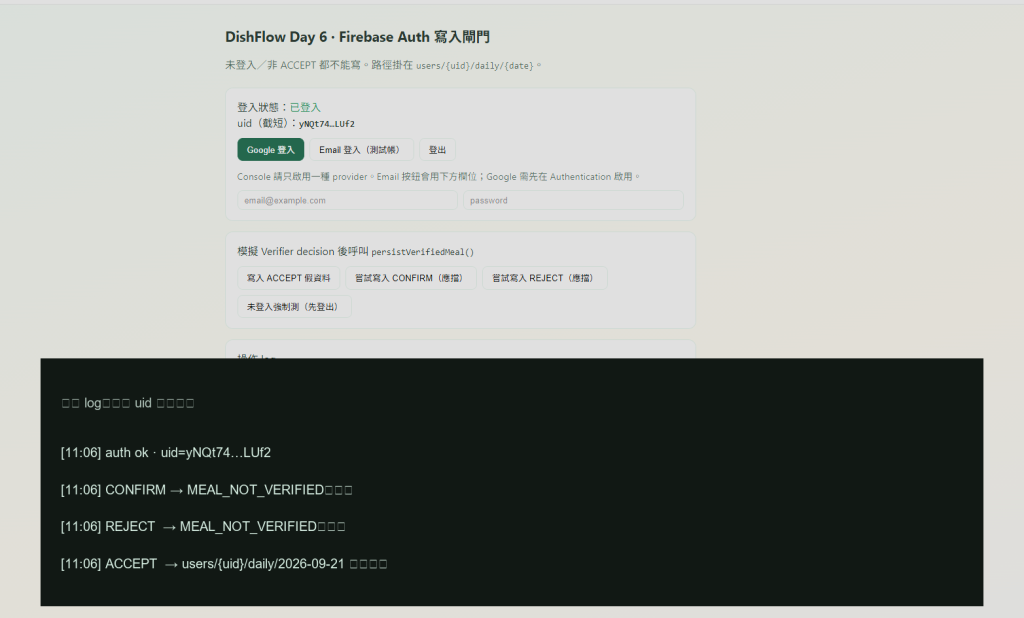
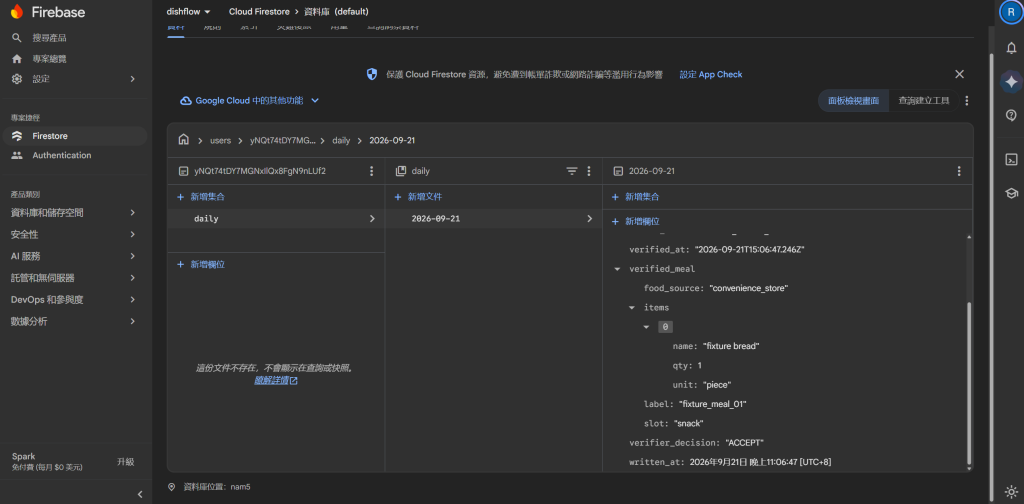
登出時記得清掉 pending 草稿——不然會把上一位的餐點套到下一個 uid。那種 bug 很安靜,也很髒。
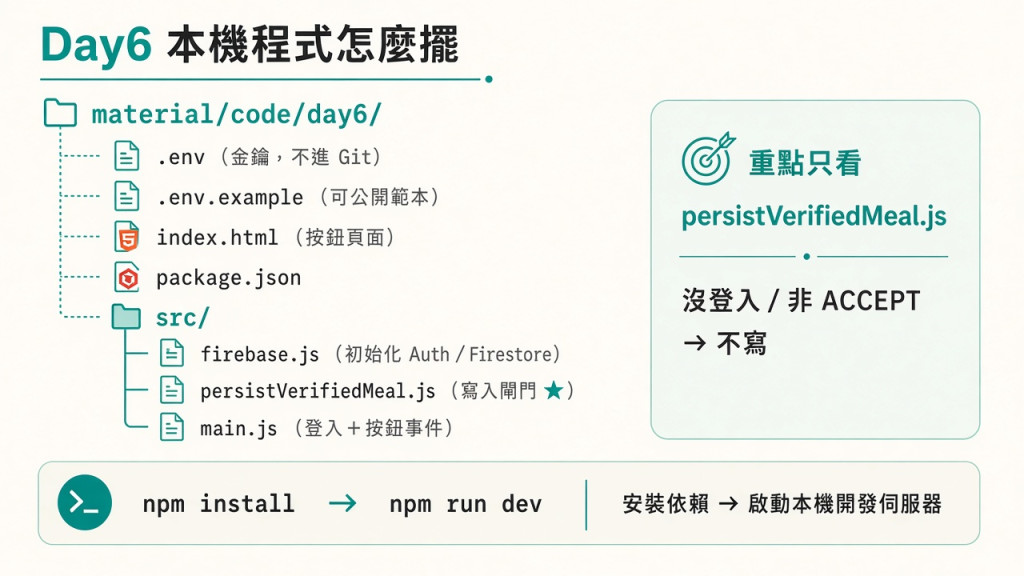
material/code/day6/
  .env                 ← 你的金鑰(勿上傳)
  .env.example         ← 公開範本
  .gitignore
  index.html           ← 按鈕頁
  package.json
  src/
    firebase.js              ← 初始化 Auth / Firestore
    persistVerifiedMeal.js   ← ★ 寫入閘門
    main.js                  ← 登入+按鈕事件
設定 .env(從 Console 的 Web 設定複製):
VITE_FIREBASE_API_KEY=你的_apiKey
VITE_FIREBASE_AUTH_DOMAIN=你的專案.firebaseapp.com
VITE_FIREBASE_PROJECT_ID=你的專案id
VITE_FIREBASE_STORAGE_BUCKET=你的專案.firebasestorage.app
VITE_FIREBASE_MESSAGING_SENDER_ID=數字
VITE_FIREBASE_APP_ID=1:數字:web:字串
也可以先複製範本再填:
cd material/code/day6
copy .env.example .env
啟動:
cd material/code/day6
npm install
npm run dev
瀏覽器打開 Vite 給的網址(通常是 http://localhost:5173),依序按:
AUTH_REQUIRED
MEAL_NOT_VERIFIED
fixture_meal_01
firebase.js — 從 .env 讀設定,初始化 auth 與 db:
import { initializeApp } from "firebase/app";
import { getAuth } from "firebase/auth";
import { getFirestore } from "firebase/firestore";

const firebaseConfig = {
  apiKey: import.meta.env.VITE_FIREBASE_API_KEY,
  authDomain: import.meta.env.VITE_FIREBASE_AUTH_DOMAIN,
  projectId: import.meta.env.VITE_FIREBASE_PROJECT_ID,
  storageBucket: import.meta.env.VITE_FIREBASE_STORAGE_BUCKET,
  messagingSenderId: import.meta.env.VITE_FIREBASE_MESSAGING_SENDER_ID,
  appId: import.meta.env.VITE_FIREBASE_APP_ID
};

export const app = initializeApp(firebaseConfig);
export const auth = getAuth(app);
export const db = getFirestore(app);
persistVerifiedMeal.js — 核心閘門:
export async function persistVerifiedMeal(result, date) {
  const user = auth.currentUser;
  if (!user) throw new Error("AUTH_REQUIRED");
  if (result.decision !== "ACCEPT") throw new Error("MEAL_NOT_VERIFIED");
  // writeMeal:路徑必須是 users/{目前uid}/daily/{date}
  return writeMeal({ /* ... */ });
}
main.js — 這頁是測試台,不是產品 UI。
index.html+main.js 只做一件事:讓我用按鈕假裝 Verifier 給出 ACCEPT/CONFIRM/REJECT,看閘門會不會擋、假資料會不會寫進 Firestore。沒有拍照、沒有真正的 Day 5 Verifier——餐點內容是寫死的 fixture_meal_01。
這頁在測什麼:
| 按鈕 | 在測什麼 |
|---|---|
| Google 登入/登出 | Auth 有沒有拿到 uid(畫面上只顯示截短) |
| 寫入 ACCEPT 假資料 | 登入後該寫成功 |
| 嘗試寫入 CONFIRM/REJECT | 該被擋 → MEAL_NOT_VERIFIED |
| 未登入強制測 | 先登出再寫 → AUTH_REQUIRED |
// material/code/day6/src/main.js
import {
  onAuthStateChanged,
  signInWithPopup,
  GoogleAuthProvider,
  signInWithEmailAndPassword,
  createUserWithEmailAndPassword,
  signOut
} from "firebase/auth";
import { auth } from "./firebase.js";
import { clearPendingDraft, persistVerifiedMeal } from "./persistVerifiedMeal.js";

const draftStore = { pendingMeal: null };

const el = {
  authStatus: document.getElementById("authStatus"),
  uidShort: document.getElementById("uidShort"),
  log: document.getElementById("log"),
  email: document.getElementById("email"),
  password: document.getElementById("password")
};

function today() {
  return new Date().toISOString().slice(0, 10);
}

function shortUid(uid) {
  if (!uid) return "—";
  return `${uid.slice(0, 6)}…${uid.slice(-4)}`;
}

function log(msg, kind = "") {
  const line = `[${new Date().toLocaleTimeString()}] ${msg}`;
  el.log.textContent = `${line}\n${el.log.textContent}`;
  console[kind === "bad" ? "error" : "log"](msg);
}

// 測試用假餐點——不是 Vision 辨識結果
function fixtureMeal(label = "fixture_meal_01") {
  return {
    slot: "snack",
    label,
    food_source: "convenience_store",
    items: [{ name: "fixture bread", qty: 1, unit: "piece" }]
  };
}

onAuthStateChanged(auth, (user) => {
  if (user) {
    el.authStatus.textContent = "已登入";
    el.authStatus.className = "ok";
    el.uidShort.textContent = shortUid(user.uid);
    log(`auth ok · uid=${shortUid(user.uid)}`);
  } else {
    el.authStatus.textContent = "未登入";
    el.authStatus.className = "warn";
    el.uidShort.textContent = "—";
    clearPendingDraft(draftStore);
    log("signed out · pending draft cleared");
  }
});

document.getElementById("btnGoogle").addEventListener("click", async () => {
  try {
    await signInWithPopup(auth, new GoogleAuthProvider());
  } catch (e) {
    log(`Google 登入失敗:${e.code || e.message}`, "bad");
  }
});

document.getElementById("btnEmail").addEventListener("click", async () => {
  const email = el.email.value.trim();
  const password = el.password.value;
  if (!email || !password) {
    log("請填 email / password", "bad");
    return;
  }
  try {
    await signInWithEmailAndPassword(auth, email, password);
  } catch (e) {
    if (e.code === "auth/user-not-found" || e.code === "auth/invalid-credential") {
      try {
        await createUserWithEmailAndPassword(auth, email, password);
        log("已建立測試帳並登入");
        return;
      } catch (createErr) {
        log(`建立帳號失敗:${createErr.code || createErr.message}`, "bad");
        return;
      }
    }
    log(`Email 登入失敗:${e.code || e.message}`, "bad");
  }
});

document.getElementById("btnSignOut").addEventListener("click", async () => {
  draftStore.pendingMeal = fixtureMeal("should_not_reuse");
  await signOut(auth);
});

// 用按鈕假裝 Verifier 的 decision,專門測閘門
async function tryPersist(decision) {
  const result = {
    decision,
    verified_meal: fixtureMeal(),
    model_raw_ref: null
  };
  draftStore.pendingMeal = result;
  try {
    const out = await persistVerifiedMeal(result, today());
    log(`寫入成功 → ${out.path}`);
  } catch (e) {
    log(`寫入被擋:${e.message}`, "bad");
  }
}

document.getElementById("btnAccept").addEventListener("click", () => tryPersist("ACCEPT"));
document.getElementById("btnConfirm").addEventListener("click", () => tryPersist("CONFIRM"));
document.getElementById("btnReject").addEventListener("click", () => tryPersist("REJECT"));
document.getElementById("btnNoAuth").addEventListener("click", async () => {
  await signOut(auth);
  await tryPersist("ACCEPT");
});
完整專案在
material/code/day6。這頁=閘門測試台;真正接照片辨識是後面的事。
| 測試 | 預期 | 實際 |
|---|---|---|
| 未登入呼叫 persistence | AUTH_REQUIRED |
通過 |
| 登入後 CONFIRM/REJECT | MEAL_NOT_VERIFIED、不寫 |
通過 |
| ACCEPT 假資料 | 寫到目前 uid 路徑 | 通過 → users/{uid}/daily/2026-09-21 |
| 登出清草稿 | pending 不沿用 | 通過 |
| Firestore 可見假資料 | fixture_meal_01 |
通過(測試模式) |
今天學到的三個坑:
uid 當前端欄位傳——網址改成別人的 id,看起來成功,其實是自欺。firebaseConfig 整段貼文章——Web apiKey 本來會進前端,但全文廣播沒必要;.env+.gitignore 就好。下一篇: 用 Firestore Rules+Emulator 證明 uid-A 真的讀不到 uid-B。
{
  "type": "object",
  "properties": {
    "schema_version": { "type": "string", "const": "meal_verified_v1" },
    "owner_uid": { "type": "string", "minLength": 1 },
    "date": { "type": "string" },
    "verifier_decision": { "type": "string", "const": "ACCEPT" },
    "needs_confirmation": { "type": "boolean", "const": false },
    "verified_meal": { "type": "object" },
    "model_raw_ref": { "type": ["string", "null"] },
    "verified_at": { "type": "string" }
  },
  "required": [
    "schema_version",
    "owner_uid",
    "date",
    "verifier_decision",
    "needs_confirmation",
    "verified_meal",
    "model_raw_ref",
    "verified_at"
  ]
}
verified_meal 沿用 Day 5;這層只定義「何時可持久化」。
| 項目 | 發文用圖 |
|---|---|
apiKey/完整 firebaseConfig |
無 |
| Web Client Secret | 無 |
| Gmail/帳戶列表 | 已遮 |
| 完整 uid | 已省略/截短 |
project 名 dishflow |
可公開 |


 iThome鐵人賽
 看影片追技術