在初階NAT介紹篇中,我們已經簡單的讓NAT功能能夠正常運作了,但大家一定對其他的部分有所疑問,本回將針對一些細部的設定值進行說明,讓大家對Virtual BOX的網路卡NAT功能,能夠更進一步的有所了解,並且能夠融會貫通。之後筆者也將會使用幾個模擬的情境來說明應用的方式。
網路地址轉換NAT(Network Address Translation),在Virtual BOX中簡單的功能就是讓虛擬機拿到IP後,可以NAT後透過HOST端(安裝Virtual BOX軟體的主機)的IP進行對外。而Host端基本上可運行的網路行為,在虛擬機上基本上也就可以運行;因為對於與HOST端平行的其他電腦來說,會認為虛擬機是所發出的網路行為均是由該台Host主機所要求的網路行為。接下來我們將逐一說明在Virtual BOX下NAT的各設定值選項。
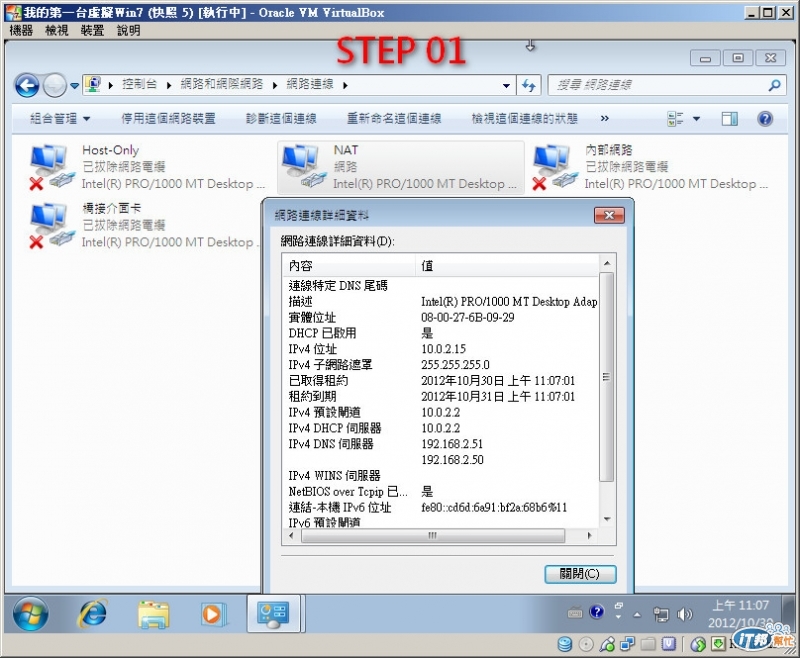
STEP1:首先如圖一,我們接續上回中,虛擬機透過Virtual BOX 自動DHCP所取得的IP畫面,我們可以清楚的看到,有網卡名稱:Inter® RRO/1000 MT Desktop Adapter、MAC Address:08-00-27-6b-09-29、和取得的IP等相關資訊。我們在此先記錄下這些資訊,然後將虛擬機關機。再接下來的兩個STEP中,我們將來檢視Virtual BOX是否在視窗模式中,提供可自訂NAT DHCP功能。
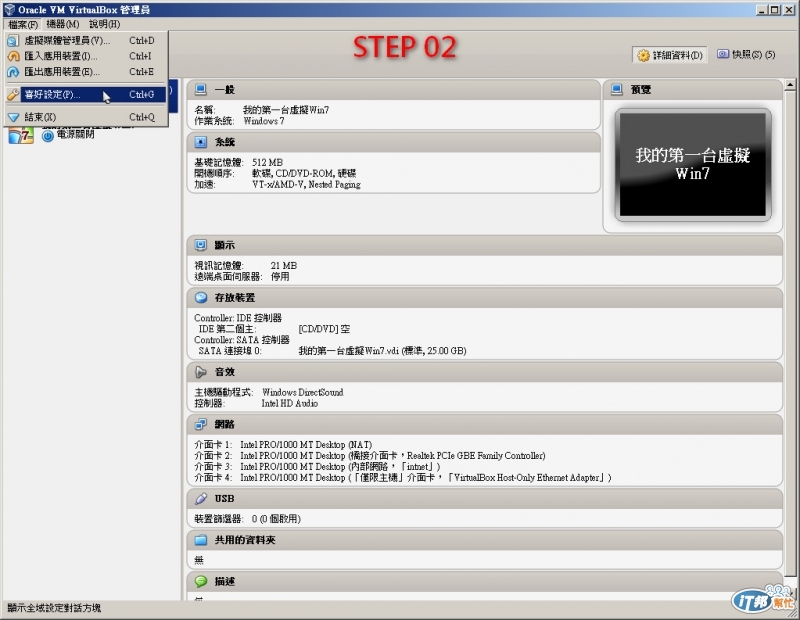
STEP2:我們回到Virtual BOX的管理員視窗中,選取[檔案]->[喜好設定]來檢視Virtual BOX的設定值。
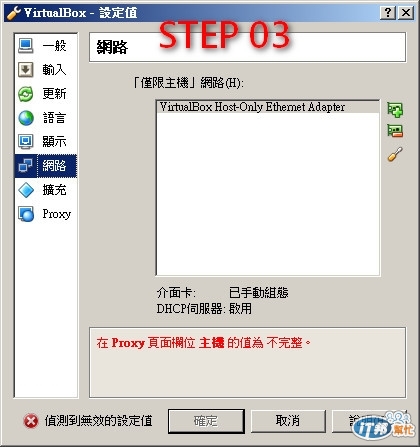
STEP3:選到[網路]我們僅發現這裡只有[Host-Only]的設定值,並沒有NAT的相關設定。此部分Virtual BOX在視窗模式中,算是很友善的避免掉,使用者自訂變更導致NAT異常的問題,所以做成全自動的吧。
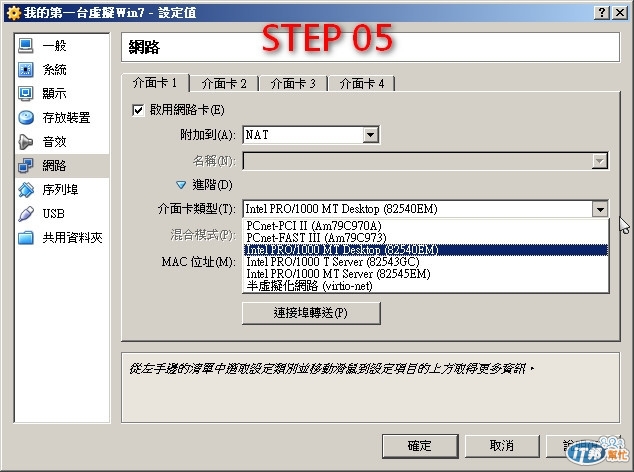
STEP4:接下來我們回到[我的第一台虛擬Win7 - 設定值]中,選取[網路],並將[進階]的部分展開。此時我們會發現,在STEP1中的網卡相關資訊,就在這裡進行調整自訂,Virtual BOX提供了[介面卡類型]、[MAC位置]、[連接埠轉送]三種進階選項,讓使用者可以自行定義(虛擬機必須在關機狀態中)。
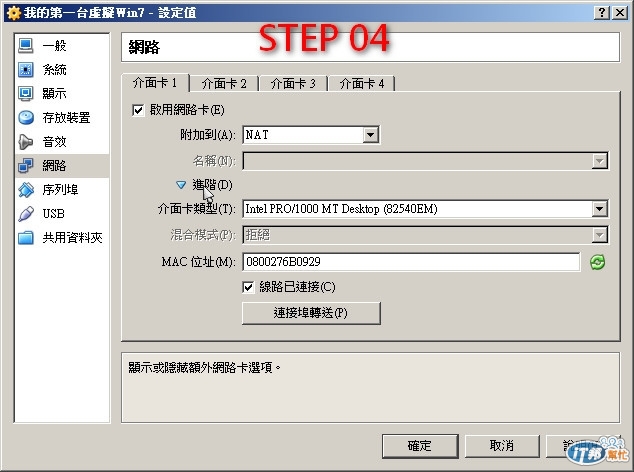
STEP5:展開[介面卡類型]Virtual BOX提供了六種網路卡類型供我們選擇。
◆ AMD PCNet PCI II (Am79C970A);
◆ AMD PCNet FAST III (Am79C973, the default);
◆ Intel PRO/1000 MT Desktop (82540EM);
◆ Intel PRO/1000 T Server (82543GC);
◆ Intel PRO/1000 MT Server (82545EM);
◆ Paravirtualized network adapter (virtio-net).
在此我們引用Virtual BOX官方原文技術文件進行說明,由技術文件中可看到
◆ PCNet FAST III是預設的網路卡配置,它支援大部分的作業系統,並且它具有GNU GRUB 啟動管理。
◆ Intel PRO/1000 MT Desktop type 支援Windows Vista及之後的版本,免安裝驅動程式。
◆ Intel PRO/1000 T Server type支援Windows XP,免安裝驅動程式。
◆ Intel PRO/1000 M Server type支援OVF,OVF(Open Virtualization Format)為各大虛擬化目前共通的佈署格式,意即這張網卡可以打包在OVF內。
◆ Paravirtualized network adapter (virtio-net) 半虛擬化網路卡,這張網路卡是專為虛擬機設計的,必須另外安裝Guest Addtion才能在驅動。而這張卡的效能也將較優於前面的幾種。
官方原文:
The PCNet FAST III is the default because it is supported by nearly all operating systems out of the box, as well as the GNU GRUB boot manager. As an exception, the Intel PRO/1000 family adapters are chosen for some guest operating system types that no longer ship with drivers for the PCNet card, such as Windows Vista.
The Intel PRO/1000 MT Desktop type works with Windows Vista and later versions. The T Server variant of the Intel PRO/1000 card is recognized by Windows XP guests without additional driver installation. The MT Server variant facilitates OVF imports from other platforms.
The "Paravirtualized network adapter (virtio-net)" is special. If you select this, then VirtualBox does not virtualize common networking hardware (that is supported by common guest operating systems out of the box). Instead, VirtualBox then expects a special software interface for virtualized environments to be provided by the guest, thus avoiding the complexity of emulating networking hardware and improving network performance. Starting with version 3.1, VirtualBox provides support for the industry-standard "virtio" networking drivers, which are part of the open-source KVM project.
The "virtio" networking drivers are available for the following guest operating systems:
• Linux kernels version 2.6.25 or later can be configured to provide virtio support; some distributions also back-ported virtio to older kernels.
• For Windows 2000, XP and Vista, virtio drivers can be downloaded and installed from the KVM project web page.[28]
VirtualBox also has limited support for so-called jumbo frames, i.e. networking packets with more than 1500 bytes of data, provided that you use the Intel card virtualization and bridged networking. In other words, jumbo frames are not supported with the AMD networking devices; in those cases, jumbo packets will silently be dropped for both the transmit and the receive direction. Guest operating systems trying to use this feature will observe this as a packet loss, which may lead to unexpected application behavior in the guest. This does not cause problems with guest operating systems in their default configuration, as jumbo frames need to be explicitly enabled.
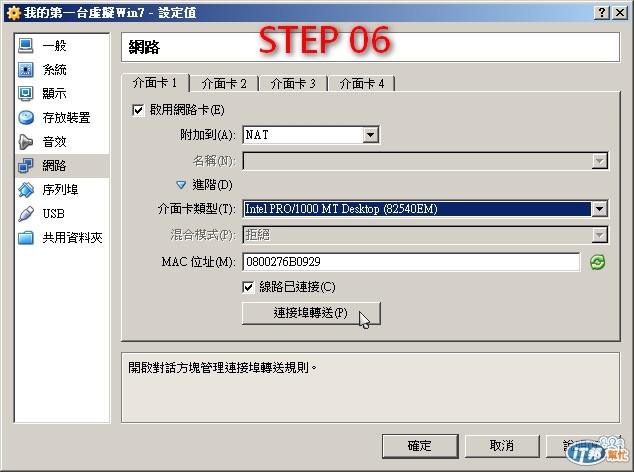
STEP6:接下來我們回到[我的第一台虛擬Win7 - 設定值]中,可以看到[MAC位置]完全可以讓使用者自行設定需要的值,當然預設Virtual BOX也會自動給一組。再來我們點下[連接埠轉送]開啟轉埠的設定視窗。
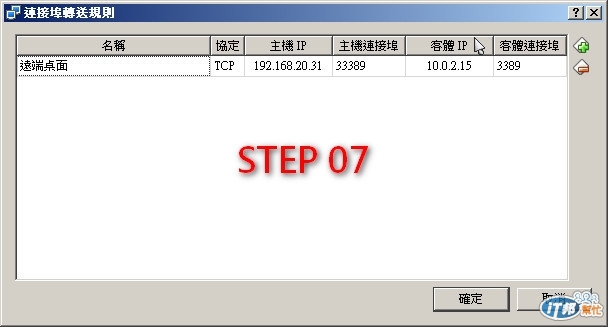
STEP7:如圖七,我們設定一條規則將虛擬機(10.0.2.15)的遠端桌面埠(3389)轉出到HOST主機(192.168.20.31 )的33389埠上。(10.0.2.15是安裝在192.168.20.31裡的虛擬機)
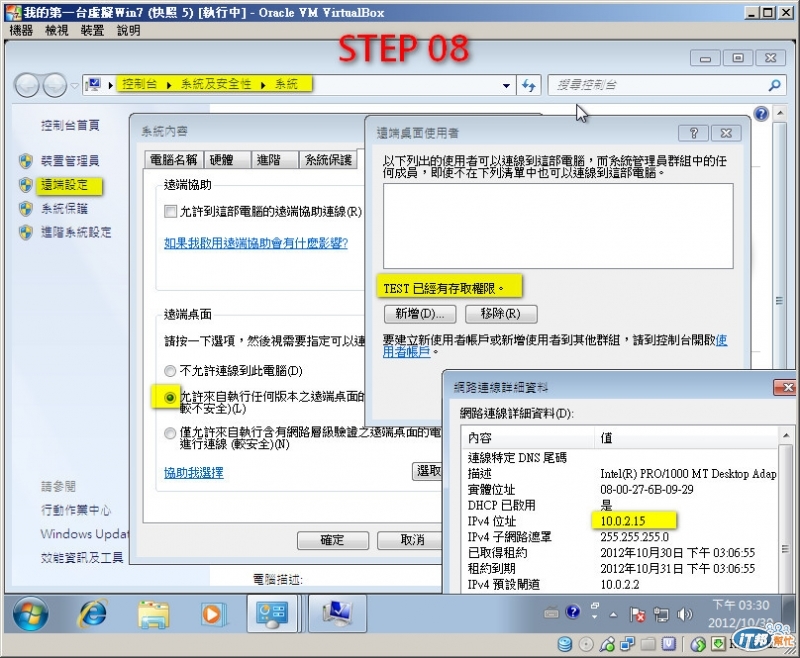
STEP8:登入[我的第一台虛擬Win7 ]並將遠端桌面功能開啟。
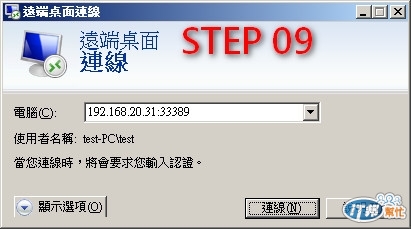
STEP9:使用一台與Host主機在相同網路環境中的電腦,開啟[遠端桌面連線]視窗,連線的電腦處輸入192.168.20.31:33389(虛擬機轉出至Host的port)。
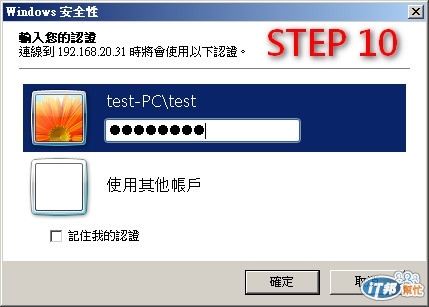
STEP10:輸入虛擬機登入的帳號密碼後,按下確定進行連線。
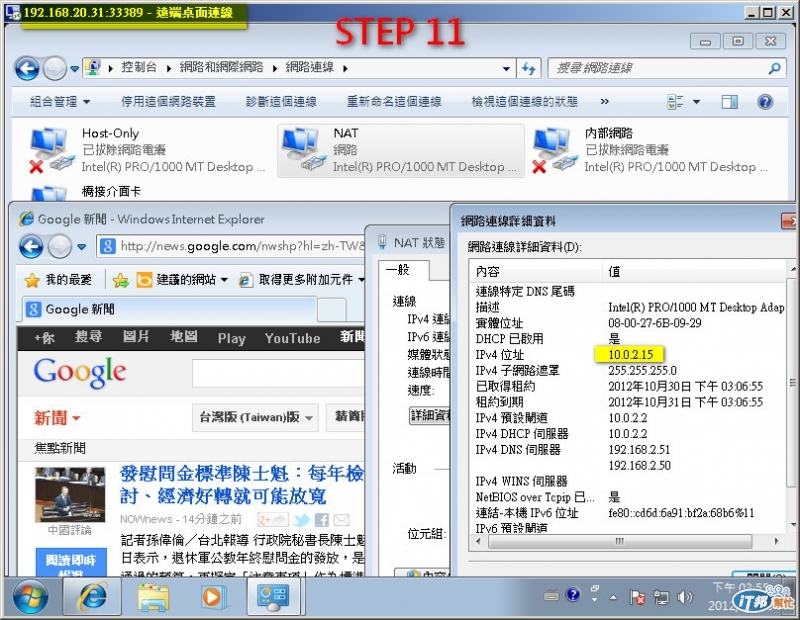
STEP11:遠端桌面連線虛擬機成功,從圖11中可看到,IP為10.0.2.15並可正常開啟網頁。
經過這篇的介紹後,希望大家對Virtual BOX的NAT更有進一步的了解。而Virtual BOX所提供的[連接埠轉送]功能也相當簡單易用,在虛擬機的開機狀態下,亦可以直接進行設定。相信各位讀者一定已經可以想到很多種其他的運用嚕~