Oracle Database是個非常強大的資料庫軟體,本文將實作介紹於「於RHEL平台安裝Oracle 11gR2」
[Lab Information]
本文測試環境已事先部署yum server,並安裝X Window System且啓動
檔案下載放置目錄:/root/plugin
測試環境帳號密碼如下,以利閱讀:
OS root password: 12345678
OS oracle password: 12345678
OS oracle user home directory: /home/oracle
SELinux status: disabled
IPtables status: disabled
[System requirements]
系統需求可參照官方建議規格
本文測試環境規格如下:
OS: Red Hat Enterprise Linux Server release 5.6 64 bit
Linux Kernel: 2.6.18-238.el5
CPU Type: Intel Xeon CPU E5620 2.40GHz
CPU Core: 2
Memory: 4GB
Disk Size: 120GB
[Download Package]
請至Oracle下載頁面進行Oracle Database 11g Release 2下載
下載前請先點選『Accept License Agreement』,因為本文主要是架設Oracle Database Server,故請下載檔名為database的檔案名稱,如下圖紅框所示(此範例為下載Oracle Database 11g Release 2 (11.2.0.1.0)):

點選檔案後網頁將自動導向至登入畫面,輸入Oracle Account and Password即可開始下載;若無Oracle Account可於該頁面進行註冊後即可開始下載
[Install on Linux]
安裝Oracle Database前置作業,請先確認Linux Server是否已經存在下列套件:
・binutils-2.17.50.0.6
・compat-libstdc++-33-3.2.3
・compat-libstdc++-33-3.2.3 (32 bit)
・elfutils-libelf-0.125
・elfutils-libelf-devel-0.125
・gcc-4.1.2
・gcc-c++-4.1.2
・glibc-2.5-24
・glibc-2.5-24 (32 bit)
・glibc-common-2.5
・glibc-devel-2.5
・glibc-devel-2.5 (32 bit)
・glibc-headers-2.5
・ksh-20060214
・libaio-0.3.106
・libaio-0.3.106 (32 bit)
・libaio-devel-0.3.106
・libaio-devel-0.3.106 (32 bit)
・libgcc-4.1.2
・libgcc-4.1.2 (32 bit)
・libstdc++-4.1.2
・libstdc++-4.1.2 (32 bit)
・libstdc++-devel 4.1.2
・make-3.81
・sysstat-7.0.2
・unixODBC-2.2.11 (32-bit) or later
・unixODBC-devel-2.2.11 (64-bit) or later
・unixODBC-2.2.11 (64-bit) or later
若無安裝上述套件,請透過root帳號使用yum or rpm command進行安裝
下列指令皆以yum command進行實作:
yum install binutils-* compat-lib* gcc-* glibc-* ksh libgcc-* libstdc++-* libaio-* make-* sysstat-* unixODBC-* -y
0. Modify Hosts File
於檔案:/etc/host增加IP與主機對應資訊
vi /etc/host
#Add the following lines to the "/etc/hosts" file.
127.0.0.1       oracle-staging
1. Creating Required Operating System Groups and Users
#Create groups
/usr/sbin/groupadd oinstall
/usr/sbin/groupadd dba
/usr/sbin/groupadd oper
#Create oracle user
/usr/sbin/useradd -g oinstall -G dba,oper oracle
#Set the password of the 'oracle' user
passwd oracle
2. Configuring Kernel Parameters and Resource Limits
a. 編輯檔案:/etc/sysctl.conf,並於檔案內增加下列參數
vi /etc/sysctl.conf
#Add or amend the following lines in the "/etc/sysctl.conf" file.
fs.aio-max-nr = 1048576
fs.file-max = 6815744
kernel.shmall = 2097152
kernel.shmmax = 536870912
kernel.shmmni = 4096
kernel.sem = 250 32000 100 128
net.ipv4.ip_local_port_range = 9000 65500
net.core.rmem_default = 262144
net.core.rmem_max = 4194304
net.core.wmem_default = 262144
net.core.wmem_max = 1048576
b. 執行下列指令,立即套用修改後的系統參數
/sbin/sysctl -p
3. Check Resource Limits for the Oracle Software Installation Users
編輯檔案:/etc/security/limits.conf,並於檔案內增加下列參數
vi /etc/security/limits.conf
#Add the following lines to the "/etc/security/limits.conf" file.
oracle              soft     nproc   2047
oracle              hard    nproc   16384
oracle              soft     nofile   4096
oracle              hard    nofile   65536
oracle              soft     stack    10240
4. Creating Required Directories
可參閱下列步驟進行建置:
mkdir -p /oracle/app/oracle/product/11.2.0.1
mkdir -p /u01/oradata
chown -R oracle:oinstall /oracle
chown -R oracle:oinstall /u01
chmod -R 775 /oracle
chmod -R 775 /u01
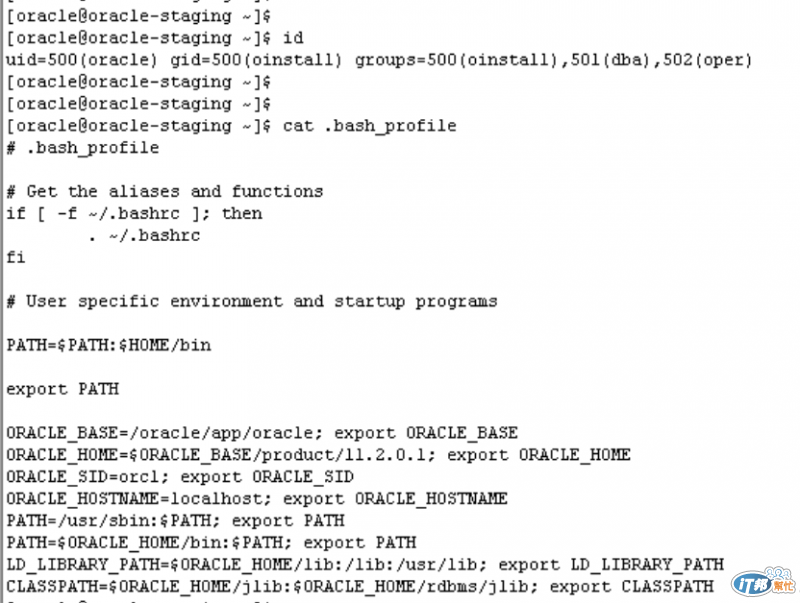
5. Configuring the oracle User's Environment
切換至oracle user,編輯檔案:~/.bash_profile,並於檔案內增加下列參數:
su - oracle
vi ~/.bash_profile
#Add the following lines.
ORACLE_BASE=/oracle/app/oracle; export ORACLE_BASE
ORACLE_HOME=$ORACLE_BASE/product/11.2.0.1; export ORACLE_HOME
ORACLE_SID=orcl; export ORACLE_SID
ORACLE_HOSTNAME=localhost; export ORACLE_HOSTNAME
PATH=/usr/sbin:$PATH; export PATH
PATH=$ORACLE_HOME/bin:$PATH; export PATH
LD_LIBRARY_PATH=$ORACLE_HOME/lib:/lib:/usr/lib; export LD_LIBRARY_PATH
CLASSPATH=$ORACLE_HOME/jlib:$ORACLE_HOME/rdbms/jlib; export CLASSPATH
後續可透過oracle user登入確認環境是否套用,如下圖示:
6. Extract compressed files
cd /root/plugin
mv linux.x64_11gR2_database_1of2.zip /home/oracle/.
mv linux.x64_11gR2_database_2of2.zip /home/oracle/.
6. Installing Oracle Database
使用oracle user登入X Window System,執行runInstaller script即可開始進行安裝,如下步驟:
'##以下步驟皆為使用oracle user執行##'
unzip linux.x64_11gR2_database_1of2.zip
unzip linux.x64_11gR2_database_2of2.zip
cd ~/database
bash runInstaller
執行結果如下圖所示,請將『I wish to receive security updates via My Oracle support.』勾選取消,如紅框1表示,後續再依紅字執行:

點選『Install databases software only』,如下圖紅框所示,並按下『Next』

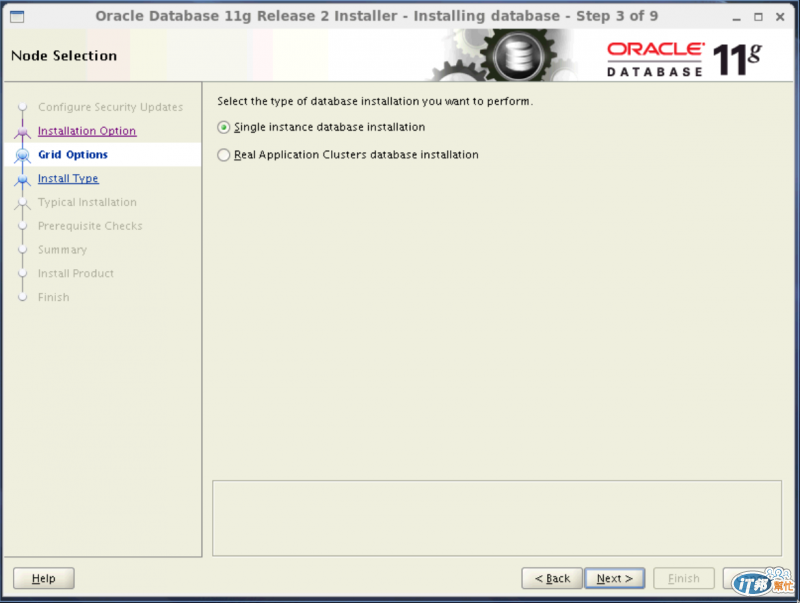
點選『Single instance database installation』,並按下『Next』
選取『Traditional Chinese』加入至「Selected Languages」,如下圖紅框所示,按下『Next』

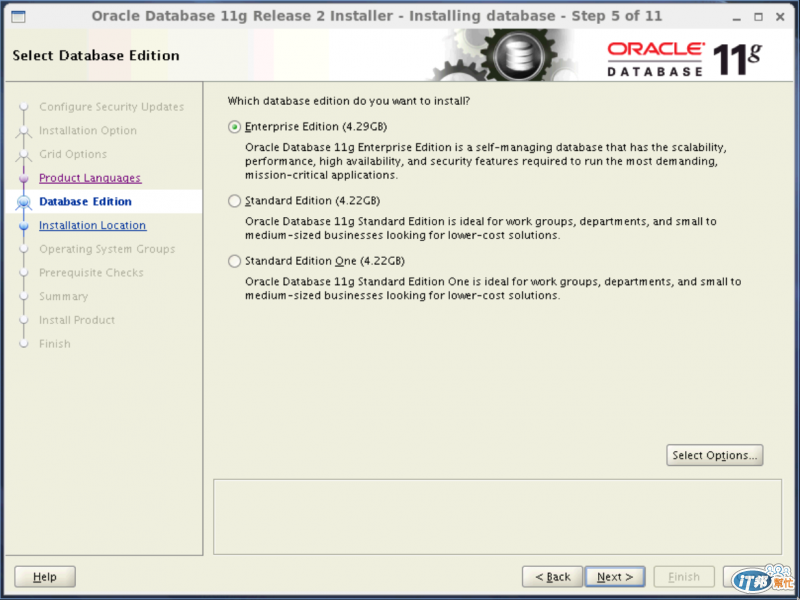
點選『Enterprise Edition』,並按下『Next』
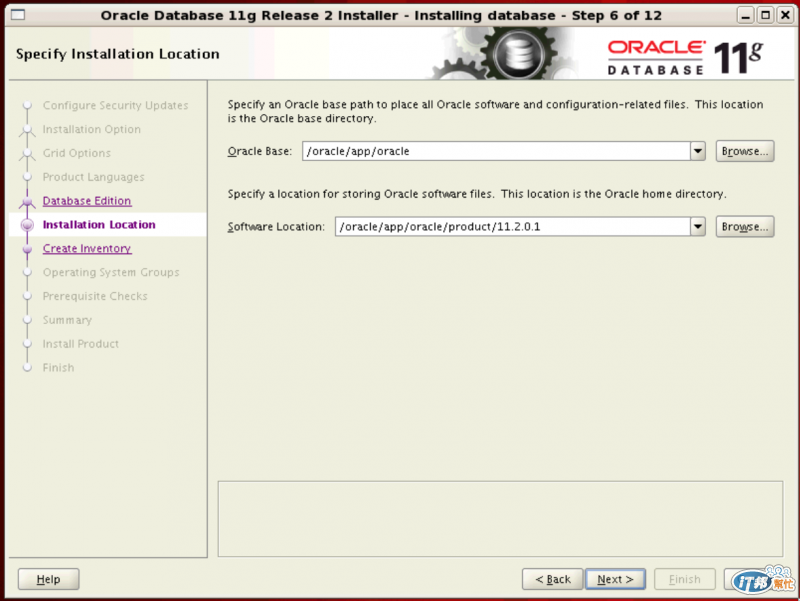
此步驟預設會套用oracle user的環境參數,故直接按下『Next』
此步驟無須異動,故直接按下『Next』
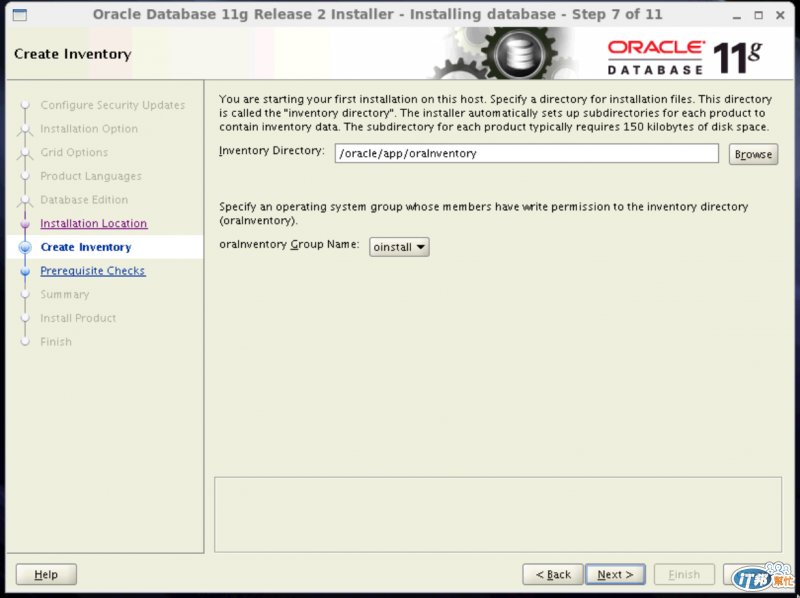
此步驟預設會套用oracle user的群組清單,故直接按下『Next』

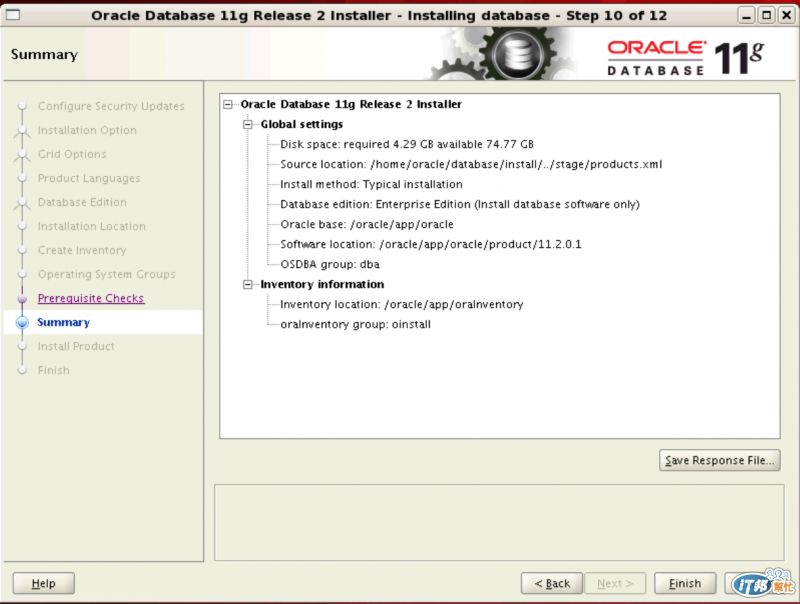
點選『Finish』將立即開始安裝
安裝約94%時,系統自動跳出下列訊息,此時請使用root帳號執行紅框處script,執行完畢後按下『OK』即可
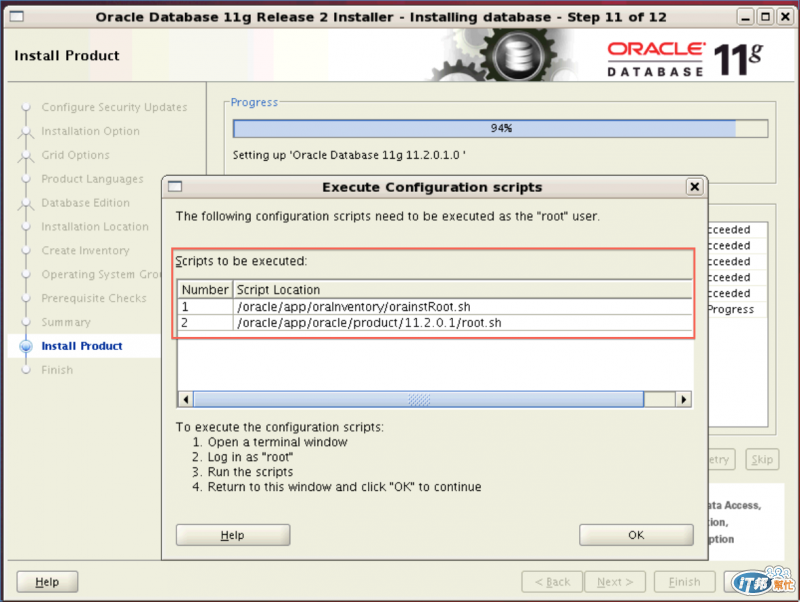
'##以下步驟皆為使用root user執行##'
bash /oracle/app/oraInventory/orainstRoot.sh
bash /oracle/app/oracle/product/11.2.0.1/root.sh
執行結果如下圖所示:

安裝完畢,按下『Close』結束安裝

下一篇將介紹建立Database Instance


 iThome鐵人賽