今天終於要來完成第一個難關的檔案上傳!!!
因為FileUpload實在是沒有提供任何方便的精靈可以幫忙完成
所以一切都只能自幹囉!
先了解一下 FileUpload 類別
裡面的範例如下:
string saveDir = @"\Uploads\";
//因為反斜線會被解析,使用@方便閱讀
//還是可寫成String saveDir= "\\FileUpload\\";
string appPath = Request.PhysicalApplicationPath;//取得目錄完整位址

if (FileUpload1.HasFile)
{
    string savePath = appPath + saveDir +
        Server.HtmlEncode(FileUpload1.FileName);
    FileUpload1.SaveAs(savePath);
    UploadStatusLabel.Text = "Your file was uploaded successfully.";
}
else
{
    UploadStatusLabel.Text = "You did not specify a file to upload.";
}
再來就是要真正實作,
先修改令人比較方便順眼的多檔上傳,
在FileUpload 屬性裡有的AllowMultiple改為True即可允許支援多檔
並改一下程式碼為
if (FileUpload1.HasFiles)
{
    foreach (HttpPostedFile postedFile in FileUpload1.PostedFiles)//取得所有上傳的檔案列表逐一處理
    {
        postedFile.SaveAs(savePath);
    }

}
這樣大致上就有個簡單的樣子出來
接著做一些必要的防呆避免在寫入檔案時重複檔名,再將檔案路徑寫入資料庫
大致功能應該就是如此!
if (FileUpload1.HasFiles)
{
          SubmitFile(MessageID, FileUpload1.PostedFiles);
          lbResult.Text+="檔案上傳完成!";
}

protected void SubmitFile(string MessageID, IList<HttpPostedFile> FileList)//上傳檔案及回傳檔案清單
{
    using (SqlConnection nowConnection = new SqlConnection(strConnection))
    {
        nowConnection.Open();//開啟連線
        foreach (HttpPostedFile postedFile in FileList)
        {
            String saveDir = @"\FileUpload\";
            //String saveDir= "\\FileUpload\\";
            String appPath = Request.PhysicalApplicationPath;//根目錄之實體路徑
            String fileName, checkPath;
            fileName = postedFile.FileName;
            string tempfileName = fileName;
            checkPath = appPath + saveDir + fileName;
            if (System.IO.File.Exists(checkPath))//避免檔案重複儲存
            {
                int counter = 2;
                while (System.IO.File.Exists(checkPath))
                {
                    tempfileName = "(" + counter.ToString() + ")" + fileName;
                    checkPath= appPath + saveDir + tempfileName;
                    counter = counter + 1;
                }
                fileName = tempfileName;
            }
            string filePathName = appPath + saveDir + tempfileName;
            postedFile.SaveAs(filePathName);
            using (SqlCommand command = new SqlCommand())
            {
                command.Parameters.Clear();//清空參數
                command.Parameters.Add("@ID", SqlDbType.Int).Value = MessageID;
                command.Parameters.AddWithValue("@FILENAME", postedFile.FileName);
                command.Parameters.AddWithValue("@FILEPATH", filePathName);
                command.CommandText = @"insert into Files(MessageID,FileName,FilePath)
                                        values(@ID,@FILENAME,@FILEPATH)";
                command.Connection = nowConnection;//資料庫連接
                command.ExecuteNonQuery();
            }
        }

    }

}
測試一下新增個檔案上傳

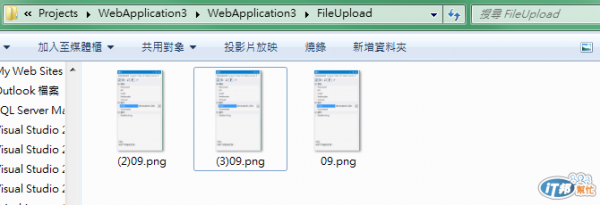
這樣就完成檔案上傳功能的部分與測試囉!!!!