angular cli 建立 component 網址
https://github.com/angular/angular-cli/wiki/generate-component
cmd
-----
ng generate component [name]
[name]→你想要取的 component 名稱,不用加[]

component 的建立 跟 所在位置有關連(紅線位置),若為專案初始位置,建立的 component 就會在 app 資料夾底下

這邊可以看到 新增一個 component 他會先建立一個 資料夾再將檔案新增至此,最後修改 app.module.ts
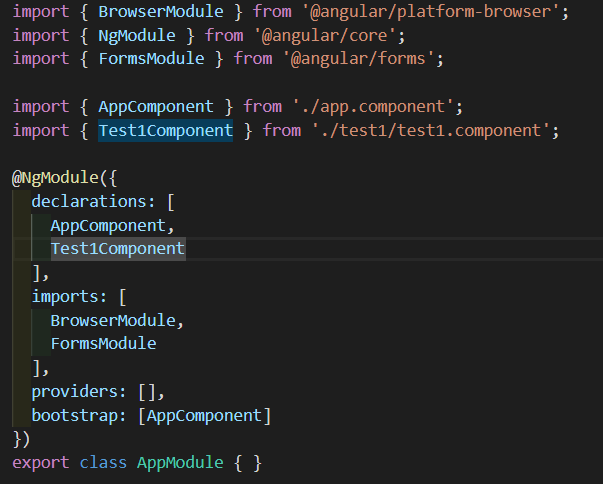
Angular 幫我們自動匯入 新的 component 並加入到 declarations
app\app.component.ts(父)
-----
export class AppComponent {
    title = '測試專案';
}
app\app.component.html(父)
-----
<app-test1 [fTitle]="title"></app-test1>
src\app\test1\test1.component.ts(子)
-----
export class Test1Component implements OnInit {
    @Input() fTitle;

    constructor() { }

    ngOnInit() {
    }
}
上面的 @Input ,也可以在 @Component 內 的 Inputs 內匯入
可以參考下列文章
https://ithelp.ithome.com.tw/articles/10188383
// property 綁定原來的名稱
@Input() 原名稱: string;// 當 component 安裝在 template,property value 綁定一個不同的 property name
@Input(原名稱) 使用名稱: string;
https://angular.io/api/core/Input
src\app\test1\test1.component.html(子)
-----
<p>
    {{fTitle}}
</p>
顯示
https://angular.io/api/core/Input