今天小妹我心情超好的啦! 找到一個很棒的工作,真的很期待未來可以去那邊上班~~~
在上一篇我們建立好了自定義的message,今天就來看看如何使用吧!
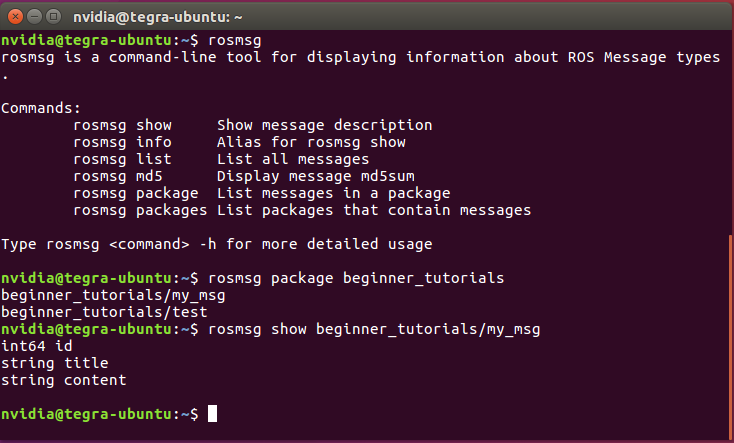
首先我們輸入rosmsg,可以看到有幾個指令可以使用,像是rosmsg list就是可以看到所有可以使用的message,而輸入rosmsg package <package_name>可以看到某個package底下有的msg檔,我們昨天寫的msg檔是在beginner_tutorials底下,所以可以由這個指令看到現在已經有一個my_msg格式的message在裡面啦! (test是我的測試檔,你們沒有是正常的 XD)
由rosmsg show可以看到該格式的定義,也就是我們昨天寫的啦! 共有一個id、一個title和一個content。
在c++和python版本中要使用這種自定義的message,就是要將他的格式的訊息include/import進來啦!
所以在C++版本的時候需要加入這幾行:
#include <beginner_tutorials/my_msg.h>

beginner_tutorials::my_msg msg;
而在python版本的時候是這樣寫的:
from beginner_tutorials.msg import my_msg

msg = my_msg()
之後就可以將msg這個變數當成一個物件使用囉! 底下就會有我們定義的id、title和content三個屬性。
接下來就以上次我們做的publisher node(c++)(python)為例,發佈自己定義的message格式的資料出去:
talker.py : 1 #!/usr/bin/env python
2 # license removed for brevity
3 import rospy
4 from beginner_tutorials.msg import my_msg
5
6 def talker():
7 pub = rospy.Publisher('chatter', my_msg, queue_size=10)
8 rospy.init_node('talker', anonymous=True)
9 rate = rospy.Rate(10) # 10hz
10 count = 1
11 while not rospy.is_shutdown():
12
13 msg = my_msg()
14 msg.id = count
15 msg.title = "hello"
16 msg.content = "hello from python"
17
18 pub.publish(msg)
19 count = count + 1
20 rate.sleep()
21 if __name__ == '__main__':
22 try:
23 talker()
24 except rospy.ROSInterruptException:
25 pass
talker.cpp: 1 #include "ros/ros.h"
2 #include "beginner_tutorials/my_msg.h"
3
4 int main(int argc, char **argv)
5 {
6 ros::init(argc, argv, "talker");
7 ros::NodeHandle n;
8 ros::Publisher chatter_pub = n.advertise<beginner_tutorials::my_msg>("chatter", 1000);
9 ros::Rate loop_rate(10);
10 int count = 0;
11 while (ros::ok())
12 {
13 beginner_tutorials::my_msg msg;
14 msg.id = count;
15 msg.title = "hello";
16 msg.content = "hello from c++";
17
18 chatter_pub.publish(msg);
19 ros::spinOnce();
20 loop_rate.sleep();
21 ++count;
22 }
23 return 0;
24 }
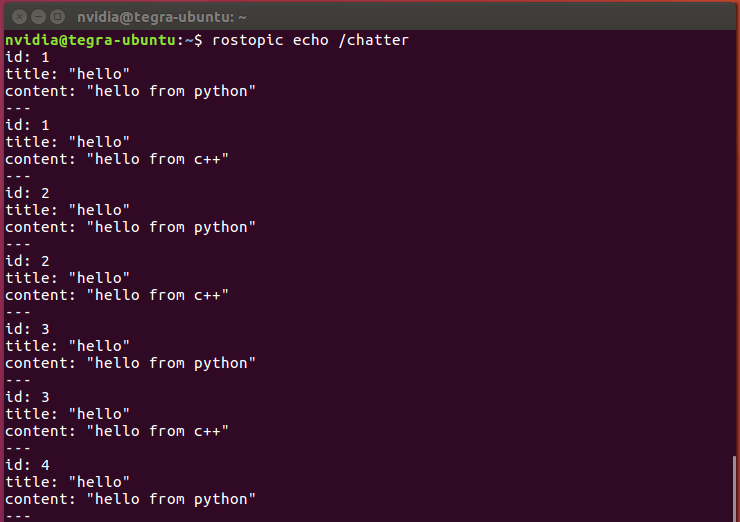
基本上有改的就是13~16行囉! 也就是把msg當成物件,去定義其內的屬性,再發送出來,執行畫面會長這樣:
在寫的時候因為小妹我太不熟python啦,看到教學寫說要from <package_name.msg> import <msg_name>的時候真的卡了很久,一直搞不懂為什麼不是from <msg_name.msg> import *,這樣不是才是我自己定義的.msg檔嗎! 卡了一陣子才想起來在import裡面的那個.msg,是/msg的意思 XD 因為我們定義的.msg檔都放在/msg資料夾底下嘛! 被ROS的命名方法陰了QQ,特別寫在這裡紀錄一下!
ROS tutorials - using custom messages

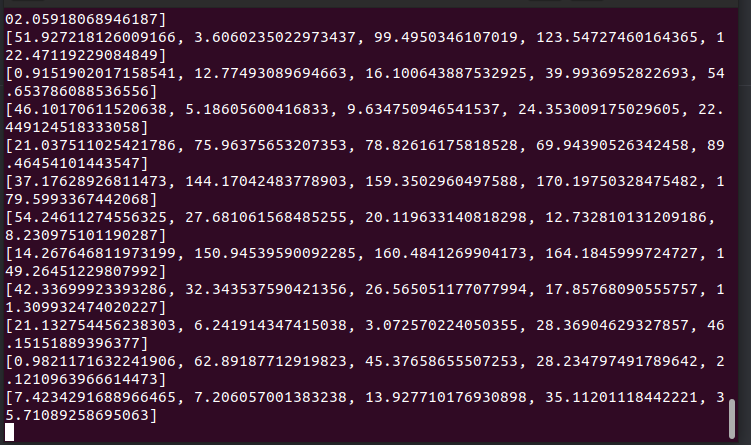
我想請問一下 我目前在做一個手勢判斷操控機器人的題目 terminal也會印出我的手勢角度(以下圖片) 但我要把我這些數據傳到msg裡面可以發送給rasberry該怎麼做 我要把msg格式打在我判斷手勢的檔案裡面嗎?謝謝版主

你好,已經回應你的私信,但是我想說搞不好還有別人也有同樣問題,所以我把回應也一併回覆在這邊:
應該是你要先自定義一個msg的格式,然後透過publisher發送,再讓樹梅派做一個subscriber接收這樣,不過如果是跨機器的話要定義master網域,可以參考我這篇文章: https://ithelp.ithome.com.tw/articles/10244398