iT邦幫忙

第 11 屆 iThome 鐵人賽

DAY 3
1
Mobile Development

iOS App初心者的30天試鍊系列 第 3

Day3:今天先來研究一下Segue , 知道如何連接App畫面

  • 分享至 

  • xImage
  •  

在Day2完成1頁式手做App後 , 接下來我們開始做多頁App , 一個Storyboard

可以同時設計多個App頁面 , 並設定不同頁面的切換流程 , 我們選定Main.Storyboard開始

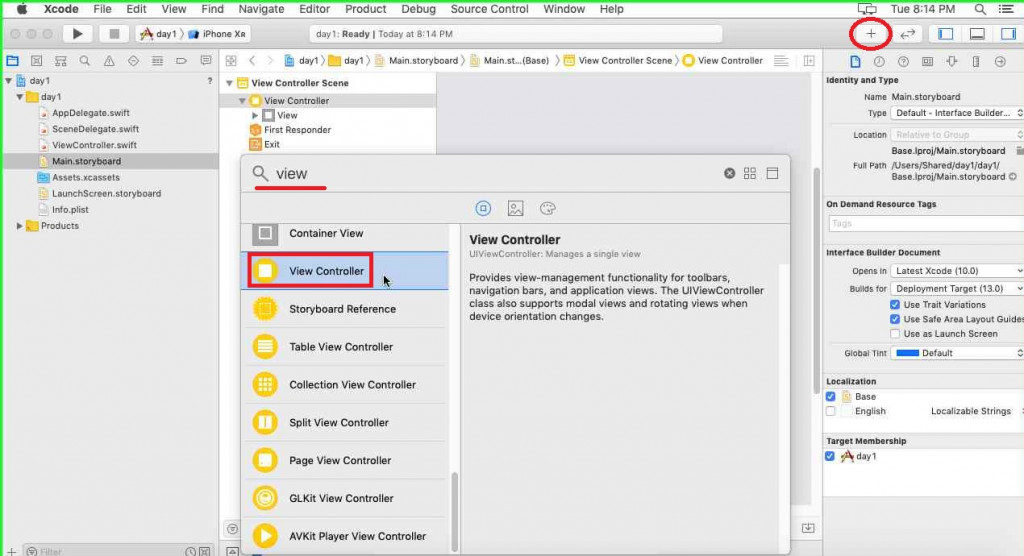
接著按右上角的+ , 輸入view , 選擇View Controller , 產生新的View Controller(第2頁),

https://ithelp.ithome.com.tw/upload/images/20190910/20112182tgeAT6uWwx.jpg

建立完成後 , 我們會在Main.Storyboard看到2個View Controller

https://ithelp.ithome.com.tw/upload/images/20190910/20112182Nt8gVbmdoe.jpg

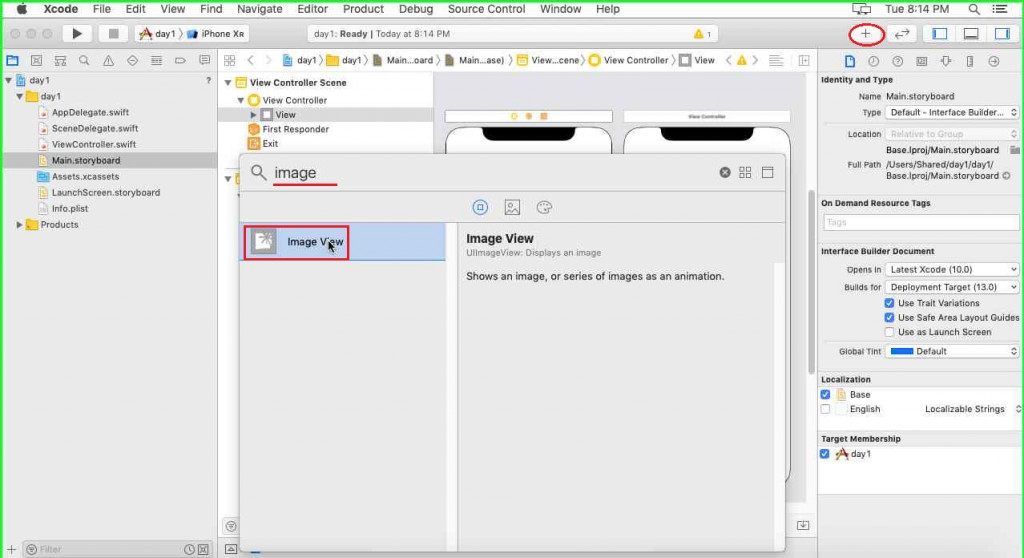
接下來我們在2個View Controller點選+ , 輸入Image , 同時新增ImageView , 如下圖

https://ithelp.ithome.com.tw/upload/images/20190910/20112182ZBaoN9MQF3.jpg

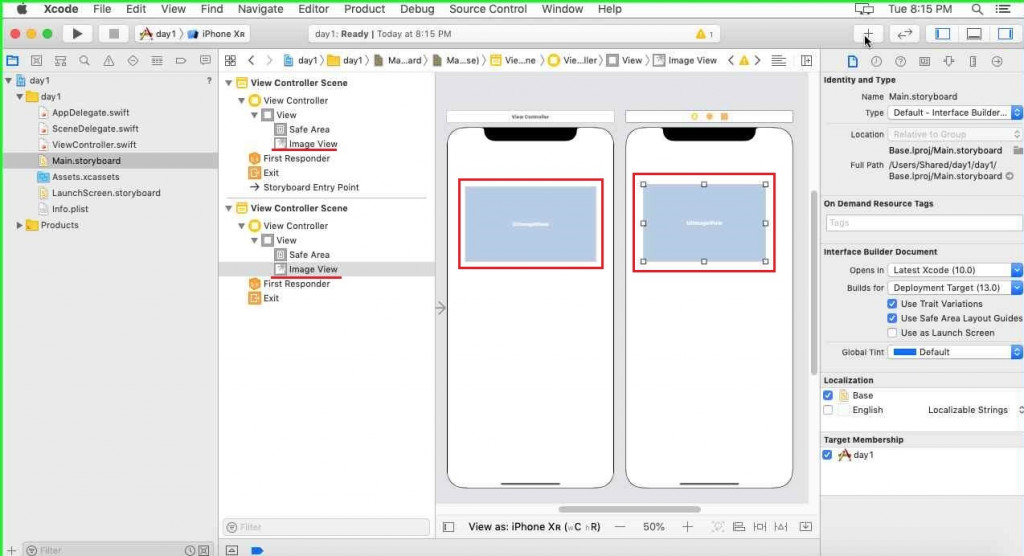
並且用滑鼠將2個ImageView上下/左右拉大 , 如下圖

https://ithelp.ithome.com.tw/upload/images/20190910/20112182c3BQ8a03sb.jpg

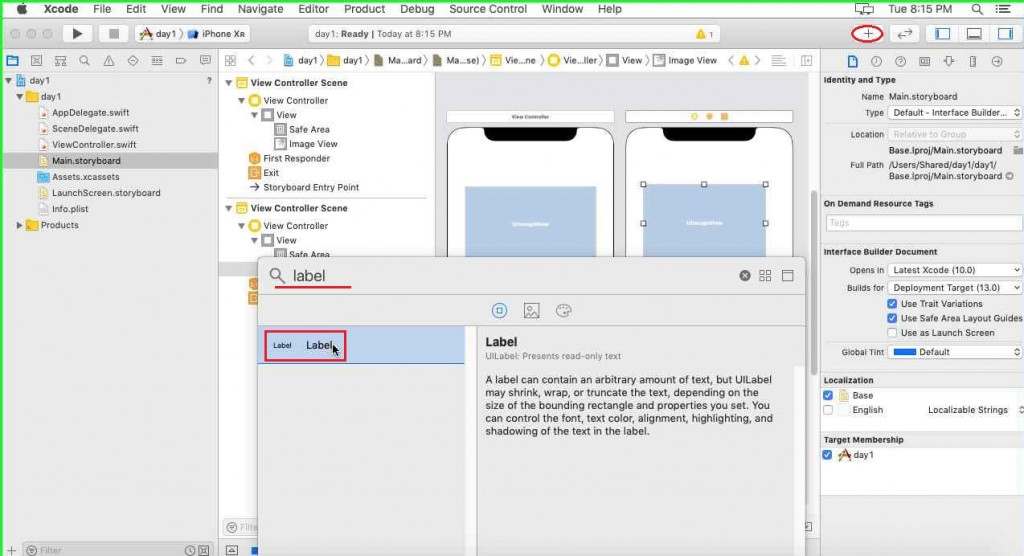
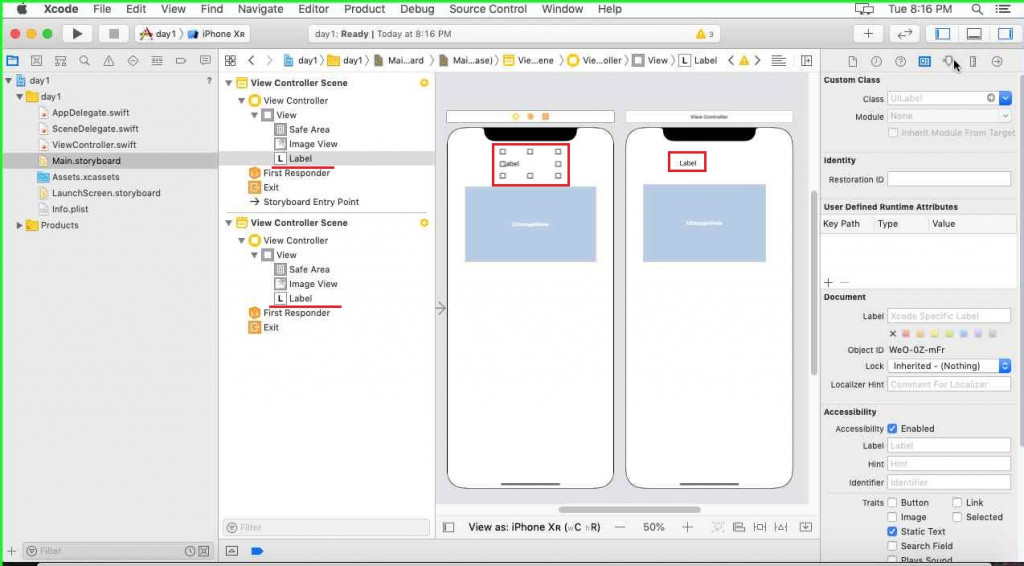
接下來我們在2個View Controller點選+ , 輸入Label , 同時新增Label , 如下圖

https://ithelp.ithome.com.tw/upload/images/20190910/20112182QdxLHfoHqU.jpg

並且用滑鼠將2個Label上下/左右拉大 , 如下圖

https://ithelp.ithome.com.tw/upload/images/20190910/20112182BPA8zHKzLN.jpg

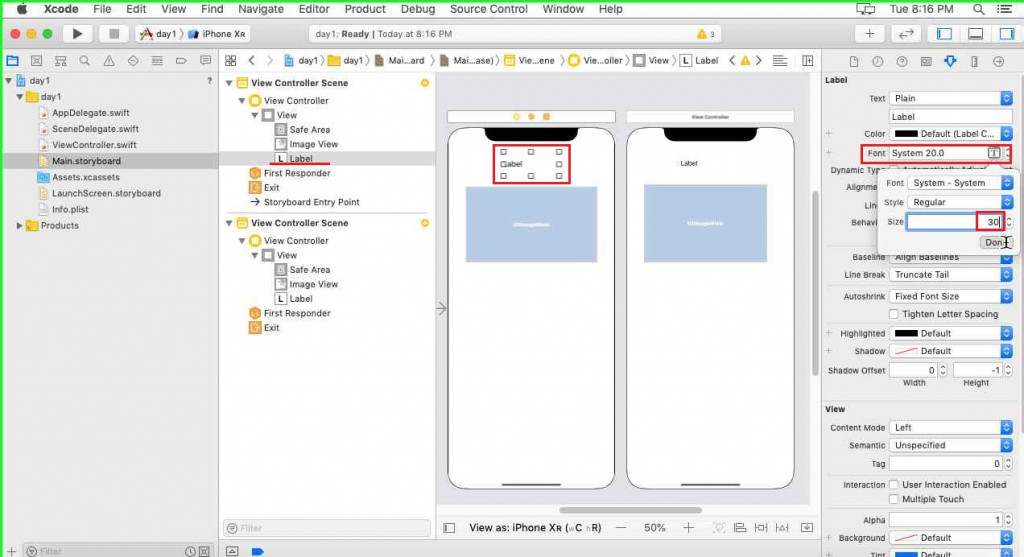
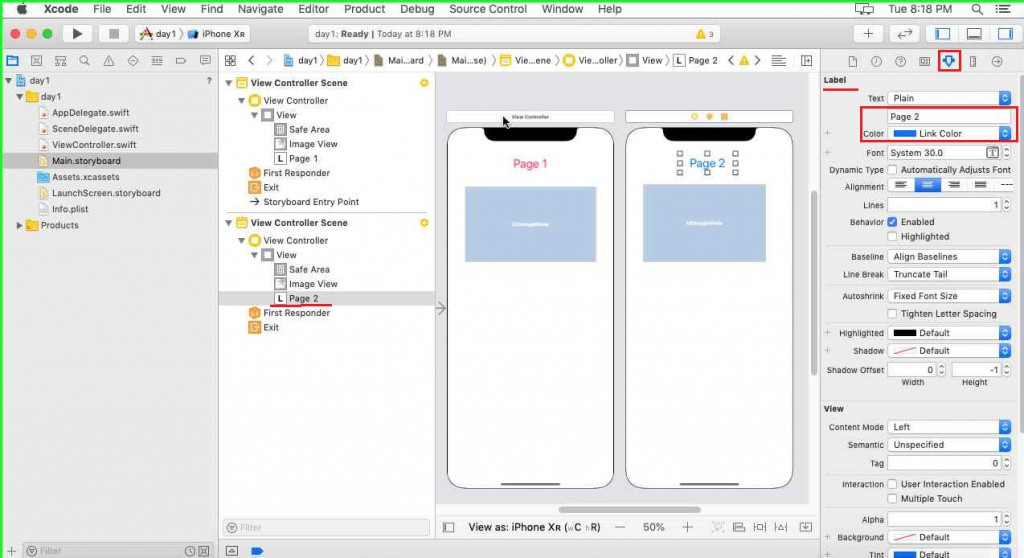
選定2個ViewController的Label , 點選最右邊的Font , 將Size調大到30

https://ithelp.ithome.com.tw/upload/images/20190910/20112182moDCl1oOSF.jpg

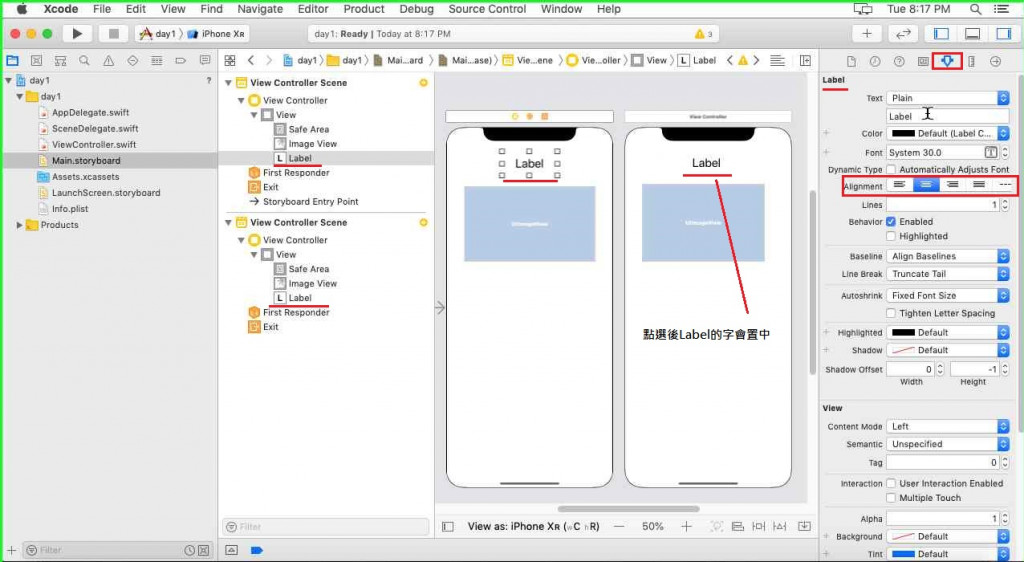
選定2個ViewController的Label , 點選最右邊的Alignment , 選擇置中

https://ithelp.ithome.com.tw/upload/images/20190910/20112182kbBZMXvSTw.jpg

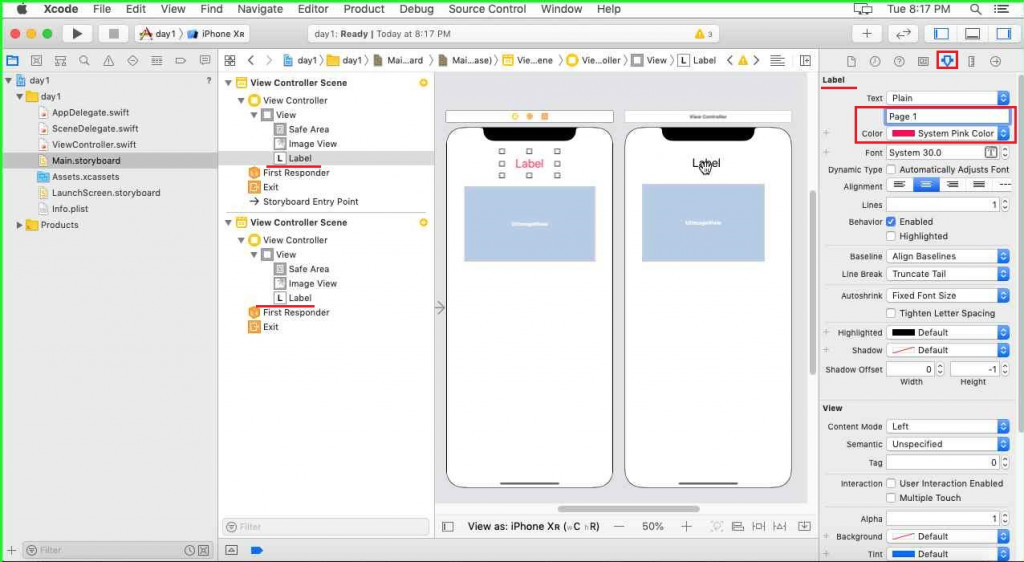
修改2個ViewController的Label文字及顏色 , 點選最右邊的Text及Color

https://ithelp.ithome.com.tw/upload/images/20190910/20112182Jl8lA7mdaF.jpg

https://ithelp.ithome.com.tw/upload/images/20190910/20112182qsNQPaey5z.jpg

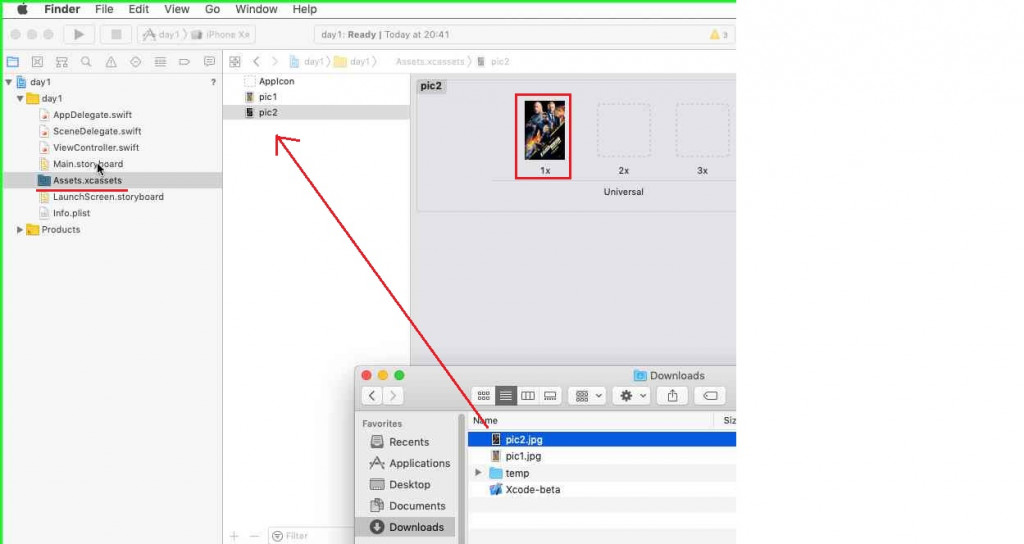
接下來我們把事先下載到Download資料夾的pic1.jpg及pic2.jpg拖拉到Assets.xcassets

https://ithelp.ithome.com.tw/upload/images/20190910/20112182QKbSRl09Kw.jpg

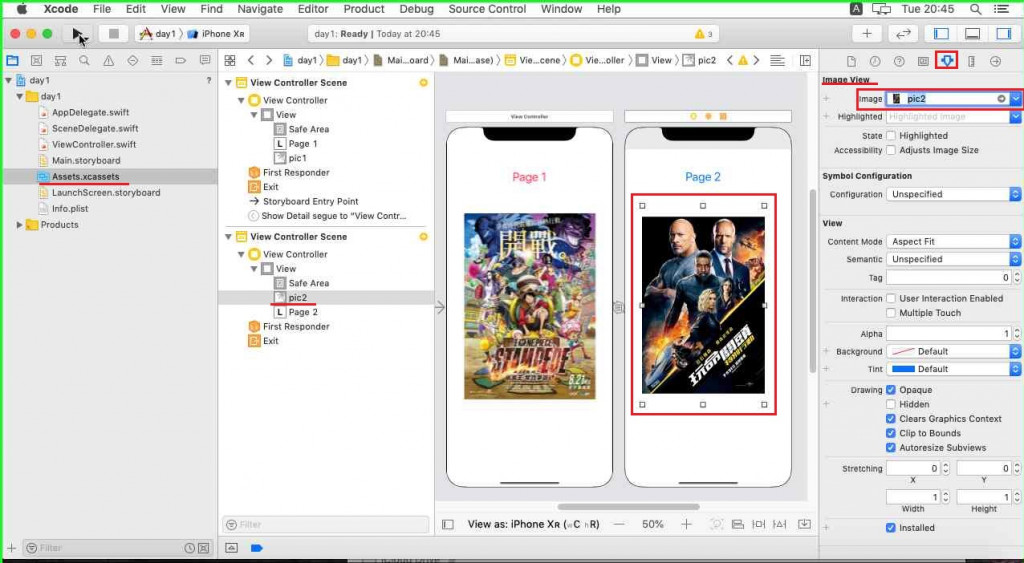
在第1個View Controller的第1個ImageView , 點選最右邊的Image ,選擇pic1.jpg

https://ithelp.ithome.com.tw/upload/images/20190910/20112182s26l2NKbhv.jpg

在第2個View Controller的第2個ImageView , 點選最右邊的Image ,選擇pic2.jpg

https://ithelp.ithome.com.tw/upload/images/20190910/20112182TnTISdOBwG.jpg

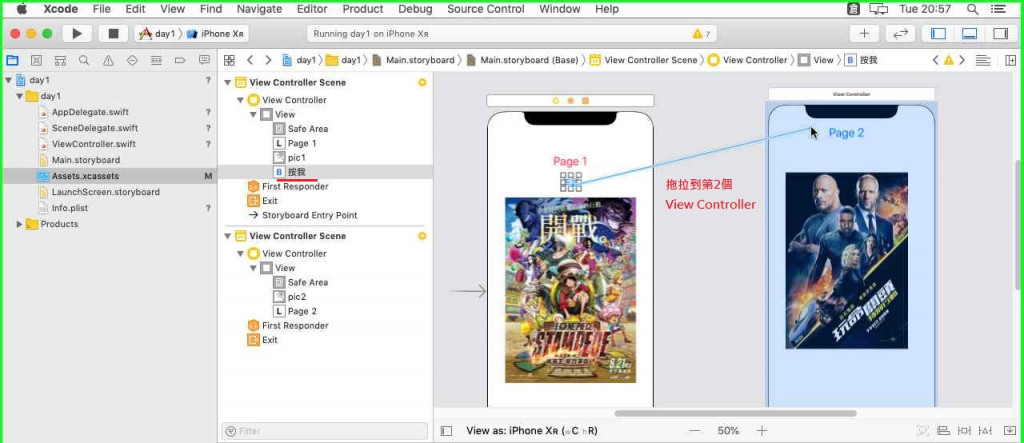
接下來在第1個View Controller , 再加一個Button , 直接拖拉到View

https://ithelp.ithome.com.tw/upload/images/20190910/20112182MFfsWqHQPD.jpg

修改Button中的文字內容

https://ithelp.ithome.com.tw/upload/images/20190910/20112182PR9J1LPiJF.jpg

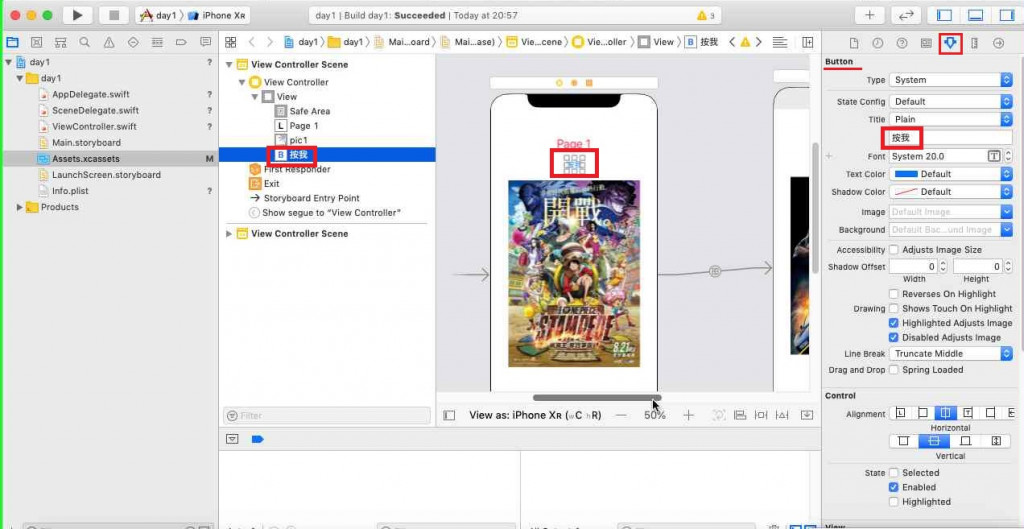
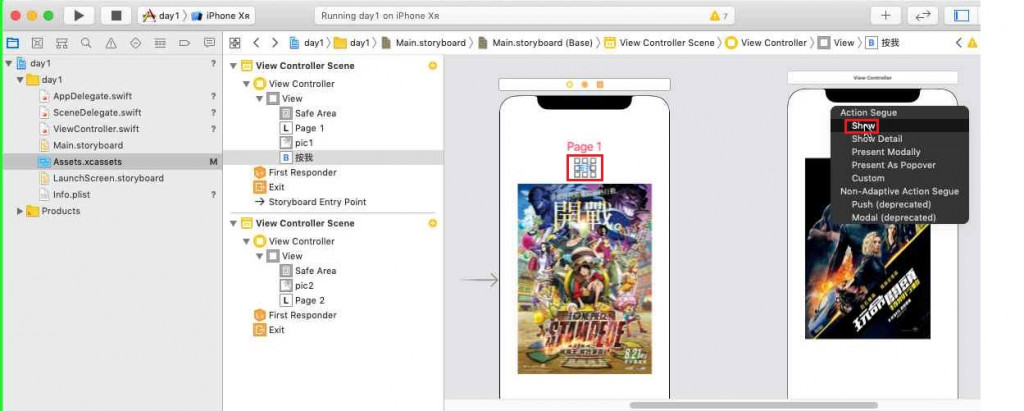
點選Button , 按住滑鼠右鍵往第2個View Controller拖拉

https://ithelp.ithome.com.tw/upload/images/20190910/20112182zjnHmmx4jP.jpg

直接在Action Segue選擇Show
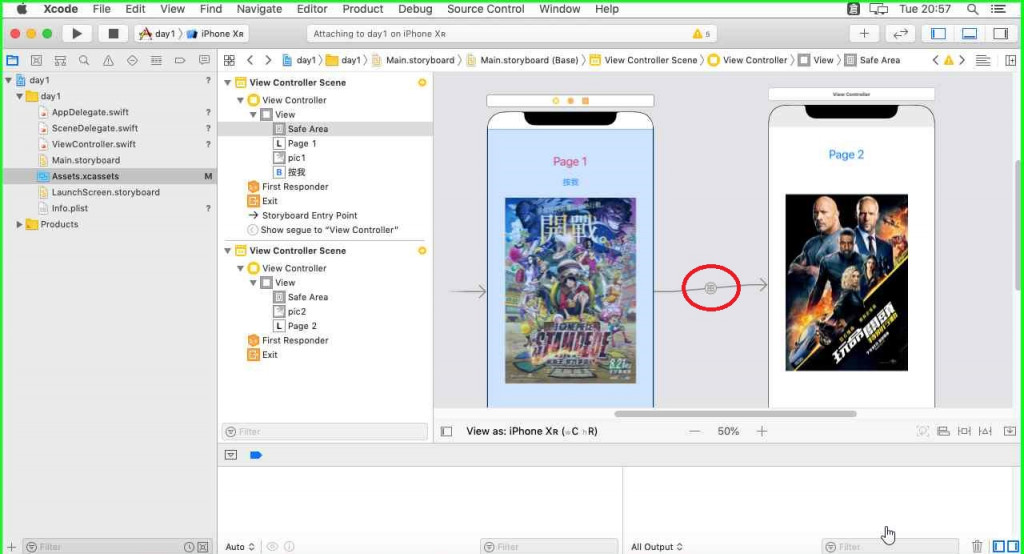
https://ithelp.ithome.com.tw/upload/images/20190910/20112182sNCJv0VHHX.jpg

完成後即可看到以下圈選畫面

https://ithelp.ithome.com.tw/upload/images/20190910/20112182thnq6MAQ59.jpg

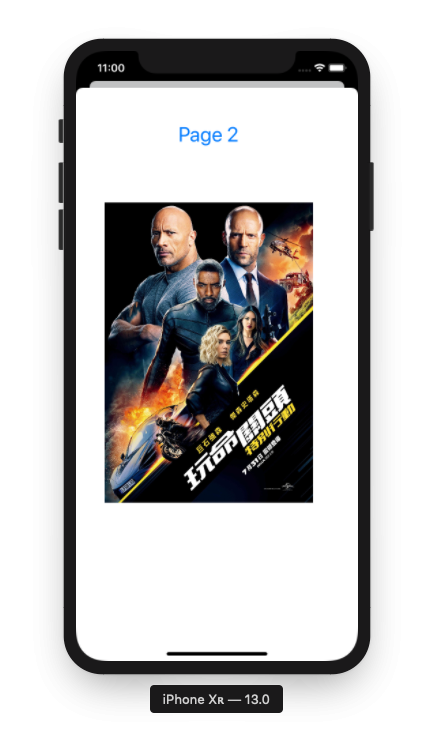
按下Play , 看到iPhone XR模擬器執行結果如以下

https://ithelp.ithome.com.tw/upload/images/20190910/20112182BG5Ih68WBs.png

https://ithelp.ithome.com.tw/upload/images/20190910/20112182pJMcQcGGMw.png


上一篇
Day2:如何在Story Board製作App畫面
下一篇
Day4:來介紹navigation controller及tab bar controller
系列文
iOS App初心者的30天試鍊31
圖片
  直播研討會
圖片
{{ item.channelVendor }} {{ item.webinarstarted }} |
{{ formatDate(item.duration) }}
直播中

尚未有邦友留言

立即登入留言