iT邦幫忙

第 11 屆 iThome 鐵人賽

DAY 2
1
Mobile Development

iOS App初心者的30天試鍊系列 第 2

Day2:如何在Story Board製作App畫面

在準備好Xcode環境後,接下來我們要開始設計iOS App畫面,在Xcode選取

Main.StoryBoard , 會看到一個View Controller Scene , 右上角有一個+符號

,直接點選下去 , ,就可以新增各種元件
https://ithelp.ithome.com.tw/upload/images/20190909/20112182meSnvsnWTg.png
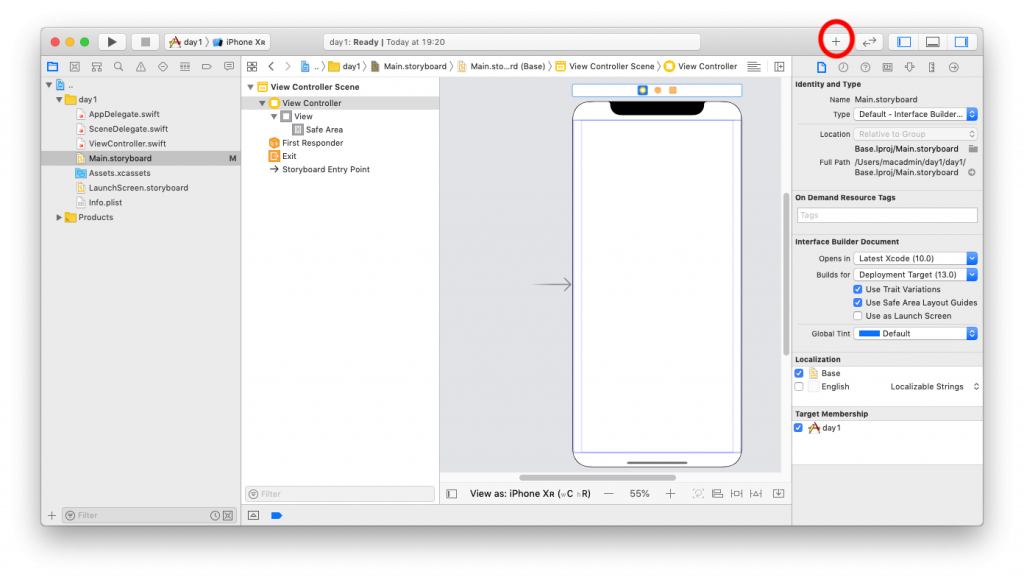
(如Button , Label , Text Field , Image View),也可以直接從Object直接拖拉到

StoryBoard上
https://ithelp.ithome.com.tw/upload/images/20190909/20112182ayyWg7GmBG.jpg

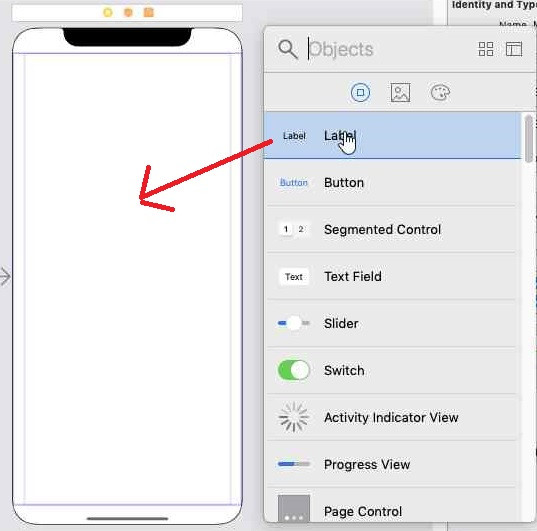
第一次使用UI , 我們先新增一個Button及一個Label , 並且依需求調整Button及Label

顏色及大小

https://ithelp.ithome.com.tw/upload/images/20190909/20112182YwF34f4rPD.png

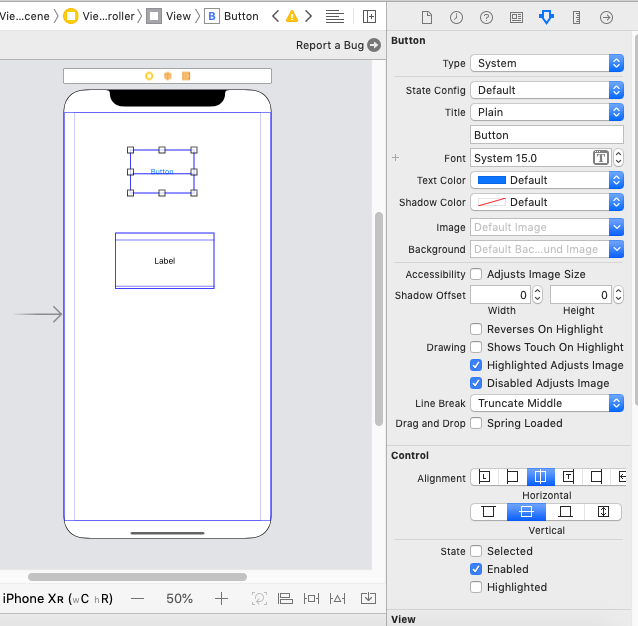
接下來我們來開始做一個簡單的Hello World App , 請依照以下畫面即可做成第1個App

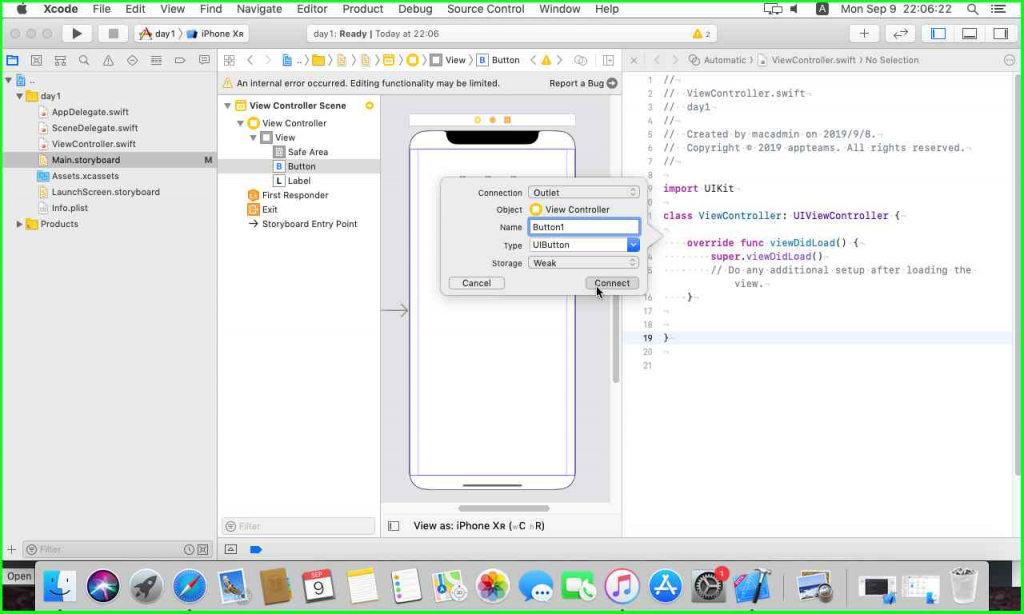
點選Button , 並按滑鼠右鍵拖拉到override func上面

https://ithelp.ithome.com.tw/upload/images/20190909/20112182V5QqlsyVDp.png

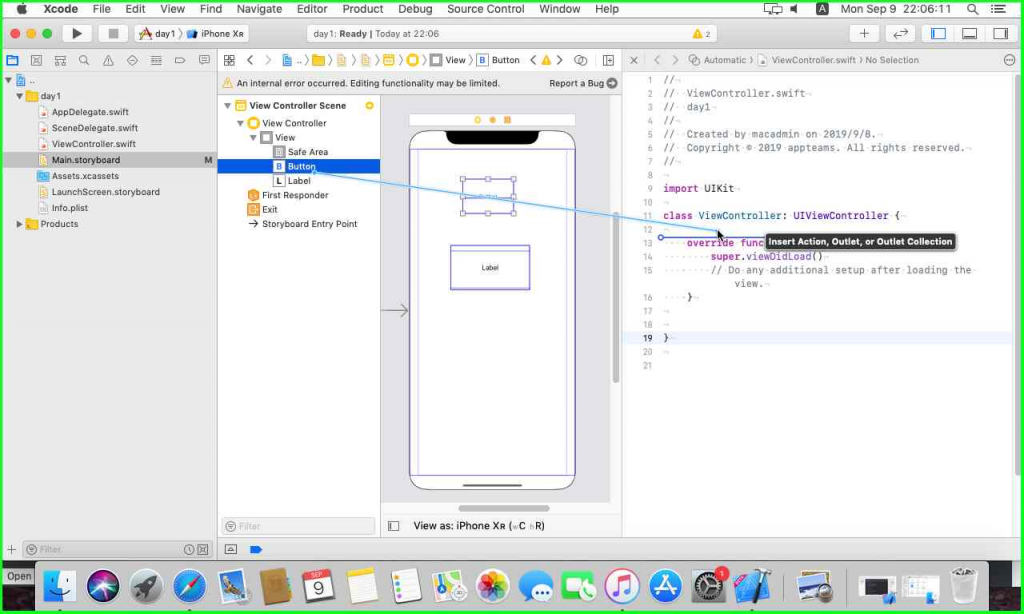
並將@IBOutlet的UIButton變數命名為BUtton1

https://ithelp.ithome.com.tw/upload/images/20190909/20112182ytYkcIb0ac.png

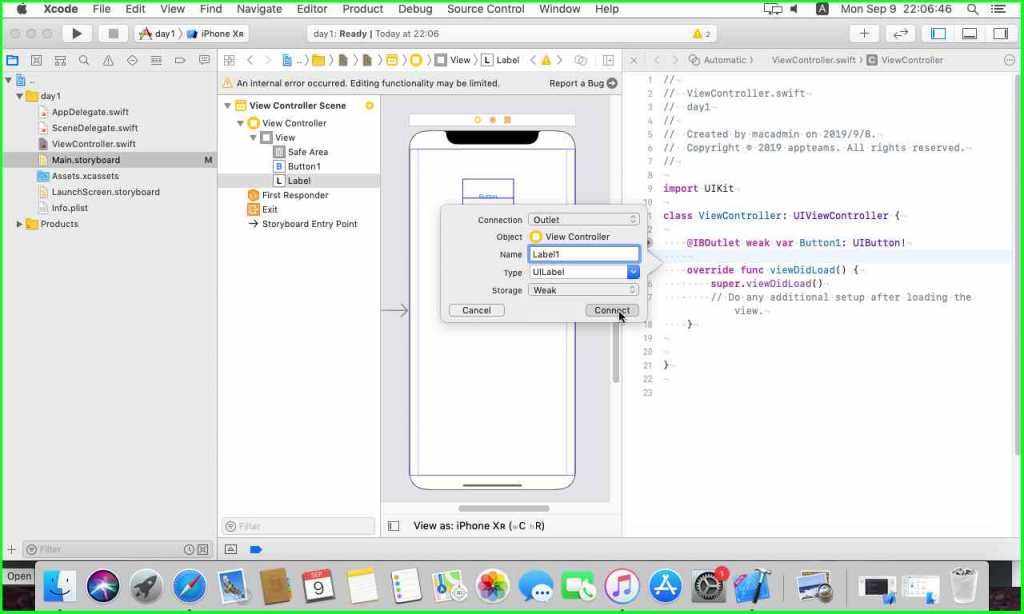
點選Label , 並按滑鼠右鍵拖拉到override func上面

https://ithelp.ithome.com.tw/upload/images/20190909/201121829maYvaIY5A.png

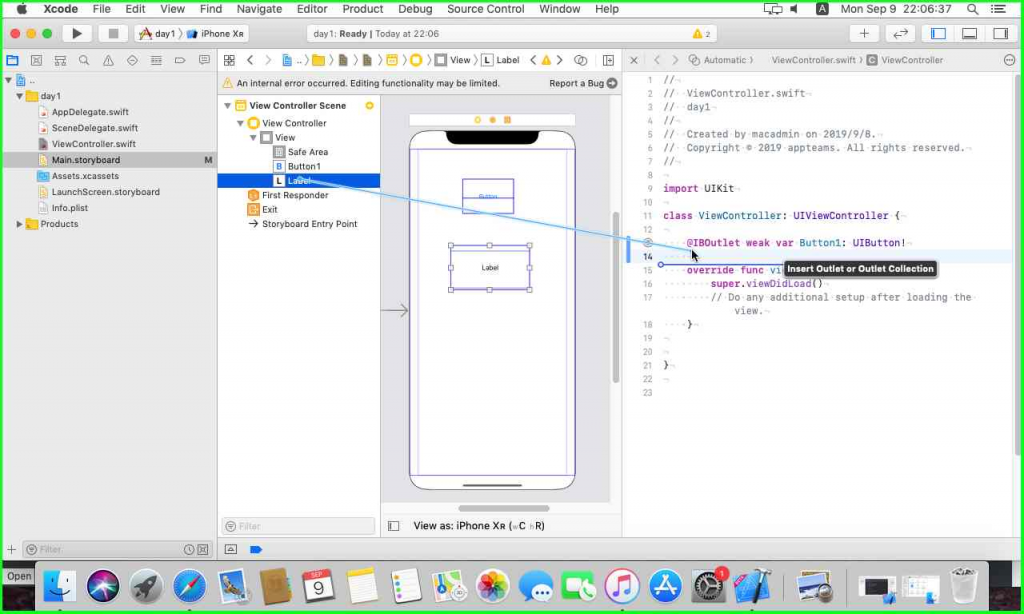
並將@IBOutlet的UILable變數命名為Label1

https://ithelp.ithome.com.tw/upload/images/20190909/20112182r3ZVHJ7uMq.png

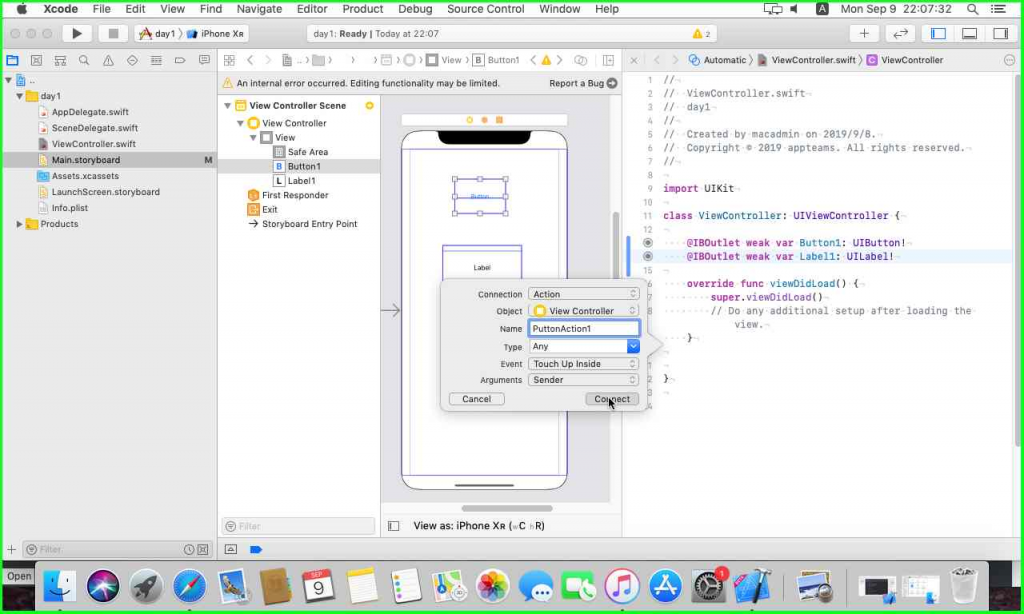
點選Button , 並按滑鼠右鍵拖拉到super.viewDidLoad()下面

https://ithelp.ithome.com.tw/upload/images/20190909/20112182zz5Osf14tU.png

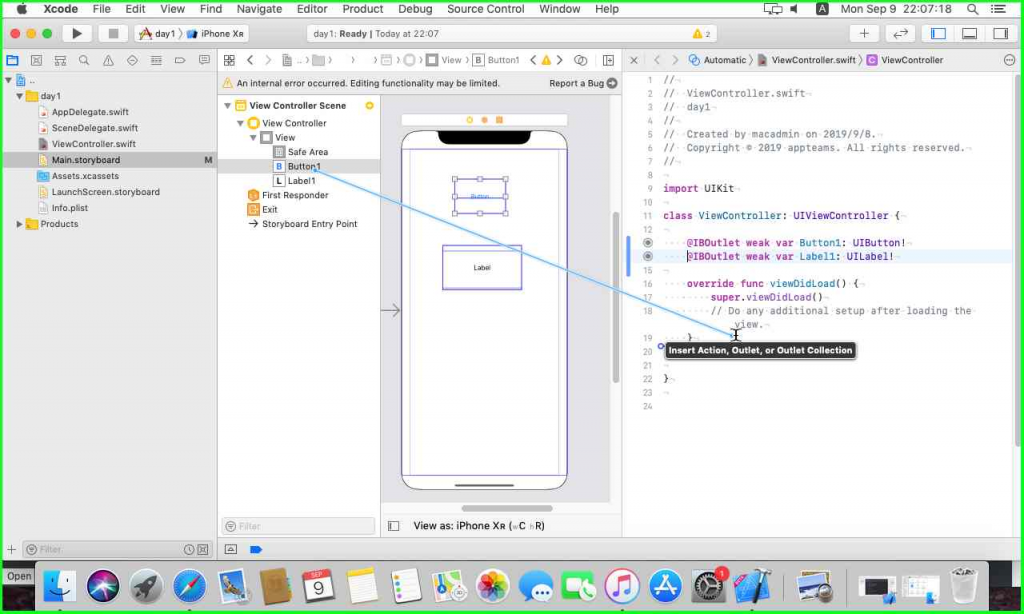
並將@IBAction的名稱設定為PuttonAction1 (手誤打錯XD)

https://ithelp.ithome.com.tw/upload/images/20190909/20112182xfMoV9C6kT.png

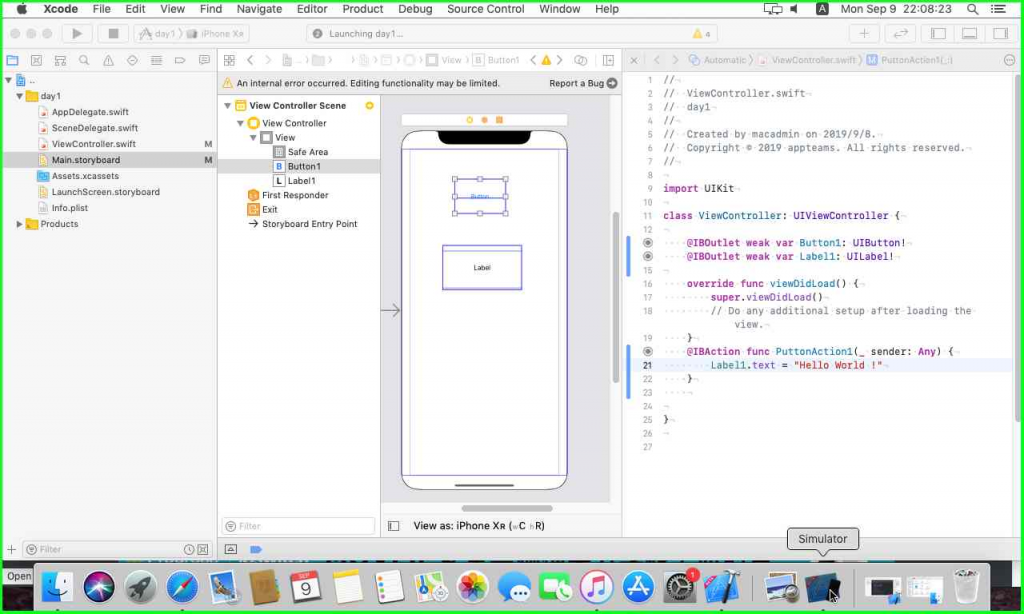
並且將Label.Text指定為"Hello World!" (字串以雙引號" "包住)

https://ithelp.ithome.com.tw/upload/images/20190909/20112182yzJ5zcbSfe.png

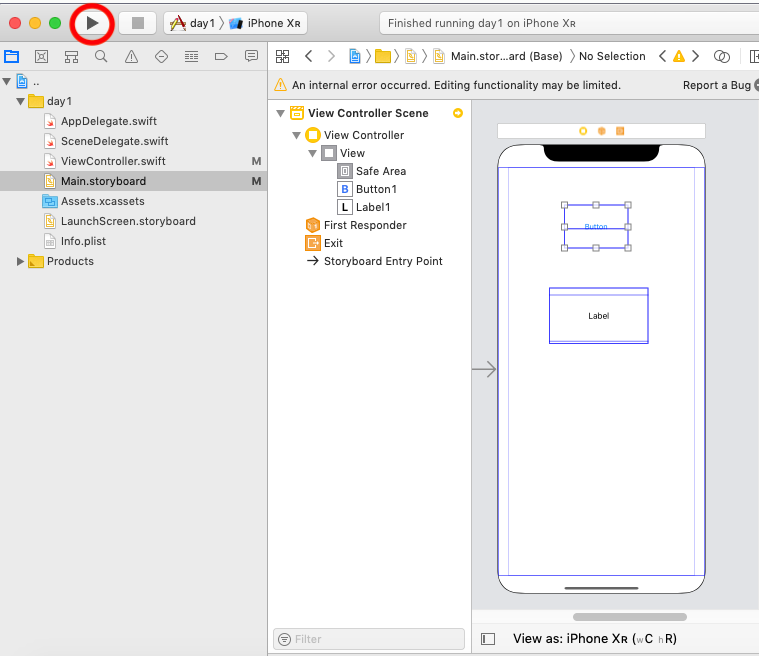
完成後按Play下去 , 執行iPhone XR 模擬器
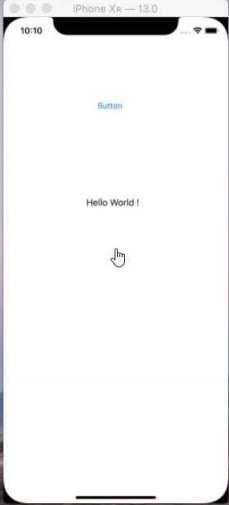
https://ithelp.ithome.com.tw/upload/images/20190909/20112182uPMV1Zysck.png

即可在App按下Button按鍵

https://ithelp.ithome.com.tw/upload/images/20190910/20112182U5AfKOPIM9.jpg

在Lable Text顯示Hello World!

https://ithelp.ithome.com.tw/upload/images/20190910/20112182diFhSiSk4b.jpg

今天就到此為止 , 明天再來介紹App多個畫面如何串接

Bye!


上一篇
Day1:要開始寫iOS App了, 先來把Xcode環境準備好
下一篇
Day3:今天先來研究一下Segue , 知道如何連接App畫面
系列文
iOS App初心者的30天試鍊31
圖片
  直播研討會
圖片
{{ item.channelVendor }} {{ item.webinarstarted }} |
{{ formatDate(item.duration) }}
直播中

尚未有邦友留言

立即登入留言