第三天在「快速學會 Bottender 基礎概念」的文章中有講到關於 Event 以及 Context 的一些架構跟原理,忘記的人歡迎回去複習一下,可以更方便加快對這篇的理解。
因為會因平台而異,這篇要來講的是在 Messenger 上會有怎樣的 Event,以及 Context 能做怎樣子的回覆或操作。
首先是從 Chatbot 的使用者可能會觸發的事件開始,可以先從 Messenger Platform 的官方文件來看看這些原生的 Webhook event 有哪些。
以訊息來說,我們可以用 context.event.isMessage 來判斷使用者傳的是不是訊息:
context.event.isMessage // true or false
如果要進一步的區分訊息,也可以使用下面這些判斷:
context.event.isText // true or false
context.event.isImage // true or false
context.event.isAudio // true or false
context.event.isVideo // true or false
context.event.isFile // true or false
context.event.isLocation // true or false
context.event.isSticker // true or false
判斷之外,當然是要讓機器人的行為針對收到的內容有點變化:
module.exports = async function App(context) {
  if (context.event.isText) {
    await context.sendText('哎呦,我知道你傳的是文字訊息');
  } else if (context.event.isImage) {
    await context.sendText('哎呦,我知道你傳的是圖片訊息');
  } else if (context.event.isAudio) {
    await context.sendText('哎呦,我知道你傳的是音檔訊息');
  } else if (context.event.isVideo) {
    await context.sendText('哎呦,我知道你傳的是影片訊息');
  } else if (context.event.isFile) {
    await context.sendText('哎呦,我知道你傳的是檔案訊息');
  } else if (context.event.isLocation) {
    await context.sendText('哎呦,我知道你傳的是地址訊息');
  } else if (context.event.isSticker) {
    await context.sendText('哎呦,我知道你傳的是貼圖訊息');
  }
};
也可以把使用這傳來的內容的資訊再放到訊息裡面去:
module.exports = async function App(context) {
  if (context.event.isText) {
    await context.sendText(`哎呦,我知道你傳的是文字訊息 - ${context.event.text}`);
  } else if (context.event.isImage) {
    await context.sendText(`哎呦,我知道你傳的是圖片訊息 - ${context.event.image.url}`);
  }
};
除了這些以外,Postback 跟 Payload 的事件也很重要,不過會等到明天的文章再來講。
前面這一個禮拜下來,大家可能已經看 context.sendText 看得有點不耐煩了,是不是太熟悉了?
await context.sendText('...');
除此之外,context 還可以做些什麼事情?Messenger Platform 的官方文件針對訊息種類也做了一些介紹。
基本的圖片、音檔、影片、檔案,可以透過這樣傳:
await context.sendImage('https://example.com/image.jpg');
await context.sendAudio('https://example.com/audio.mp3');
await context.sendVideo('https://example.com/image.mp4');
await context.sendFile('https://example.com/receipt.pdf');
你也可以搞這招「已讀不回」:
await context.markSeen();
有一個稍微要注意的點是,Messenger 為了避免遭到濫用(而且要確保廣告只有自己能賣),會自動過濾掉使用者已經超過 24 小時沒理你而你還繼續騷擾他的訊息。只有在有重要事情要跟使用者更新,或是有真人的客服在處理才能超過 24 小時還去發訊息,而訊息必須要帶這四種 Tag 之一:
Bottender 因為是在處理即時回覆,通常不會遇到這個問題,但未來要寫程式推播時就必須得要注意要有正當理由才能騷擾超過 24 小時沒回應的使用者。
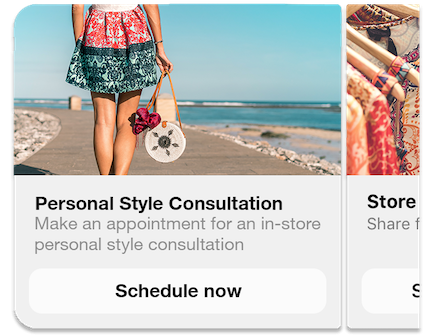
除了基本的訊息外,要表達更豐富的格式化內容通常得靠 Template(範本):

文字、圖搭配按鈕,有時候這不失為一個很好的方式來呈現你的內容。
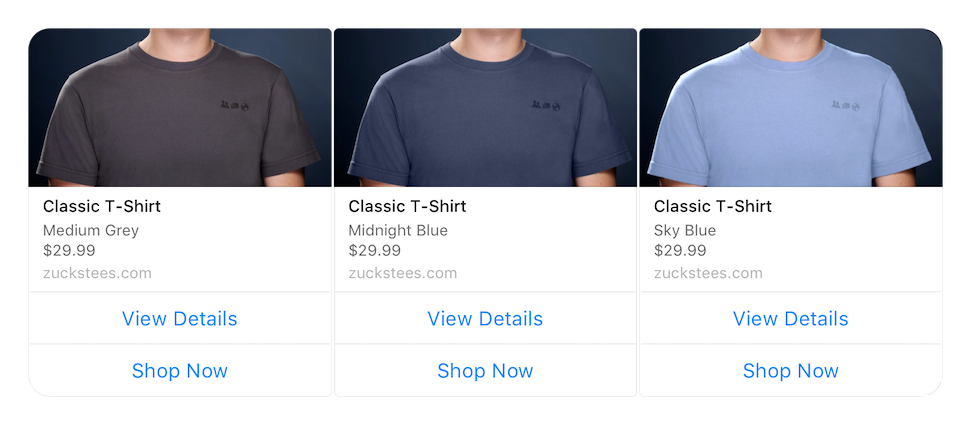
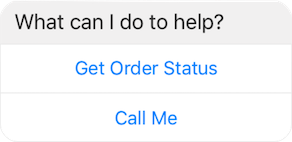
範本中最重要的兩個就是 Generic Template(一般型範本)跟 Button Template(按鈕範本)。

一般型範本的優勢是可以放 10 個以內的項目在這供人檢視或挑選,可以水平的在左右去滾動,而不會佔據上下過大的聊天空間。另外每個項目都可以附帶按鈕,可以打開網頁或傳送資料等等,加快瀏覽、選擇的速度。
用法類似這樣:
await context.sendGenericTemplate(
  [
    {
      title: "Welcome to Peter's Hats",
      image_url: 'https://petersfancybrownhats.com/company_image.png',
      subtitle: "We've got the right hat for everyone.",
      default_action: {
        type: 'web_url',
        url: 'https://peterssendreceiveapp.ngrok.io/view?item=103',
        messenger_extensions: true,
        webview_height_ratio: 'tall',
        fallback_url: 'https://peterssendreceiveapp.ngrok.io/',
      },
      buttons: [
        {
          type: 'postback',
          title: 'Start Chatting',
          payload: 'DEVELOPER_DEFINED_PAYLOAD',
        },
      ],
    },
  ],
  { image_aspect_ratio: 'square' }
);

按鈕範本的優勢是,可以在文字下面放 1 - 3 個可以點擊的按鈕,可以用來打開網頁或是送出 Payload,Payload 的部分會在明天說明:
用法類似這樣:
await context.sendButtonTemplate('What do you want to do next?', [
  {
    type: 'web_url',
    url: 'https://petersapparel.parseapp.com',
    title: 'Show Website',
  },
  {
    type: 'postback',
    title: 'Start Chatting',
    payload: 'USER_DEFINED_PAYLOAD',
  },
]);
一系列一堆的訊息種類可能會讓人手忙腳亂,不過更多的用法可以慢慢再去查、再去學,並不急著要在第一天搞懂這麼多,所以先從基本的開始學吧!
