學習完 Vue 之後,想要透過單元測試守護你的專案,但又不知道從何起手?
別擔心,快來訂閱作者最新系列文 《小白也能輕鬆瞭解的 Vue3 單元測試!》
讓你的 Vue 專案更上一層樓!
上次提到了 D3.js 實際上是透過 HTML DOM 來操作元素標籤,並且透過 SVG 來繪圖的,而 SVG 繪圖十分簡單,各種基本圖形在 SVG 中都有標籤能夠直接使用,並且使用方法大同小異,只要控制該元素標籤的屬性,就能夠相對應的產生想要製作的圖形,以下列出 SVG 目前支援的標籤以及介紹各個標籤中有哪些屬性可以操控:
<circle>
<ellipse>
<rect>
<line>
<polyline>
<polygon>
<path>
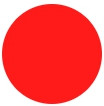
cx :表示圓心在 SVG 畫布中的 X 座標cy :圓心在 SVG 畫布中的 Y 座標r :圓半徑例:產生一個半徑為 50 px 的圓形圖案
<svg width="200" height="200">
    <circle cx="50" cy="50" r="50" style="fill:red"></circle>
</svg>
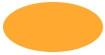
cx :圓心在 SVG 畫布中的 X 座標cy :圓心在 SVG 畫布中的 Y 座標rx :橢圓形的 X 軸半徑ry :橢圓形的 Y 軸半徑例:產生一個 X 軸半徑為 50 px,Y 軸半徑為 25 px 的橢圓形圖案
<svg width="200" height="200">
    <ellipse cx="50" cy="50" r="50" rx="50" ry="25" style="fill:orange"></ellipse>
</svg>
width :矩形寬度height :矩形高度x :以矩形左上角為基準的 X 座標y :以矩形左上角為基準的 Y 座標rx :導圓角的 X 軸半徑ry :導圓角的 Y 軸半徑例:產生一個長寬為 50 px 且導圓角 10px 的矩形
<svg width="200" height="200">
    <rect width="50" height="50" x="0" y="0" rx="10" ry="10" style="fill:yellow"></rect>
</svg>

x1 :起始位置的 X 座標x2 :終點位置的 X 座標y1 :起始位置的 Y 座標y2 :終點位置的 Y 座標例:產生一個 50 px 長寬,左上到右下與左下到右上的叉叉圖案
<svg width="50" height="50">
    <line x1="0" x2="50" y1="0" y2="50" style="stroke: green; stroke-width: 2" ></line>
    <line x1="0" x2="50" y1="50" y2="0" style="stroke: green; stroke-width: 2" ></line>
</svg>

折線與多邊形基本上會以 points 屬性來表示每個點之間的 X、Y 座標,透過多個座標來連成一條線,多邊形與折線的差異在於多邊形的最後一點座標點會連回起始座標點。
例:產生一個上下彎折的折線與多邊形
<svg width="100" height="50">
    <polyline points="0,0 25,25 50,0 75,25" style="fill: none;stroke: blue;stroke-width: 4"></polyline>
</svg>

<svg width="100" height="50">
    <polygon points="0,0 25,25 50,0 75,25" style="fill: none;stroke: purple;stroke-width: 4"></polygon>
</svg>

路徑則是 SVG 標籤裡面功能最多樣的標籤元素,除了擁有類似於折線、多邊形的座標軸來定義各個點來繪製線條之外還可以透過其他輔助的屬性值來描述如何移動到下個座標軸,最後透過屬性 d 來將下列有用到的內容來定義圖形:
M :移動到該座標軸(不繪製線條)。L :繪製線條到下一個座標。H :繪製水平線到下個 X 座標V :繪製水平線到下個 Y 座標C :經兩個指定座標來繪製貝茲曲線S :輸入終點座標後與前一條貝茲曲線的指定座標,對稱產生下個貝茲曲線指定座標,來繪製貝茲曲線。A :繪製一個橢圓曲線到下一個座標。Z :繪製一條到起點座標的線條。(效果看起來像是封閉圖形)例:如 D3.js 官網本身的 LOGO 就是由 SVG 所定義而成的
<svg width="96" height="91" style="position:relative;top:22px;">
    <clipPath id="clip">
      <path d="M0,0h7.75a45.5,45.5 0 1 1 0,91h-7.75v-20h7.75a25.5,25.5 0 1 0 0,-51h-7.75zm36.2510,0h32a27.75,27.75 0 0 1 21.331,45.5a27.75,27.75 0 0 1 -21.331,45.5h-32a53.6895,53.6895 0 0 0 18.7464,-20h13.2526a7.75,7.75 0 1 0 0,-15.5h-7.75a53.6895,53.6895 0 0 0 0,-20h7.75a7.75,7.75 0 1 0 0,-15.5h-13.2526a53.6895,53.6895 0 0 0 -18.7464,-20z"></path>
    </clipPath>
    <linearGradient id="gradient-1" gradientUnits="userSpaceOnUse" x1="7" y1="64" x2="50" y2="107">
      <stop offset="0" stop-color="#f9a03c"></stop>
      <stop offset="1" stop-color="#f7974e"></stop>
    </linearGradient>
    <linearGradient id="gradient-2" gradientUnits="userSpaceOnUse" x1="2" y1="-2" x2="87" y2="84">
      <stop offset="0" stop-color="#f26d58"></stop>
      <stop offset="1" stop-color="#f9a03c"></stop>
    </linearGradient>
    <linearGradient id="gradient-3" gradientUnits="userSpaceOnUse" x1="45" y1="-10" x2="108" y2="53">
      <stop offset="0" stop-color="#b84e51"></stop>
      <stop offset="1" stop-color="#f68e48"></stop>
    </linearGradient>
    <g clip-path="url(#clip)">
      <path d="M-100,-102m-27,0v300h300z" fill="url(#gradient-1)"></path>
      <path d="M-100,-102m27,0h300v300z" fill="url(#gradient-3)"></path>
      <path d="M-100,-102l300,300" fill="none" stroke="url(#gradient-2)" stroke-width="40"></path>
    </g>
 </svg>

以上光是看到屬性可能大家就已經暈了,而實際上開發時我們通常不會親自一個一個輸入這些座標屬性值,開發者除了可以透過 D3.js 的函式去產生對應的路徑之外,像是使用繪圖軟體 AI (Adobe Illustrator)也可以將圖片儲存為 SVG 的格式將其放置在網頁當中,最後就能產出像是上方 D3.js 官網的 SVG 程式碼了。
以上便是今天 D3.js 基礎圖形繪製篇,眼尖的各位可能會發現 D3.js LOGO SVG 範例中有出現不少沒介紹到的標籤與屬性,明天的章節將會介紹這些內容的實際功用!
不知不覺中,鐵人賽已經邁向第 21 天了,時間過的真的好快阿!而阿橘現在也開始會固定在我要打文章的時候來蹭螢幕了。前幾天甚至還差點被阿橘直接發送沒打完文章 XD
(阿橘一臉無辜地看著我)


 iThome鐵人賽