Android 提供了讓你很方便讓你將不同的UI元件組成一個客制化的View。並將這個組合的View裡的邏輯封裝在一起。這一篇我們要來示範如何透過Custom View Component提高可測試性。
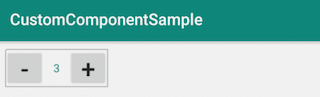
下圖是一個購物車常見的購買份數選擇。像這樣的功能,就很適合做成一個Component。
將「減」按鈕、「加」按鈕及中間的數值,做成一個Component。這樣的好處是你的Activity會比較乾淨,加減Button的Click事件及邏輯在component處理,而不在Activity。在做測試時,也會較方便,單獨針對這個Component測試就好。你不需要在每一個Activity去測試,當按下「+」Button時,TextView的數字有沒有增加。
新增一個 NumberSelect Layout,將UI元件放在這個Layout裡。這個Layout裡有一個「-」Button、「+」Button、TextView數字
<LinearLayout xmlns:android="http://schemas.android.com/apk/res/android"
    android:layout_width="wrap_content"
    android:layout_height="wrap_content"
    android:background="@drawable/number_select_background">
        <Button
            android:id="@+id/minusButton"
            android:layout_width="50dp"
            android:layout_height="wrap_content"
            android:padding="0dp"
            android:text="-"
            android:textSize="32sp" />
        <TextView
            android:id="@+id/valueTextView"
            android:layout_width="wrap_content"
            android:layout_height="wrap_content"
            android:width="30dp"
            android:gravity="center"
            android:layout_gravity="center_horizontal|center_vertical"
            android:textColor="@color/colorPrimary" />
        <Button
            android:id="@+id/addButton"
            android:layout_width="50dp"
            android:layout_height="wrap_content"
            android:padding="0dp"
            android:text="+"
            android:textSize="32sp" />
</LinearLayout>
這可以讓你在使用時,直接指定attribute的值。以這個範例,就是在使用這個Custom Components時,可以直接指定數量的上下限及預設值。
在 values 裡新增 attrs.xml ,分別是min_value最小值、max_value最大值、default_value預設值。
<?xml version="1.0" encoding="utf-8"?>
<resources>
    <declare-styleable name="NumberSelect">
        <attr name="default_value" format="integer" />
        <attr name="min_value" format="integer" />
        <attr name="max_value" format="integer" />
    </declare-styleable>
</resources>
attrs.xml 這裡設定好了之後,就可直接在layout上設定defaultValue、minValue、maxValue屬性。
res/layout/acitivty_main.xml
<LinearLayout
        xmlns:android="http://schemas.android.com/apk/res/android"
        xmlns:tools="http://schemas.android.com/tools"
        xmlns:app="http://schemas.android.com/apk/res-auto"
        android:layout_width="match_parent"
        android:layout_height="match_parent"
        android:orientation="vertical"
        android:layout_gravity="center"
        tools:context=".MainActivity">

    <evan.chen.tutorial.tdd.customcomponentsample.NumberSelect
            android:layout_width="wrap_content"
            android:layout_height="wrap_content"
            android:id="@+id/number_select"
            app:default_value="3"
            app:min_value="0"
            app:max_value="20"
    />
</LinearLayout>
這個類別會載入建好的layout,並將attributes做處理。再新增類別的公開方法:設定最大值、最小值、設定listener。
class NumberSelect : LinearLayout {

    private lateinit var addButton: Button
    private lateinit var minusButton: Button
    private lateinit var valueTextView: TextView

    //最小值
    private var minValue: Int = 0
    //最大值
    private var maxValue: Int = 0
    //預設值
    private var defaultValue: Int = 0
    //目前數值
    var textValue: Int = 0

    private var listener: NumberSelectListener? = null

    interface NumberSelectListener {
        fun onValueChange(value: Int)
    }

    constructor(context: Context) : super(context) {
        init(context, null)
    }

    constructor(context: Context, attrs: AttributeSet) : super(context, attrs) {
        init(context, attrs)
    }

    constructor(context: Context, attrs: AttributeSet, defStyle: Int) : super(context, attrs, defStyle) {
        init(context, attrs)
    }

    private fun init(context: Context, attrs: AttributeSet?) {
        View.inflate(context, R.layout.number_select, this)
        descendantFocusability = ViewGroup.FOCUS_BLOCK_DESCENDANTS
        this.addButton = findViewById(R.id.addButton)
        this.minusButton = findViewById(R.id.minusButton)
        this.valueTextView = findViewById(R.id.valueTextView)

        this.textValue = 0
        this.maxValue = Integer.MAX_VALUE
        this.minValue = 0

        if (attrs != null) {
            val attributes = context.theme.obtainStyledAttributes(
                attrs,
                R.styleable.NumberSelect,
                0, 0
            )


            //從Layout上 取得預設值
            this.maxValue = attributes.getInt(R.styleable.NumberSelect_max_value, this.maxValue)
            this.minValue = attributes.getInt(R.styleable.NumberSelect_min_value, this.minValue)
            this.defaultValue = attributes.getInt(R.styleable.NumberSelect_default_value, 0)


            this.valueTextView.text = defaultValue.toString()
            this.textValue = defaultValue
        }

        //點下「+」Button,將TextValue數字+1,並呼叫listener.onValueChange
        this.addButton.setOnClickListener {
            addTextValue()
            if (listener != null) {
                listener!!.onValueChange(textValue)
            }
        }

        //點下「-」Button,將TextValue數字-1,並呼叫listener.onValueChange
        this.minusButton.setOnClickListener {
            minusTextValue()
            if (listener != null) {
                listener!!.onValueChange(textValue)
            }
        }
    }

    fun setMaxValue(value: Int) {
        this.maxValue = value
    }

    fun setMinValue(value: Int) {
        this.minValue = value
    }

    fun setDefaultValue(value: Int) {
        this.defaultValue = value
        this.textValue = value
    }

    private fun addTextValue() {
        if (this.textValue < this.maxValue) {
            this.textValue++
            this.valueTextView.text = this.textValue.toString()
        }
    }

    private fun minusTextValue() {
        if (this.textValue > this.minValue) {
            this.textValue--
            this.valueTextView.text = this.textValue.toString()
        }
    }

    fun setListener(listener: NumberSelectListener) {
        this.listener = listener
    }
}
寫好之後,就可以直接在activity_main.xml裡使用NumberSelect了
在 activity_main.xml 加入NumberSelect Custom Component
<?xml version="1.0" encoding="utf-8"?>
<LinearLayout
        xmlns:android="http://schemas.android.com/apk/res/android"
        xmlns:tools="http://schemas.android.com/tools"
        xmlns:app="http://schemas.android.com/apk/res-auto"
        android:layout_width="match_parent"
        android:layout_height="match_parent"
        android:orientation="vertical"
        android:layout_gravity="center"
        tools:context=".MainActivity">

    <evan.chen.tutorial.tdd.customcomponentsample.NumberSelect
            android:layout_width="wrap_content"
            android:layout_height="wrap_content"
            android:id="@+id/number_select"
            app:default_value="3"
            app:min_value="0"
            app:max_value="20"
    />

</LinearLayout>
在AndroidTest裡新增NumberSelectAndroidTest
測試,按下AddButton時,textValue應加1
@Test
fun testAddButtonThenValueShouldAdd() {

    val context = InstrumentationRegistry.getTargetContext()

    val numberSelect = NumberSelect(context)
    numberSelect.setDefaultValue(1)
    numberSelect.addButton.performClick()

    Assert.assertEquals(2, numberSelect.textValue)
}
測試,按下MinusButton時,textValue應減1
@Test
fun testMinusButtonThenValueShouldMinus() {

    val context = InstrumentationRegistry.getTargetContext()

    val numberSelect = NumberSelect(context)
    numberSelect.setDefaultValue(2)
    numberSelect.minusButton.performClick()

    Assert.assertEquals(1, numberSelect.textValue)
}
測試,textValue 不能小於最小值minValue
@Test
fun testMinValueLimit() {

    val context = InstrumentationRegistry.getTargetContext()

    val numberSelect = NumberSelect(context)
    numberSelect.setDefaultValue(2)
    numberSelect.setMinValue(2)
    numberSelect.minusButton.performClick()

    Assert.assertEquals(2, numberSelect.textValue)
}
測試,textValue 不能大於最大值maxValue
@Test
fun testMaxValueLimit() {

    val context = InstrumentationRegistry.getTargetContext()

    val numberSelect = NumberSelect(context)
    numberSelect.setDefaultValue(2)
    numberSelect.setMaxValue(2)
    numberSelect.addButton.performClick()

    Assert.assertEquals(2, numberSelect.textValue)
}
像這樣的CustomViewComponent,我們會用Instrumented test來測試。
而當被使用在Activity時,我們就會用Espresso的UI測試來測試整個Activity的呈現。
出版書:
Android TDD 測試驅動開發:從 UnitTest、TDD 到 DevOps 實踐
線上課程:
Android 動畫入門到進階
Android UI 進階實戰(Material Design Component)
範例下載:
https://github.com/evanchen76/CustomComponentKotlinSample
參考:
https://developer.android.com/guide/topics/ui/custom-components


 iThome鐵人賽